Auto-Create and Schedule Social Media Posts with Google Sheets

In this tutorial, you'll learn how to build an automation system that creates, schedules, and posts social media content using Google Sheets and Make.com.
Keeping up with a consistent social media presence can be challenging, especially when it's not your main focus and you have many other things to do. Good news: automation tools can greatly simplify this process. Imagine spending just one moment writing down your content ideas for the entire month. Simply add them to a spreadsheet, and let it automatically turn into social media posts that go live without any extra effort. Sounds pretty good, right?
In this tutorial, I'll show you how to build a simple yet powerful social media scheduler using Google Sheets. To tie everything together, we'll set up a workflow on Make.com, a no-code automation platform. We'll also use Creatomate, a video and image generation API, to create visuals. By the end, you'll have a fully functional system that automatically creates YouTube Shorts, Instagram Reels, or TikTok videos — completely hands-free.
With the automation we're about to set up, you'll be able to create all kinds of social media posts. While this tutorial focuses on Instagram Reels, like the one shown above, the process is similar for other types of content. It doesn't even have to be a video; you can also create static Instagram Stories, image posts, or Facebook photos. Creatomate comes with an online template editor that allows you to create your own custom designs exactly the way you want.
💡 AI Tip: If you want to take it a step further, consider using generative AI as well. An AI like ChatGPT can help you write the content of your social media videos. A text-to-image tool like DALL·E can generate corresponding visuals. For voiceovers, you could consider using a text-to-speech AI like ElevenLabs. Last but not least, Creatomate is able to generate the subtitles for your social media videos.
Implementing AI is beyond the scope of this tutorial. But if you're interested in exploring AI further, be sure to check out this tutorial next. It demonstrates how to combine all four AI techniques mentioned above to automatically generate faceless YouTube Shorts, TikTok videos, and Instagram Reels.
Prerequisites
One of the great things about Make.com is that you can control when and how often your automation runs. This flexibility allows us to use a straightforward Google Sheets setup. The scheduling part of this tutorial (step 9) is fully customizable, so you can tailor it to your exact needs. Whether you want to post on specific days of the week or three times a day, it's all possible.
These are the tools we'll use:
- Google Sheets: to organize content ideas and captions for social media posts.
- Creatomate: to generate videos or images.
- A social media platform: like Instagram, YouTube or TikTok for sharing.
- Make.com: to automate the process.
How to use Google Sheets to automate social media?
First, we'll create a template in Creatomate, which will serve as the foundation for the videos or images we'll produce. Next, we'll set up a Google Sheets document and add the content for our social media posts.
Once the preparation is done, we'll move on to Make to set up the automation. The Make scenario will start with a simple trigger that integrates seamlessly with our Google Sheets document, which I'll explain in more detail shortly. Next, the Creatomate module will generate a visual using the template and data from Google Sheets. Once the content is ready, you can share it on social media. I'll demonstrate how to post it as an Instagram Reel, but you can also upload it as a YouTube Short, share it on Facebook, or email it to post on TikTok — whatever you prefer. Finally, we'll update our Google Sheets document to confirm that the post has been successfully shared. Here's what our scenario will look like:

Let's get started!
1. Create a template in Creatomate
Log in to your Creatomate account or create a free account if you don't already have one.
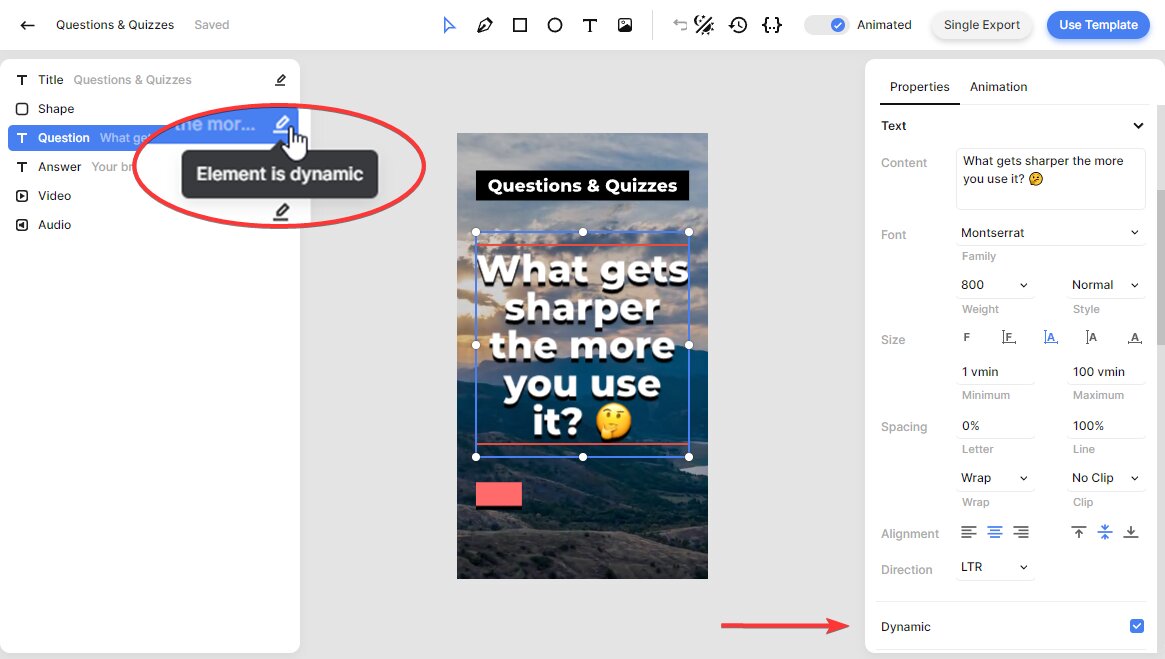
Navigate to the Templates page and click the New button. You can browse the template gallery and pick the one you like most, or design your own from scratch. For this tutorial, go to the Social Media category and choose the Question & Quizzes template. Select the 9:16 Vertical size, then click Create Template to open it in the editor:
Let's take a closer look at our video design and how we can use it for our automation plans. In the left side menu, you'll find the elements that make up our template. You'll notice that some elements, like Title, Shape, Question, Answer, and Video, are marked as dynamic. This means we can easily replace these elements with different content, allowing us to create lots of unique social media videos.
Our template is ready to use right away, but you can also customize it to suit your needs. Feel free to make design adjustments now or come back later to tweak it. If you want to learn more about how the editor works, refer to this quick guide.
Now that we have a template set up, let's move on to the next step: preparing a Google Sheets document.
2. Set up a Google Sheets document
Log in to your Google Drive account and create a new spreadsheet. Let's name it Content Calendar.
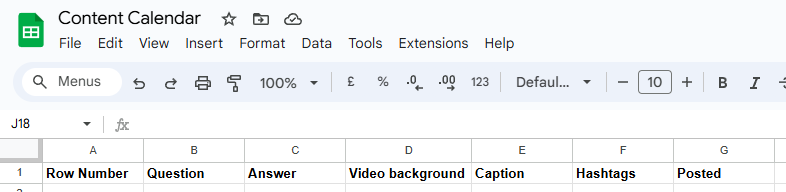
For the first row, we'll add the following headers: Row Number (A), Question (B), Answer (C), Video background (D), Caption (E), Hashtags (F), and Posted (G):
Then, in the first column, labeled "Row Number", we'll insert a formula to display the row number. We'll use this row number later on to connect our Make.com trigger with the Google Sheets document. Copy and paste the =ROW() formula and drag it down the entire column to automatically number your rows:
With this set up, each row in the spreadsheet will be turned into a social media post. The data we enter in the Question, Answer, and Video background columns will be used to fill in the dynamic elements of our template, resulting in a new and unique video. The Caption and Hashtags columns will be used for the social media post itself. We'll leave the Posted column empty for now, as it will be used later (in step 7).
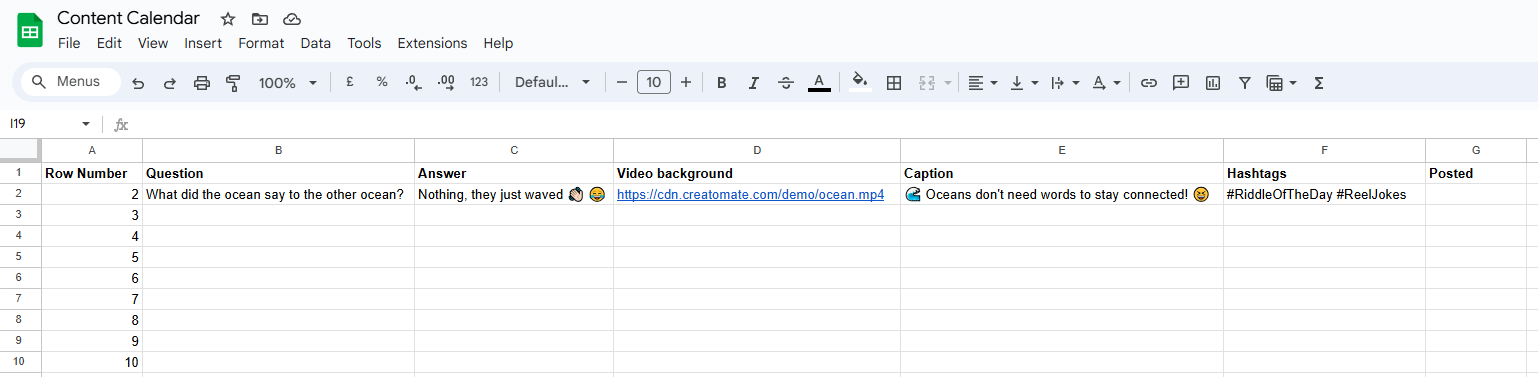
Now, we can start adding content for our social media posts. For example, let's input the following data in the second row:
- Question -> What did the ocean say to the other ocean?
- Answer -> Nothing, they just waved 👋🏻 😂
- Video background -> https://cdn.creatomate.com/demo/ocean.mp4
- Caption -> 🌊 Oceans don't need words to stay connected! 😆
- Hashtags -> #RiddleOfTheDay #ReelJokes
- Posted -> (leave blank)
It should look like this (click on the screenshot to open it full screen):
We'll use this dummy record to set up the rest of our automation, but feel free to add as many rows as you like. You don't have to do it all now; you can always come back later to edit your content or add new rows.
With the spreadsheet ready, let's move on to the next step: setting up the automation trigger in Make.com.
3. Trigger the Make.com scenario
An automated workflow, also known as a scenario, always starts with a trigger, which typically initiates the automation process. This could be something like adding a new record to an Airtable base or a new item appearing in an RSS feed, etc. For this tutorial, we'll use a module that increments by 1 each time the scenario runs. This will help us track which spreadsheet row to process next. In the final step of this tutorial, step 9, we'll set up a custom schedule to choose when and how often the scenario should run.
Create a free Make.com account or log in if you already have one.
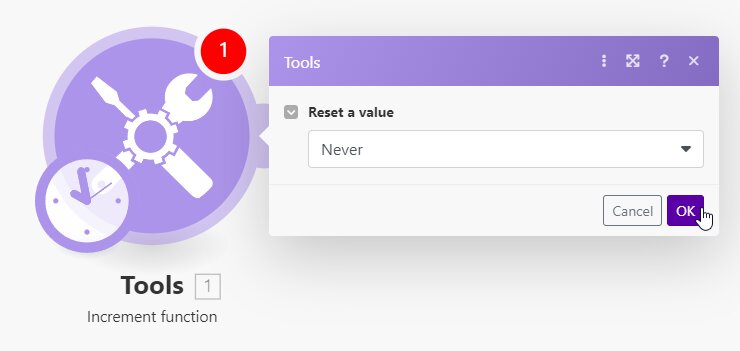
From your dashboard, click Create a new scenario. Search for and select Tools as the app and Increment function as the action.
Set Reset a value to Never and click OK:
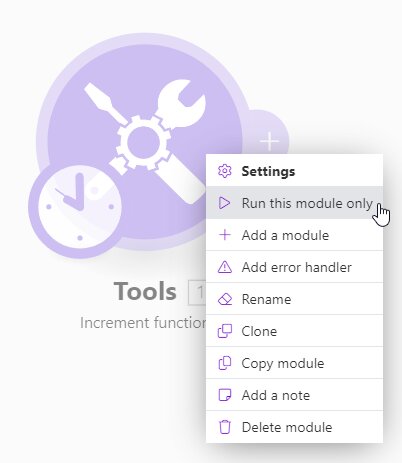
Next, right-click the module and select Run this module only:
This will return the number “1”:
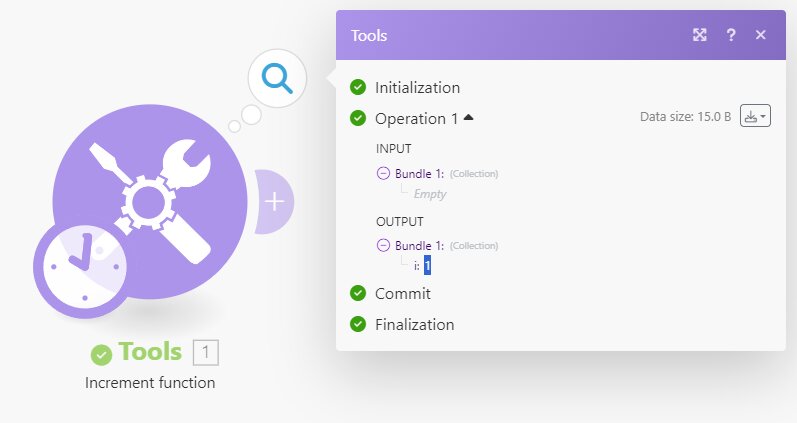
Next time the scenario runs, it will increment by one, making it number 2, and so on.
4. Search for the row in Google Sheets
In this step, we'll set up an action to search through our Google Sheets document and return the row that matches the number generated by the increment function trigger.
Click + to add the Google Sheets app with the Search Rows action.
Create a connection first by signing in with your Google account.
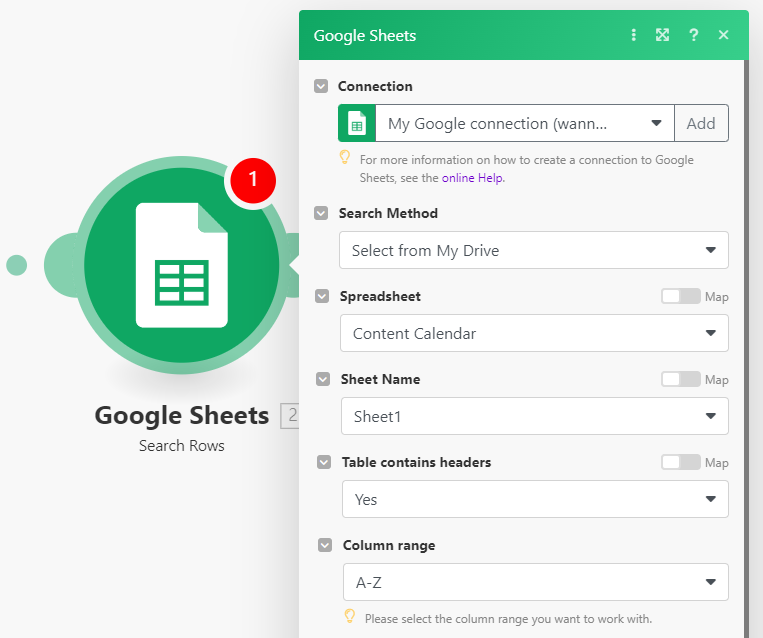
Then, set up the first part of the module as follows:
- Set Search Method to Select from My Drive
- Set Spreadsheet to Content Calendar
- Set Sheet Name to Sheet1
- Set Table contains headers to Yes
- Set Column range to A-Z
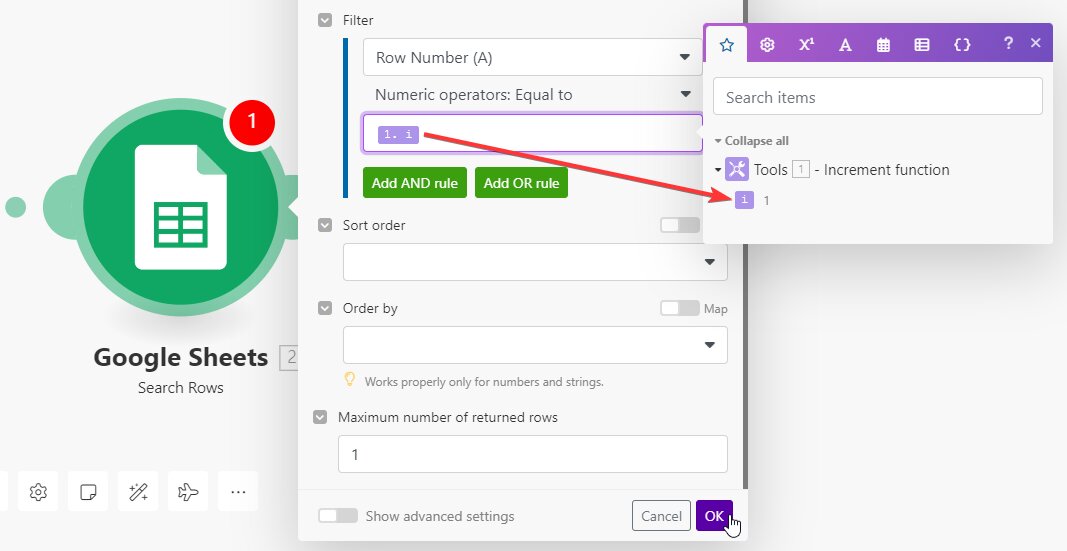
Now, let's configure a filter to get the corresponding row. To do this, select the Row Number (A) column, Numeric operators: Equal to, and Tools - Increment function -> i.
You can leave the Sort order and Order by fields empty. Also, set the Maximum number of returned rows to 1 as we only need one row per scenario run. Once you've done that, click OK:
5. Generate video/image content
In this step, we'll set up an action for Creatomate to generate a video or image using the template and data from our Google Sheets row.
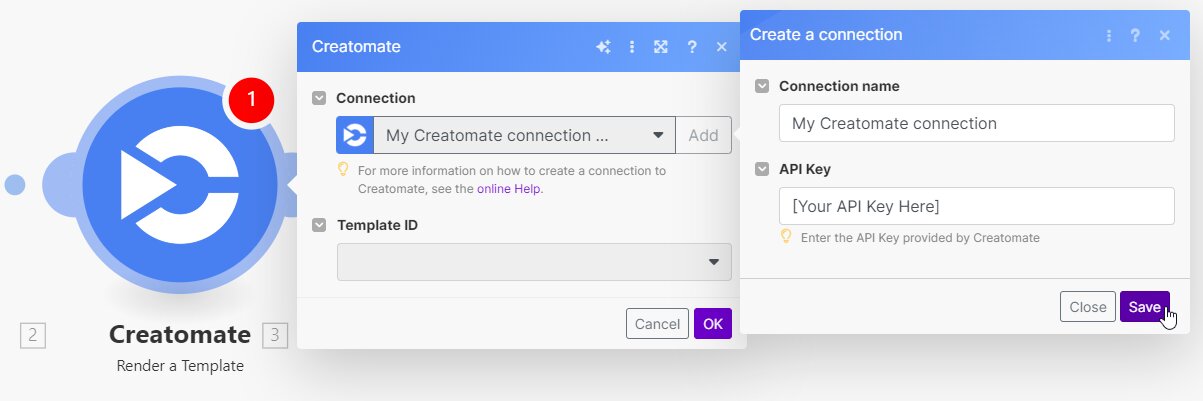
Add the Creatomate app with the Render a Template action.
First, create a connection using your project's API key, which you can find under Project Settings in your Creatomate dashboard:
Next, choose the Question & Quizzes template in the Template ID field. Make.com will automatically pull in the dynamic elements and list them under Modifications.
Now, connect the data from Google Sheets to the template as follows:
- Set Video to Google Sheets - Search Rows -> Video background (D)
- Set Question to Google Sheets - Search Rows -> Question (B)
- Set Answer to Google Sheets - Search Rows -> Answer (C)
When done, click OK:
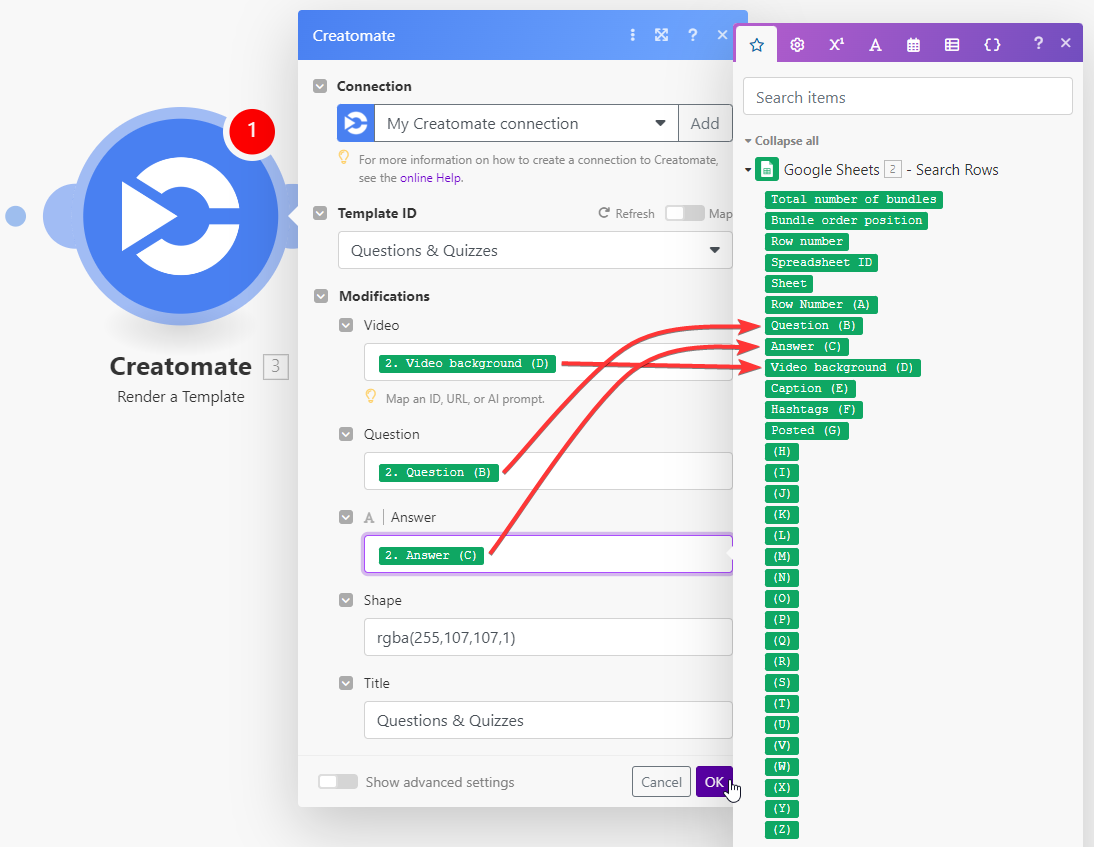
Note: Shape and Title are also dynamic elements. For the purpose of this tutorial, we won't modify them, so the template default values will be used for each video.
6. Post on social media
Once the Creatomate module has successfully generated a video or image, you can share it on your preferred social media platform. For example, I'll show you how to post the video as an Instagram Reel, but you can also share it on YouTube, Facebook, or even send it by email to upload to TikTok later. Feel free to set up this action in any way that suits you best.
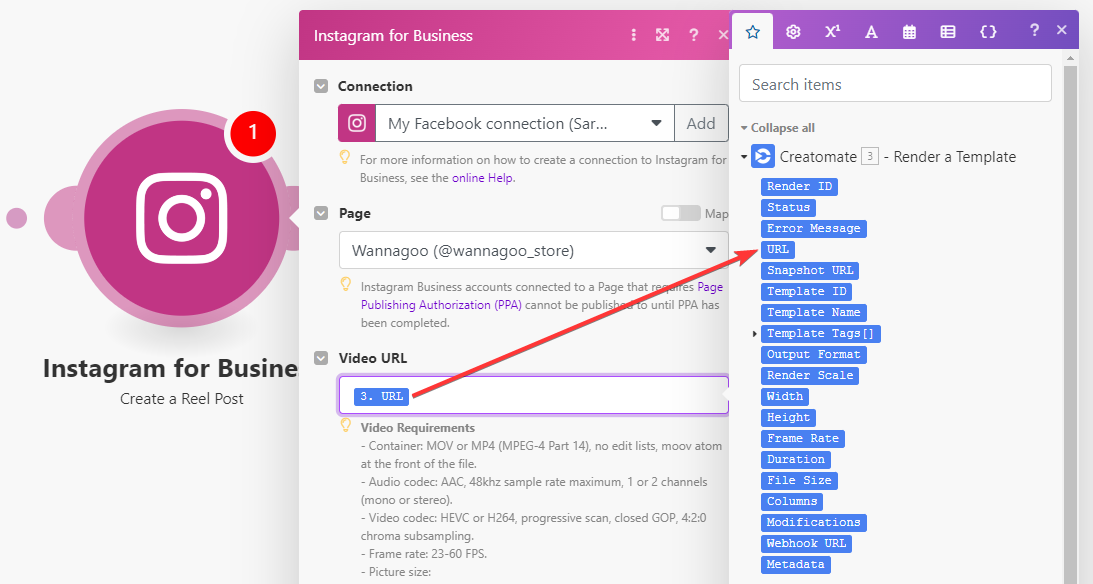
Add the Instagram for Business app with the Create a Reel Post action.
First, create a connection and select your Instagram page.
In the Video URL field, select Creatomate - Render a Template -> URL:
Note: Some apps, like YouTube, require the actual video file rather than just the URL. In these cases, you'll need to add an HTTP module with the "Get a file" action to download the file first. For detailed instructions, refer to step 4 of this tutorial.
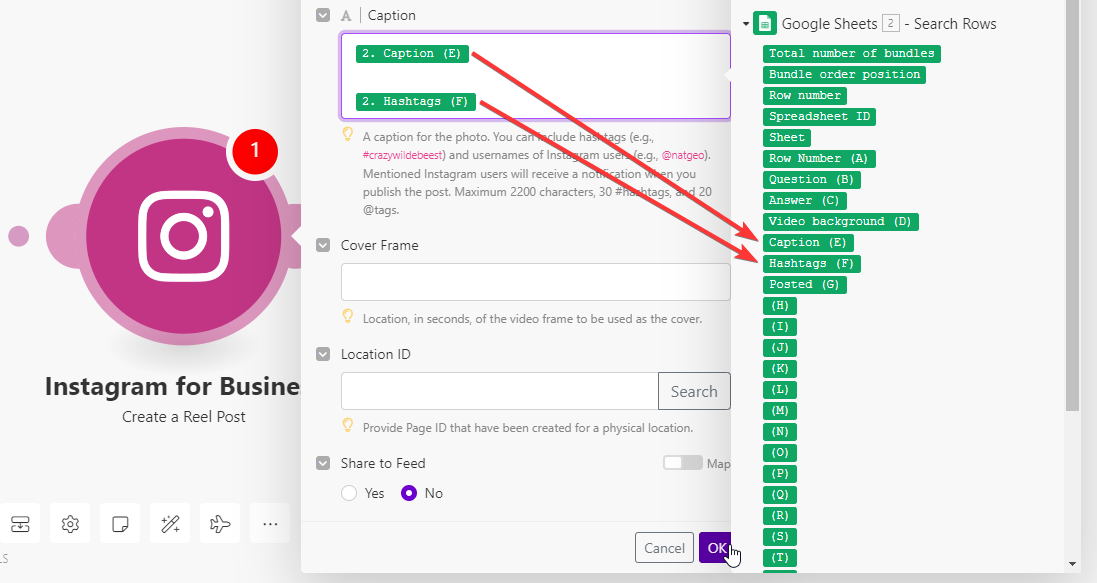
For the Caption field, select Google Sheets - Search Rows -> Caption (E) and Google Sheets - Search Rows -> Hashtags (F). You can leave the Cover Frame and Location ID options empty and choose whether to share the Reel on your feed as well. When done, click OK:
7. Update Google Sheets
In this step, we'll add a module to update our Google Sheets document once a social media post is published. This will help you quickly identify which rows have been processed and which have not. It's particularly useful if you want to edit existing content or add new entries to your sheet.
Add the Google Sheets app with the Update a Row action.
Use the same connection as you did with the first Google Sheets module.
Next, configure the module to use the same spreadsheet as before, like this:
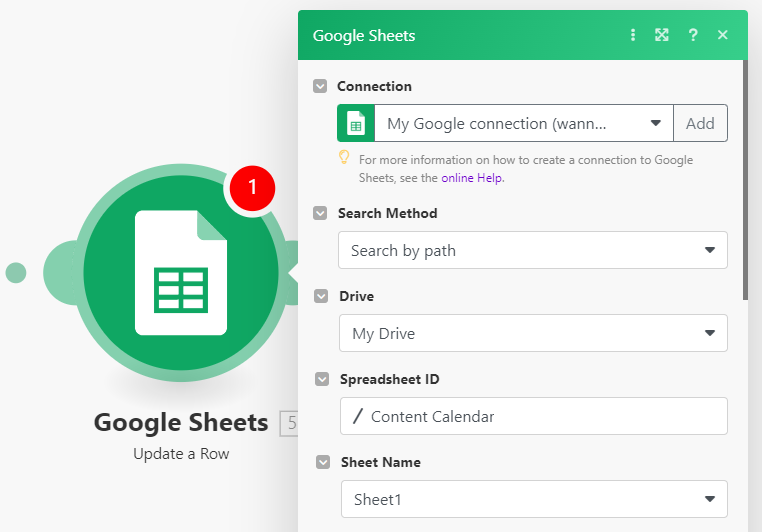
- Set Search Method to Search by path
- Set Drive to My Drive
- Set Spreadsheet ID to Content Calendar
- Set Sheet Name to Sheet1
To update the right row, select Google Sheets - Search Rows -> Row number in the Row number field:

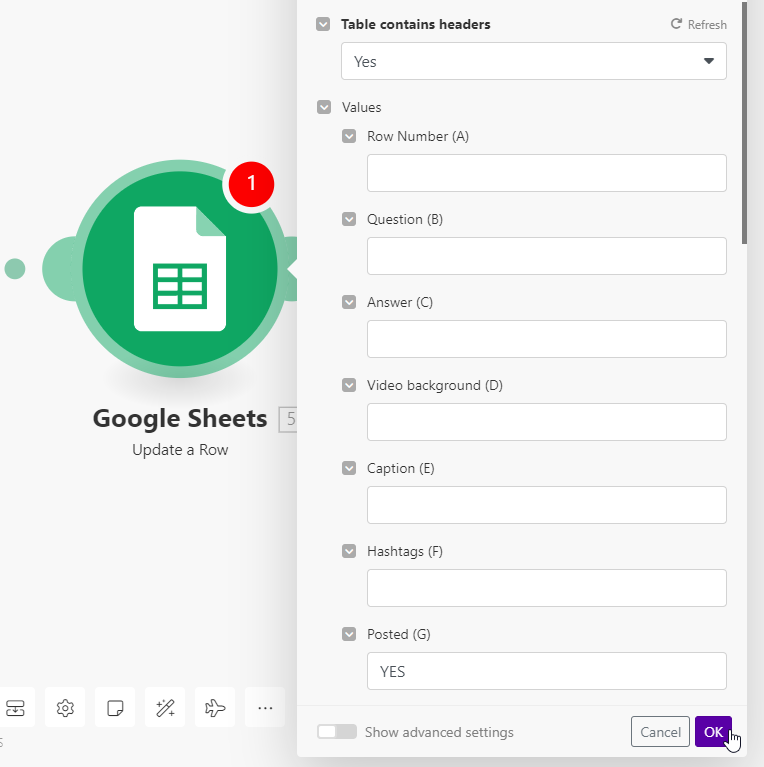
Then, set Table contains headers to Yes. Under Values, type YES in the Posted (G) field. When done, click OK:
8. Test the automation
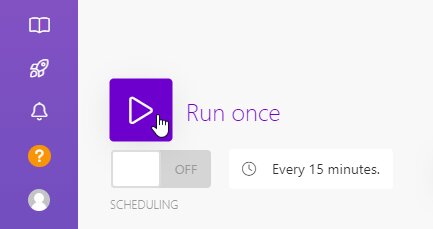
Now that we've set up the scenario, let's test it by clicking the Run once button located in the bottom left corner:
Here's a summary of what should happen: the increment function module will output the number "2". This means that the second row in the spreadsheet, our dummy record, will be used to create a video, which will then be posted on Instagram:
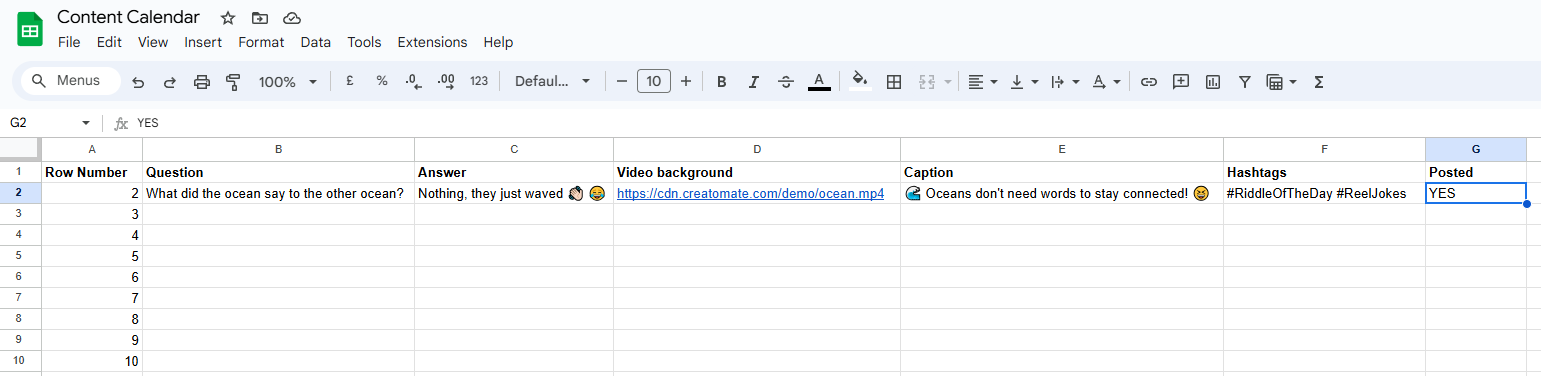
After that, the spreadsheet row will be updated accordingly:
Once the test is successful, let's move on to the final step of this tutorial: setting up a schedule.
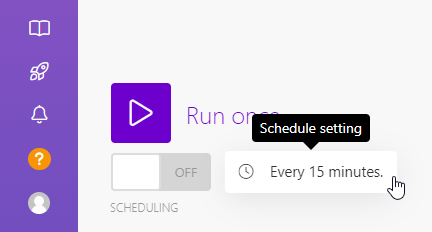
9. Schedule your scenario
Finally, we've reached the point where you can set up a custom schedule for your scenario. Here, you can choose how often and when you want it to run. For instance, you can schedule it to run only on weekdays at 8:00 AM or three times a day, depending on when you want your social media posts to be published.
Click on the Every 15 minutes button to access the schedule settings:
There are several options for running the scenario. For the scheduling use case in this tutorial, I recommend choosing one of the following:
- At regular intervals: Set the number of minutes for the interval at which the scenario should repeat. For example, if you want to post three times a day, set the interval to 480 minutes (which equals 8 hours).
- Every day: Choose a specific time for your automation to run each day.
- Days of the week: Select the days of the week when you want the automation to run and set a specific time for it.
- Days of the month: Similar to the above option, but you choose specific days of the month for the automation to run, along with a time.
- Specified dates: Select the exact months, days, and a time for the automation to run.
For more information, refer to the Make.com documentation on scheduling a scenario.
Once you've set up your schedule, all that's left to do is toggle the scheduling button to activate your scenario:
What's next for social media automation using Google Sheets
Congratulations! You've reached the end of this tutorial. With this automation set up, all you need to do is list your content ideas, and the rest will be done automatically. The scenario will keep running until all the rows in your spreadsheet have been processed, so just remember to keep your document updated. By planning your social media content in advance, you'll enjoy a steady stream of posts without the daily hassle.
If you're interested in adding generative AI into the mix, check out one of these tutorials next:
👉 Create Videos with Voice Overs using Text-to-Speech AI and Make
👉 How to Create Videos with DALL·E Images using Make.com
👉 How to Automatically Convert Text to Video using AI and Make.com
👉 How to Create AI-Generated Videos using ChatGPT and Make.com
👉 How to Automatically Add Subtitles to Videos using Make
You might also like these tutorials


Start automating today
Start with a full-featured trial with 50 credits, no credit card required.
Get started for free →