How to Batch-Create Videos for Shorts, Stories, and Reels

Learn how to bulk-generate short-form vertical videos (9:16) for Instagram, TikTok and YouTube using a simple video automation spreadsheet.
The popularity of short-form video content on social media has skyrocketed. Take a look at Instagram Reels, YouTube Shorts, and TikTok videos. These bite-sized and easy-to-consume videos are extremely captivating, engaging, and well-converting. However, as demand grows, you'll have to produce more and more videos. The problem is, it would take too much time and effort to make shorts every day. There must be a better way.
Luckily, this can be done much more efficiently. Because these storytelling videos often share the same design, but contain different content, video automation works very well. So with a reusable template and a simple video generation spreadsheet, it's easy to create short videos in batches. In this tutorial, you'll learn how to make a month's worth of short-form video content in one go.
We're going to batch-create these TikTok style videos. However, be sure to check out the template editor as well, which lets you make your own designs.
Unmute the audio to hear the background music.
How to create Shorts, Stories, and Reels in bulk?
Make sure you've got a Creatomate account if you want to follow along. Don't have one yet? Create your free account here.
We'll start by creating a video template. This design will serve as the foundation for our videos. After that, we'll create a feed, which is basically a spreadsheet we use to make a lot of videos at once. Here's where we add the text and media we want to include in our shorts. We can then generate our videos at the click of a button and download them to our computer.
As we wrap up, I'll give you some suggestions on what you can do next to make your workflow even more efficient.
1. Create a video template
Log in to your Creatomate account and navigate to the Templates page. Click the + New button to browse the template gallery. You can choose one of the ready-made templates or design your own from scratch. For this tutorial, let's pick the Storytelling Video template from the Social Media category. Select the 9:16 Vertical size and click Create Template to open it in the editor:
In the left-hand panel, we can find the elements that make up our template. You should know that elements can be dynamic, as indicated by the pen icon. In our template, the Text, Background, and Music elements are all dynamic. This means that we can replace them with other text, images, and clips through the feed we're about to make:
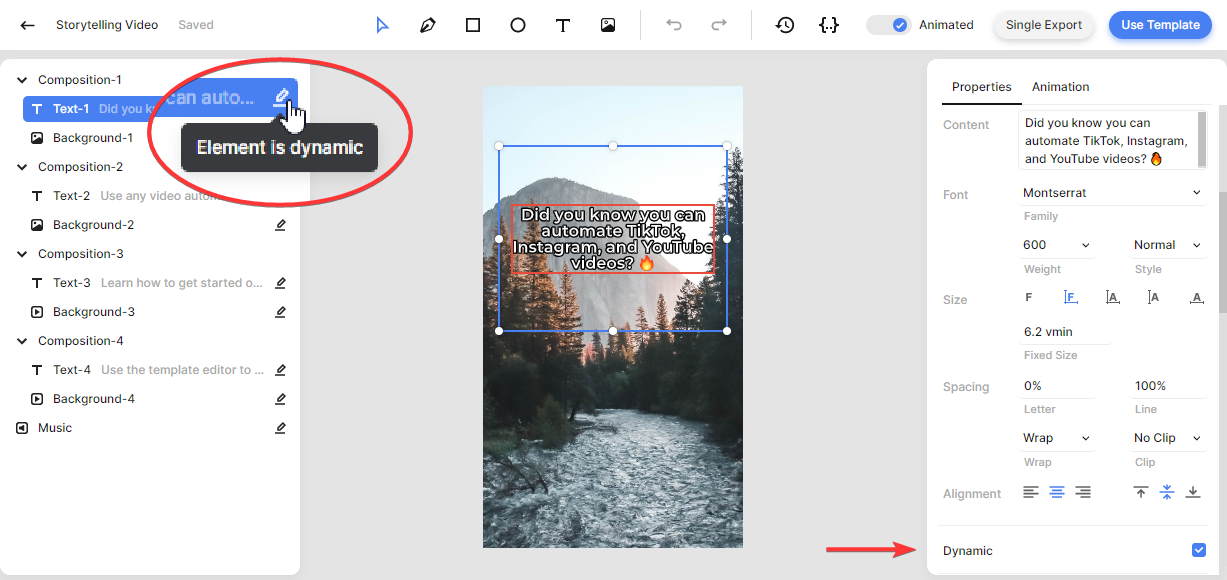
You can customize the template however you like, but let's use it as-is to keep things simple. Next, we'll create a feed.
2. Create a feed
At the top right of the template editor, click the blue Use Template button. Then click Spreadsheet to Video and select Create new feed. Upon clicking Continue, we will be taken to our newly created feed:
You can think of the feed as a spreadsheet based on a video template. As you can see, the template's dynamic elements are mapped to the columns of the feed; Music, Background, and Text. As a result, each row of the feed will create its own video once we enter different text values and upload media files.
The easiest way is to enter data manually. By clicking Add row, you'll add another row to the feed. Let's upload an audio file for the Music colum, some images (or paste URLs to public images) for the Background columns, and enter some text for the Text columns. We can see a preview of the video on the right side of the feed. When you're done, click Save. You'll see the status column update from Unsaved Row to No Render, which means your data is saved, but no video has been generated yet (which is called a render):
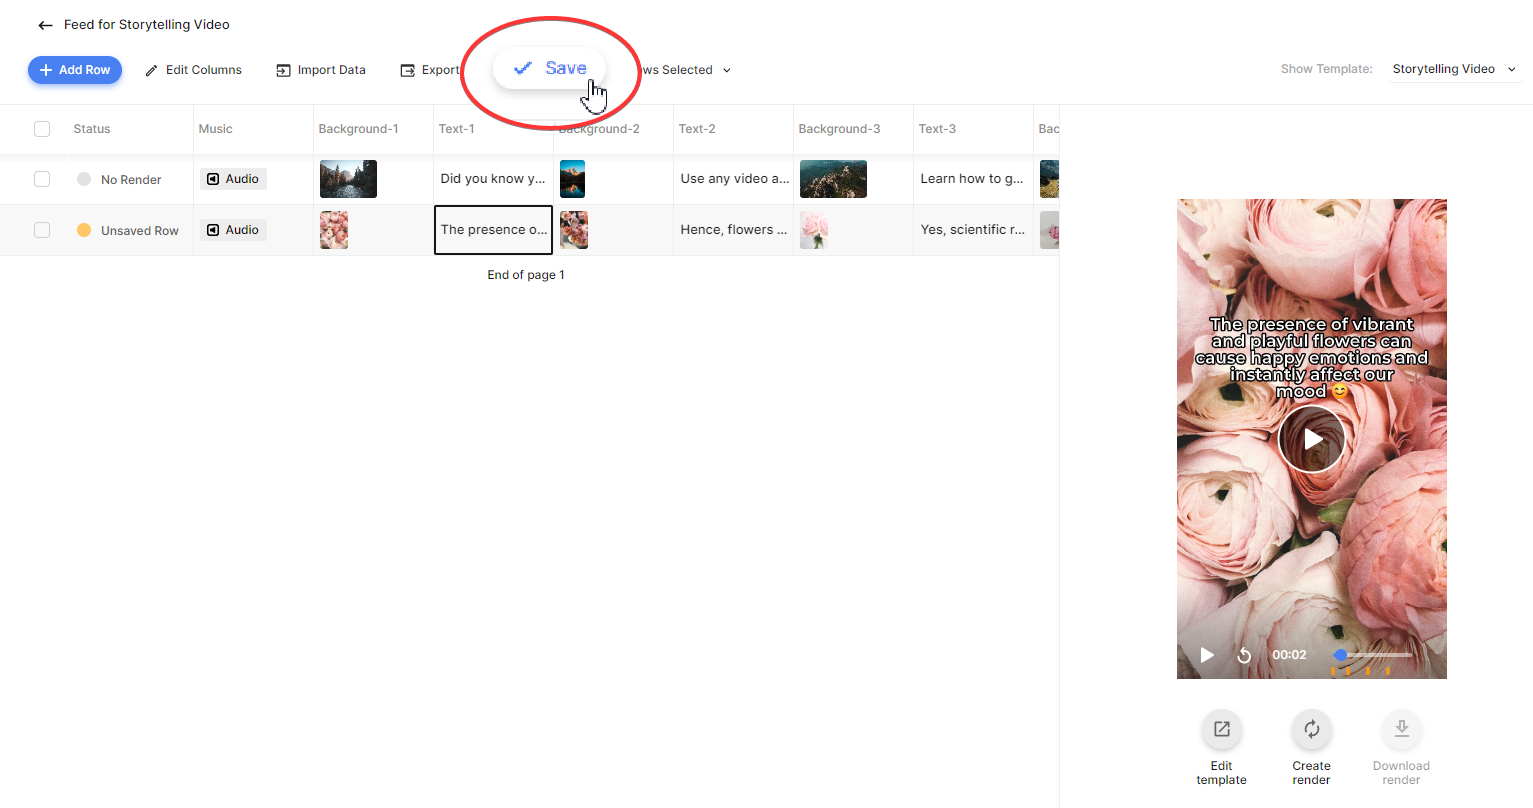
Tip: Rather than manually adding your data, you can import it from a CSV file using the Import Data button.
Just add as many rows as you need to create videos weeks or months in advance. In the next step, we'll generate and download the videos.
3. Generate and download the videos
On the right side, you can preview the final video for each row. When you're satisfied with the result, click Create render to generate the video. Once the status says Rendered, the video is done:
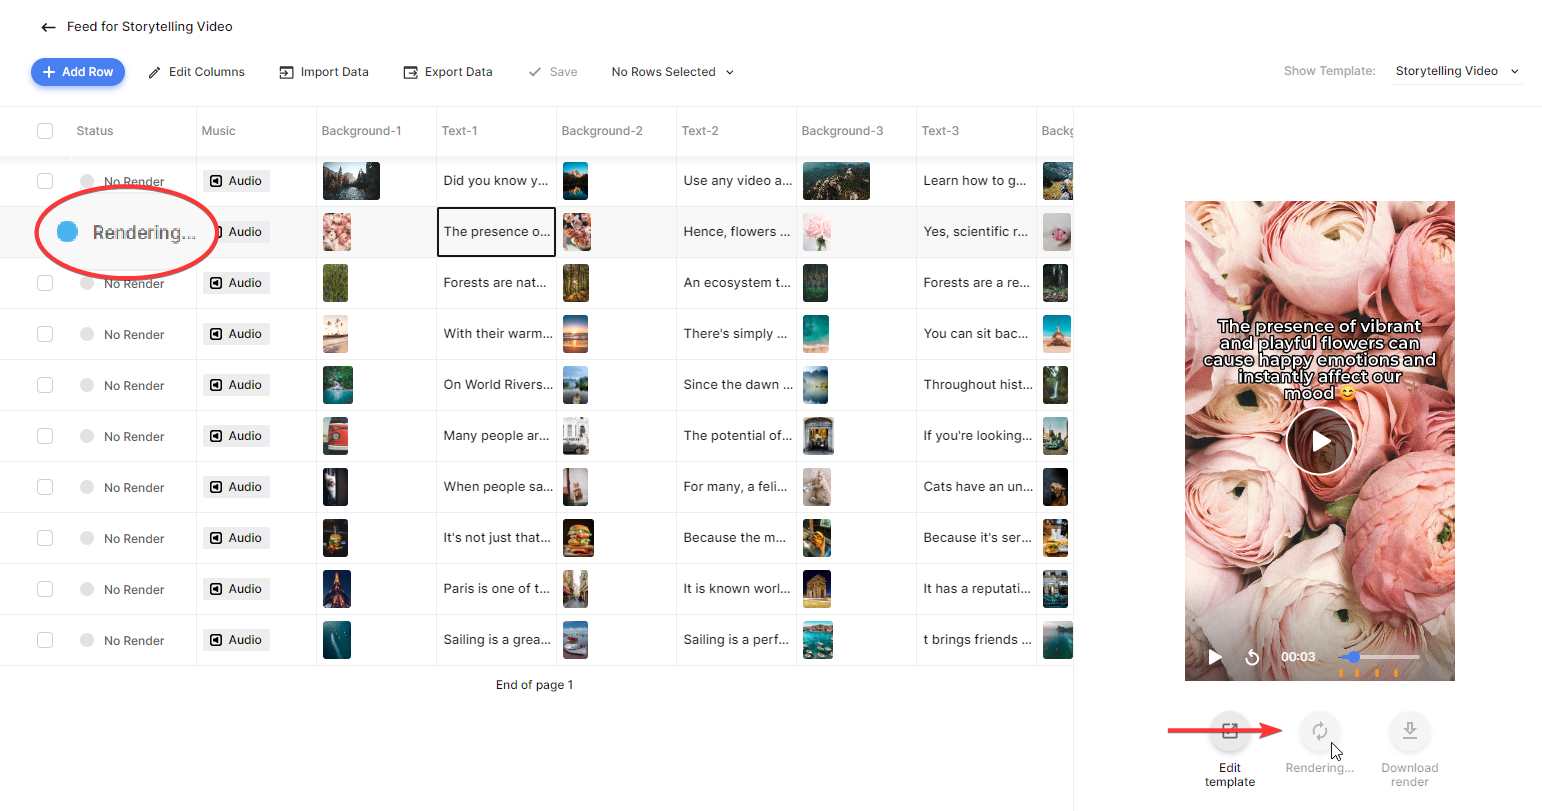
You can also render multiple rows at once. To do this, select some rows, click × Rows Selected, and hit Create Renders:
After your videos are ready, click Download render under the preview screen to download one. Also, you can download multiple videos at once by selecting the corresponding rows, clicking × Rows Selected and choosing the Download Renders option. You can choose a file name by selecting a column and click Download. A ZIP file will be downloaded to your computer:
You can now use the videos whenever and wherever you want.
Wrapping up
That's how easy it is. It only takes three simple steps to make videos in batches. Here are some suggestions for getting even more out of it:
- Schedule your social media posts ahead of time with tools like Buffer and Hootsuite.
- Create multiple templates for different social media platforms and render them at once using the same feed. You can accomplish this by assigning a tag to these templates on the Templates page. Then, select this tag in the top right corner of the feed.
- You can also connect the feed to Zapier and Make. This way, you can set up custom automated workflows that process the videos for you. Check out step 5 of this tutorial on how to use Zapier to auto-post videos to YouTube, Facebook and Twitter and step 6 of this tutorial on how to use Make (Integromat) to auto-post videos to Instagram and LinkedIn.
You might also like these tutorials


Start automating today
Start with a full-featured trial with 50 credits, no credit card required.
Get started for free →