How to Automate YouTube Shorts with AI-Generated Videos

In this no-code tutorial, you'll learn how to build an AI YouTube Shorts automation using ChatGPT, Zapier, and Airtable.
Just a few years ago, who would have believed AI would be able to generate entire videos; from script writing to generating visuals, voiceovers and captions? Let alone ready-to-post social media videos, made without any human involvement. Enter the world of generative AI!
AI comes in all shapes and sizes. There are LLM models (such as ChatGPT), image models (e.g., OpenAI DALL·E), video models (like Sora), audio models (ElevenLabs), and transcription models (Whisper).
In this tutorial, we'll integrate some of these AIs to auto-generate a specific type of video: the YouTube Short. I'll demonstrate how to set up an automated workflow that generates AI videos based on a single prompt. For instance, when we enter "Generate a video about the topic 'The Beginning of Life'," we'll get the following video. From the script and images to the voiceover and captions, everything is automatically generated:
What quality you get from AI is all up to what you feed it; bad input means bad output. So, if we want it to have any practical uses, we'll have to lay down rules for the AI to follow. This is where Creatomate comes in, helping us set up a template and bring everything together.
To complete this example, we will set up a workflow on Zapier.com to fully automate the process. This includes scheduling, video generation, and posting the video to YouTube. By the end of this tutorial, you'll simply need to input video topics and their posting dates into a spreadsheet, and the automated workflow will handle the rest.
One of the great things about this approach is that it's very flexible. Every step of the process can be customized. Want to make a different kind of video? Or maybe use the video somewhere other than YouTube? All that's possible with the same setup. You'll likely adapt this method to make it your own. Feel free to do so – we'd love to hear what you come up with!
Let's dive in!
Prerequisites
The plan for this tutorial is simple: build an automation that generates AI-powered YouTube Shorts and publishes videos daily. To do this, we'll use the following tools:
- Zapier: to automate the entire process;
- Airtable: to keep track of the videos, and schedule when they'll be posted;
- ChatGPT: to generate the writing, image prompts, titles, and descriptions for the videos;
- ElevenLabs: to generate AI voice overs;
- Stability.ai: to generate AI images;
- Creatomate: to set up a video template and bring everything together;
- YouTube: to publish the shorts on a YouTube channel.
How to use AI to automate YouTube Shorts?
Starting off, we'll set up accounts on the AI platforms we'd like to integrate. Next, we'll create a video template in Creatomate; this will serve as the design for the YouTube Shorts. Following that, we'll create a YouTube Shorts schedule in Airtable. For each video we generate, we'll specify a topic and set a time and date for posting.
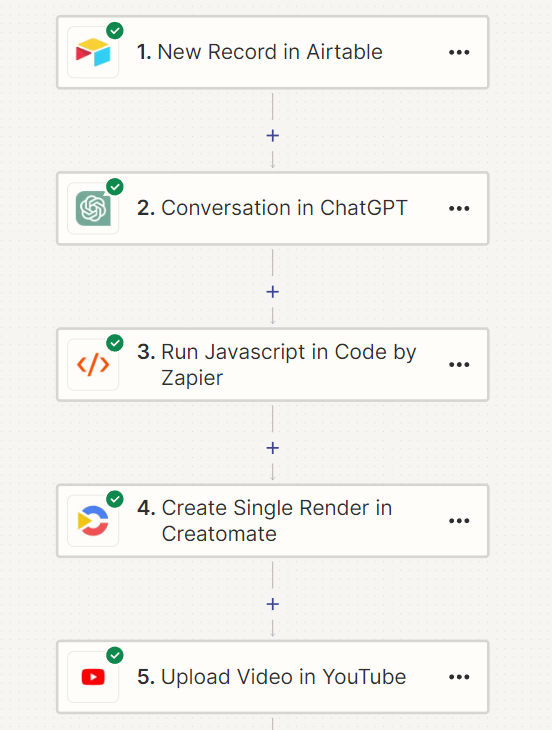
We'll connect everything together using Zapier, a no-code automation platform. When our Airtable document indicates it's time to publish a video, the workflow automatically kicks in. First, a video prompt is sent to ChatGPT, which generates a script along with image prompts, a title, and description for posting. We'll then pass the output of ChatGPT to a template to generate the voiceovers, subtitles, and images. Finally, the video will be posted as a YouTube Short:
Let's get started!
1. Set up ElevenLabs for voice generation
Let's start with the voiceover. For that, we'll be using ElevenLabs.io, one of the best AI voiceover generators around. Another excellent alternative is OpenAI's text-to-speech API, but we found ElevenLabs to be much better when it comes to voice customization.
To integrate ElevenLabs into our automation workflow, we'll need an AI voice and API key. If you haven't already, head over to ElevenLabs.io and create a free account.
ElevenLabs has lots of voice control options. I recommend starting with one of their premade AI voices, which you can find under Speech Synthesis. But if you've got time, check out ElevenLabs' ability to design a custom voice or clone your own. For this tutorial, we'll keep it simple by choosing one of ElevenLabs' premade voices.
Navigate to the Voices page, then go to Library:

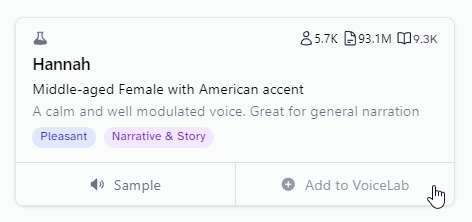
To add any of these voices to your account, click the Add button:
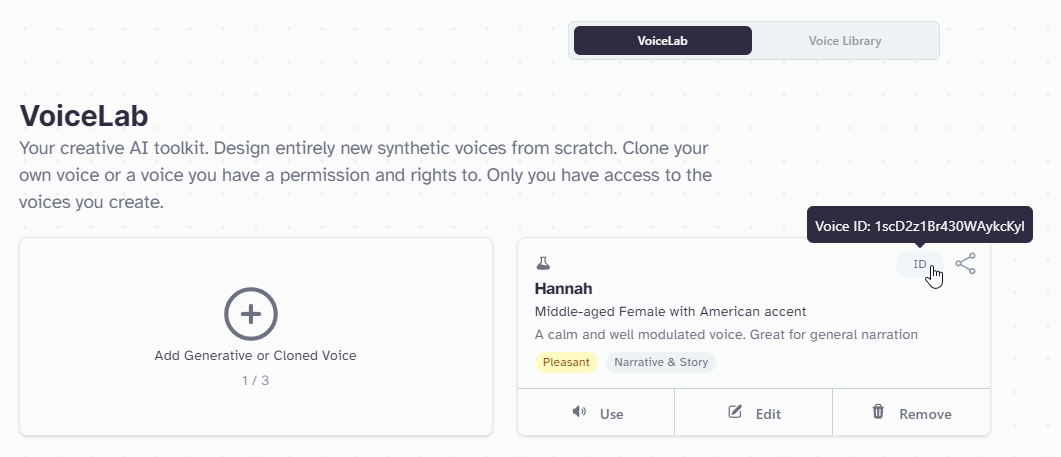
Return to the "My voices" page. Under the Community section, you'll see that the voice has been added. You can specify this voice by its ID, which will be used later in this tutorial. For now, click View, then click the ID button. Save the ID for future reference. (Click the screenshot to view it in full screen):
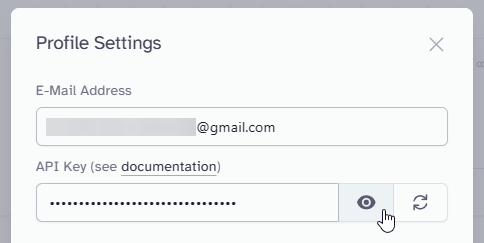
There's one last thing to do. Throughout this tutorial, you'll need your ElevenLabs API key to connect your automation workflow. You can create one by clicking on My Account in the bottom left corner, and then click API Keys:
Now that you've got your voice ID and API key from ElevenLabs, let's move on to the next step.
2. Create a Stability.ai account for image generation
Next, we'll need an AI for generating the visuals for the YouTube Shorts. One of the most popular platforms for generating images is Stability.ai, which provides an API interface to the Stable Diffusion image model.
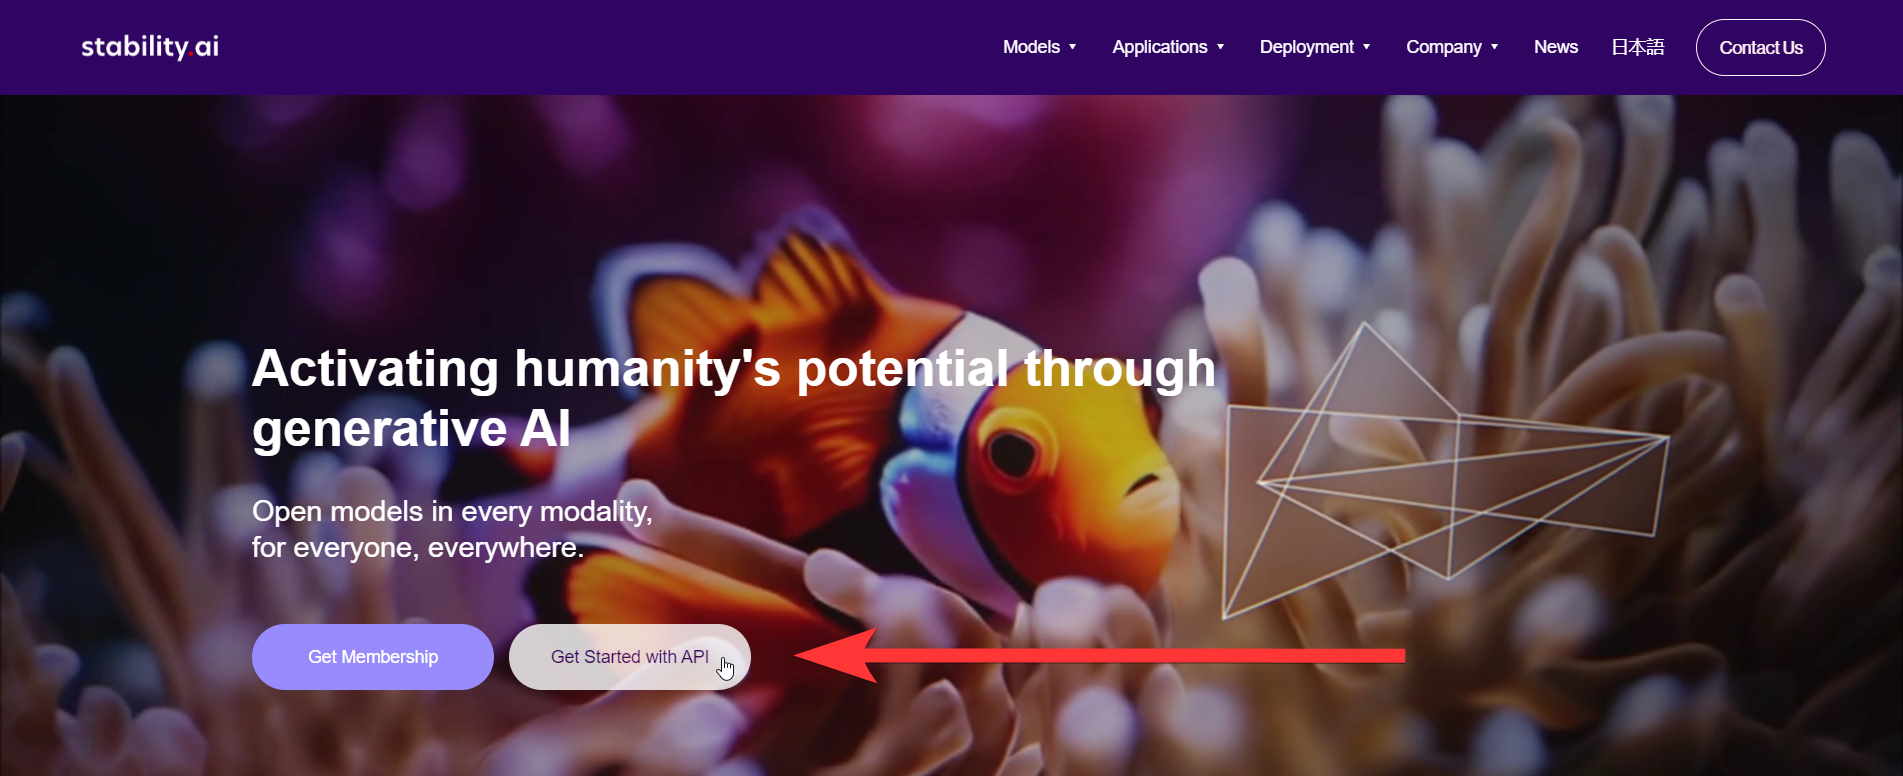
Just like in the previous step, you'll need a key to access the API. To retrieve your API key, go to Stability.ai, and click the Get Started with API button:
In the top right corner, click on Login. If you already have an account with Stability, log in. If not, click Sign up to create an account.
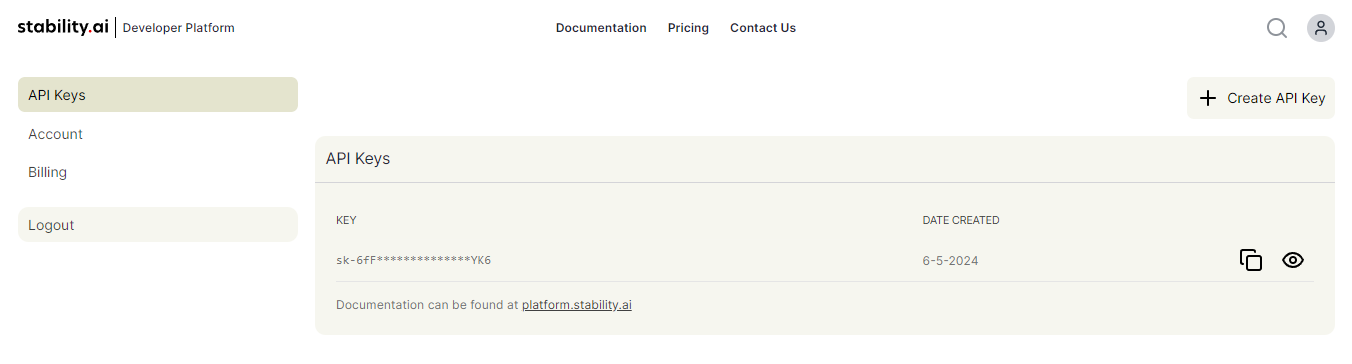
Once logged in, click on your profile icon in the top right corner. Then, go to the API Keys page. You can find your API key here, which you'll need shortly.
3. Create an OpenAI account for ChatGPT
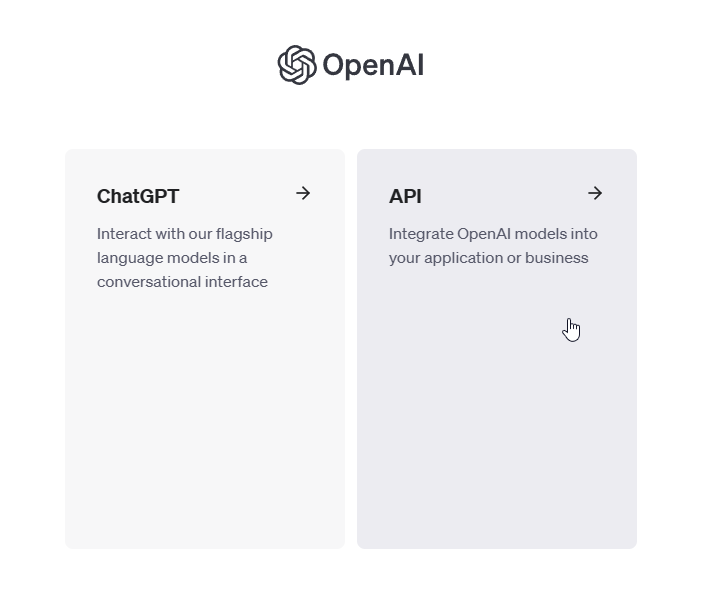
By now, you should be familiar with the drill. Similar to ElevenLabs and Stability.ai, we'll need an API key to access ChatGPT. Sign in to your OpenAI account, and go to the API section:
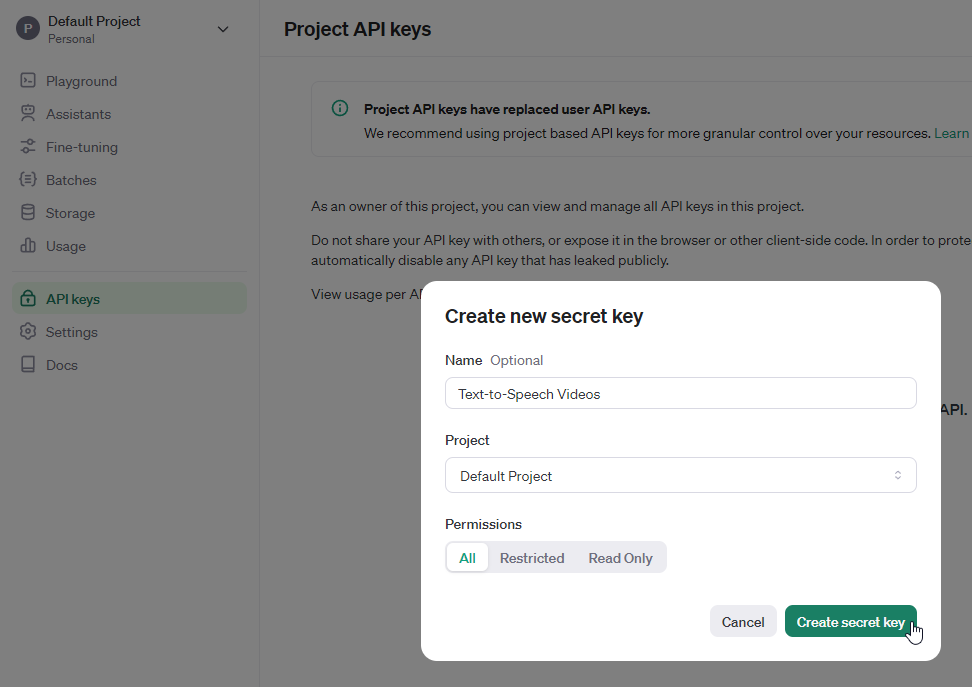
Next, from the left side menu, click API keys. Then, click on Create new secret key, enter a name, and click Create secret key:
Keep your API key somewhere safe and accessible; you'll need it when setting up your Zap.
4. Create a video template in Creatomate
At this point, you'll have an account with ElevenLabs, Stability.ai, and OpenAI. To recap, we'll use ElevenLabs to generate the voiceovers, Stability.ai to create the images, and OpenAI to write the script for the video. Now we can make these powerful tools work together with a video template; this is where Creatomate comes into play.
Log in to your Creatomate account or create a free account. First, we'll connect to our ElevenLabs and Stability.ai accounts. To do this, click on ..., then choose Project Settings. In the Integrations section, toggle the switch for ElevenLabs, paste your API key, and click Confirm. Next, do the same for Stability. Once you're done, close the Project Settings menu:
Your accounts are now configured, and we're ready to create a video template.
Let's navigate to the Templates page, and click the New button to open the template gallery. Head over to the Voice Overs category and select the AI-Generated Story template. Select 9:16 Vertical, then click Create Template to open it in the editor:
The template editor might seem intimidating at first. No worries, it's pretty easy to get started.
If you've used other editing tools before, most of this will be familiar to you. Because Creatomate's editor is built for video automation, it works slightly differently. Instead of producing the final video, you can create a reusable design, called a template, capable of generating hundreds of unique videos. Every aspect of the video is customizable, including text, images, subtitles, and more. This provides you with a huge amount of freedom when it comes to video automation. Even the templates themselves are open-source JSON that can be generated through automation.
Let's focus on our AI-generated story template. As you can see, there are six compositions, each corresponding to a scene in the video. Each composition includes a voiceover, subtitle, and image element. As you play with the template in the editor, you'll notice that the voiceovers, subtitles, and images are just placeholders. This is because the actual AI content will be generated by our automated Zapier workflow. If this doesn't make sense yet, you'll understand in the next few steps.
Our template is almost ready to use; the only thing left to do is specify the ElevenLabs voice you chose in step 1. Let me demonstrate this with the first composition. You can then do the same for the other compositions as well.
On the left side panel, select the Voiceover-1 element. Then, navigate to the properties panel on the right, where you'll find the Audio property. This is where you can customize the voice over. The Provider is already set to ElevenLabs. The Model setting lets you choose between four different text-to-speech models. It's best to stick with Multilingual v2, as it has great speech synthesizing and works with a lot of languages.
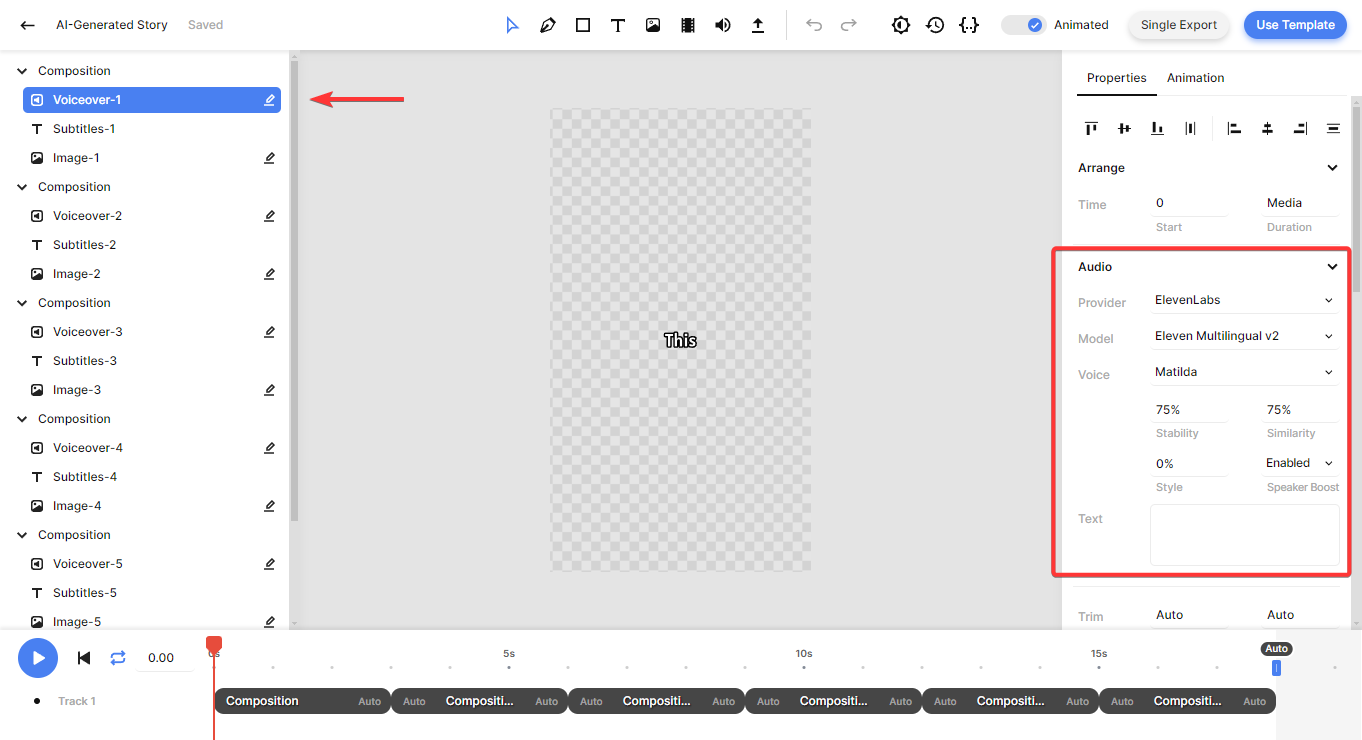
For the Voice, Matilda is the default; a premade voice from ElevenLabs. Here's how to change it: click on Matilda, scroll up, and select Custom Voice. Paste the voice ID from your ElevenLabs dashboard, and click OK.
You also can customize the Stability, Similarity, Style, and Speaker Boost. This is a set of AI parameters you can adjust to fine-tune the voiceover generated by ElevenLabs. For instance, the Stability parameter controls the amount of emotion and randomness in the voice. I recommend leaving them the way they are unless there is a good reason for changing them; the default settings are perfect for most purposes. You can read more about each setting in ElevenLabs' Voice Settings documentation.
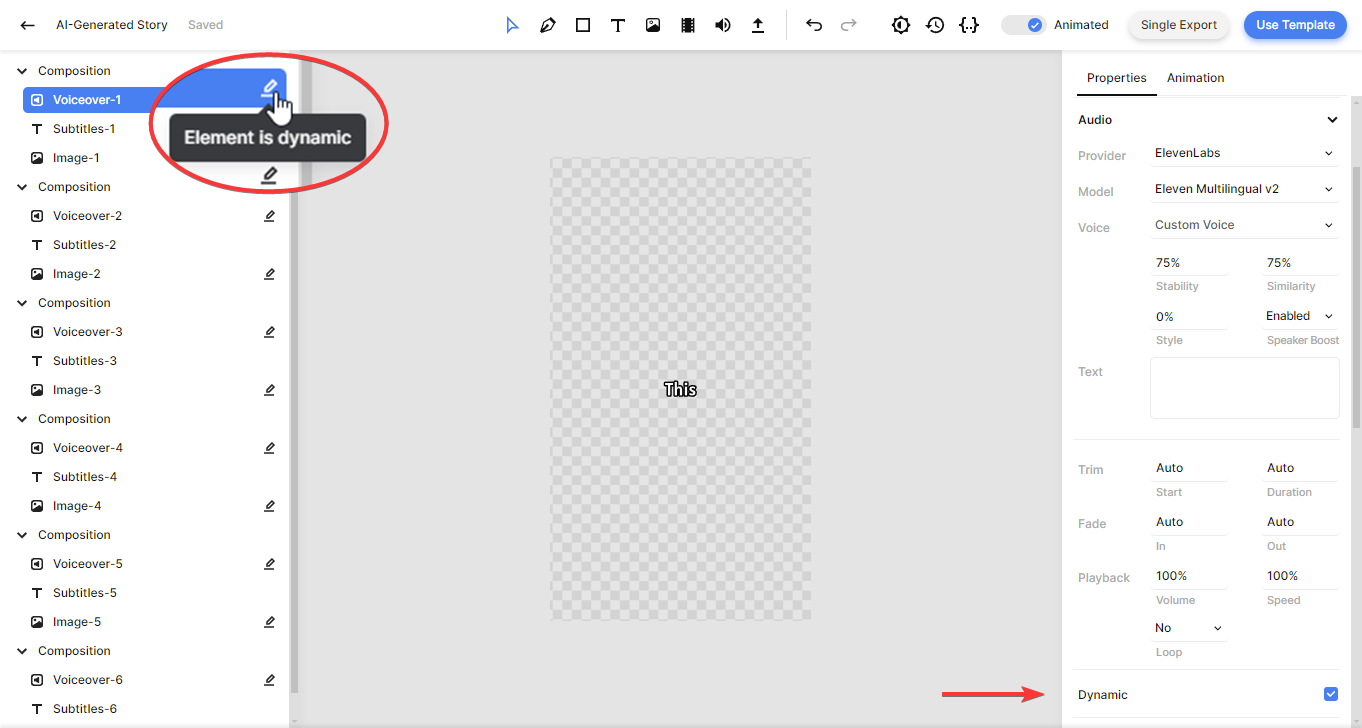
There's another important aspect of the voiceover elements you need to know: they are marked as dynamic, just like the image elements. This means we can input a text prompt in Zapier to generate this content. Later on, we'll map ChatGPT's script to the voiceover elements to create an AI voiceover using ElevenLabs.
To complete the template setup, we'll also look at the subtitle and image elements – but no changes are needed here.
Select the Subtitles-1 element, then scroll down to the Transcription property in the properties panel. No adjustments are needed, but if you'd like to customize the subtitles, you can do so here. As you can see, the Source points to the Voiceover-1 element. This tells Creatomate to generate subtitles based on the voice over. In addition to the Style and Color options, you can also use the Fill and Stroke properties to customize the subtitles' look and feel.
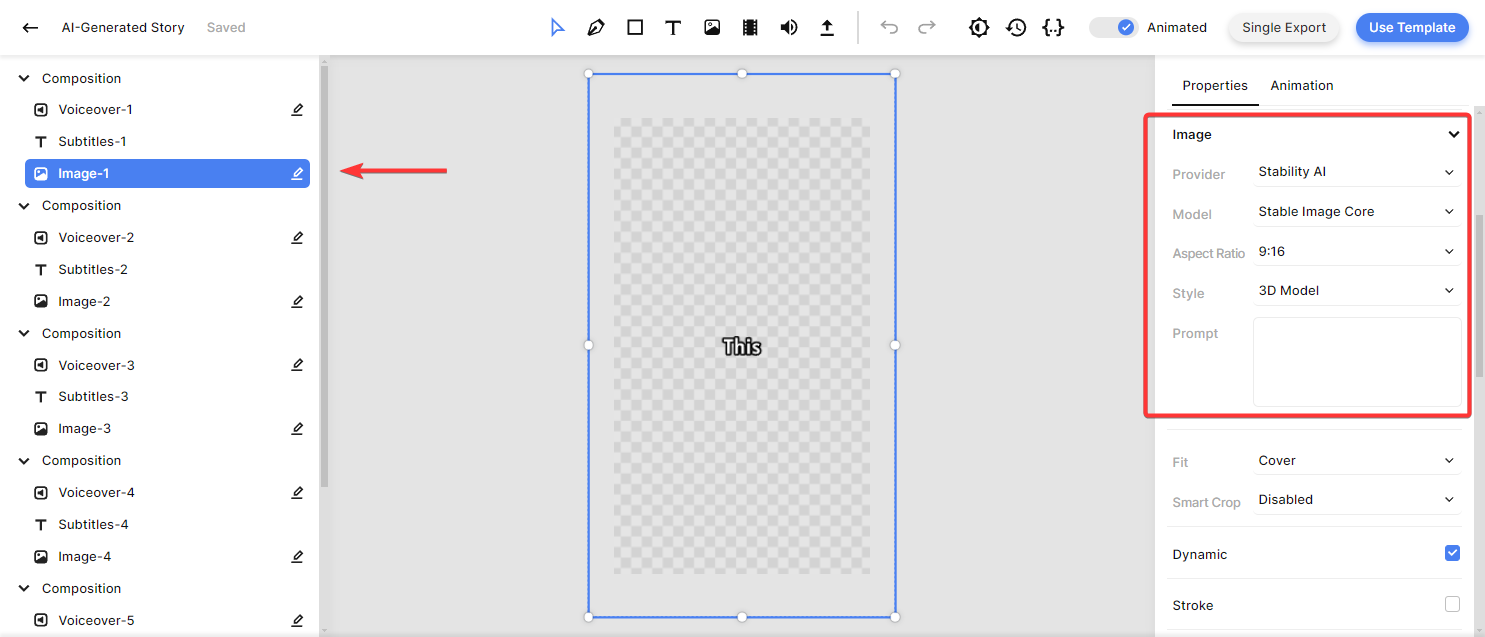
Finally, let's have a look at the images. Select the Image-1 element and find the Image property. The Provider should already be set to Stability AI. For the Model, I recommend Stable Image Core, which is their primary service for text-to-image generation. This model gives you the highest quality images and includes an additional parameter: Style. The Style parameter lets you specify a theme for the images, such as Comic Book, Fantasy Art, or Photographic.
For the type of video we're creating in this tutorial, I prefer the 3D Model style, but feel free to choose the one you like best. Also, make sure the Aspect Ratio is set to 9:16. You can leave the Prompt field empty for now, as we'll input an image prompt generated by ChatGPT in our Zap.
Tip: Stability.ai also runs the Stable Video Diffusion model, allowing you to include AI-generated video clips in your YouTube Shorts, not just static images. Here's a tutorial on how to do it.
And that's all you need to do. Your template is now ready for use. Let's move on to the next step.
5. Schedule YouTube Shorts in Airtable
Now that our video template is ready, we will set up a system for scheduling the videos. There are several platforms that let you schedule social media videos, like Buffer, Hootsuite, and SocialBee. But if you're just looking to publish videos at a certain time, there's a much simpler (and free) solution. This involves using Airtable and a formula that triggers when a video is due to be published. When that happens, it kicks off the automation workflow, setting everything in motion. Let me show you how that works.
Go to Airtable.com, and sign up for free. Or sign in if you already have an account.
Let's create a new base called YouTube Automation. On Table 1, set up the following fields:
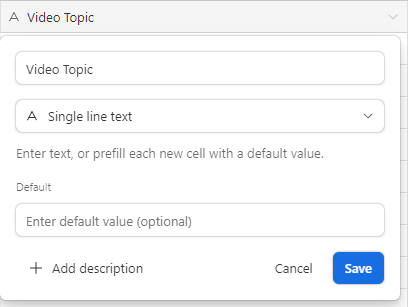
• A Single line text field: Video Topic
You can use this column to list topics for your YouTube Shorts.
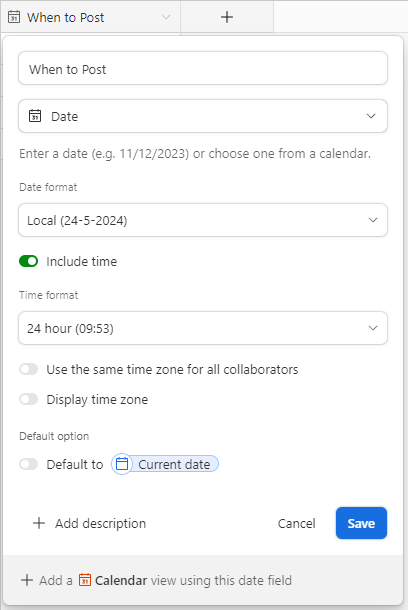
• A Date field: When to Post
To set up this field, choose the Local option for Date format. Also toggle the switch to Include time and set Time format to 24 hour. This way, we can set a specific day and time for posting the videos.
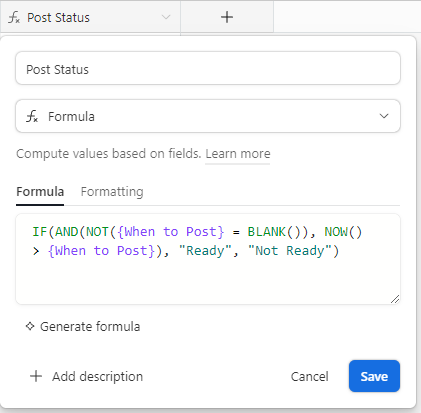
• A Formula field: Post Status
Copy and paste this formula:
IF(AND(NOT({When to Post} = BLANK()), NOW() > {When to Post}), "Ready", "Not Ready")
This is a crucial part of the automation process. Here's how it works: Airtable compares the current time (now) with the time set in our "When to Post" field. As long as the posting date is still empty or in the future, the status will be set to "Not Ready". Once it matches the current time, the status will change to "Ready".
Note: The NOW() function doesn't update instantly; it can take between 8 minutes and an hour. But since we post videos only once a day, it works great for this purpose.
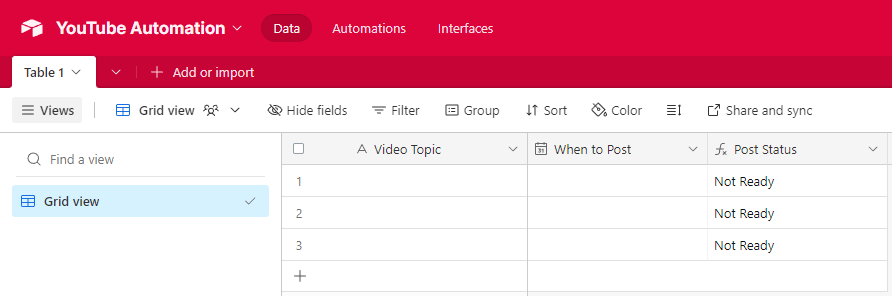
At this point, your table should look like this:
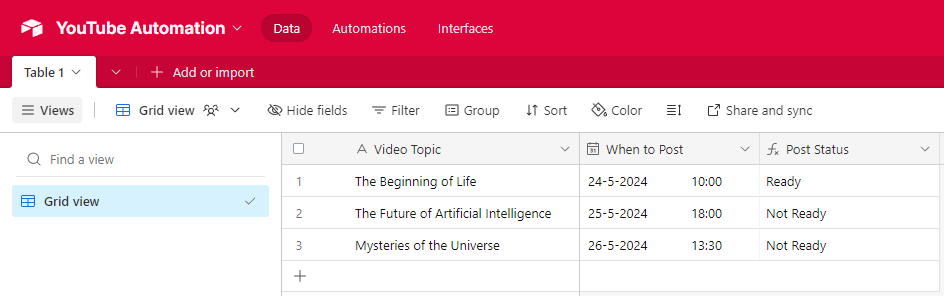
Now, let's add some test records. This data will be used to set up our second view and test our Zapier trigger. I used the three records that Airtable added. Provide three video topics; you can use the same ones as I did, and select a posting time for each. Make sure that at least one record has a date and time in the past. For this record, the Post Status should change to "Ready." Here's what my test setup looks like:
Next, we'll add a new view: Ready to Post:
Add the following filter condition to make sure that only records with a "Ready" status appear in this view:
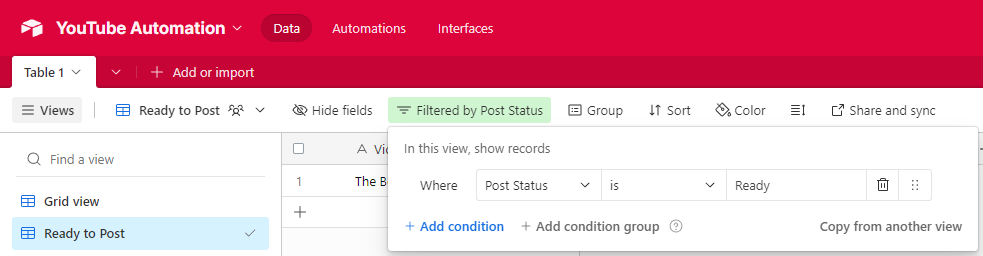
You should only see the record with the date and time already passed. Did it work? Great!
You've successfully created your own YouTube Shorts automation schedule! Feel free to create as many rows as you'd like, one for each video you wish to generate. Whenever a scheduled date matches the current time, the record will appear in the "Ready to Post" view. In the next step, we'll use this to activate the automated workflow.
Let's head over to Zapier.
6. Set up the automation trigger
Let's move on to Zapier next. For this tutorial, we'll trigger an automation workflow based on the Airtable document from the previous step. So when a video in Airtable gets pushed to the "Ready to Post" table, Zapier will automatically start the workflow. That workflow will involve pulling the data from Airtable, generating the video, then uploading it to YouTube.
Log in to your Zapier account or sign up for free if you haven't already.
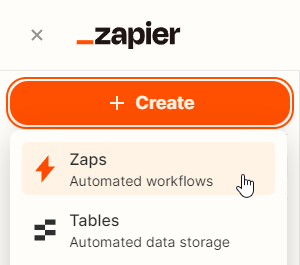
Once logged in, click the Create button, and choose Zaps.
Once you're in the Zap editor, click the Trigger block. Search for and select the Airtable app, and choose the New Record event. Then, click Continue.
If you've used Airtable with Zapier before, select your account. If not, sign in. Then, grant Zapier access to your YouTube Automation base.
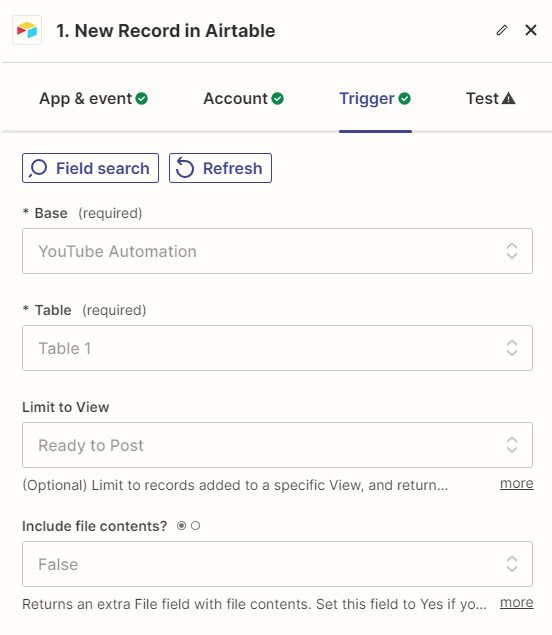
Next, set up the trigger by specifying your YouTube Automation base, Table 1, and the Ready to Post view. Then, click Continue.
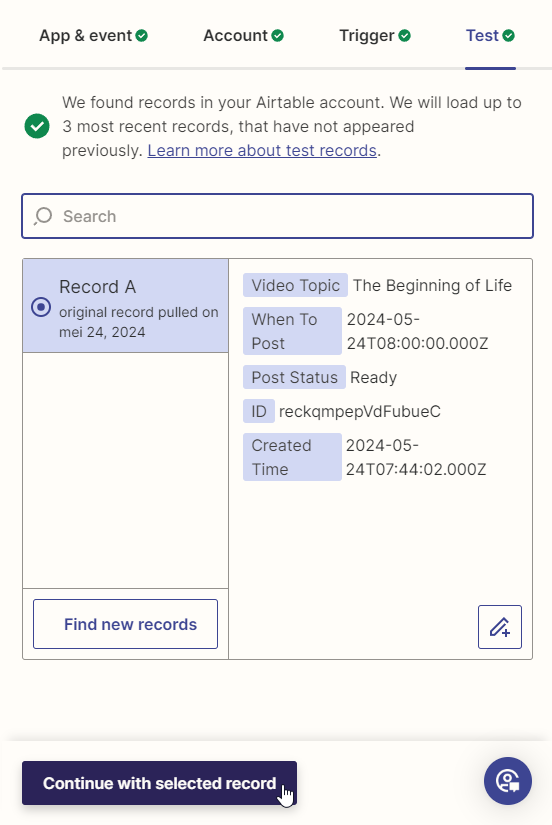
On the Test tab, click Test trigger to make sure Zapier can find your sample record. Once the test is successful, click Continue with selected record, and move on to the next step.
7. Generate a video script with ChatGPT
Here's where ChatGPT comes into the picture. Based on the topic provided through Airtable, we'll ask ChatGPT to generate the content for the video. We'll also ask it to generate image prompts for the visuals. If it doesn't make sense yet, don't worry! Just follow the upcoming steps carefully, and you'll see what I mean once the workflow has been set up.
Add another action to your Zapier workflow, select the the ChatGPT app, and choose the Conversation event. Continue by signing in to your OpenAI account using the API key from step 3.
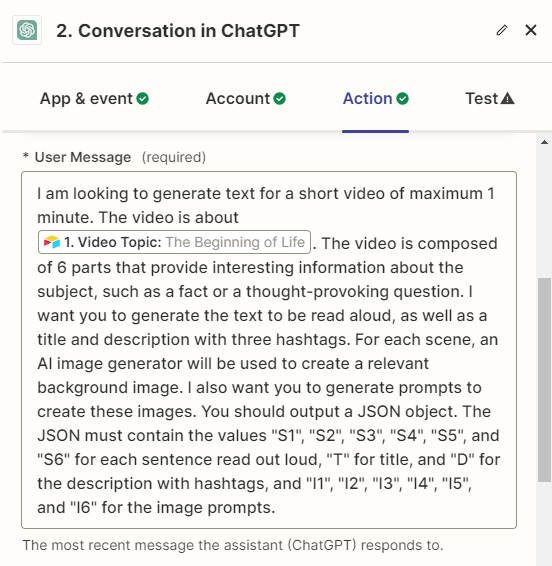
On the Action tab, copy and paste the following prompt into the User Message field:
I am looking to generate text for a short video of maximum 1 minute. The video is about [topic]. The video is composed of 6 parts that provide interesting information about the subject, such as a fact or a thought-provoking question. I want you to generate the text to be read aloud, as well as a title and description with three hashtags. For each scene, an AI image generator will be used to create a relevant background image. I also want you to generate prompts to create these images. You should output a JSON object. The JSON must contain the values "S1", "S2", "S3", "S4", "S5", and "S6" for each sentence read out loud, "T" for title, and "D" for the description with hashtags, and "I1", "I2", "I3", "I4", "I5", and "I6" for the image prompts.
Make sure to replace [topic] with Airtable -> Video Topic, like this:
You can leave the other options as is, or customize them to suit your needs. Once you're done, click Continue.
Click Test step on the Test tab to see what ChatGPT replies:
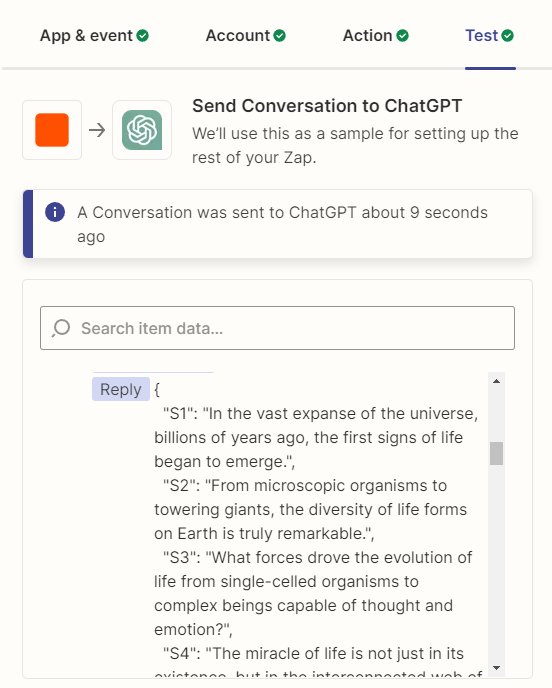
Exactly as we asked, ChatGPT generated a response, stored in the field "Reply". However, the returned data is in a format that Zapier does not understand, so we will need to convert it before continuing. That's what we'll do next.
8. Parse the AI script
This step is simple, but essential. We're going to break down the JSON response into individual items.
Click + to add a new step to your Zap:
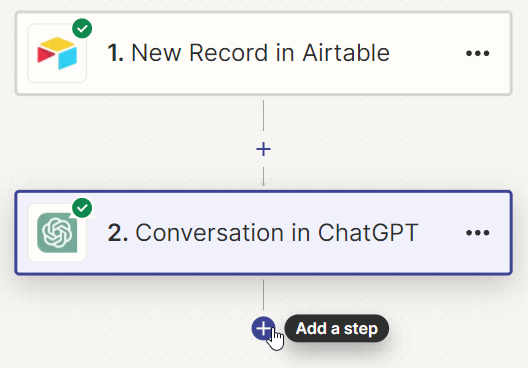
Search for the Code by Zapier app, and select the Run Javascript event. Then, click Continue.
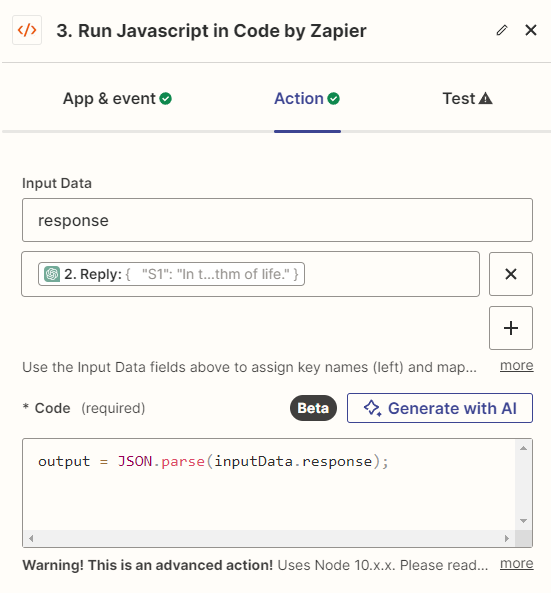
On the Action tab, type response in the Input Data field, and select ChatGPT ->Reply. Then, in the Code field, copy and paste the following:
output = JSON.parse(inputData.response);
It should look like this:
When done, click Continue.
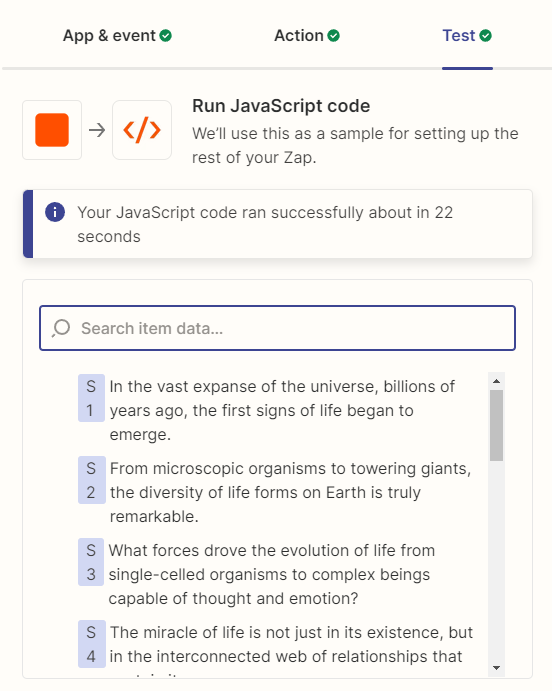
On the Test tab, click Test step. You'll see that JSON is broken down into single items; S1, S2, S3, S4 etc.:
9. Generate the video
Here's where everything comes together. We can now map the data from ChatGPT to the video template we created earlier.
Click +, search for the Creatomate app, and choose the Create Single Render event. Continue by selecting your account or signing in with your project's API key, which you can find under Project Settings in your Creatomate dashboard.
On the Action tab, select the AI-Generated Story template in the Template field first:
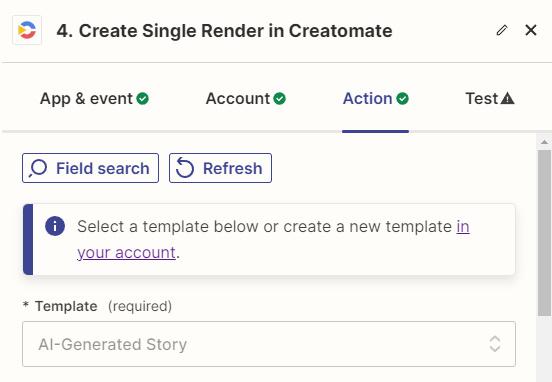
Zapier will now pull in the dynamic elements and list them under Modifications.
When passing text to a voiceover element, it'll be converted to speech using ElevenLabs. And when text is passed to an image element, it will be used as a text-to-image prompt for Stability. To instruct Creatomate to create a video, connect the AI-generated sentences to the voiceover elements and the image prompts to the image elements like this:
- Set Image-1 to Code by Zapier -> I1
- Set Voiceover-1 to Code by Zapier -> S1
- Set Image-2 to Code by Zapier -> I2
- Set Voiceover-2 to Code by Zapier -> S2
- Set Image-3 to Code by Zapier -> I3
- Set Voiceover-3 to Code by Zapier -> S3
- and so on.

When done, click Continue.
Click Test step on the Test tab to create a test video. If everything is set up correctly, Creatomate will do a few things. First, it will send a request to Stability.ai to generate the images. Next, it will use your ElevenLabs account to produce the voiceovers. It will then auto-generate subtitles based on these AI voiceovers. Finally, it'll put everything together into a video.
This process may take a minute or two to complete. Once the video is ready, you can check it by visiting the URL provided in the test result. If you get a 'Not Found' page, wait a little longer as the video is still being processed. This only occurs during the initial setup of your Zap. Once the workflow is active, it will wait for the video to finish before moving on to the next step.

Here's how my AI-generated video looks:
Congratulations, we have produced our first fully AI-generated video! In order to complete this walkthrough, we'll wrap up by adding a final step to the workflow; automatically posting the video to YouTube.
10. Upload to YouTube
At this point, all that remains is to upload the video to YouTube.
Add the YouTube app with the Upload Video event. Continue by selecting your account or signing in first. Then, click Continue.
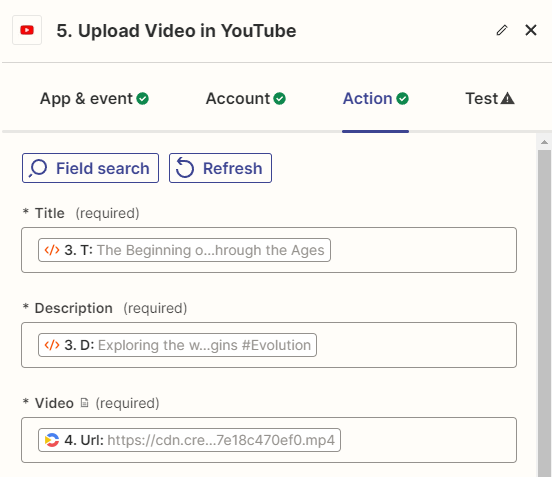
On the Action tab, map the required fields as follows:
- Set Title to Code by Zapier -> T
- Set Description to Code by Zapier -> D
- Set Video to Creatomate -> Url
You can adjust the other settings, like Privacy Status, Category, and Notify Subscribers, however you want. When done, click Continue.
On the Test tab, click Test step. This test will only make sure Zapier passes the correct data. No video will be uploaded to your YouTube channel right now.
And last but not least, click Publish Zap to activate the workflow.
What's next for video automation using AI?
You made it through this tutorial, well done! By now, you should know how to set up your own automation workflows for generating YouTube Shorts.
I've already stated at the beginning of this tutorial that you can do so much more than generating Shorts. By customizing the prompt sent to ChatGPT, you can generate almost any kind of video content. Combining that with the flexibility of Zapier and Creatomate, this approach will work in many other video automation scenarios.
This doesn't always have to involve AI. Generative AI is great for some purposes, but sometimes a simpler approach works just as well. Particularly if you are concerned with (fact) checking the content of the videos, you might like an automated workflow using cherry-picked content. Those use cases are also perfectly covered by Zapier and Creatomate.
To learn more, be sure to visit our blog where we'll lay out more use cases.
You might also like these tutorials


Start automating today
Start with a full-featured trial with 50 credits, no credit card required.
Get started for free →