How to Create AI-Generated Videos using ChatGPT and Make.com

Learn how to automatically generate YouTube Shorts, TikTok videos, and Instagram Reels using ChatGPT, DALL·E (optional), and Make (Integromat).
AI technology opens up a whole new world of opportunities, especially in the area of marketing purposes. One popular strategy is to generate text and images for social media content. Think of creating AI-powered YouTube Shorts, TikTok videos, or Instagram Reels.
In this tutorial, I'll walk you through the process of automating short-form videos based on AI-generated content. ChatGPT will be our go-to tool for generating the video scripts. Optionally, you can also use DALL·E for creating images, but that's up to you. To generate the social media videos, we'll use Creatomate, a video generation API. And to tie everything together, we'll use Make.com, a no-code automation platform.
Even the highlighted words and emojis are automatically chosen by the AI.
To give you an idea of what's possible, the video you see above is the one we'll create. This particular video focuses on the topic of 'animals that live in the mountains'. However, this is just an example. If you have a completely different video concept in mind, you can use the template editor to create your own designs.
💡 AI tip: Did you know you can also create different types of AI-generated videos with Make.com? For example, you can use a text-to-speech tool like ElevenLabs to produce AI voiceovers for your videos. Plus, with Creatomate's auto-transciption feature, you can add animated subtitles. Check out this complete tutorial to learn how to create faceless shorts for YouTube, TikTok, and Instagram using Make.com and ChatGPT.
Prerequisites
With Make.com's support for over a thousand apps, you may want to build a workflow that perfectly suits your specific needs. That's why, in this tutorial, we'll go with a straightforward setup. We'll use a simple set of data as our trigger. However, in practice, you can use any other app that works for you, such as Airtable or Google Sheets, for example.
These are the tools we'll use:
- Creatomate: to create a design and generate the AI videos. Sign up for free.
- Make.com (formerly Integromat): to set up the automated workflow.
- ChatGPT: to generate video content based on a chosen topic.
- DALL·E (Optional): to generate images for our videos.
- Instagram: or any other app to process the videos.
In this tutorial, I'll also show you how to use DALL·E to generate AI images. It's worth noting that this step is optional. If you'd rather not use it, you can skip all the upcoming DALL·E-related steps.
How to create social media content with ChatGPT and Make
To automatically generate AI-powered videos, we'll start by creating a template in Creatomate. This design serves as the foundation for all our videos. There are ready-made templates available, but you can also create your own video designs.
Moving on, we'll head over to Make.com and start our workflow with a basic trigger. Here, we can input a topic for our videos and write a caption for posting on social media. Next, we'll instruct ChatGPT to generate the script for our videos. Once it's ready, we'll convert it into a format Creatomate can use. Optionally, we'll use DALL·E to generate an image. Creatomate will then take the template and content produced by the AI steps to create our videos. In the end, we'll post the videos on Instagram. Here's what our scenario might look like:

Let's get started by creating a video design.
1. Create a video template in Creatomate
Log in to your account and navigate to the Templates page. Click the + New button. For the purpose of this tutorial, let's go to the Social Media category, select the 5 Facts Story template, and click Create Template:
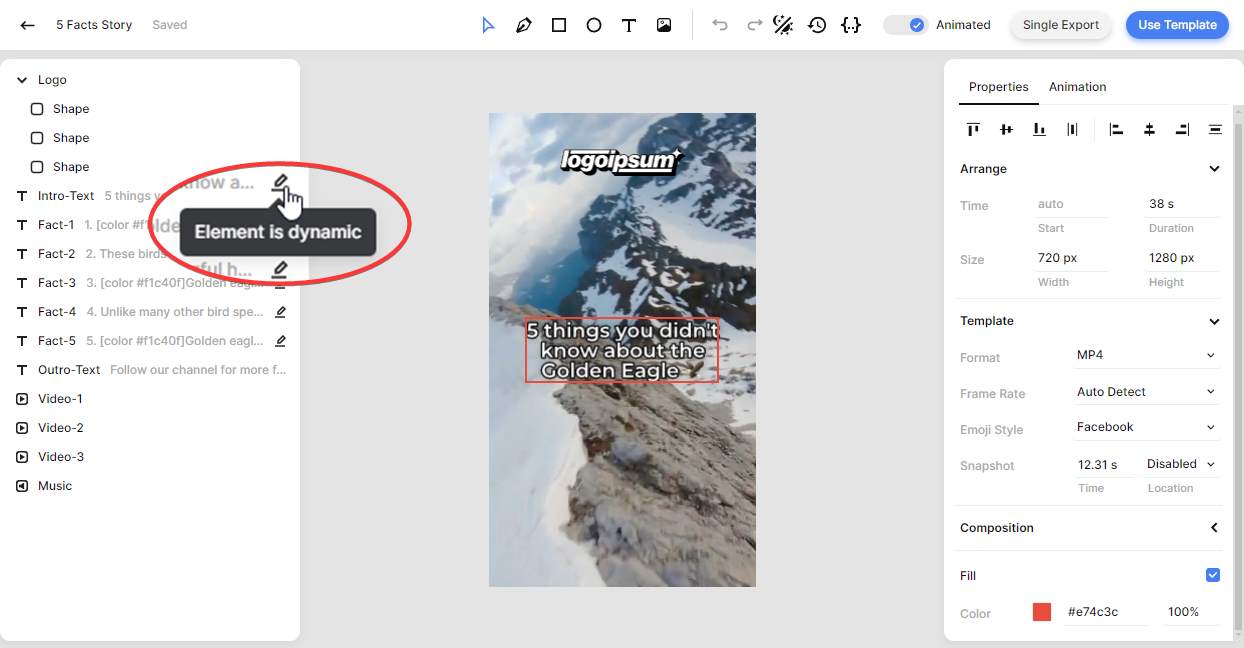
Let's take a closer look at our template and how we can use it to auto-generate AI videos. On the left side panel, we can find the elements that make up our template. It's worth noting that some elements are marked as dynamic, such as the Intro-Text, and the Facts. This means they function as placeholders, which we can populate with text generated by ChatGPT using our Make scenario:
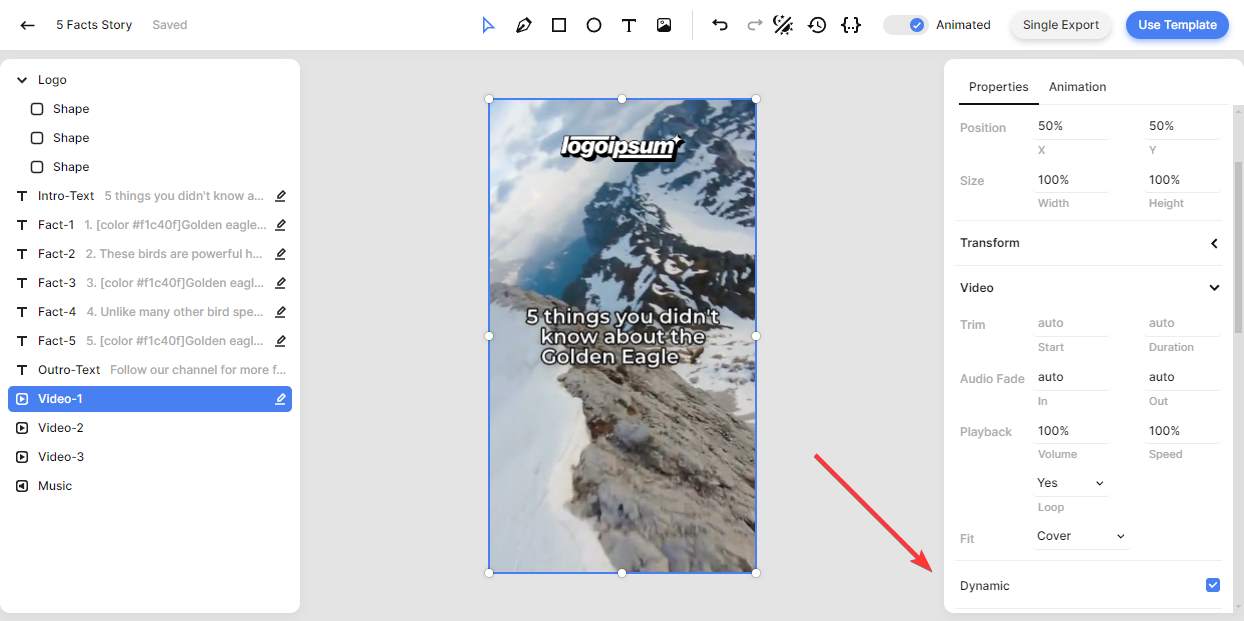
You may have noticed that our template also contains three video elements, but they aren't dynamic. That means if we keep the template as it is, every video we generate will include the same video clips. There is, however, another option. We can provide video clips with Make, or as we'll do in this tutorial, generate an image with DALL·E to replace a video element. To do this, select a Video element in the left side panel, then check the Dynamic property in the right side panel, as shown in the screenshot below. I'm only using one video element to show how this works, but you can do the same with multiple clips:
Tip: We've recently introduced our DALL·E integration. While the steps in this tutorial still work, you might want to consider our native integration, which simplifies the process. Here's a tutorial with step-by-step instructions. Although it covers a Zapier automation, the concept is the same for Make.com workflows.
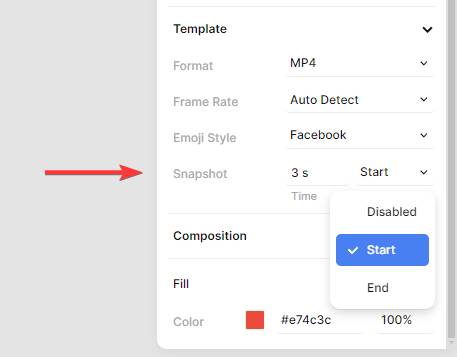
If you plan to post Instagram Reels, it's a good idea to create an eye-catching cover. Most social media platforms take the first frame of a video as a cover image. Here is where the Snapshot setting comes in. With this property, you can extract a frame from the video and place it somewhere in the video. So, set the snapshot time to a point in your video that you want to use as the cover image. Make sure you also set the location to Start.
This covers everything you need to know about the template for now. If you wish, you can further customize it to your liking. For example, you can upload your own logo and personalize the outro. While we didn't delve deeply into this aspect in this tutorial, you can refer to this quick guide to learn more about how the editor works.
Let's move on to Make.
2. Set up a scenario trigger
If you’re already familiar with Make, you can set up your own trigger to pass data into the automated workflow. For example, refer to one of these tutorials if you want to use Google Sheets or Airtable to activate your scenario.
The goal here is to provide a topic for creating prompts for ChatGPT and DALL·E. Additionally, we'll compose a caption for our social media posts.
Log in to your Make account and click + Create a new scenario. Once in the scenario editor, click the big + button. Then, search for and select Tools as the app, and Basic trigger as the trigger.
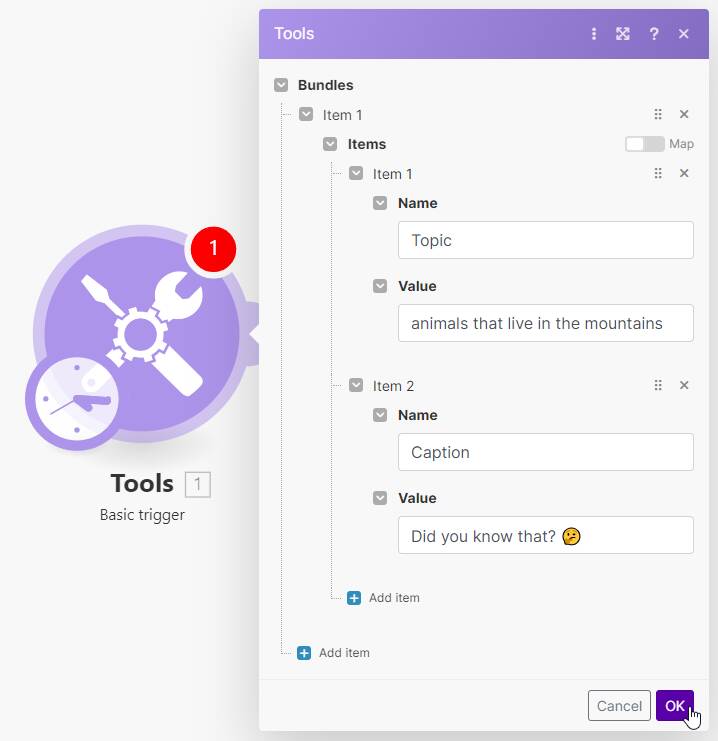
Next, let's add the following items:
- Topic -> animals that live in the mountains
- Caption -> Did you know that? 🤔
Then, click OK:
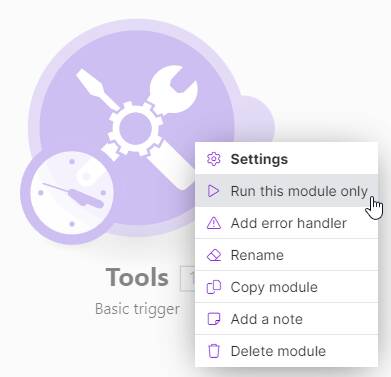
Right-click the module and select Run this module only:
We have our trigger in place, so let's move on to the next step.
3. Generate video scripts with ChatGPT
In this step, we'll create a prompt for ChatGPT with clear instructions about the content it should generate.
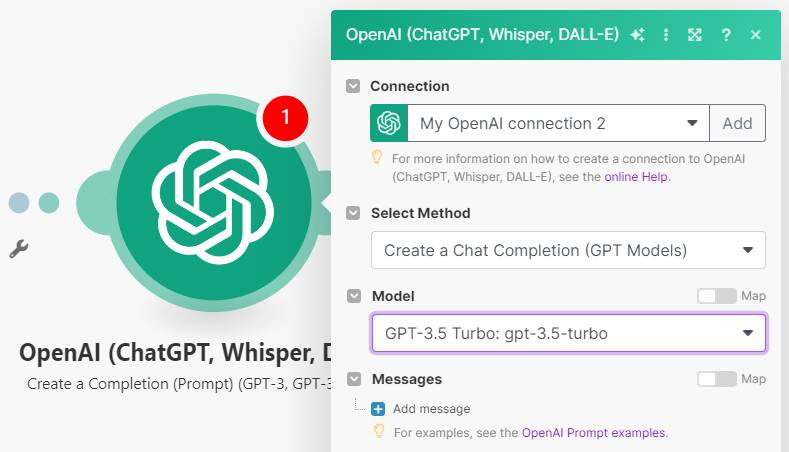
Click + to add another module. Search for and select the OpenAI (ChatGPT, Whisper, DALL-E) app and choose the Create a Completion (Prompt) (GPT-3, GPT 3.5, GPT-4) action.
First, select your connection or create one if needed. Make sure that Select Method is set to Create a Chat Completion (GPT Models). Then, choose the model you wish to use, such as GPT-3.5 Turbo:
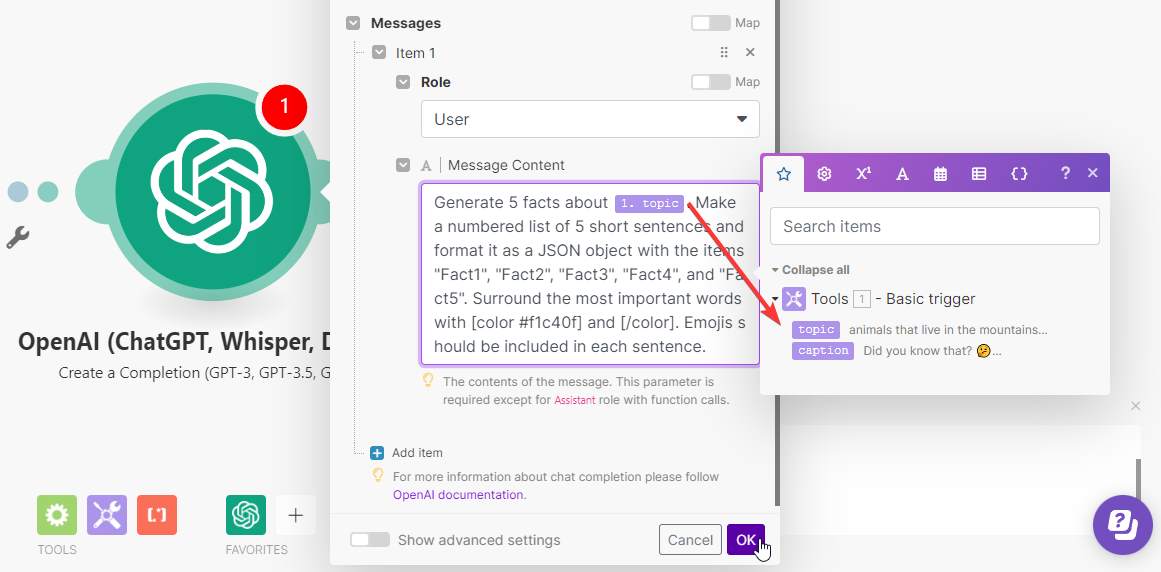
Under Messages, click + Add message. Then, select User in the Role field, and copy and paste the following into the Message Content field:
Generate 5 facts about [TOPIC]. Make a numbered list of 5 short sentences and format it as a JSON object with the items "Fact1", "Fact2", "Fact3", "Fact4", and "Fact5". Surround the most important words with [color #f1c40f] and [/color]. Emojis should be included in each sentence.Make sure to replace [TOPIC] with Tools - Basic trigger -> topic. Also, set Max Tokens to 0. When done, click OK:
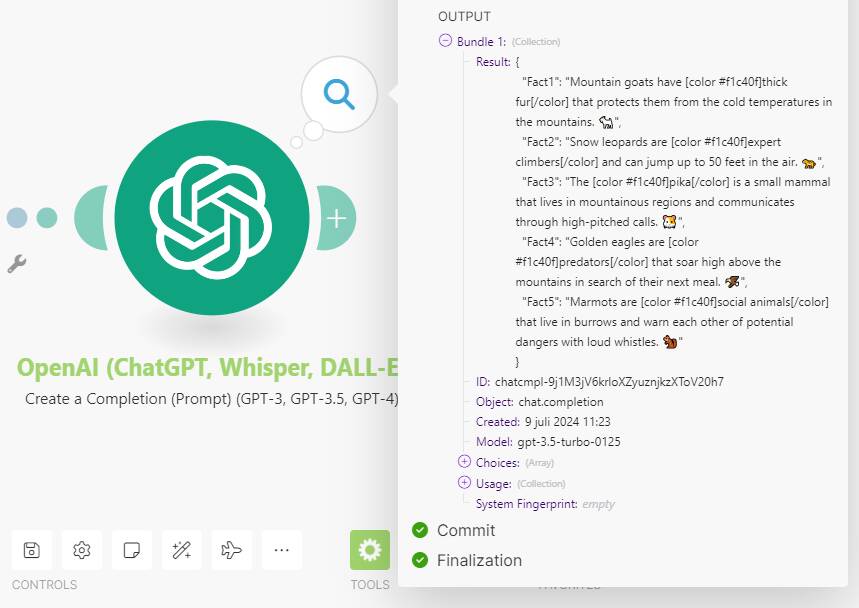
To test if ChatGPT can generate the facts for us, click Run once in the bottom left corner:

If the test succeeds, you can click on the magnifying glass icon to view ChatGPT's result:
Let's continue.
4. Restructure the facts
In this step, we'll convert the output from ChatGPT into a format that Creatomate can use. The response should be divided into separate values: Fact-1, Fact-2, etc.
Click + and add the JSON app, with the Parse JSON transformer.
Select OpenAI - Create a Completion -> Result, and click OK:

I suggest testing this action along with the next step, where we generate an image with DALL·E. The reason is twofold: firstly, we don't need to connect the results in the upcoming module, and secondly, each time you run the ChatGPT module, it sends another request, consuming credits and generating new facts.
However, if you prefer not to use DALL·E, you should test this step now by clicking Run Once. Afterward, you can skip the next step and proceed to step 6.
5. Generate images with DALL·E (optional)
This step is optional. If you prefer not to use DALL·E images in your videos, skip this step and proceed to step 6.
Click + to add another Open AI (ChatGPT, Whisper, DALL-E) module. This time, select the Generate an Image action.
Your OpenAI connection should be pre-selected; if not, add it. In the Model field, you can choose whether you want to use DALL-E 2 or DALL-E 3.
Next, select Tools - Basic trigger -> topic in the Prompt field:

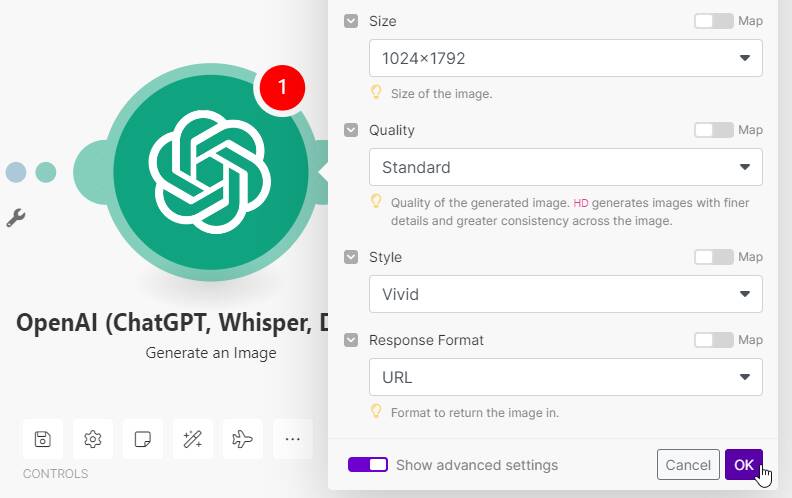
Toggle the switch to show advanced settings. Since we're creating vertical videos, choose 1024x1792 for the Size. Optionally, you can adjust the quality and style. Make sure Response Format is set to URL. Then, click OK:
To verify that DALL·E can generate an image (and the JSON module can reformat the facts correctly), click the Run once button. If the test is successful, you can preview the image by visiting the URL provided in the test result, if you wish.
Next, we'll use this AI-generated content to create social media videos.
6. Auto-generate the videos
In this step, we'll set up an action for Creatomate to generate our videos. To do this, we'll populate the dynamic elements of our template with the facts generated by ChatGPT and the image from DALL·E.
Add the Creatomate app with the Render a Template action.
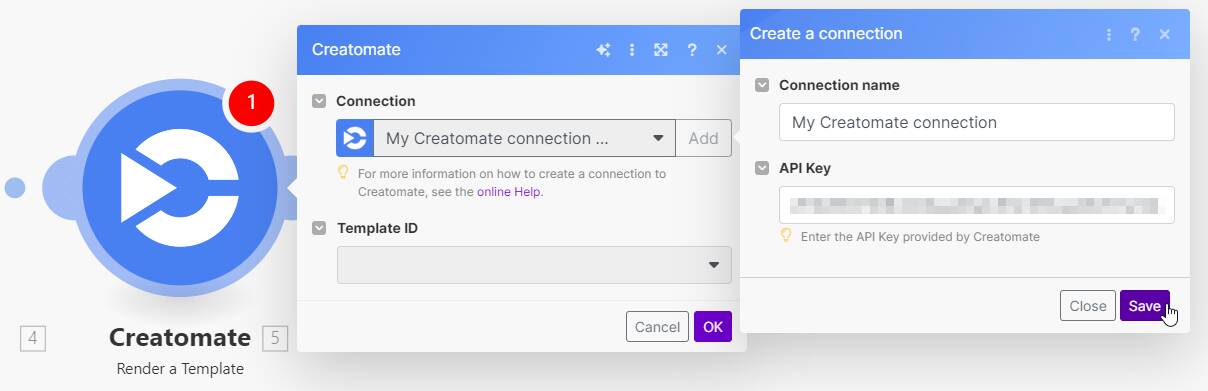
Create a connection first. You can do this by entering your project's API key, which you can find under Project Settings in your Creatomate dashboard:
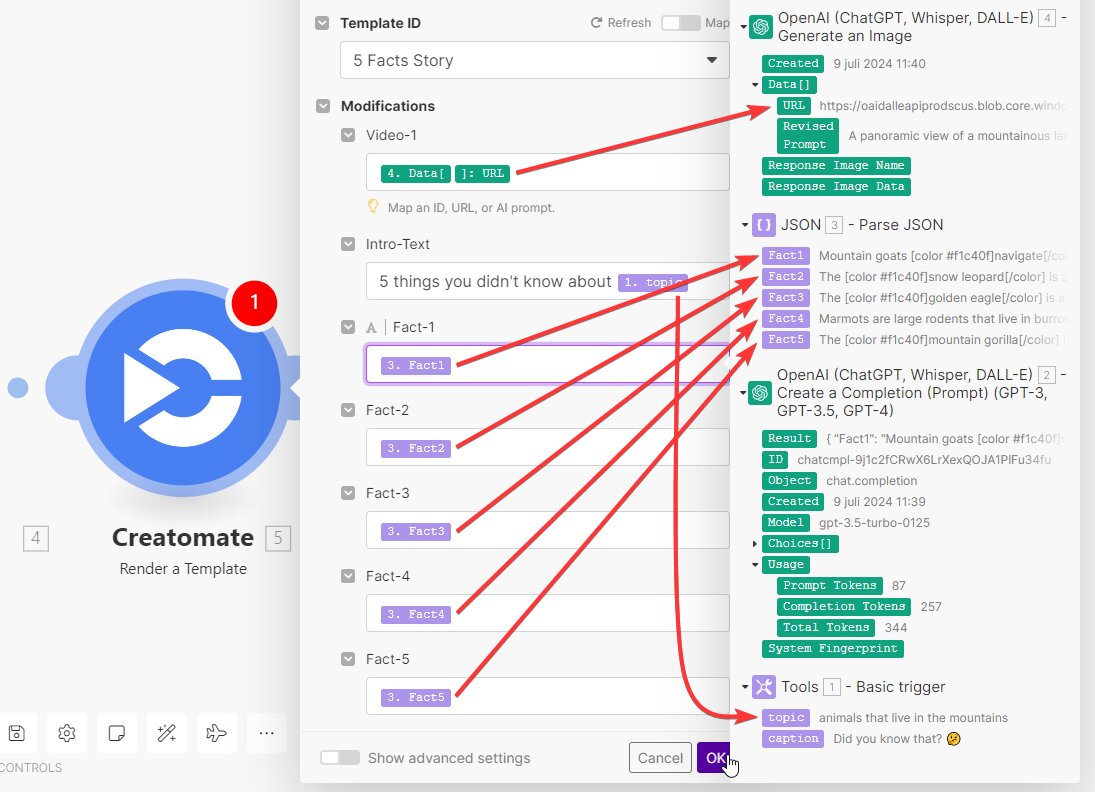
Then, choose the 5 Facts Story template in the Template ID field. Make.com will now pull in the template’s dynamic elements and list them under Modifications.
Now, let’s connect our AI-generated content to our template as follows:
- Set Video-1 to OpenAI - Generate an Image -> Data -> URL
- For the Intro-Text: replace ‘the Golden Eagle 🦅’ with Tools - Basic trigger -> topic
- Set Fact-1 to JSON - Parse JSON -> Fact1
- Set Fact-2 to JSON - Parse JSON -> Fact2
- Set Fact-3 to JSON - Parse JSON -> Fact3
- Set Fact-4 to JSON - Parse JSON -> Fact4
- Set Fact-5 to JSON - Parse JSON -> Fact5
When done, click OK:
To verify if Creatomate can generate a video with the provided data, click the Run once button. If the module turns green, the test is successful. If you want, you can preview your video by visiting the URL provided in the test result:

7. Post on social media
All right, we're almost there. The video is now ready to use. I'll show you how to post it as a Reel on Instagram, but feel free to use whichever app suits you best. You may also want to share it as a YouTube Short or on TikTok. While Make.com doesn't have direct integrations with TikTok for posting video content, there are workarounds. For example, you can email the video to yourself and then publish it manually. This approach gives you the chance to review your AI-generated videos before sharing them. The choice is yours.
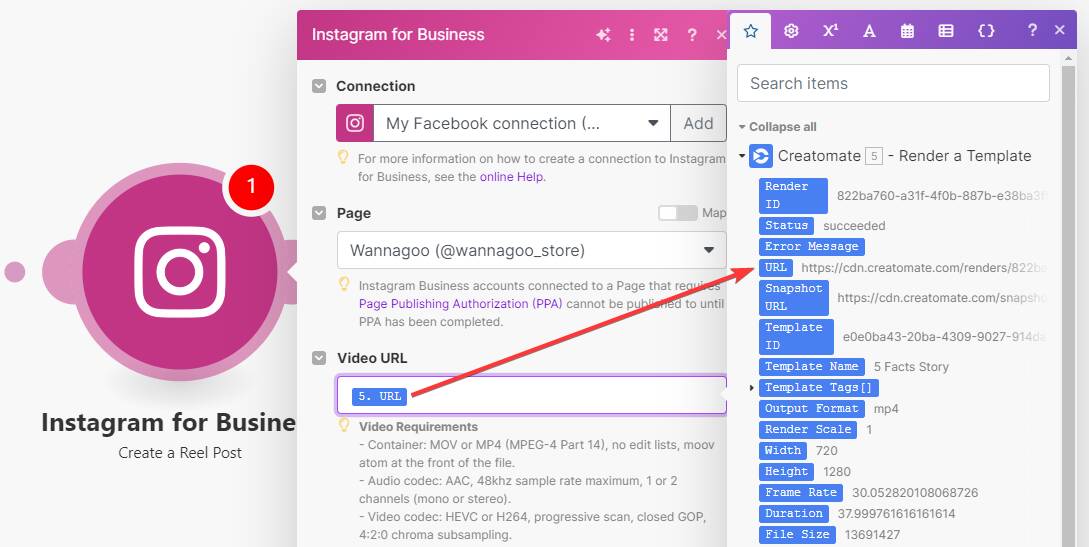
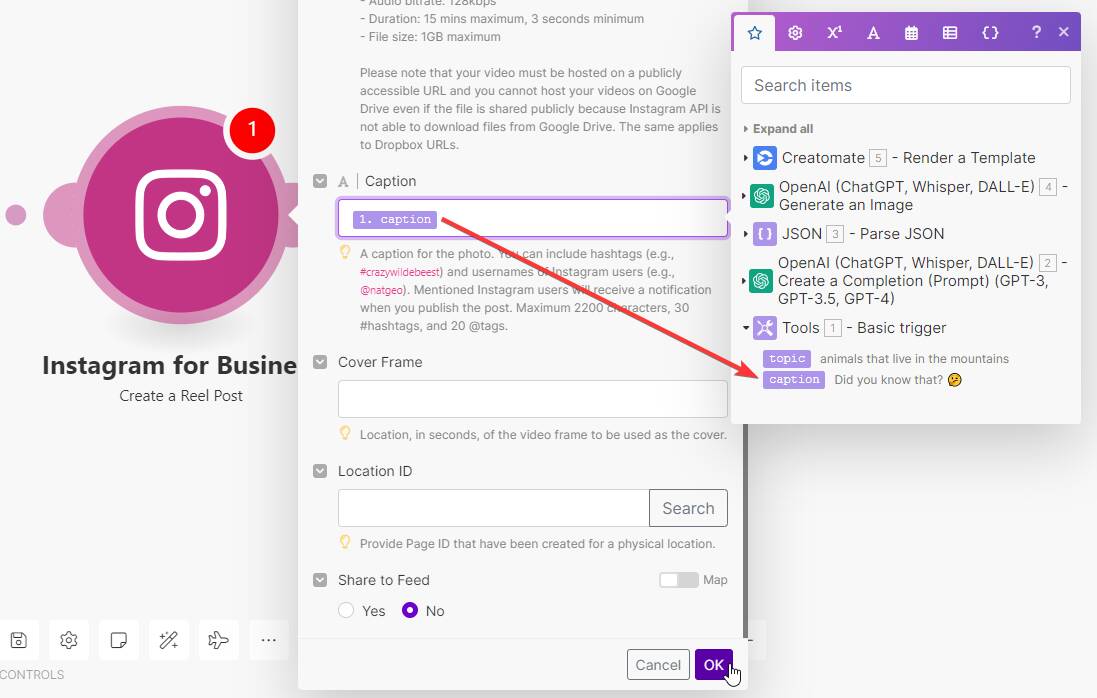
Click + to add the Instagram for Business app with the Create a Reel Post event.
Choose your account or create a connection, then select your Instagram page. In the Video URL field, select Creatomate - Render a Template -> URL:
In the Caption field, select Tools - Basic trigger -> caption. Then, click OK:
Finally, let's put the entire scenario to the test. Click Run once, and if everything is set up correctly, your Instagram Reel should be posted within a few minutes:
Note: Every time you run the scenario, all modules are executed again. This results in receiving new facts from ChatGPT and a new image from DALL·E each time. Any content you may have previewed while setting up the workflow will be replaced with new content in the posted video.
If the test is successful and you're happy with your workflow, click the ON/OFF button to activate your scenario.
What's next for AI video creation with Make.com
Congratulations on completing this tutorial! By now, you've learned how to make use of ChatGPT and DALL·E to generate AI content, then use it to create social media videos with Creatomate. The best part? This Make scenario is completely customizable, so you can make it exactly the way you want.
Want to take generative AI to the next level? Try adding a text-to-speech tool for AI voiceovers and Creatomate’s auto-transcription feature for animated subtitles. This combination lets you create fully AI-powered, faceless shorts. See how it's done in this step-by-step tutorial.
While AI tools are pretty good at content creation, it's important to remember that they might produce content that doesn't meet your expectations. If you automate the entire process, the videos will also be posted without any human intervention. This could result in AI-generated videos appearing on your social media channels that you did not intend to share. To prevent this from happening, consider adding more control to your workflow. Instead of auto-posting, you might prefer to send the videos to yourself first. This way, you have the chance to review them, and if you approve, you can share them manually.
Alternatively, instead of relying on AI-generated content from ChatGPT and DALL·E, you can also create a Google Sheet or Airtable document with content for your videos. This approach gives you maximum control over how your videos will turn out, as you provide the content yourself. You can then use this document to trigger your automated workflow, eliminating unwanted surprises along the way.
You might also like these tutorials


Start automating today
Start with a full-featured trial with 50 credits, no credit card required.
Get started for free →