How to Automatically Create & Post YouTube Shorts using Zapier

Learn how to automate YouTube Shorts creation and publishing using Zapier and Creatomate’s video generation API.
Consistency is everything on platforms like YouTube, Instagram, and TikTok. Posting regularly helps you grow, but manually creating, exporting, and publishing short-form videos quickly becomes time-consuming and repetitive. Fortunately, this entire process can be automated.
In this tutorial, we’ll build a fully customizable YouTube Shorts automation using Zapier, a no-code automation platform, and Creatomate, a video generation API. Instead of relying on a rigid, off-the-shelf solution, you’ll create your own workflow, choosing the apps, data sources, and logic that fit your process. This gives you the freedom to build and scale exactly the kind of videos you have in mind.
This setup works especially well for structured, repeatable video formats such as motivational quotes, educational tips, short stories, product updates, list-style videos, and repurposed written content. It’s also a great fit for faceless videos and AI-driven workflows, like the example below:
The videos we’ll generate include a visual background, subtitles, and AI voiceovers. To keep things simple, we’ll start with predefined content and media assets. That said, the workflow is intentionally flexible. You can add generative AI at any step, for example by using ChatGPT to generate scripts, text-to-speech services for lifelike narration, or image and video generation tools to create background visuals. If you prefer, you can also skip AI entirely and pull content from an existing database like Google Sheets or Airtable.
Prerequisites
Zapier supports over 8,000 apps, which means you can build automations using tools that already fit your workflow. To keep this tutorial easy to follow, we’ll use a simple setup that works for everyone. Once you understand the core idea, you can customize or expand it however you like.
For this tutorial, we’ll use the following tools:
- Creatomate: to design and generate the videos.
- YouTube: to publish the Shorts to your channel.
- Zapier: to automate the entire workflow.
How to automate YouTube Shorts with Zapier?
We’ll start by creating a video template in Creatomate. This template will act as the foundation for all of our YouTube Shorts and can be fully customized in Creatomate’s online editor. You can fine-tune every aspect of the design, including layouts, animations, subtitle styles, and transitions, and reuse the same template to generate as many videos as you need.
Next, we’ll set up a table in Zapier to hold the content for our videos. This data is sent to Creatomate, which combines it with the template to render a finished video. Once the video is ready, Zapier automatically publishes it to your YouTube channel as a Short.
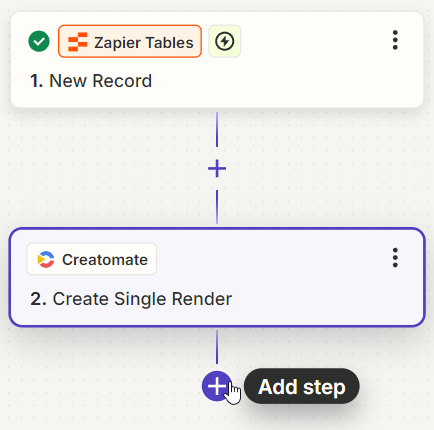
Here’s what the final Zap will look like:
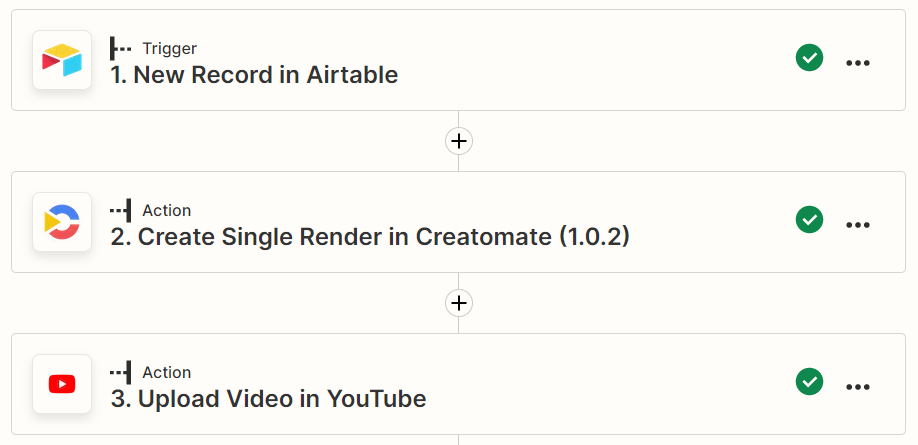
Let's get started!
1. Create a video template in Creatomate
Start by logging in to your Creatomate account, or sign up for free if you don’t have one yet.
Once you’re logged in, open the Templates page and click the + button to open the template gallery. You can either choose a ready-made design or create a custom template from scratch. For this tutorial, we’ll use the Short-Form Voice Over template from the Voice Overs category. Make sure to select the 9:16 Vertical format, then click Create Template to open it in the editor:
Let’s take a quick look at how this template works and how we’ll use it in our Zapier automation.
On the left side of the editor, you’ll see all the elements that make up the video design. The template is divided into four scenes. Each scene contains a voiceover, subtitles, and an image element. Together, these scenes form a complete short-form video.
If you press play, you’ll notice that there’s no audio yet and the subtitles are still placeholders. That’s expected. Later in the tutorial, we’ll provide our own voiceover and image files through Zapier. Once the voiceover files are added, Creatomate will automatically generate subtitles based on the audio.
Before we move on, there’s one important setting we need to adjust. By default, this template is configured to generate voiceovers using ElevenLabs, a text-to-speech service. In this tutorial, we’ll use pre-recorded voiceover files instead, so we need to disable that option.
Tip: If you’d rather generate voiceovers automatically using ElevenLabs, you can follow this step-by-step tutorial instead.
Hold Ctrl and select all four Voiceover elements in the left panel. Then, in the properties panel on the right, find the Audio setting and change the Provider to None. This allows us to pass publicly accessible URLs to our voiceover files directly through Zapier:
At this point, the template is ready to use.
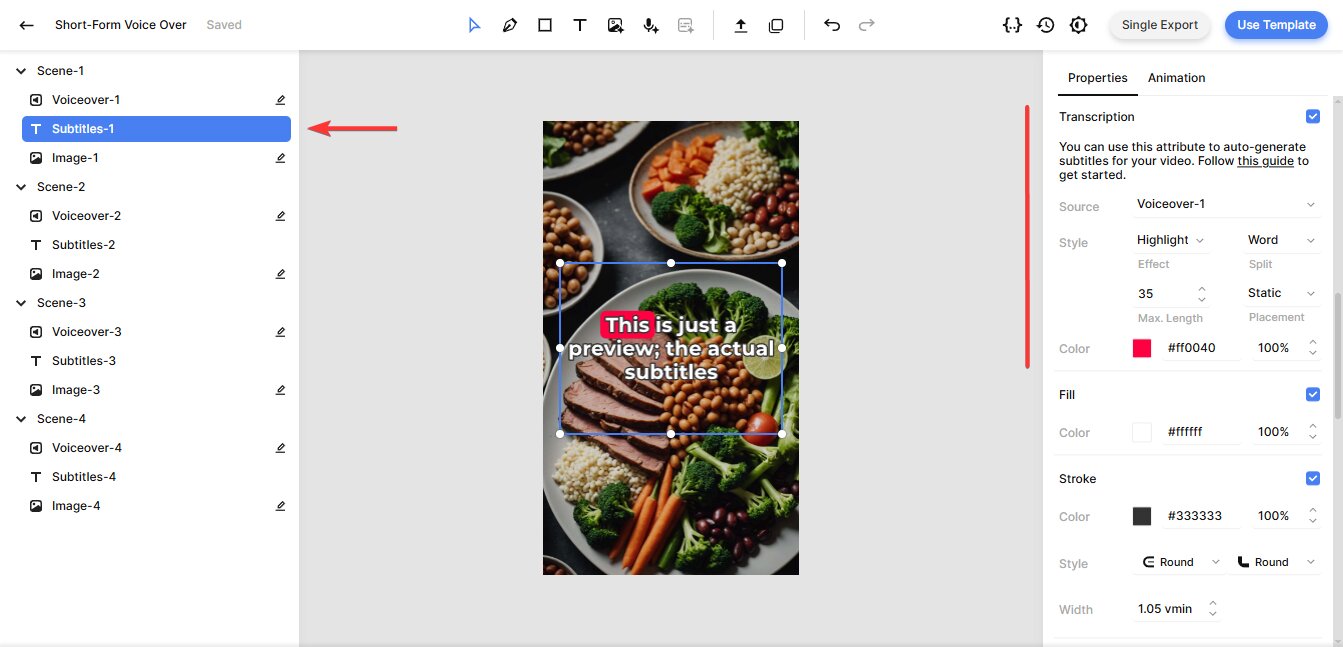
Optionally, you can customize the subtitle styling to match your brand or preferred style. Select the Subtitles-1 element and look at the Transcription setting. You’ll see that the Source is set to Voiceover-1, which tells Creatomate to generate subtitles automatically from that audio file.
Using the Style, Color, Fill, and Stroke options, you can adjust how the subtitles look. For example, if you want subtitles to appear one word at a time, which is a popular style on YouTube Shorts, TikTok, and Instagram, set Max. Length to 1. The editor shows a live preview, so feel free to experiment:
If you make changes to the subtitles, you may want to apply the same settings to the other scenes to keep the video consistent.
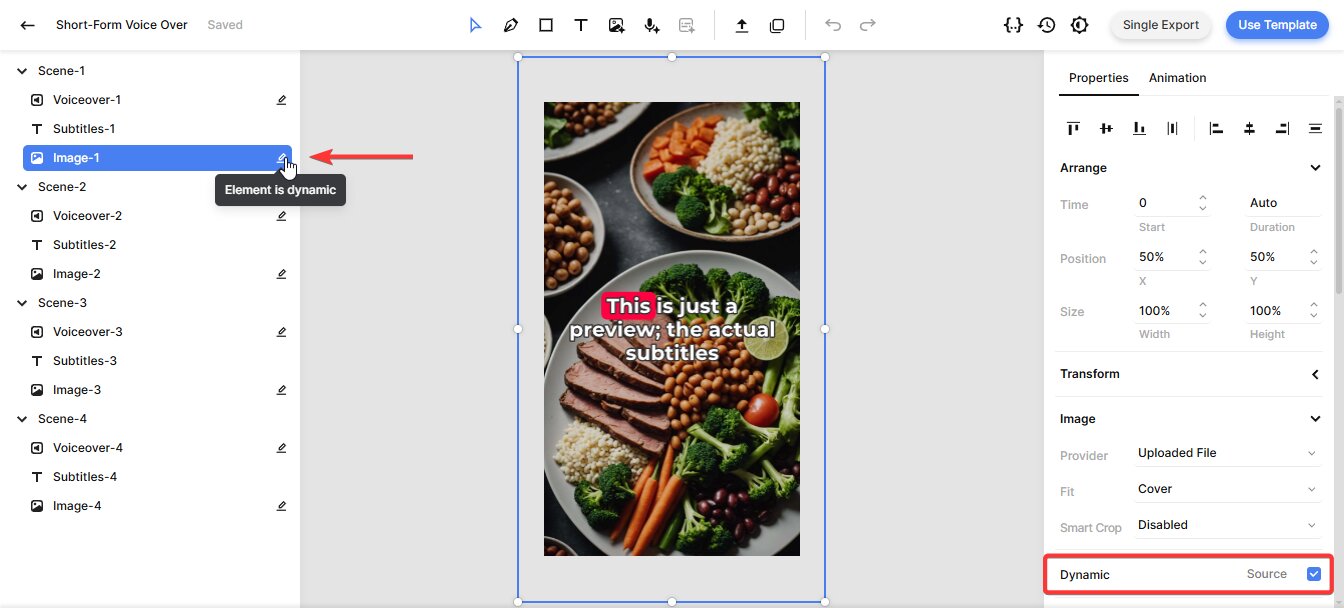
Finally, note that the image elements in the template are dynamic. This means we can easily replace them with images provided through Zapier when generating each video:
That’s all you need to know about the template for now. The editor offers many more customization options, but this setup covers everything required for our automation.
With the template ready, we can move on to building the Zap.
2. Add video content to your Zap
Every Zap starts with a trigger, which is the event that kicks off the automation. In this tutorial, we’ll use Zapier Tables to provide the content for our videos. This keeps things simple and makes it easy to test the workflow. If you prefer, you can use other apps instead, such as Google Sheets or Airtable. The overall concept stays the same.
The table will contain pre-made voiceover files and image URLs that will be used as backgrounds for the video scenes. Since we’re publishing the video as a YouTube Short, we’ll also include a title and description.
Log in to your Zapier account, or sign up for free if you don’t have one yet.
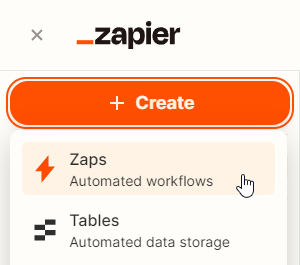
From the left-hand menu, click + Create, and choose Tables:

Choose the option to create a blank table, then give your table a name, such as YouTube Shorts Automation. Once you’re done, click Create table.
Once the table is created, set up the following text fields: Voiceover-1, Voiceover-2, Voiceover-3, Voiceover-4, Image-1, Image-2, Image-3, Image-4, Title, and Description.
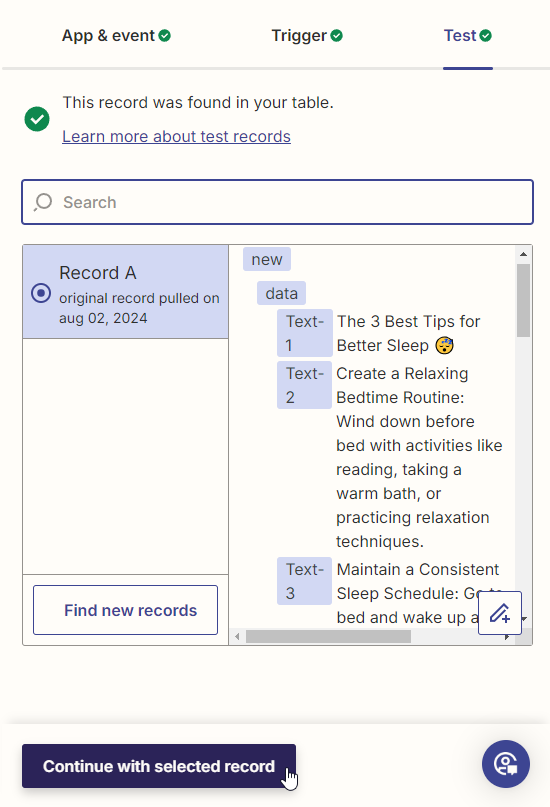
Next, create a record and add some test data to the first row. Copy and use the sample data provided below:
- Voiceover-1 -> https://cdn.creatomate.com/demo/voiceover-1.mp3
- Voiceover-2 -> https://cdn.creatomate.com/demo/voiceover-2.mp3
- Voiceover-3 -> https://cdn.creatomate.com/demo/voiceover-3.mp3
- Voiceover-4 -> https://cdn.creatomate.com/demo/voiceover-4.mp3
- Image-1 -> https://cdn.creatomate.com/demo/better-sleep-1.jpg
- Image-2 -> https://cdn.creatomate.com/demo/better-sleep-2.jpg
- Image-3 -> https://cdn.creatomate.com/demo/better-sleep-3.jpg
- Image-4 -> https://cdn.creatomate.com/demo/better-sleep-4.jpg
- Title -> Unlock Better Sleep: 3 Essential Tips You Need
- Description -> Struggling to sleep? 💤 We've got you covered! Check out our top tips for improving your sleep quality. Say goodbye to tossing and turning with these simple yet effective strategies. #SleepWell #SleepBetter #HealthyLiving
Click the screenshot below to see how the table should look:

Once your table is set up, return to your Zapier dashboard. Then, click + Create and choose Zaps:
You’re now in the workflow editor, where we’ll build the Zap. Start by clicking the Trigger block. Search for Zapier Tables, select the New Record event, and then click Continue.
In the Table ID field, choose the YouTube Shorts Automation table you just created:
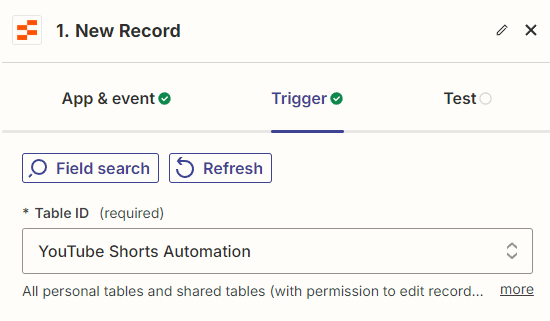
Then, click Continue.
Click Test trigger to check whether Zapier can find the sample record. Once the test succeeds, click Continue with selected record:
With the data in place, we can now set up the rest of the Zap.
3. Generate the video
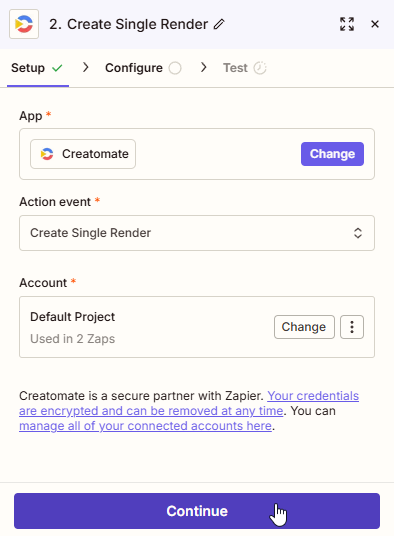
Search for the Creatomate app and select the Create Single Render action.
If this is your first time connecting Creatomate to Zapier, you’ll be asked to sign in using your project’s API key. You can find this key in the Project Settings section of your Creatomate dashboard.
Once you’re connected, click Continue:
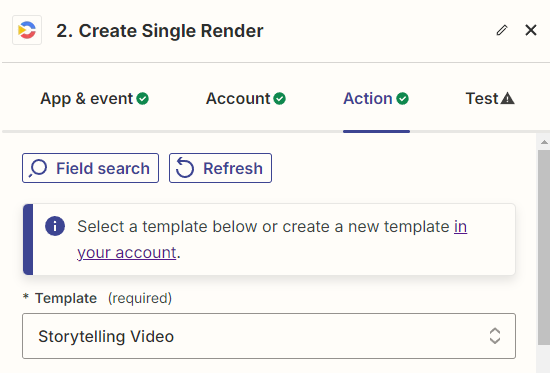
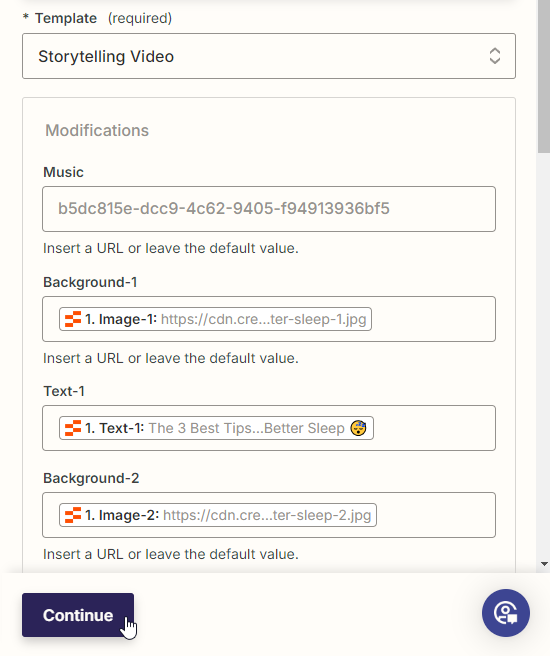
First, select the Short-Form Voice Over template in the Template field:
Once selected, the template’s dynamic elements will appear under Modifications. Here, we’ll map the data from the trigger to the template:
- Set Image-1 to Zapier Tables -> Image-1
- Set Voiceover-1 to Zapier Tables -> Voiceover-1
- Set Image-2 to Zapier Tables -> Image-2
- Set Voiceover-2 to Zapier Tables -> Voiceover-2
- Continue mapping the remaining fields in the same way.
When you’re done, click Continue:
Click Test step to send a request to Creatomate. This will insert the images and voiceovers into your YouTube Shorts template and start generating the video.
If you’d like, you can preview the video by opening the URL shown in the test output. Keep in mind that video rendering can take a moment. During this time, you might briefly see a “Not Found” message. If that happens, just wait a bit and refresh the page. This only happens during Zap setup. Once the workflow is turned on, Zapier will automatically wait for the video to finish rendering before continuing to the next step.
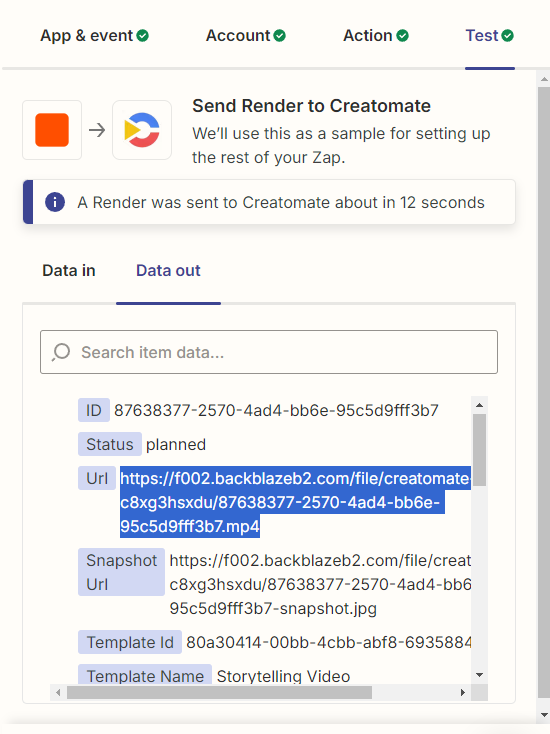
Here’s our generated video:
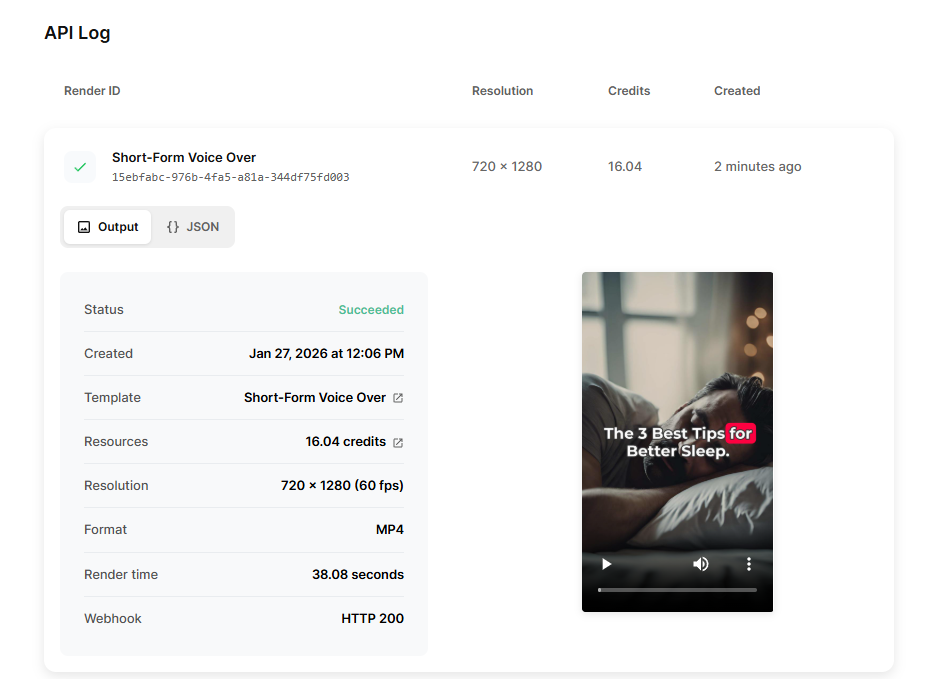
On the API Log page in your Creatomate dashboard, you can monitor all API activity. In this example, the video was generated successfully (status: succeeded). If anything goes wrong, this page will display an error message along with suggestions on how to fix the issue.
Once the test is successful, we can move on to the final step of this tutorial: uploading the video to YouTube.
4. Upload as a YouTube Short
Click + to add a new step to your Zap:
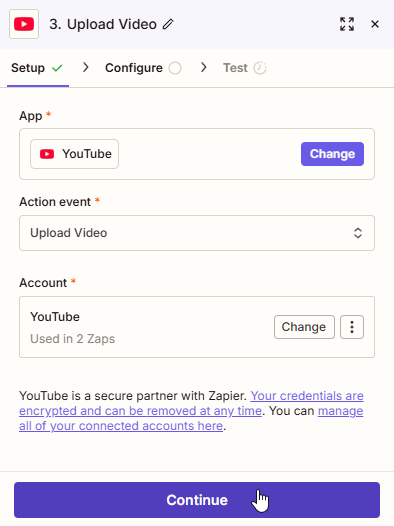
Search for the YouTube app and select the Upload Video action. Choose your YouTube account, or sign in if prompted, and then click Continue:
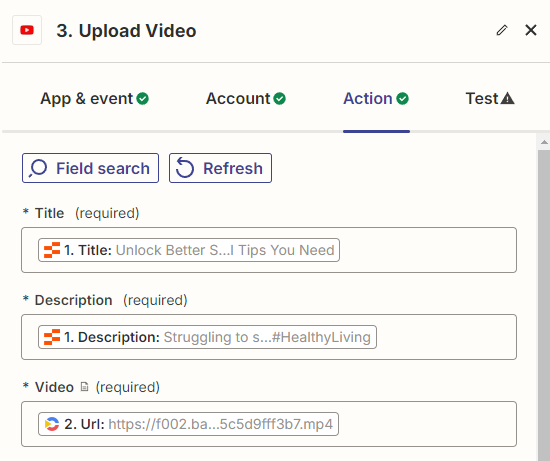
Next, fill in the required fields:
- Set Title to Zapier Tables -> Title
- Set Description to Zapier Tables -> Description
- Set Video to Creatomate -> Url
When you’re done, click Continue:
Note: The optional fields can be configured however you like. For example, you can set the category, privacy status, or publishing options based on your preferences.
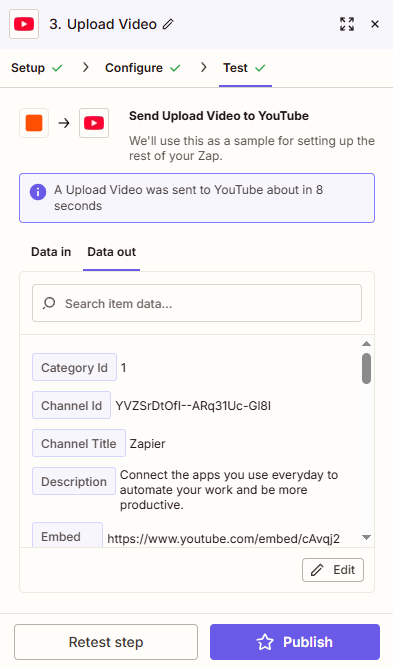
Finally, click Test step to make sure Zapier is passing the correct data. Since this is only a test, no video will be uploaded to your YouTube channel:
Once you’re happy with the setup, click Publish to activate your Zap. From now on, whenever a new record is added to your table (or any other app you’ve connected), a YouTube Short will be generated and published automatically on your channel.
Next steps for YouTube Shorts automation
And that’s it! You now have a working setup to automate YouTube Shorts using Zapier and Creatomate. This tutorial covered the basics, but there’s much more you can build on top of this foundation.
In real-world use, you may want to use a different data source to trigger the automation. Tools like Google Sheets or Airtable work especially well. As long as your app provides the video content along with a title and description, you can plug it into the same workflow.
If you want to take things further, consider adding generative AI to your workflow. Creatomate’s templates support AI voiceovers, AI-generated background images and videos, and animated word-by-word subtitles. I’ve also written a step-by-step guide on automating YouTube Shorts with AI-powered videos that can create, schedule, and publish content automatically based on a single video topic.
Below, you’ll find additional tutorials, each focused on a specific AI-powered approach you can use to level up your YouTube Shorts automation.
👉 How to Create Videos with AI Voice Overs using Zapier
👉 How to Automatically Add Subtitles to Videos using Zapier
👉 Use ChatGPT to Auto-Create Social Media Content with Zapier
👉 How to Use Stable Diffusion to Create Videos with Zapier
You might also like these tutorials


Start automating today
Start with a full-featured trial with 50 credits, no credit card required.
Get started for free →