How to Automatically Add Subtitles to Videos using Make

This video automation tutorial shows you how to auto-transcribe video and audio files to add animated word-by-word captions to social media videos using Make.com (Integromat).
It's easy to see why subtitles are so important for social media videos. First of all, animated captions engage better, keeping viewers interested longer. Assuming they watch the video to begin with, because most people flick through social media with sound muted. Without captions, videos are less likely to be watched.
If you've ever transcribed a video manually, you know how time-consuming this can be, let alone if you have to animate the captions as well. Fortunately, speech-to-text AI technology has come a long way, and with no-code platforms like Make.com, it's easier than ever to set up fully automated video workflows that do all the work for you.
Video courtesy of Ryan Holiday of The Daily Stoic podcast.
In this step-by-step tutorial, I'll show you how to set up an automated workflow to transcribe a video file, add animated captions, and post the subtitled video to social media. To do this, we'll use Make.com, a no-code automation platform, along with Creatomate, an API for video creation. With Make.com's support for over a thousand apps, you can easily build a workflow to perfectly suit your needs.
If you look at YouTube Shorts, TikTok videos, or Instagram Reels, you'll come across a wide range of subtitle styles. Creatomate not only supports the most common styles seen on social media, but also gives you the flexibility to customize animations and styling exactly the way you want.
There is much more to video automation than adding subtitles to your videos. Using Creatomate's template editor, you can automate almost any type of video, whether it is for social media, marketing, or video personalization. Let's stay on subtitles for now. But, if you're curious about what else is possible, be sure to check the rest of our video automation tutorials.
💡 AI tip: You can also use a text-to-speech tool, like ElevenLabs, to generate AI voiceovers. Then, Creatomate’s auto-transcription feature can add animated subtitles to these audio files. Check out this step-by-step tutorial to learn how.
Even better, you can also create faceless shorts for YouTube, TikTok, and Instagram, complete with AI voiceovers, animated subtitles, and visuals. Learn how to do all of this in this tutorial.
Prerequisites
As you'll likely build a scenario to meet your specific needs, we'll keep the setup simple. We'll use a basic trigger to submit a video clip to be transcribed and subtitled. Throughout this tutorial, feel free to create a completely different Make.com workflow, with apps such as Google Drive, Airtable, or Facebook. It would follow the same general process.
Here are the tools we'll use:
- Creatomate: to create a video template and auto-generate the subtitles. Sign up for free.
- Make: to automate the entire process.
- (Optional) Instagram for Business: or any other app for further use of the videos.
How to generate subtitles using Make.com (Integromat)?
The first step to automatically generating subtitles is to set up a template in Creatomate. This is where we can change the style, color, and animation. Next, we'll move on to Make and create a new automation scenario. In this case, we'll use a basic trigger to add a video clip to our workflow. Following that, Creatomate automatically transcribes the input video and generates subtitles. We can then share the video wherever we want, for example, on Instagram.

Let's get started by creating a template.
1. Create a transcription template
Log in to your Creatomate account, navigate to the Templates page, and click the + New button. For this tutorial, we'll use the Highlighted Subtitles template found in the Auto-Subtitles category. Choose a size, such as 9:16 Vertical and click Create Template to open it in the editor:
This template is already set up to automatically transcribe a video file. In the left-hand panel, you can tell that our template consists of a placeholder video (Video-1), a text element (Subtitles-1), and an outro image (Logo). As you can see, the subtitles haven't yet been generated. Instead, we see placeholder captions that will be replaced by auto-generated subtitles when the Make.com scenario runs.
You can customize the subtitles however you like. To do this, double-click the Subtitles-1 element in the left side panel. On the right-hand properties panel, scroll down until you find the Transcription settings:
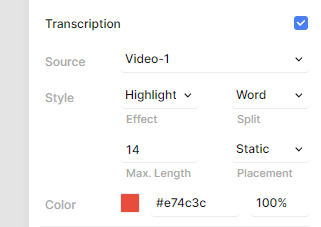
Here, you can see that the Source property is set to Video-1. As a result, Creatomate will generate captions based on that video element. Feel free to play around with the Style properties to customize the subtitles' styling and animation. For instance, if you want to display one word at a time, which is a popular style on TikTok and Instagram, set the "Max. Length" property to 1.
As a starting point, let's just use the template as it is. It's always possible to return to the template later. In the next steps, we'll set up a Make scenario using this template. From there, we can automatically replace the placeholder video with our own.
2. Trigger the automated workflow
If you're already familiar with Make, you can set up your own trigger to pass data into the automated workflow. For example, here’s how to use Airtable or Google Sheets.
Sign in to your Make account and click + Create a new scenario. Click the big + button, search for the Tools app, and choose Basic trigger.
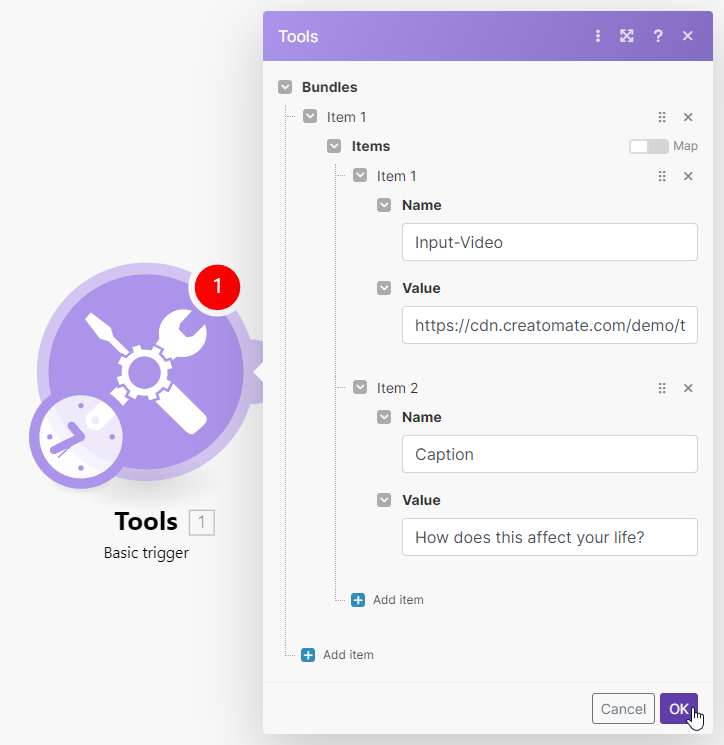
Next, let's add some dummy items. We'll provide a video file along with a caption for social media. You can use the following data:
- Input-Video -> https://cdn.creatomate.com/demo/the-daily-stoic-podcast.mp4
- Caption -> How does this affect your life?
Then, click OK:
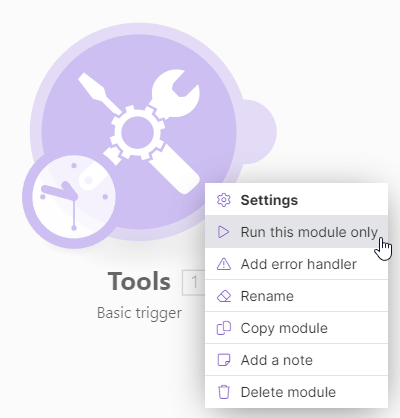
Now, right-click this module and select Run this module only:
3. Create an auto-transcribed video
Click + to add another module. Search for and select Creatomate as the app and Render a Template as the action.
Create a connection first. You can do this by entering your project's API key, which you can find under Project Settings in your Creatomate dashboard:
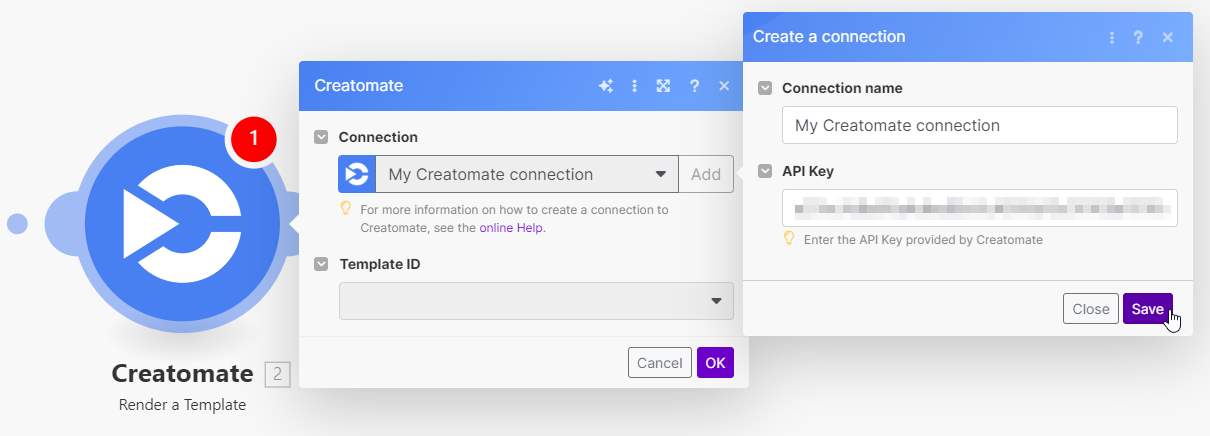
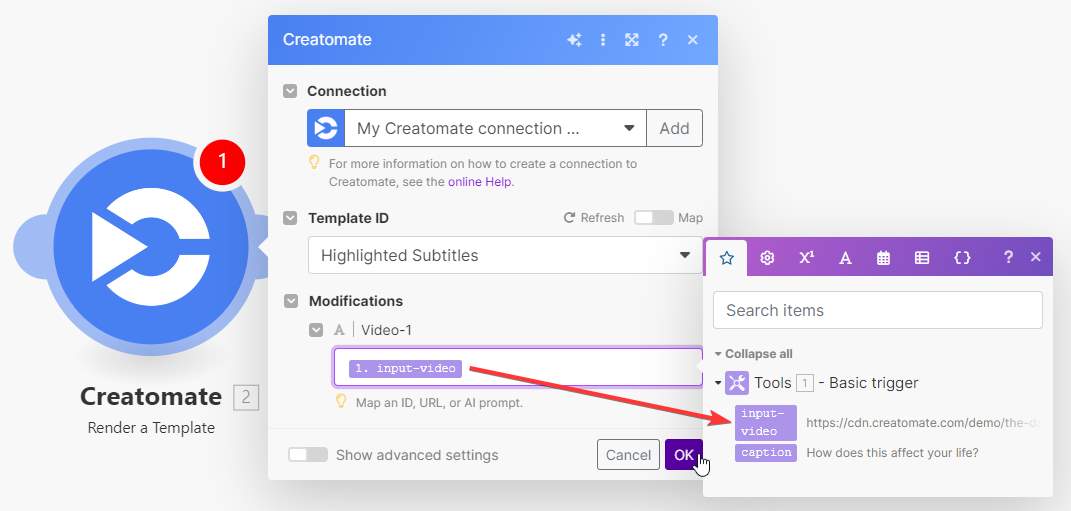
Then, choose your Highlighted Subtitles template in the Template ID field.
We can now connect the input video from our trigger to our template. When done, click OK:
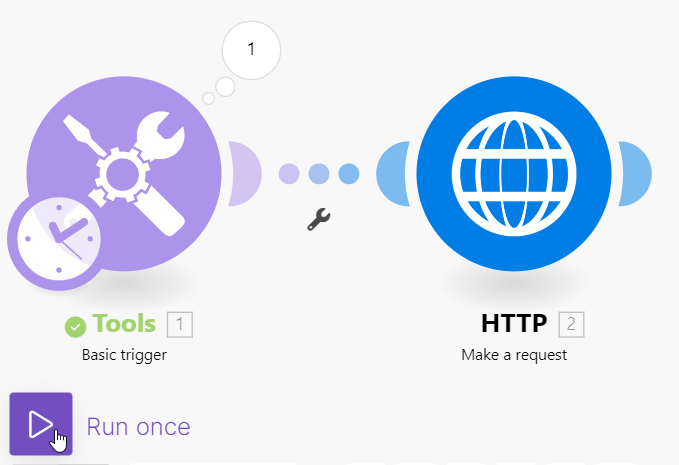
Click the Run once button located in the bottom left corner to test if Creatomate can transcribe the file and generate a video with subtitles for us:
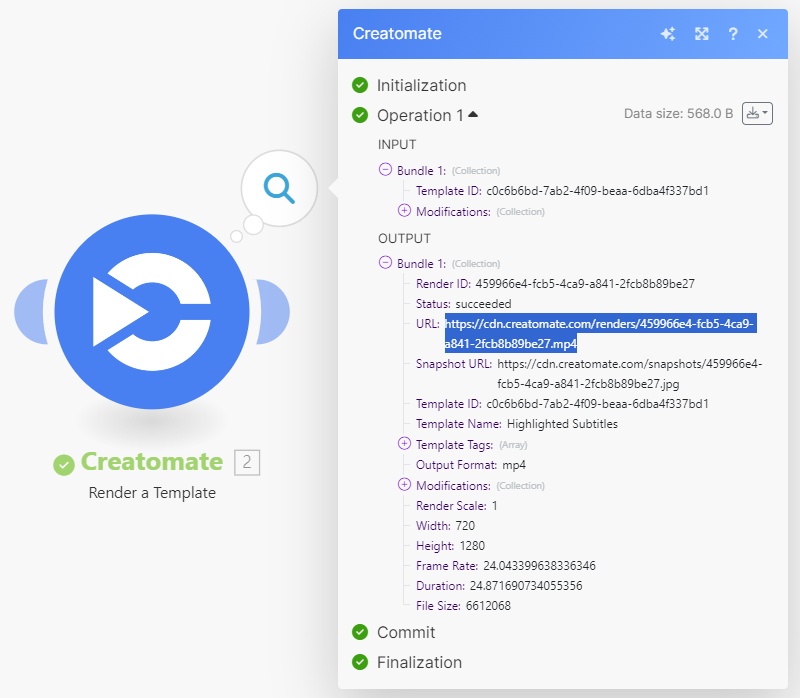
When the test succeeds, the module turns green. If you wish, you can preview your video by clicking the magnifying glass icon and visiting the provided URL:
4. Post the video to social media
By now, the subtitles have been successfully generated, and we have access to a transcribed MP4 video for further use. To wrap up this example, we'll post the video on Instagram. However, feel free to customize the workflow based on your preferences. For instance, you might want to share the video on Facebook, TikTok, or YouTube instead.
Add the Instagram for Business app with the Create a Reel Post action.
Choose your account or create a connection, then pick your page. In the Video URL field, select Creatomate - Render a Template -> URL:
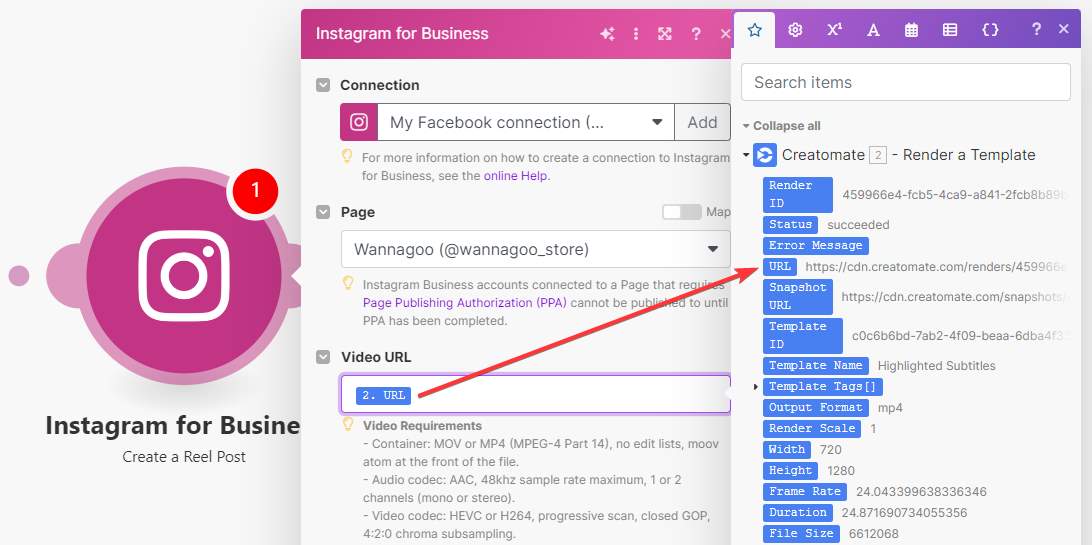
Note: Certain app integrations in Make, like Facebook Pages and YouTube, take a file as input, whereas others, such as Instagram for Business, expect a URL. If you want to use an app that requires a file, you'll have to add a module to fetch the file first. Check out this tutorial as a reference (step 4).
In the Caption field, choose Tools - Basic trigger -> caption. Customize the other options to your liking. Once you're finished, click OK:
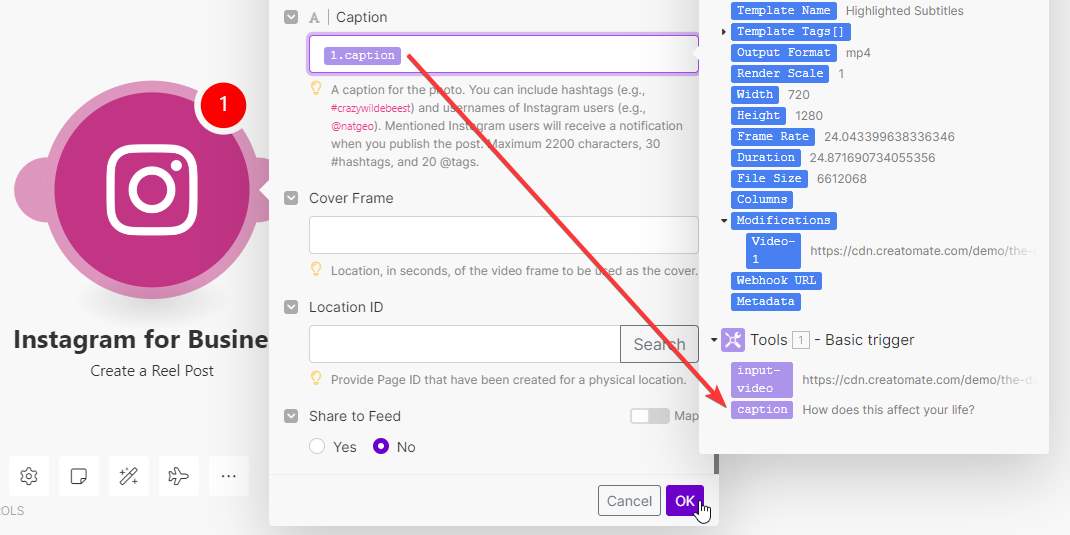
Finally, click Run once. If your scenario is set up correctly, the video with subtitles will be posted on Instagram:
What's next for automated subtitle videos?
By using Creatomate, you can skip the manual work of typing video transcripts and syncing captions for each video. Setting up such an automated workflow with Make.com requires only a few simple steps. Once it's up and running, you can effortlessly generate subtitled videos for all your social media channels—on autopilot.
Now that you've learned how auto-transcription works, I recommend checking out our other step-by-step tutorials to maximize your social media marketing efforts.
👉 How to Automatically Convert Text to Video using AI and Make.com
👉 How to Automatically Create TikTok Videos using Make.com
👉 How to Automatically Create YouTube Shorts using Make
👉 How to Automatically Create Instagram Posts using Make
👉 Create Videos with Voice Overs using Text-to-Speech AI and Make
👉 How to Create AI-Generated Videos using ChatGPT and Make.com