Use ChatGPT to Auto-Create Social Media Content with Zapier

Learn how to use OpenAI's ChatGPT to automatically generate videos for Instagram, TikTok, and YouTube Shorts using Zapier and Creatomate.
ChatGPT is an AI model developed by OpenAI. Even though its name suggests it's mainly for conversations, ChatGPT can also be used for many non-chat purposes as well. To generate social media videos automatically, for example. In this tutorial, we'll find out how this can be accomplished using only no-code tools.
As ChatGPT is a language model using GPT-4, it operates solely on text. This is where Creatomate comes in. Creatomate is a video generation platform for editing and creating video using automation. Combining these tools together, we can set up completely automated workflows for creating video. And by using Zapier, we can customize the automated workflow even further, for example, by auto-posting the video to social media as well.
Even the highlighted words and emojis are automatically chosen by the AI. 🦾🤖
To illustrate, we will generate videos based on a single input prompt: "5 facts on animals that live in the mountains". We'll use ChatGPT to generate the text captions, which will then be used to create a unique video, ready to be posted on social media. Completely automated!
If you have a different type of video in mind, feel free to come up with your own concept. Creatomate includes an online template editor, making it easy to create custom video designs for your automation needs.
For this tutorial, we'll dive into the basics of video automation using ChatGPT. But this is just the beginning – generative AI can do so much more. As we wrap up, I'll point you to related tutorials on creating faceless YouTube Shorts and TikTok videos on autopilot, complete with AI voiceovers, background images, and subtitles. So, keep reading!
Prerequisites
These are the tools we'll use:
- Creatomate: to create a template and generate videos;
- Zapier: to set up the automated workflow;
- ChatGPT: to generate video content;
- Any social media channel: to share the videos with your followers.
How to create social media content using ChatGPT and Zapier?
We'll first set up an OpenAI account and grab our API key, which we'll later use to connect ChatGPT with Zapier. Next, we'll create a video template in Creatomate. This design will serve as the foundation for our social media videos.
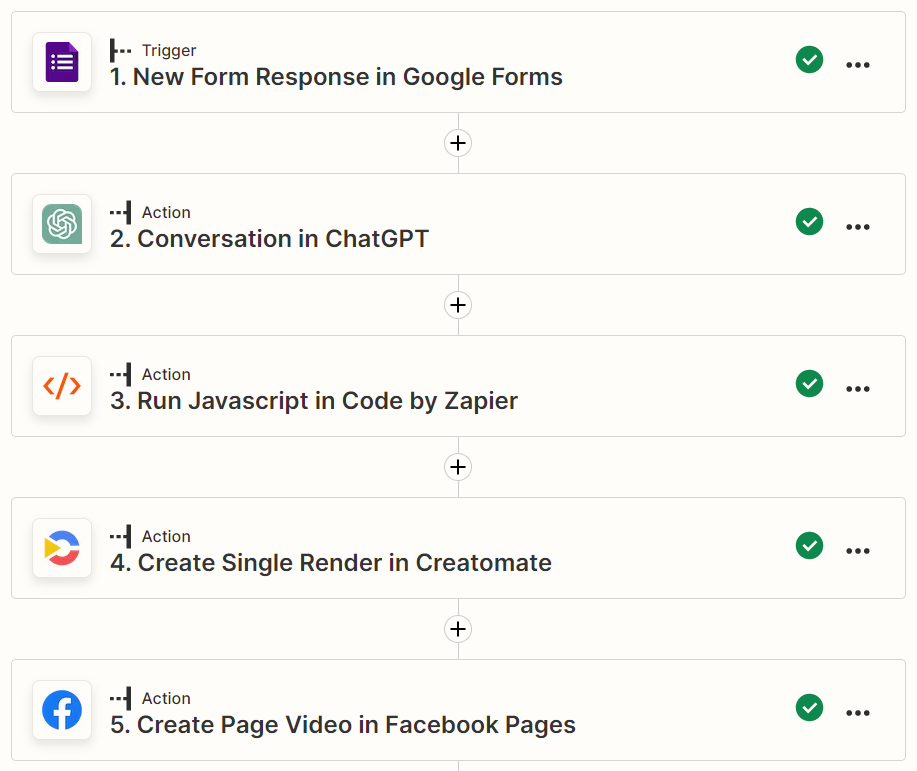
After that, we'll set up the automation in Zapier. To keep things simple, I'll demonstrate how to use a Zapier Table to input a video topic into the workflow. In real-world applications, you can use any app that suits your needs, like Airtable or Google Sheets. ChatGPT will then generate video content and a social media caption based on the topic. We'll parse this response to connect it to our video template in Creatomate, allowing it to produce a video. Once the video is ready, we can share it on social media. I'll show you how to upload it as a YouTube Short, but you can also share it on TikTok or Instagram — it's up to you.
Let's get started!
1. Set up an OpenAI account for ChatGPT
In this step, we'll create an account with OpenAI, the company behind ChatGPT, and generate an API key. We'll need this API key to connect with Zapier later on.
Create a free OpenAI account or sign in if you already have one. Then, go to the API section:

Next, go to your dashboard and click on the lock icon in the left-side menu. Then, click Create new secret key, provide a name, and click Create secret key:

Keep your API key on hand. You'll need it in step 4.
2. Create a video template in Creatomate
Log in to your Creatomate account or create a free account if you don't already have one.
Navigate to to the Templates page and click New. For this tutorial, choose the 5 Facts Story template from the Social Media category. Let's go with the 9:16 Vertical size and click Create Template to open it in the editor:
Let's take a closer look at our template and how we can use it for automation. In the left side panel, you'll find the elements that make up our template. You'll notice that the Intro-Text and all five facts are marked as dynamic, meaning we can replace their content with text generated by ChatGPT through the Zap we're about to set up.

You can customize the template however you like. For example, you can insert your own logo and include a custom outro. To keep things simple, we'll use the template as it is for now. However, you can always come back later and adjust the design to suit your needs. If you want to learn more about how the editor works, check out this quick guide.
Now that we have a template, let's move on to Zapier.
3. Set up the automation trigger
Every Zap starts with a trigger that initiates the process. For demonstration purposes, I'll show you how to use a Zapier Table. However, you can choose any app for this, such as when a new record is added to an Airtable base or a new row is created in your Google Sheets document. The trigger should also provide a topic for your social media videos.
Log in to your Zapier account. From the left menu, navigate to the Tables page. Click the Start blank button, enter a name, and hit Create table:

We only need to input a video topic into our automation using this table. To do this, create a text field called Video Topic and enter 5 facts on animals that live in the mountains for the first record:

Now that your table is set up, return to your Zapier dashboard and create a new Zap.
In the workflow editor, click on the trigger block. Search for Zapier Tables as the app, and select New Record as the trigger event. Then, click Continue.
In the Table ID field, select the table you just created:

Then, click Continue.
Click Test trigger to see if Zapier can find our sample record. Once the test is successful, click Continue with selected record:

We can now use this video topic to set up the rest of our Zap.
4. Generate video content with ChatGPT
Search for the ChatGPT app, then select the Conversation action event. Sign in to your OpenAI account using the API key from step 1. Once you're done, click Continue.
Now, we can create a prompt for ChatGPT to generate content for our videos. It's important to give ChatGPT clear instructions on what to generate. You can do this using the User Message field. Simply copy and paste the following prompt:
Generate text for a short-form social media video about [topic]. Create a numbered list with 5 brief facts (F1-F5), surround the most important words with [color #f1c40f] and [/color], and include emojis in each sentence. Also, create a caption for posting the video on social media (C).
Return only valid JSON with the following structure. Remove any JSON formatting, so the output is on a single line and in its most compact form, as follows:
{"F1":"", "F2":"", "F3":"", "F4":"", "F5":"", "C":""}
Make sure to replace [topic] with Zapier Tables -> Video Topic, like this:

Select the Model you want to use, such as gpt-4o. You can keep the other settings as they are or adjust them as needed. Once you're finished, click Continue:

Click Test step to send a test request to ChatGPT. You can review ChatGPT's response under "Reply”:

The response from ChatGPT is exactly what we asked for — a JSON object with 5 facts and a social media caption. However, Zapier can't interpret this format directly, so we'll need to convert it before generating the videos. That's what we'll do next.
5. Parse the AI content
In this step, we'll break down the JSON response into individual items using a piece of JavaScript. It might sound technical, but it's as simple as copying and pasting a single line of code.
Click + to add a step to your Zap. Search for the Code by Zapier app and select the Run Javascript action event. Then, click Continue.
Type "response" in the Input Data field and select ChatGPT -> Reply. Then, in the Code field, copy and paste the following:
1output = JSON.parse(inputData.response);Here's what it should look like:

Then, click Continue.
Click Test step to make sure everything works as expected. If the test is successful, you should see that the JSON has been broken down into single items: F1, F2, F3, F4, F5, and C:

6. Generate a video
Add the Creatomate app with the Create Single Render action event. Then, select your account or signing in with your project's API key, which you can find under Project Settings in your Creatomate dashboard.
Next, select the 5 Facts Story template in the Template field:

Zapier will now pull in the dynamic elements and list them under Modifications.
Let's map the data from the previous steps to the template as follows:
- Set Intro-Text to Zapier Tables -> Video Topic
- Set Fact-1 to Code by Zapier -> F1
- Set Fact-2 to Code by Zapier -> F2
- Set Fact-3 to Code by Zapier -> F3
- Set Fact-4 to Code by Zapier -> F4
- Set Fact-5 to Code by Zapier -> F5
When done, click Continue:

Click Test step to make sure Creatomate can generate a video.
You can view the video by visiting the URL provided in the test result. The video generation may take a few seconds, so if you see a 'Not Found' message, wait a moment and refresh the page. This only happens during Zap setup. Once the workflow is active, it will wait for the video to finish before proceeding to the next step.

7. Post to social media
Lastly, we can automatically post the video to social media. I'll show you how to upload it as a YouTube Short. If you wish, you can also share it as a TikTok video or Instagram Reel.
Add the YouTube app with the Upload Video action event. Select your account or sign in with Google. Then, click Continue.
To set up the action, map the required fields as follows:
- Set Title to Zapier Tables -> Video Topic
- Set Description to Code by Zapier -> C
- Set Video to Creatomate -> Url

You can adjust the other settings however you want. When done, click Continue.
Next, click on Test step. This will only verify that Zapier is passing the correct data, so the video won't be uploaded to your YouTube channel.
And once you're happy with your automation, simply click the Publish button to activate your Zap.
What's next for video generation with ChatGPT
You've now learned how to use ChatGPT to automatically generate videos for social media. With Zapier and Creatomate, you have a lot of flexibility to build an automation that fits your needs. You can select the trigger app that suits you best and use the template editor to design videos tailored to your specific use case.
As mentioned in the introduction, this is just the beginning. Generative AI is improving every day, and with it, the possibilities for creating videos continue to grow. What we've covered here is just one way to use ChatGPT for video content. To enhance your setup, you might consider integrating an AI voice generator like ElevenLabs for automatic voiceovers. You can also use Creatomate's auto-transcription feature to produce animated word-by-word captions. And instead of relying on stock images, try using AI tools like DALL·E and Stable Diffusion to create background visuals that perfectly match your video content.
I've put together two tutorials that combine all four AI techniques to produce faceless shorts. Take a look at this tutorial to learn how to automate the creation, scheduling, and posting of AI-generated YouTube Shorts. For a custom solution for automated TikTok videos, refer to this tutorial.
If you're interested in exploring AI tools further but prefer a more gradual, step-by-step approach, check out these tutorials next:
👉 How to Create Videos with AI Voice Overs using Zapier
👉 How to Automatically Add Subtitles to Videos using Zapier
👉 How to Use AI Images from DALL·E to Create Videos with Zapier
👉 How to Use Stable Diffusion to Create Videos with Zapier
You might also like these tutorials


Start automating today
Start with a full-featured trial with 50 credits, no credit card required.
Get started for free →