How to Automate Video Creation with Pabbly

By following this no-code tutorial, you will learn how to create videos using Pabbly, for example to automate social media video.
As videos become more and more important in marketing, making them is still a long and tedious process. In order to grow our business, it's likely we need videos for social media, personalized outreach to customers and prospects, videos with a watermark or cropped and resized videos to different aspect ratios. But why make all these videos manually when you can do it automatically?
Tools like Pabbly Connect enable you to build custom automated workflows by connecting multiple tools together. With Creatomate, you can automate and scale video production using code and no-code tools like Zapier, Make, and Pabbly. Together, these two tools allow you to create marketing videos automatically and hands-free! This tutorial will show you how to do that. We'll automatically create videos like this:
Note that this is just an example video. The method outlined in this article can be applied to any type of marketing video!
Prerequisites
Here's what we'll need:
- Pabbly Connect: to set up an automated workflow.
- Creatomate: to auto-generate videos. Don't have an account? Sign up for free.
- A Trigger app: like Airtable, to provide input data for the videos.
- An Action app: like Gmail, to use the videos in your marketing.
Tip: I'm using Airtable and Gmail for demonstration, but you can use any app you want.
How to create videos using Pabbly
Our first step is to create a video template in Creatomate. The videos we'll auto-generate will be based on this template.
After that, we'll create an automated workflow that triggers for new records in Airtable. Creatomate will then automatically generate a video with this data. The workflow will wait for the video to render, before it's emailed to someone's inbox using Gmail. Here's how our workflow will look:
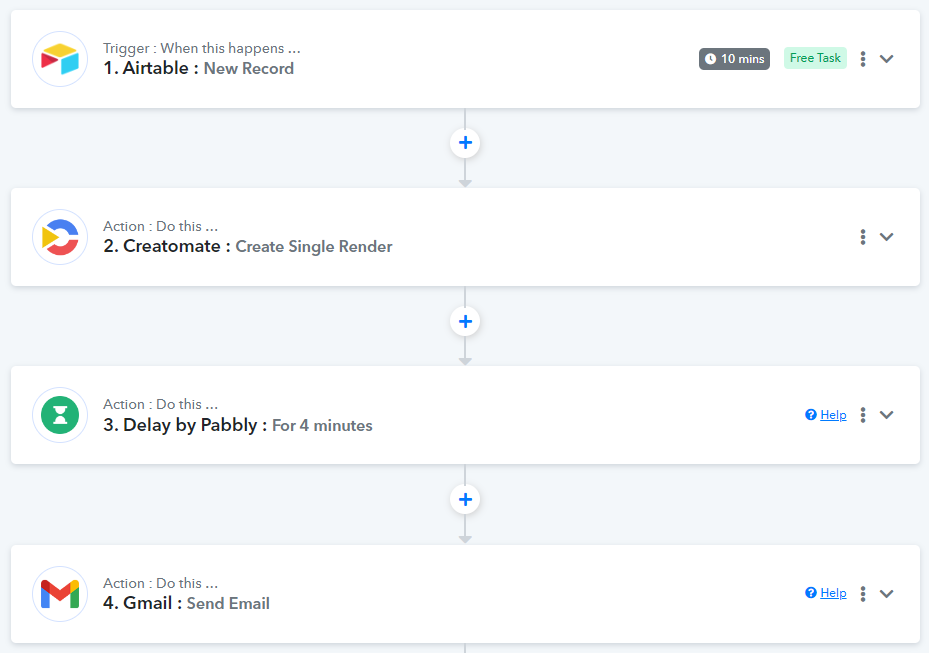
Let's get started!
1. Create a template in Creatomate
Log in to your Creatomate account first. Let's go to the Templates page and click + New. We can choose a ready-made template from the gallery or design a template from scratch. For the purpose of this tutorial, let's go with the Quick Promo template from the Featured category. Choose the 1:1 square size, then click Create Template.
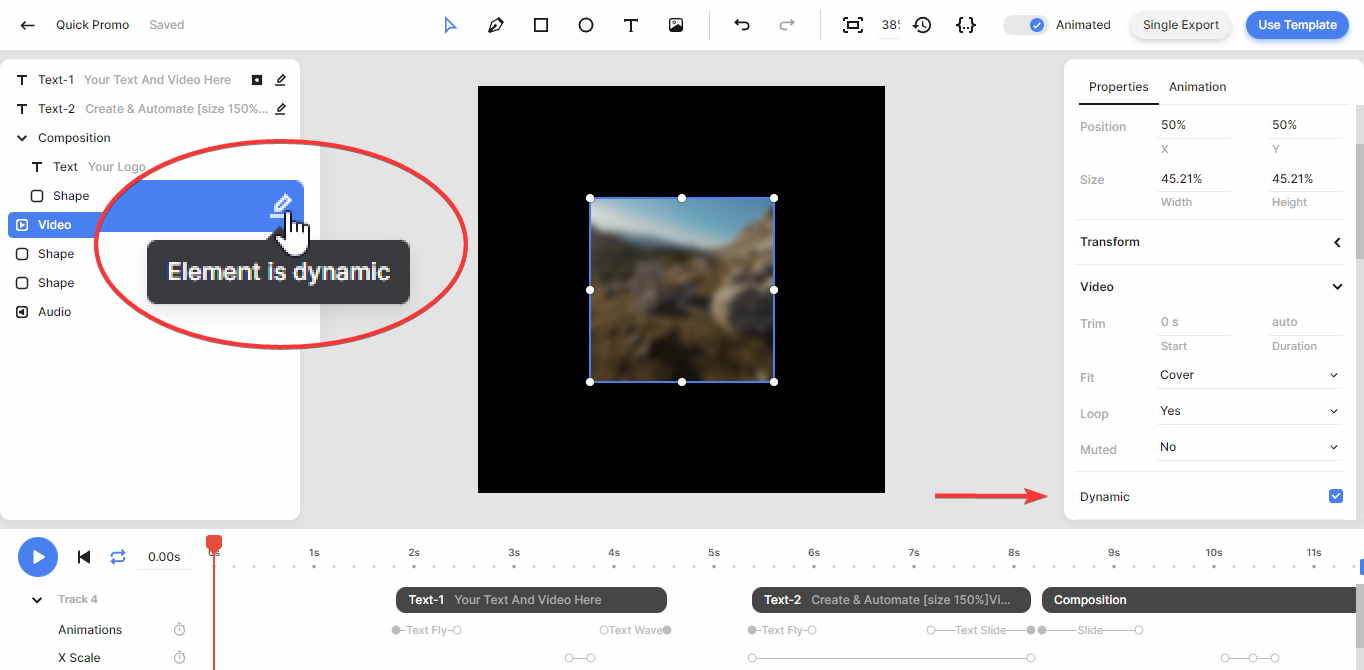
On the left side of the template editor, we can see that our Quick Promo template has 3 dynamic elements; Text-1, Text-2, and Video. This means these elements can be changed to create unique videos. A template can also be customized, but we'll just use it as-is to keep things simple.
Now that we have a template, let's move on to Pabbly.
2. Add Trigger: Airtable: New Record
Log in to your Pabbly account first. From your Pabbly Connect dashboard, click + Create Workflow, enter a workflow name and click Create.
Now, search for the Airtable app and select the New Record event. Then, click Connect. If you've used Airtable with Pabbly Connect before, you can select your existing connection. If not, add a new connection by providing your Airtable API key. When done, click Save.
I've created a simple demo table in Airtable for this tutorial. Here's what it looks like:

Let's set up our trigger as follows:
- Set Base to Pabbly Demo
- Set Table to Table 1
- Set Trigger Field to Created
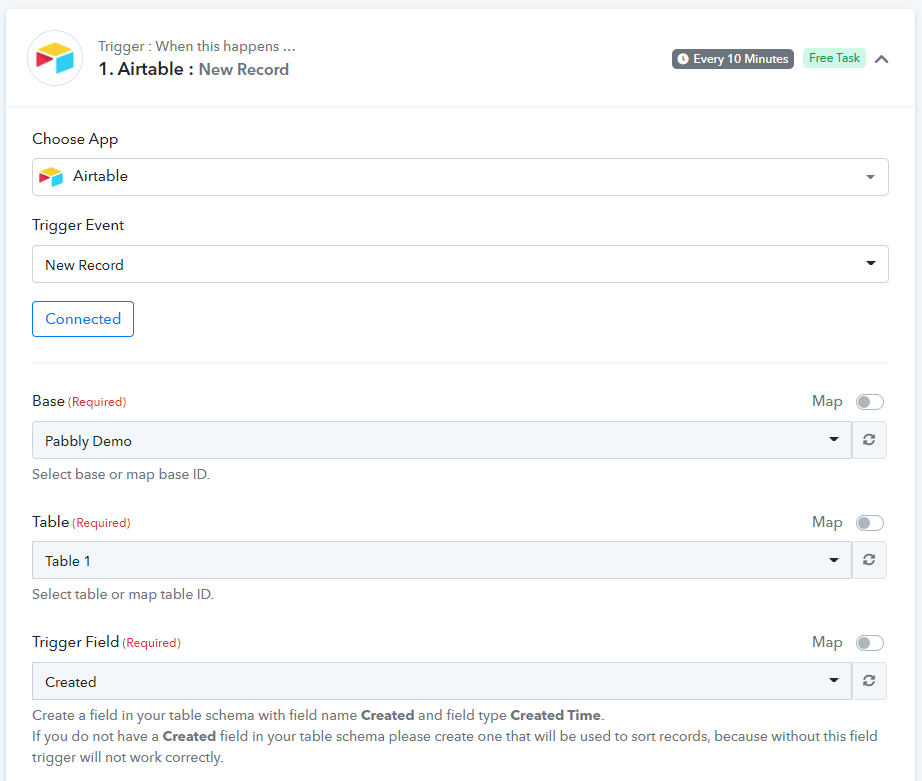
To test the trigger, click Save & Send Test Request. We'll get a response with data from Airtable.
3. Add Action: Creatomate: Create Single Render
Search the app Creatomate and the Create Single Render event. Click Connect to add a new connection by providing your Creatomate's project API key and click Save.
To set up the action to auto-generate videos, we have to select our Quick Promo template.
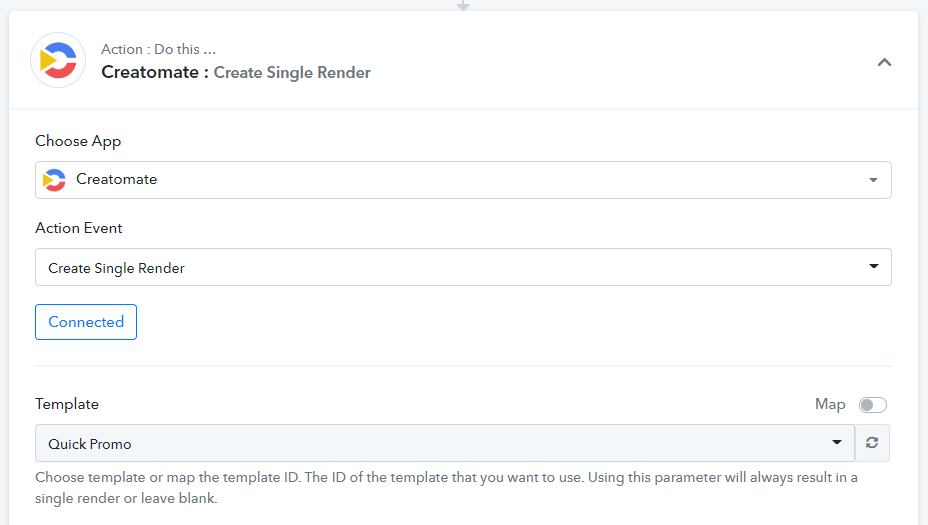
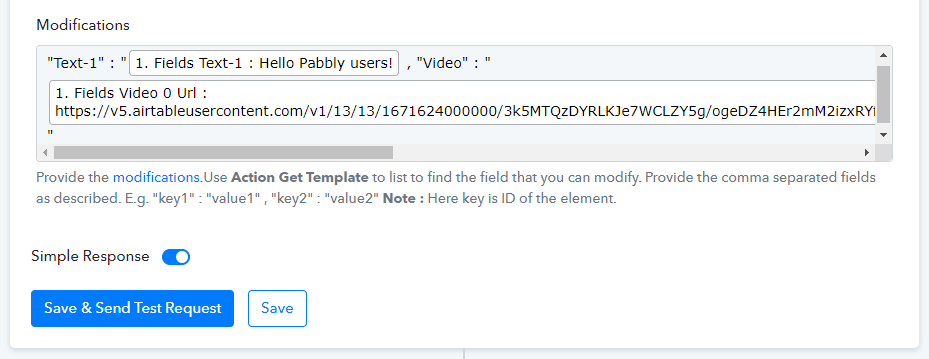
We can leave all the settings as-is and scroll down to the Modifications field. Let's connect our Airtable data to the template's dynamic elements. Copy and paste the following into that field:
"Text-1" : "value1" , "Video" : "value2"Now, replace value1 with the Airtable field Text-1 and value2 with the Airtable field Video Url.
If you don't want to replace a dynamic element, Text-2 for example, just don't list it as a modification. In that case, the template's default value will be used.
Be sure to provide the modifications in the right format, like Pabbly's example. When done, click Save & Send Test Request.
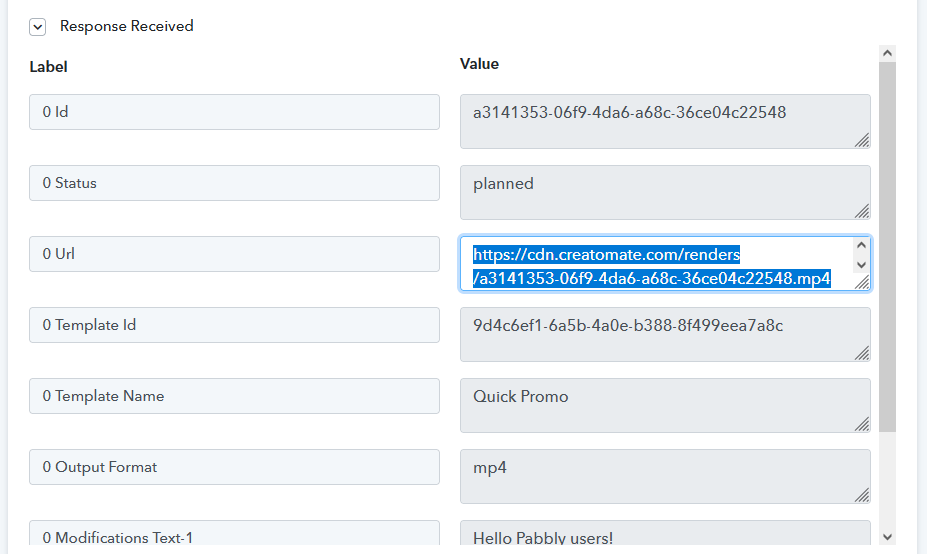
This will test the trigger by sending a request to Creatomate. By visiting the URL in the response, you can see what the video looks like. But rendering the video takes some time, so refresh the page if you get a Not Found message.
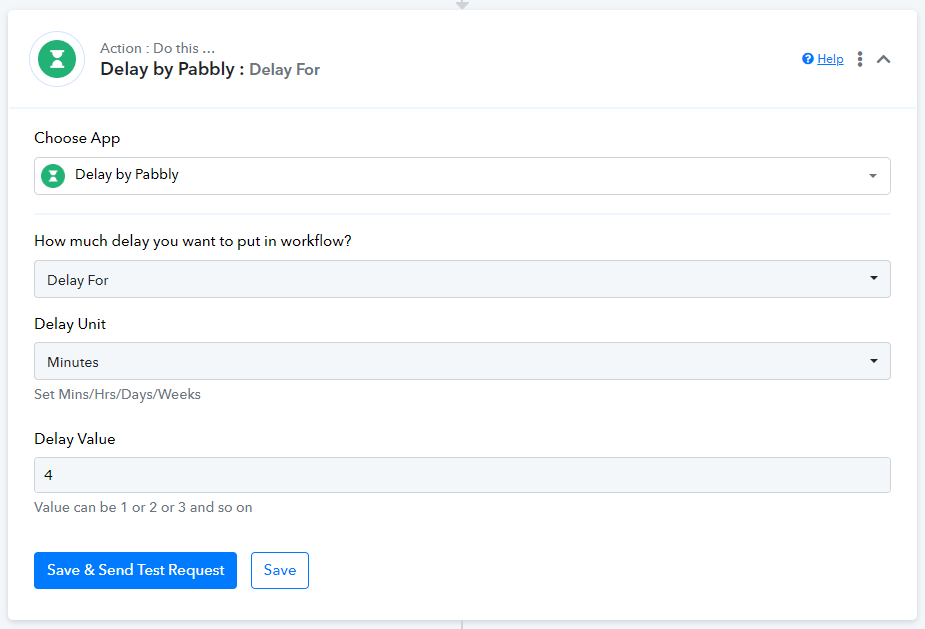
4. Add Action: Delay by Pabbly: For 4 minutes
As rendering takes some time, we need to add a delay to our workflow. If we don’t wait for the video to be ready before moving on to the next step, the workflow could fail because it will try to use the video before it's fully rendered.
Click + and search for the Delay app. Let’s add a delay of four minutes to be safe. Then, click Save & Send Test Request and move on to the next step.
5. Add Action: Gmail: Send Email
Click + to add another action. Search for the Gmail app and select the Send Email event. Click Connect to select a connection or to add a new one. Then, click Save.
Let's set up the action by filling in the required fields:
- Add a Recipient Email Address. I'll enter my own email address for this demo. But if you have email addresses in your Airtable database, you can use these as well.
- Add an Email Subject. You can type text or link to data from one of the previous steps.
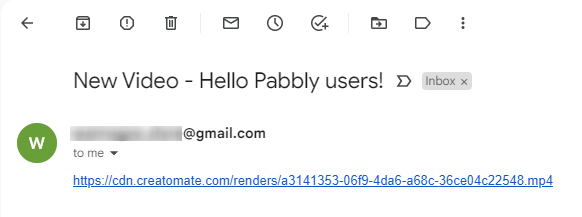
- Add the video as Email Content. Choose 2. Creatomate's Url from the previous step to add a link to the video.
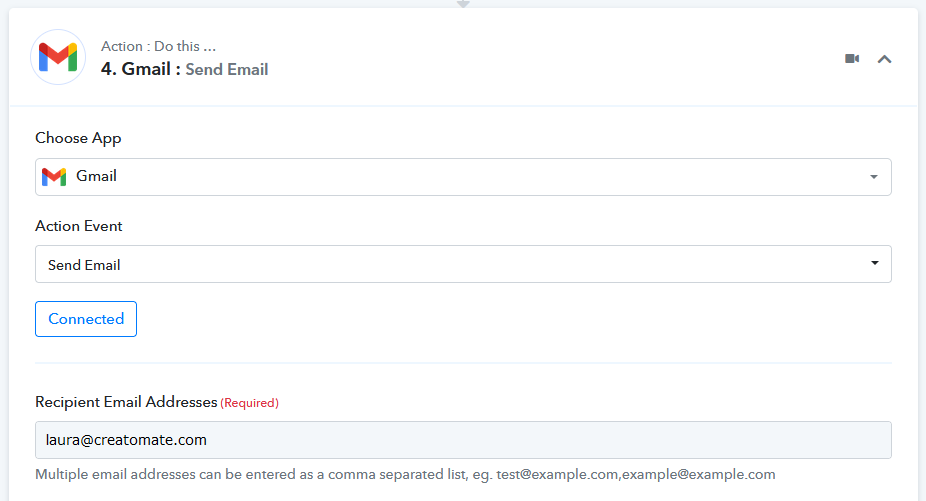


When done, click Save & Send Test Request to make sure everything is set up correctly. I got the test email with a link to the video in my inbox:
More tutorials
That's all. You now know how to generate videos automatically with Pabbly Connect using Creatomate. You can use apps you're already familiar with to customize it to your own use case.
Pabbly also made a few video tutorials about Creatomate. Watch them here:
👉 How to Create Short Videos Automatically & Share to Social Media Platforms
👉 How to Create Instagram Reels Automatically with Pabbly Connect
👉 How to Showcase Your Business Reviews on Facebook
👉 How to Showcase Your Business Reviews on Instagram as Reels
👉 How to Display Recently Registered Users in Facebook Group