How to Create AI Voice Over Videos using an API

In this tutorial, you'll learn how to create AI voiceover videos using ElevenLabs and Creatomate, all with just a single API request.
Text-to-speech APIs like AWS Polly, Google TTS, and Microsoft Azure have been around for a long time. But if you ask me, the output often sounded artificial, not like human speech at all. Listen to an example from AWS Polly and you'll see what I mean.
Fortunately, much has changed in the past years. AI voice generation took a big step forward, with ElevenLabs and OpenAI paving the way. In fact, AI-generated speech is getting so good that it's hard to tell the difference between a real voice actor and a computer-generated voice. Now check out this one generated by ElevenLabs:
It's a world of difference. Unlike old TTS services that sounded robotic and flat, ElevenLabs' text-to-speech AI is capable of generating speech that is rich in emotion, tone, and depth. Even better, ElevenLabs lets you fully customize the voice, so it's ideal whether you're trying to create a professional sounding voiceover, or a dynamic and engaging voice that's perfect for social media. You can even clone your own voice by uploading your own recordings.
This tutorial shows you how to make voice-over videos using ElevenLabs and Creatomate. Speech synthesizing will be done with ElevenLabs' API. The actual video will be generated with Creatomate's API, ultimately creating an entire voiceover clip as shown above, complete with images and animated captions.
Prerequisites
To follow along, you'll need a free account with Creatomate and ElevenLabs. You'll also need a way to interact with the API. Creatomate is just a simple REST API, so you can use any API tool, like cURL, Insomnia, or Postman. You can also use your favourite programming language to invoke the API. Node.js has the fetch module, PHP has the GuzzleHttp library, and Python has the requests package.
How to add a voice over to a video using an API?
Generating a voiceover video involves using ElevenLabs' AI for text-to-speech and Creatomate's video API. Both platforms provide a simple REST API that is easily integrated into your own applications or workflows.
We'll begin by setting up an AI-voice in ElevenLabs. Next, we'll create a voiceover template in Creatomate. In order to make that work, we'll connect Creatomate to ElevenLabs. Finally, we'll be able to generate the video by making an API request to Creatomate. During this process, Creatomate uses ElevenLabs to generate the voice, create the subtitles, and put it all together in a video – all with just a single API call.
It is as simple as that. Let's get started!
1. Set up ElevenLabs' text-to-speech API
Sign up for ElevenLabs or log in if you already have an account. To create an account, go to ElevenLabs.io, and click the Sign up button in the top right corner.
ElevenLabs provides several options for creating AI voice overs. To simplify this tutorial, we'll use an existing voice from their library. But if you prefer, you can also design a voice or clone your own voice.
Navigate to the Voices page, then open the Explore tab:
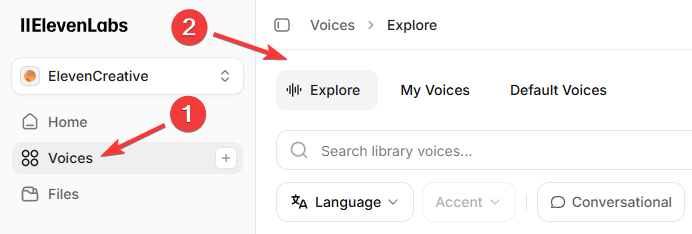
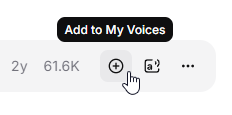
Here, you can browse the available voices and choose one for your AI voiceover. To add a voice to your account, click the + button:
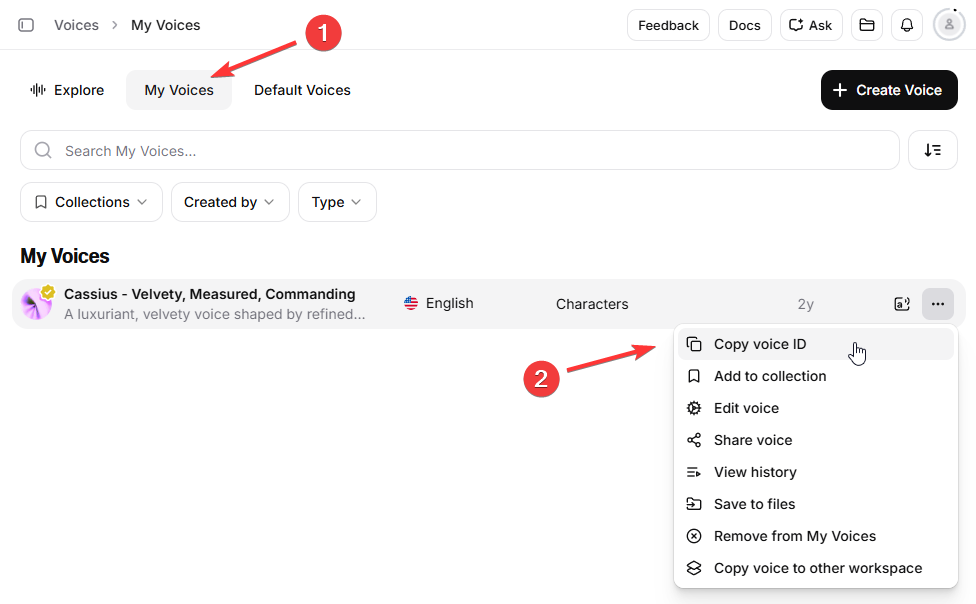
Go to the "My Voices" tab. You should now see the voice you just added. Click the three dots next to the voice and select Copy voice ID. Keep this ID handy – you'll need it in the next step:
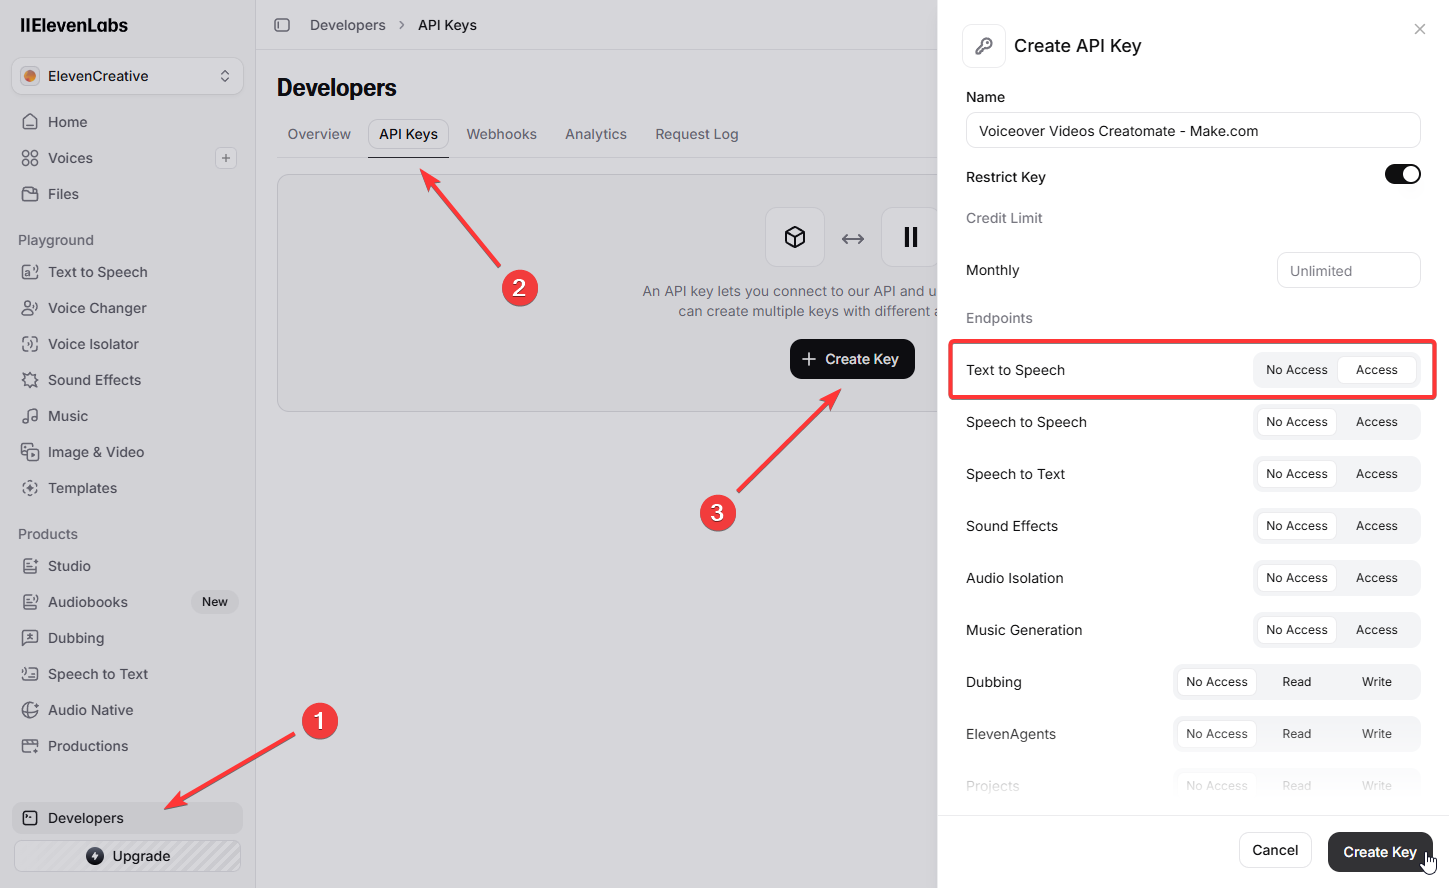
You'll also need your ElevenLabs API key. To create one, click Developers in the bottom-left corner and open the API Keys tab. Then click + Create Key and make sure Text to Speech access is enabled:
Let's move on to Creatomate.
2. Create a voiceover template in Creatomate
Log in to your Creatomate account or create a free account if you haven't already.
First, let's connect to our ElevenLabs account. To do so, click ... on the left, then choose Project Settings. Within the Integration section, toggle the switch to enable ElevenLabs. You'll then be prompted to enter your API key. Once you're done, click Confirm, and close the Project Settings:
Your ElevenLabs account is now connected to Creatomate. Next, we'll create a video template.
Navigate to the Templates page, and click the New button. For the purpose of this tutorial, go to the Voice Overs category, and click the Short-Form Voice Over template. Select the 9:16 Vertical size, then click Create Template to open it in the editor:
The video editor might seem intimidating at first, but don't worry – it's actually quite easy to get started.
If you have experience with video editing, much of this will feel familiar. Creatomate's editor – built specifically for video automation – works a bit differently. It doesn't limit you to specific designs; nearly any type of video can be automated, giving you the freedom to implement your own custom ideas. Even the templates are open-source JSON, which can be generated through automation.
Let's focus on this voiceover template. You'll notice there are four compositions, each representing a scene in the video. Each composition includes a voiceover, subtitle, and image element. As you work with the template in the editor, you'll see that the voiceovers and subtitles haven't been generated yet. These are just placeholders; actual voiceovers and subtitles will be generated through the API request we'll talk about later.
The template is almost ready to use; the only remaining task is to specify the voice you selected in the previous step. Let me demonstrate this with Voiceover-1, and then you can apply the same process to the other voiceover elements.
On the left side panel, select the Voiceover-1 element. Then, go to the properties panel on the right, where you'll find the Audio property. This is where you can customize the voiceover. The Provider is already set to ElevenLabs. The Model setting allows you to choose from different text-to-speech models. It's best to stick with Multilingual v2, because it offers excellent speech synthesis and works with a lot of languages.
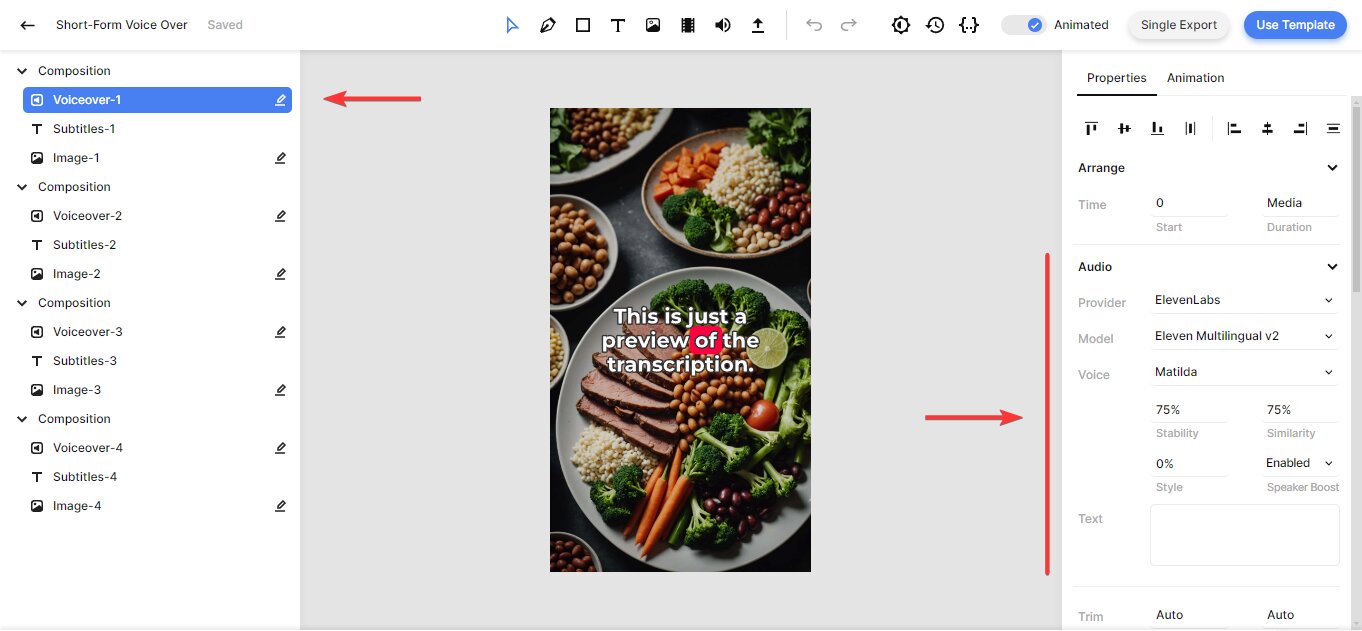
For the Voice, Matilda is the default; a premade voice from ElevenLabs. But what if you want a custom voice? To do this, click on Matilda, scroll up, and select Custom Voice. Paste the voice ID from your ElevenLabs dashboard, and click OK:
You can also adjust the Stability, Similarity, Style, and Speaker Boost parameters. These AI settings allow you to fine-tune the voiceover generated by ElevenLabs. For example, the Stability parameter controls the amount of emotion and randomness in the voice. I recommend keeping the default settings unless there's a specific reason to change them; they are perfect for most purposes. For more details, you can refer to ElevenLabs' Voice Settings documentation.
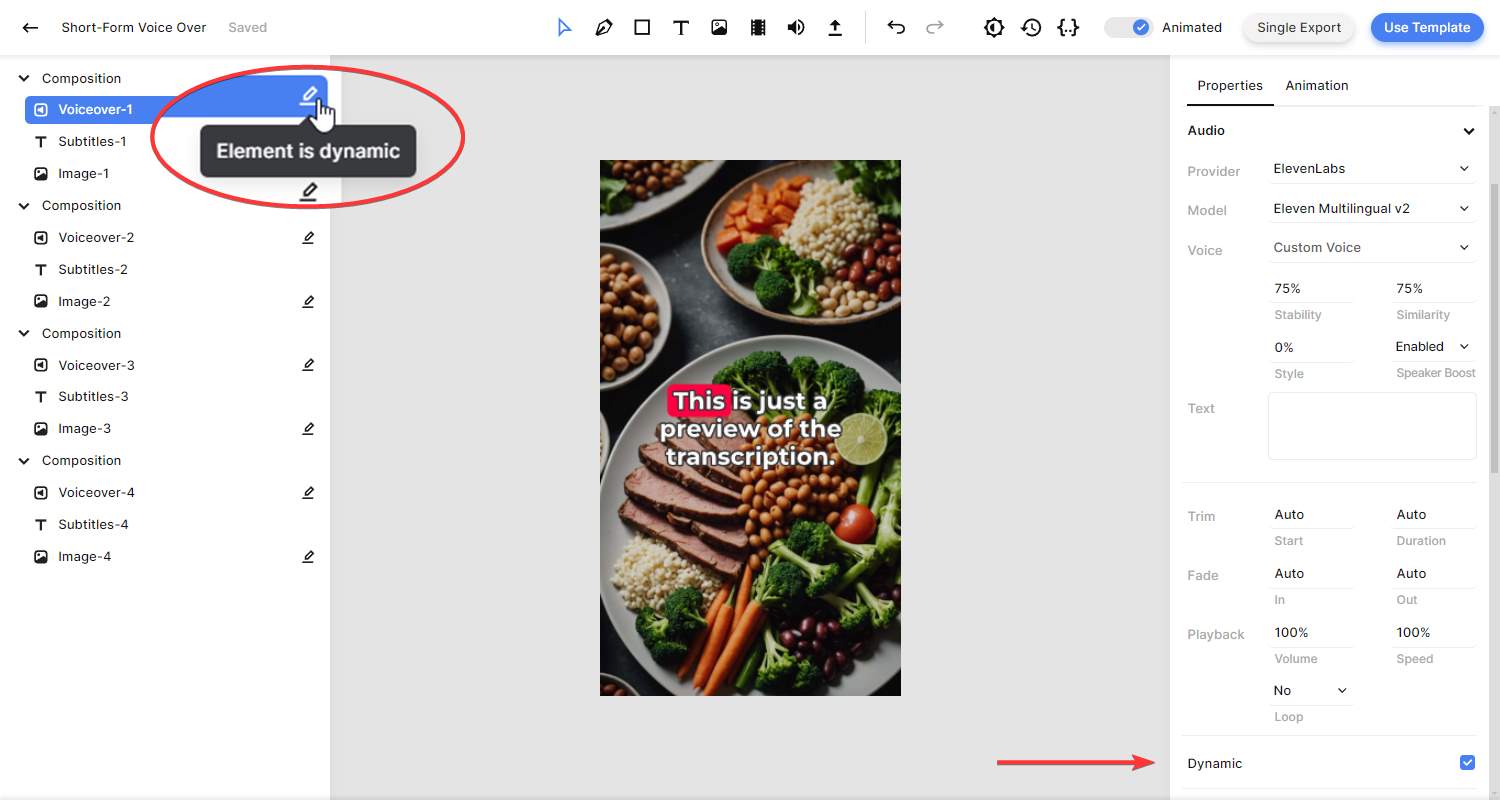
All voiceover elements are marked as dynamic, allowing them to be easily replaced through our script. Any text you add will automatically be converted into speech using the selected voice:
To complete the template setup, let's look at the subtitle elements next.
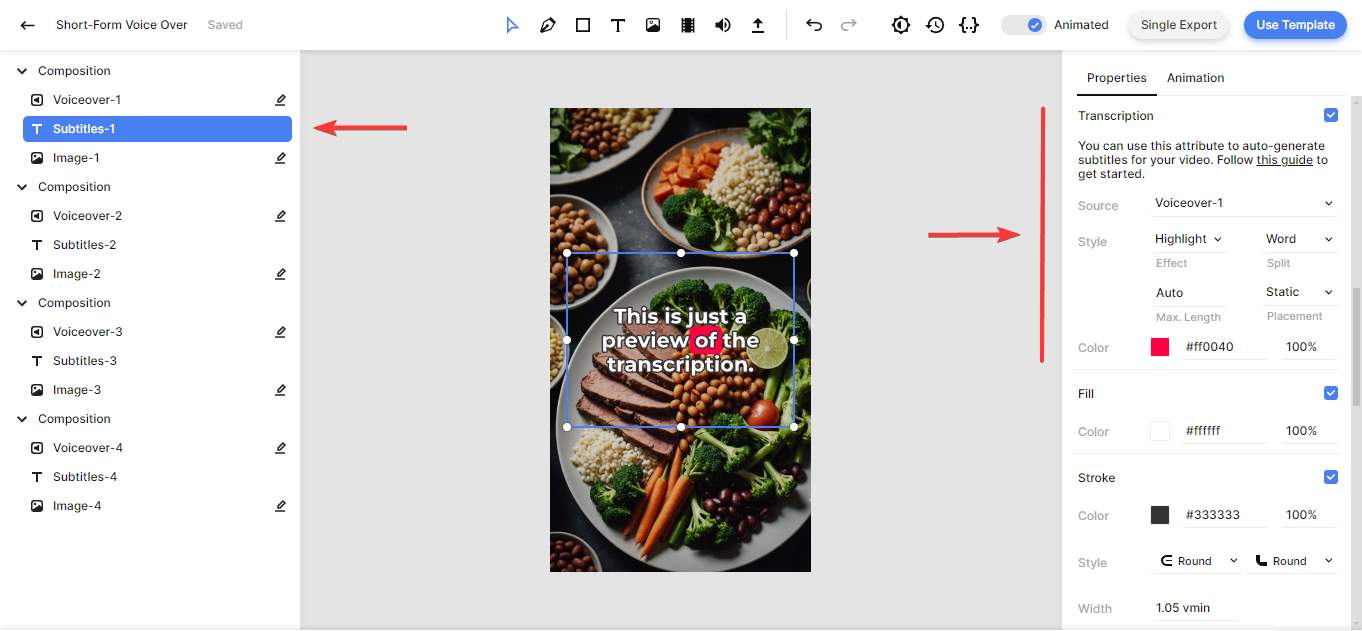
In the left side panel, select the Subtitles-1 element. Then, in the properties panel on the right, scroll down to the Transcription property. Here you can customize the subtitles. You'll see that the Source is set to the Voiceover-1 element. This tells Creatomate to generate subtitles based on the voice over. You can also customize the appearance of the subtitles using the Style, Color, Fill, and Stroke properties:
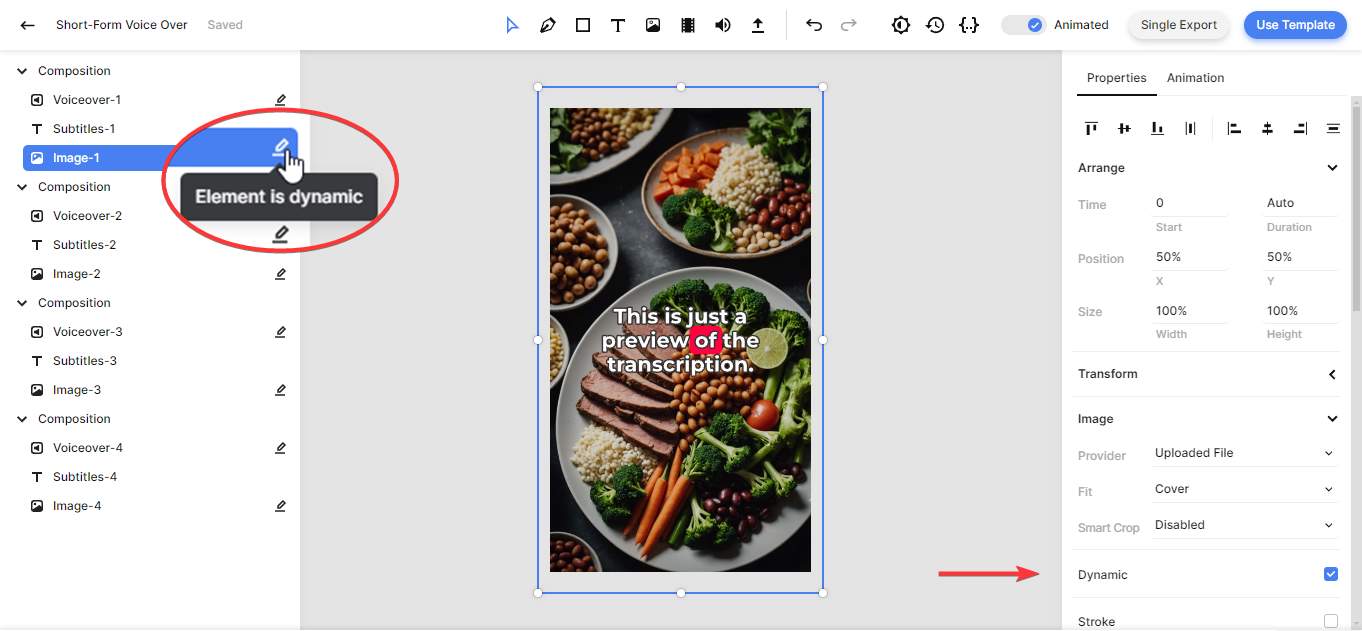
Before we move on to the API script, let's take one final look at the Image-1 element. Like the voiceover elements, it is dynamic – meaning you can replace it with a different image for each video:
There's a lot of flexibility in the editor when it comes to creating your own video templates. Let's not go into too much detail here, but you should definitely play around with the editor after completing this tutorial. But for now, let's move on to the last step of the tutorial, where we'll use the API to generate the actual voiceover video.
AI tip: If you're wondering how to use generative AI in your voiceover video, it's like the ElevenLabs integration, but instead of ElevenLabs, you connect Stability AI. Then, select an image element and change the Provider from "Uploaded File" to Stability AI. This lets you provide a text-to-image prompt instead of a URL. You can find out more about using AI in your video templates in the tutorial below. Even though the instructions refer to Zapier.com, the steps are the same when using a simple API request:
👉 How to use AI to Automate Videos for Shorts, Stories, and Reels
3. Call the REST API to generate the voiceover video
With ElevenLabs and a video template set up, all that's left is calling Creatomate's API. The API is accessible using a simple REST interface. So you don't have to install any software or libraries; just send a request over HTTP.
Two things are needed for this API request; the API key and the template ID. You can find them both under Use Template at the top right:
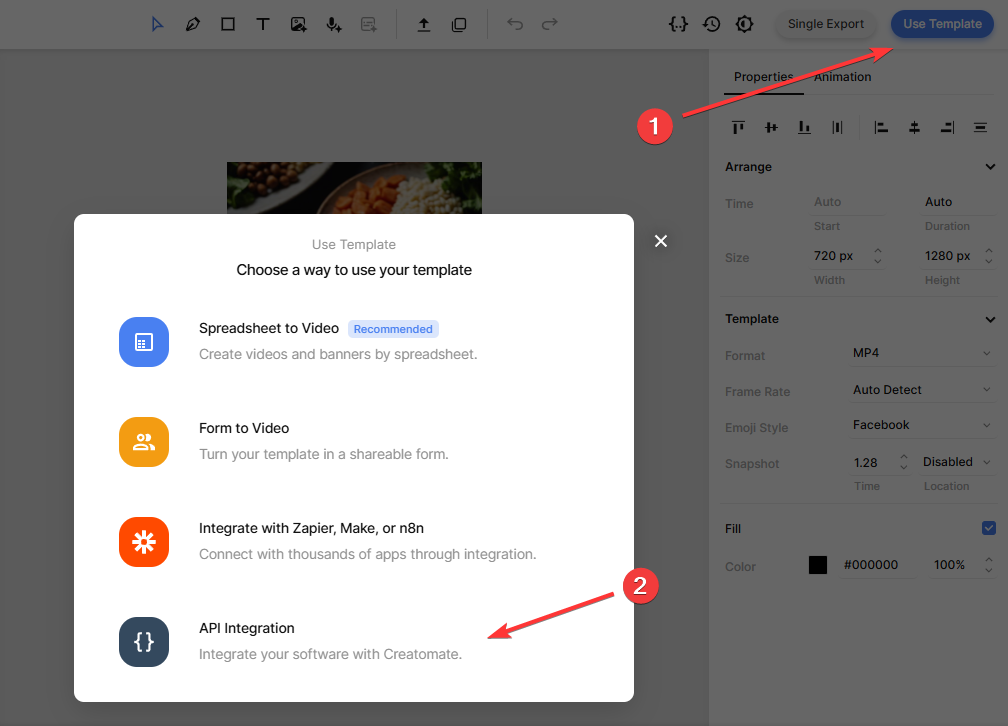
Next, go to the API Integration section, where you'll find instructions in multiple programming languages:
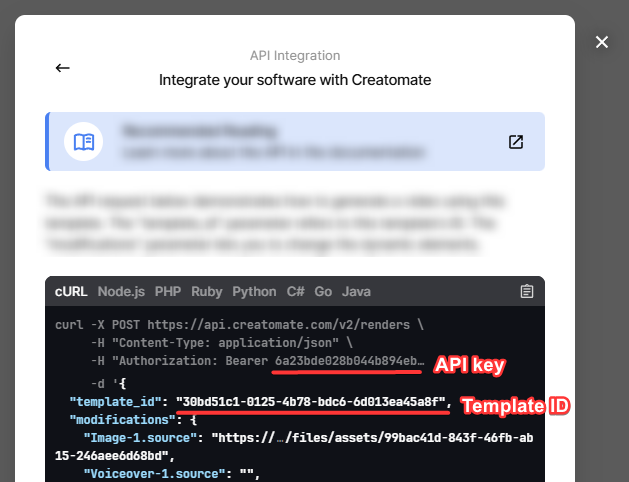
Let's look at the API request more closely. As you can see, you'll need to make a POST request to the "https://api.creatomate.com/v2/renders" endpoint. You'll need to specify an API key, a template ID, and the "modifications" parameter.
The modifications parameter lets us specify what changes we want to make to the template before it's rendered. Here, we'll change the image elements (Image-1, Image-2, etc.) and the voiceover elements (Voiceover-1, Voiceover-2, etc.). For the images, we'll pass an URL, and for the voiceovers, we'll pass a text sentence:
1curl -s -X POST https://api.creatomate.com/v2/renders \
2  -H 'Authorization: Bearer [Your-API-Key]' \
3  -H 'Content-Type: application/json' \
4  --data-binary @- << EOF
5{
6  "template_id": "[Your-Template-ID]",
7  "modifications": {
8    "Image-1": "https://cdn.creatomate.com/demo/better-sleep-1.jpg",
9    "Voiceover-1": "The 3 Best Tips for Better Sleep",
10    "Image-2": "https://cdn.creatomate.com/demo/better-sleep-2.jpg",
11    "Voiceover-2": "Create a Relaxing Bedtime Routine: Wind down before bed with activities like reading, taking a warm bath, or practicing relaxation techniques.",
12    "Image-3": "https://cdn.creatomate.com/demo/better-sleep-3.jpg",
13    "Voiceover-3": "Maintain a Consistent Sleep Schedule: Go to bed and wake up at the same time every day, even on weekends, to regulate your body's internal clock.",
14    "Image-4": "https://cdn.creatomate.com/demo/better-sleep-4.jpg",
15    "Voiceover-4": "Exercise Regularly: Stay active during the day, but avoid vigorous exercise close to bedtime for better sleep quality."
16  }
17}
18EOF
For this example, we'll use the cURL command-line program to make the API request. But this request can be made through any API client, such as Postman or Insomnia. Or you can write a script to do the request.
If you want to integrate the API into your script or app, take a look at these tutorials:
👉 How to Create Videos with AI Voice Overs using Node.js
👉 How to Create Videos with AI Voice Overs using Python
As soon as you call the API endpoint, Creatomate gets to work. First, it inserts the “modifications” data into the template. It then calls any required third-party APIs, such as ElevenLabs or Stability AI. For this template, only ElevenLabs is used, but if your template is configured to generate images (for example with Stable Diffusion), those APIs will be called as well. Once everything is ready, Creatomate compiles it all into a final video.
Immediately after calling the endpoint, we'll receive a response confirming Creatomate has accepted the request:
1{
2  "id": "c612f3c7-32d7-40f3-8c2a-75205a360cba",
3  "status": "planned",
4  "url": "https://f002.backblazeb2.com/file/creatomate-c8xg3hsxdu/c612f3c7-32d7-40f3-8c2a-75205a360cba.mp4",
5  "snapshot_url": "https://f002.backblazeb2.com/file/creatomate-c8xg3hsxdu/c612f3c7-32d7-40f3-8c2a-75205a360cba-snapshot.jpg",
6  ...
7}
The response shows that Creatomate successfully started a new job to generate the voiceover video. You can see that the "status" is set to "planned", indicating that the generation job is in progress. The process may take a few minutes, depending on the complexity of the template. It is now time to wait for the video to finish.
There are two ways in which you can await the video. In the first approach, the status of the video is obtained by performing a separate GET call. The second, and the recommended way, is by using a webhook. This essentially means that Creatomate is capable of making a reverse API call to your application whenever the video is ready for use.
For this example, we'll just wait a minute or two. Grab a cup of coffee and sit back for a bit. Then visit the URL you got from the API request. If the URL returns "Not Found", the video has not been completed. Wait a little longer and try again.
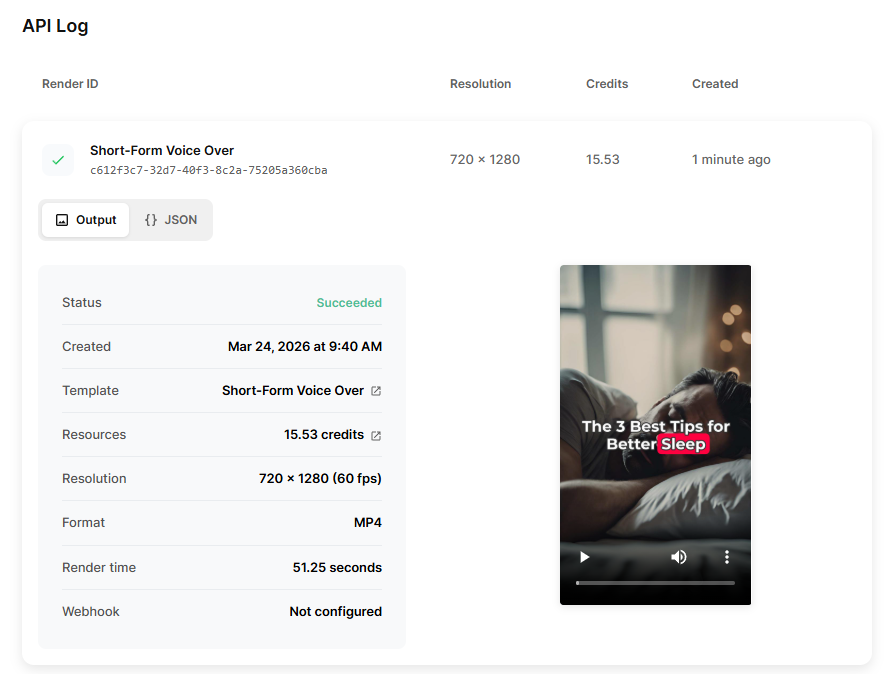
When it's done, the URL will return the finished video:
Tip: You can find your requests on the API Log page in your Creatomate dashboard, where the 50 most recent renders are displayed. If something goes wrong, this page will show the error message along with suggested fixes.
Next steps for creating AI voiceover videos using an API
At its core, that's all there is to it. In this tutorial, we walked through how to create a voiceover video with animated subtitles using Creatomate and ElevenLabs. To keep things simple, we focused on generating a basic video with a few images and voiceovers.
But this is just the beginning. Video automation offers far more possibilities. The API gives you the flexibility to automate virtually any type of video you can imagine. You're not limited to reusable templates – you can even generate videos directly from JSON.
For more use cases and practical guidance, check out our tutorial page or jump straight into one of the most popular examples below.
👉 How to Automate Video Generation with Python
👉 How to Automatically Add Subtitles to Videos with Node.js
👉 How to Create Videos from JSON
You might also like these tutorials


Start automating today
Start with a full-featured trial with 50 credits, no credit card required.
Get started for free →