TikTok Automation: How to Create TikTok Videos using AI

In this no-code tutorial, you'll learn how to build a TikTok automation system that creates, schedules, and posts AI-generated TikTok videos.
TikTok's algorithm loves consistency, so you need to post regularly to stay relevant and keep your audience engaged. Making each video manually is one way to go, but keeping up with the endless demand can quickly feel like a full-time job. Luckily, there's a more efficient way.
Some of the most popular and viral TikTok videos are faceless shorts featuring interesting stories, facts, top 5 lists, etc. These videos are perfect for automation because they usually follow a similar format and content.
In this tutorial, I'll walk you through setting up a workflow to create faceless TikTok videos with AI-generated voice-overs, images, and subtitles. We'll use Creatomate to produce the videos and Zapier to make it all work together. By the end, you'll have a solid TikTok automation system that generates and posts AI-powered videos just like the one below.
Have a different type of TikTok video in mind? No problem! Creatomate has an online editor that allows you to design your own video templates for automation.
What is TikTok automation?
TikTok automation is the use of software tools to manage and optimize your TikTok channel without having to do everything by hand. These tools can help with lots of tasks, such as brainstorming video ideas, scheduling posts, liking and commenting on videos, following and unfollowing users, and even generating video content itself.
Essentially, TikTok automation can handle a wide range of activities, but it's flexible – you can choose to automate only the parts that make sense for you. In this tutorial, we'll focus on automating the creation, scheduling, and posting of TikTok videos.
Integrating AI into TikTok automation
Generative AI makes the process of creating videos much easier and faster: you simply provide a video topic, and the AI handles the rest. This includes writing a script with a text generator, creating voiceovers with a text-to-speech tool, producing background visuals with an image generator, and even generating animated subtitles.
This method of TikTok automation uses tools that don't require any coding skills. So, whether you're a marketer, content creator, or someone without technical expertise, you can easily follow along with this tutorial.
Prerequisites
Here are the tools we'll use:
- Creatomate: to create a design and generate TikTok videos;
- ChatGPT: to turn a video topic into a script;
- DALL·E: to generate visuals for the videos;
- ElevenLabs: to generate voice overs for the videos;
- Buffer: to set up a schedule and publish the video on TikTok;
- Zapier: to automate the entire process.
How to use AI to automate TikTok videos?
Starting off, we'll set up accounts for the AI tools we'll be using: ElevenLabs, DALL·E, and ChatGPT. Next, we'll create a Buffer account and set up a posting schedule. Following that, we'll create a video template in Creatomate, which will serve as the foundation for all our TikTok videos.
Once the initial setup is complete, we'll integrate everything using Zapier. To keep things simple, we'll start by creating a basic table and entering a topic for our TikTok video. In a real-world scenario, you might use Airtable, Slack, or Google Sheets for this task. ChatGPT will then generate a script, image prompts, and a caption based on the video topic. We'll parse this response to connect it to our video template in Creatomate, allowing it to produce the video. Finally, we'll send the completed TikTok video to Buffer for automatic posting.
Let's get started!
1. Set up ElevenLabs for AI voice-overs
There are many text-to-speech tools available, but we find ElevenLabs to be one of the most advanced AI voice generators on the market. It offers top-notch audio quality that sounds like a natural human voice, complete with accents, emotions, styles, and more.
It also provides several options for creating AI voice overs, including designing custom voices and cloning your own. To simplify this tutorial, I'll show you how to use a voice from their library. If you prefer, you can also use a pre-made voice, which we'll cover later in this tutorial.
Sign up for ElevenLabs or log in if you already have an account.
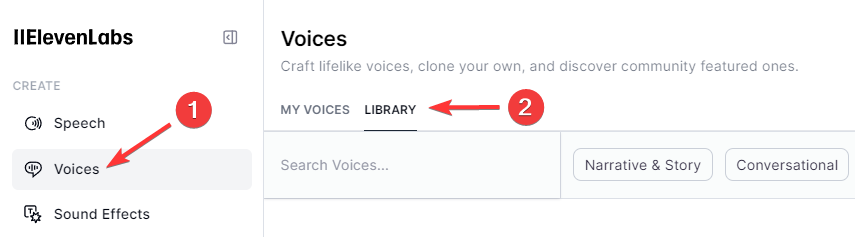
Navigate to the Voices page, then go to Library:
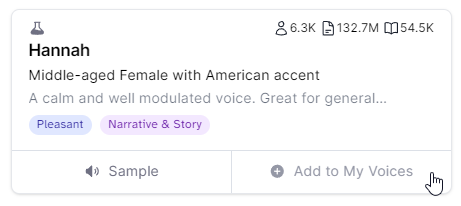
Here, you can choose a voice you want to use for your voiceover. To add any of these voices to your account, click the Add button:
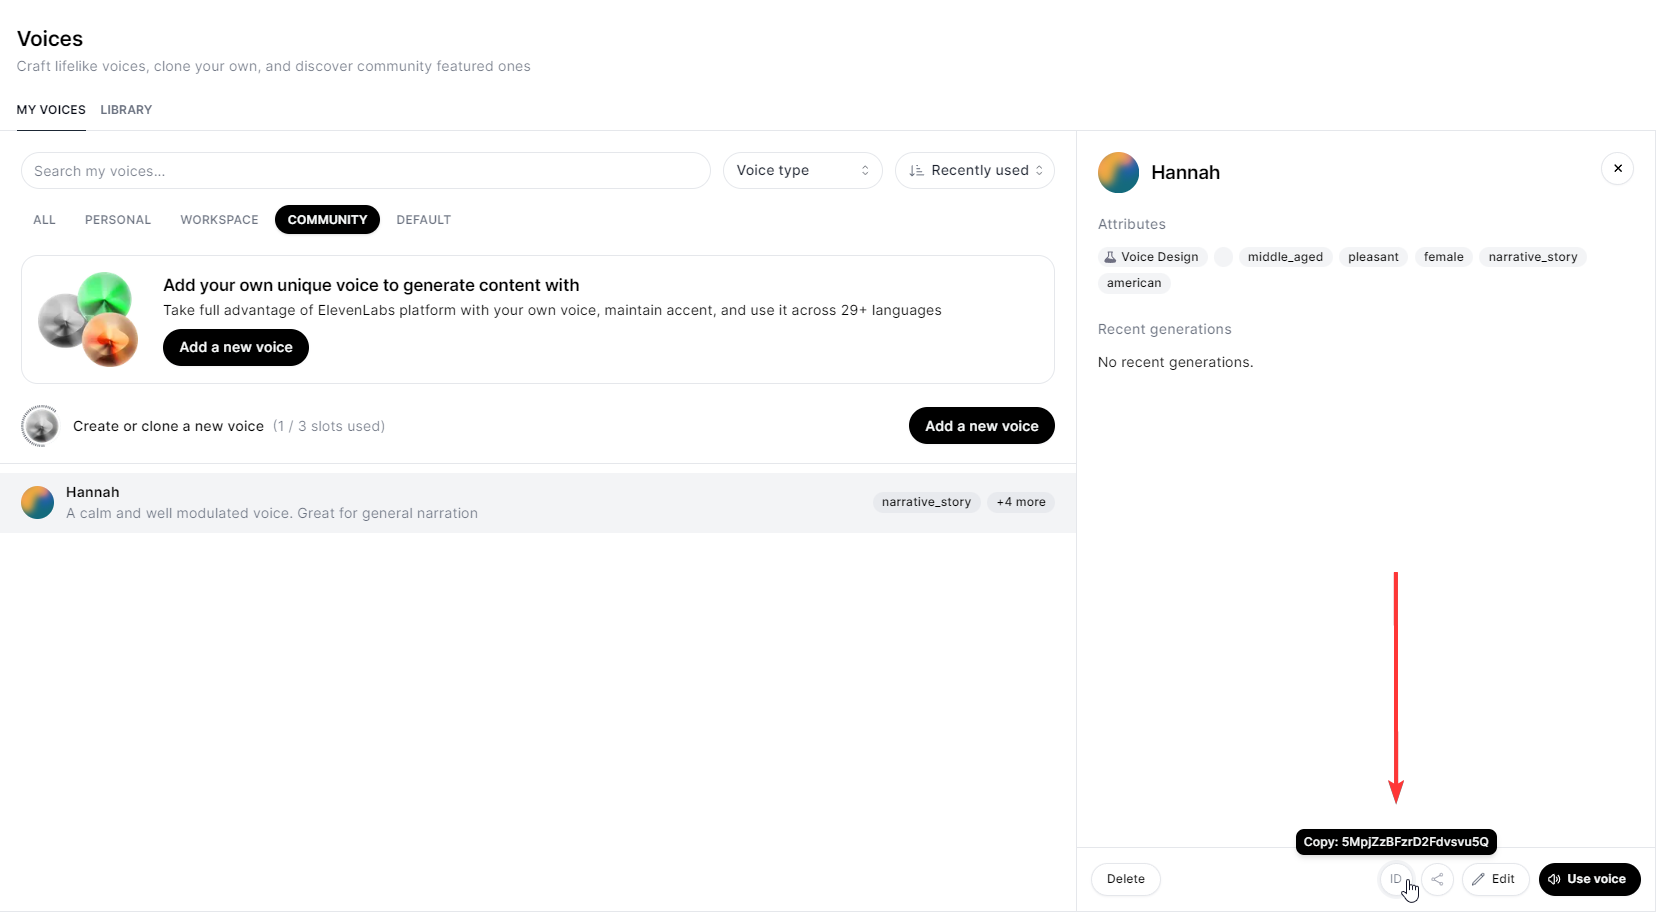
Return to the "My voices" page. Under the Community section, you'll see that the voice has been added. You can specify this voice by its ID, which will be used later in this tutorial. For now, click View, then click the ID button. Save the ID for future reference. (click the screenshot to view it in full screen):
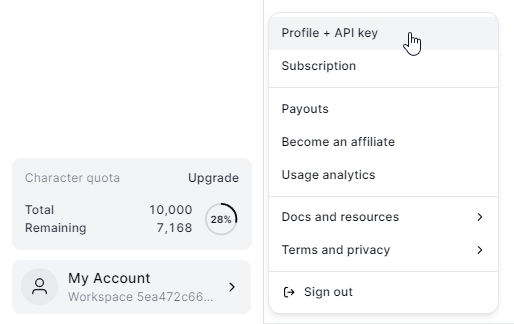
You'll also need your ElevenLabs API key. You can create one by clicking on My Account in the bottom left corner, and then click API Keys:
2. Create an OpenAI account for ChatGPT and DALL·E
Both ChatGPT and DALL·E are developed by OpenAI. In this step, we'll create an account and generate an API key, which we'll use to connect with both tools later on.
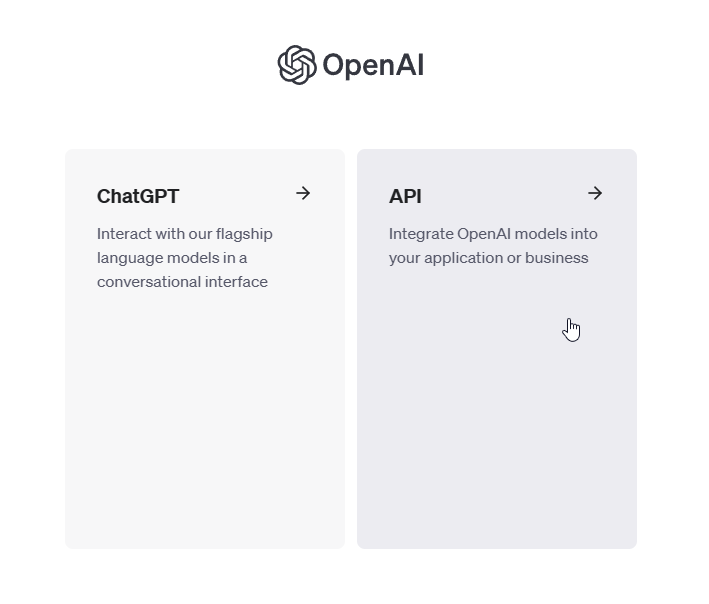
Create a free OpenAI account or sign in if you already have one. Then, go to the API section:
Next, from the left side menu, click API keys. Then, click on Create new secret key, provide a name, and click Create secret key:

Keep your API key on hand. You'll need it to connect DALL·E with Creatomate (in step 4) and ChatGPT with Zapier (in step 6).
3. Set up a schedule in Buffer
Buffer is one of the most popular social media scheduling tools on the market. While there are other similar products, such as HootSuite and SocialBee, which also allow you to schedule and post TikTok videos, we'll use Buffer for this tutorial. It's very user-friendly, integrates nicely with Zapier, and offers a free plan that includes everything we need.
In this step, we'll create a Buffer account, connect our TikTok channel, and set up a schedule for our videos.
Create a free Buffer account or sign in if you already have one.
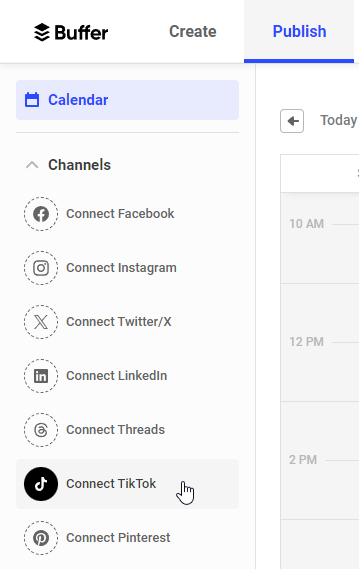
Once in the dashboard, click Show all channels in the left side menu, then select Connect TikTok:
Next, log in to your TikTok account. If Buffer found your TikTok account, click Start Connecting:

Your TikTok account has been successfully connected to Buffer.
Now, let's set up a posting schedule for your TikTok videos. Here's how it works: you can choose specific times for your videos to be published. Each scheduled time slot becomes a spot in your queue. Later, when configuring the Buffer module in Zapier, we'll set it up so that videos are added to the queue and scheduled for the next available time slot.
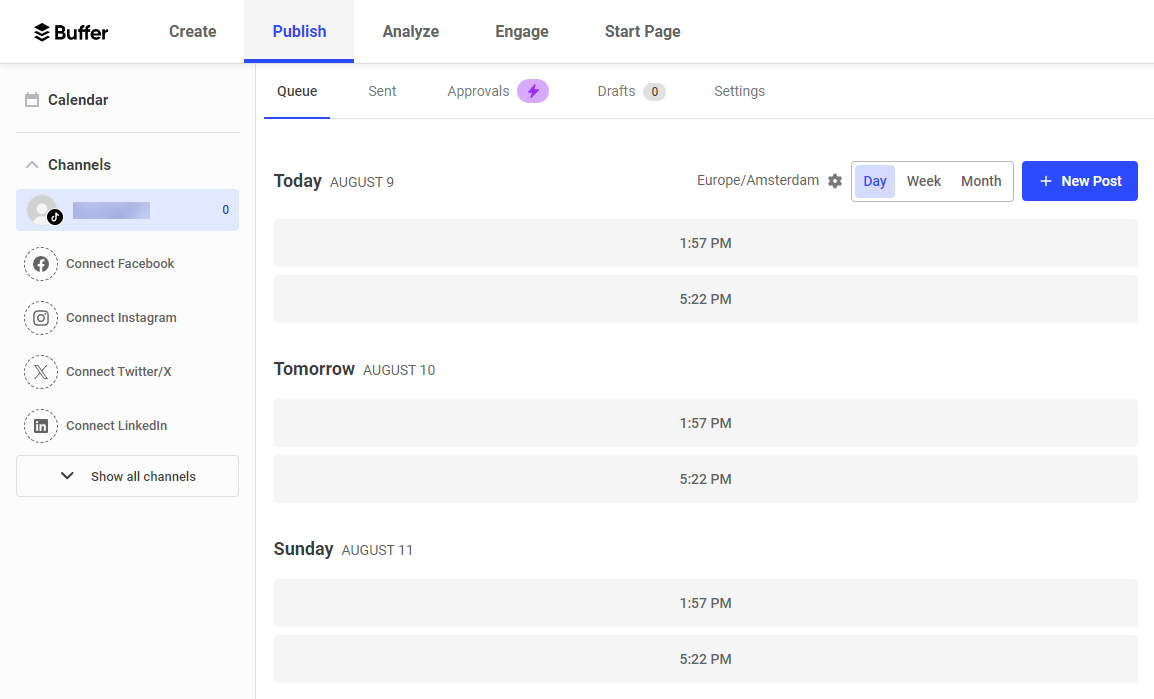
Click on your TikTok channel from the left side menu. This will take you to the Queue page, where Buffer has set up a schedule for you. To keep it simple, I'll use these pre-set time slots, but you can customize the schedule to suit your needs. For more detailed information about posting schedules, refer to Buffer's documentation page.
For now, that's all there is to Buffer. We'll get back to it when setting up the action in Zapier (step 9).
4. Create a video template in Creatomate
Log in to your Creatomate account or create a free account if you don't already have one.
Let's connect with ElevenLabs and DALL·E first. To do this, click on ... , then choose Project Settings. In the Integrations section, toggle the switch for OpenAI, paste your API key, and click Confirm. Next, do the same for ElevenLabs. Once you're done, close the Project Settings menu:
We're now ready to create a video template. Navigate to the Templates page and click the New button to open the template gallery. Go to the Voice Overs category and select the AI-Generated Story template. Since we're creating TikTok videos, choose the 9:16 Vertical size, and click Create Template to open it in the editor:
Creatomate's editor is specifically intended for video automation. There are many similarities with other editing tools, but Creatomate has some unique features that set it apart. Instead of producing the final video, you can create a reusable design, called a template, capable of generating hundreds of unique videos. Every aspect of the video is customizable, including text, images, subtitles, and more. This provides you with a huge amount of freedom when it comes to video automation. Even the templates themselves are open source JSON that can be generated through automation.
Let's focus on our TikTok video template for now. As you can see, there are 6 compositions, each corresponding to a scene in the video. Each composition includes a voiceover, subtitle, and image element. As you play with the template in the editor, you'll notice placeholders for the voiceover, subtitles, and image elements. This is because the actual content will be generated as part of our automated workflow. We'll see how that works later on.
Our template is almost ready to use. All that's left is to specify the voice for the voiceover (optional) and configure the image elements for DALL·E. I'll demonstrate this with the first composition, and you can then do the same for the remaining five compositions.
On the left side panel, select the Voiceover-1 element. Then, navigate to the properties panel on the right, where you'll find the Audio property. This is where you can customize the voice over. The Provider is already set to ElevenLabs. The Model setting lets you choose between four different text-to-speech models. It's best to stick with Multilingual v2, as it has great speech synthesizing and works with a lot of languages.
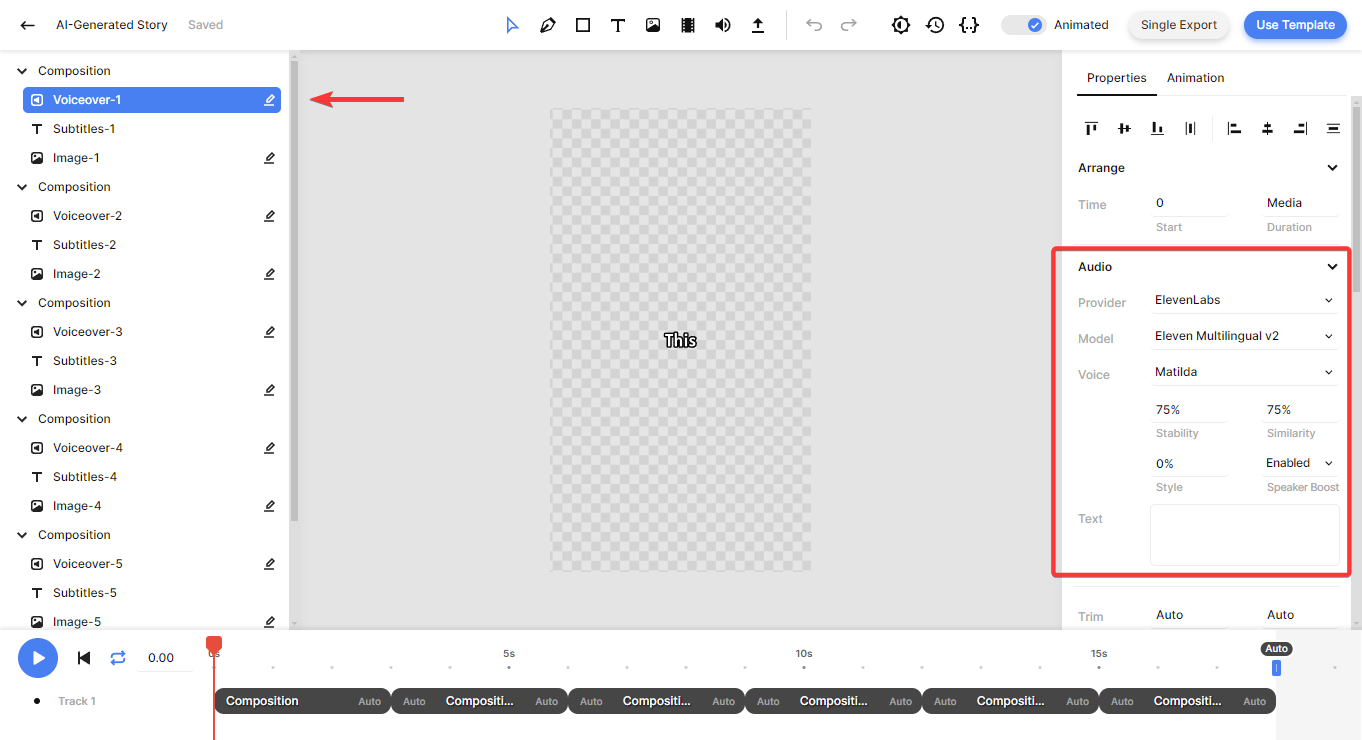
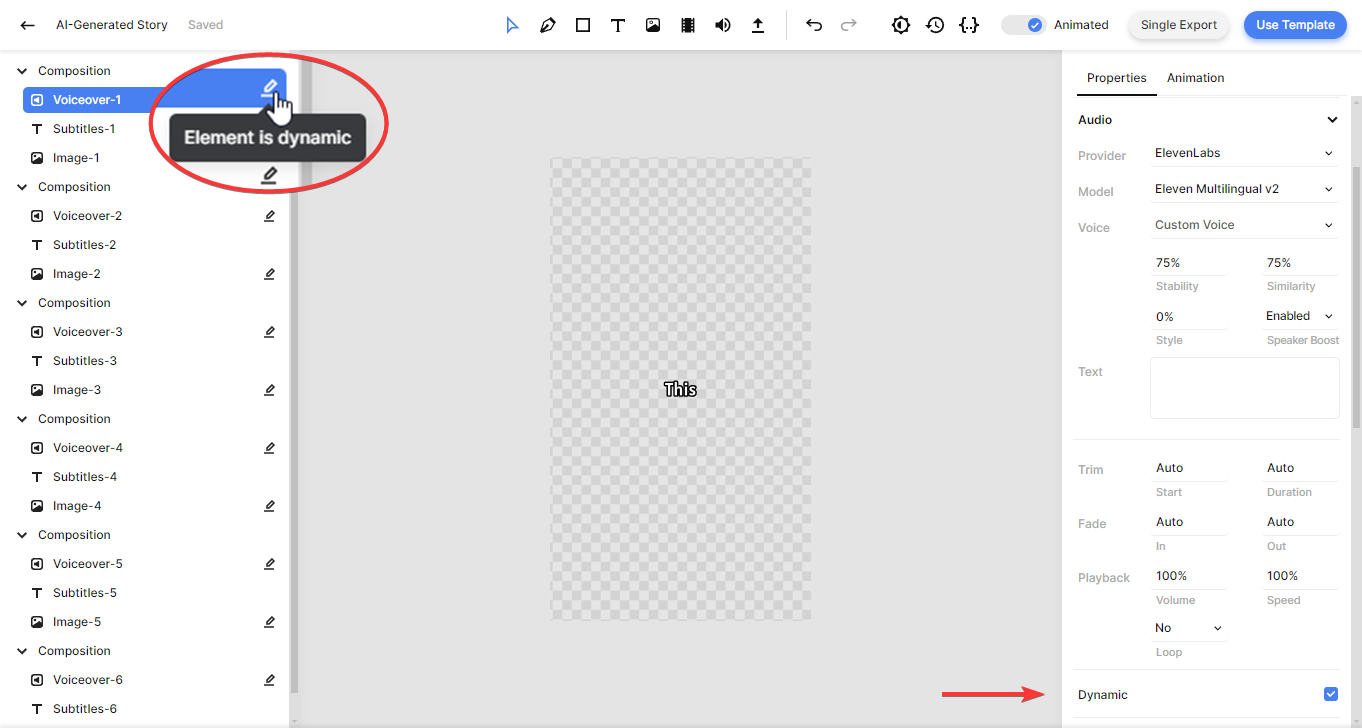
For the Voice option, Matilda is the default, a pre-made voice from ElevenLabs. If you want to use another premade voice, pick one from the drop-down menu. You can listen to a sample of each voice on the Speech Synthesis page in your ElevenLabs dashboard. And in case you prefer to use one of the voices from the VoiceLibrary, click on Matilda, scroll up, select Custom Voice, paste the voice ID, and click OK:
You can also adjust settings such as Stability, Similarity, Style, and Speaker Boost. These AI parameters help fine-tune the voiceover generated by ElevenLabs. For example, the Stability parameter controls the level of emotion and randomness in the voice. Unless you have a specific reason to change them, I recommend leaving these settings at their default values, as they are ideal for most purposes. For more details about each setting, refer to ElevenLabs' Voice Settings documentation.
There's another important aspect of the voiceover elements you need to know: they are marked as dynamic, just like the image elements. This means we can input different text values via Zapier. Later on, we'll map ChatGPT's script to the voiceover elements to create an AI voiceover using ElevenLabs.
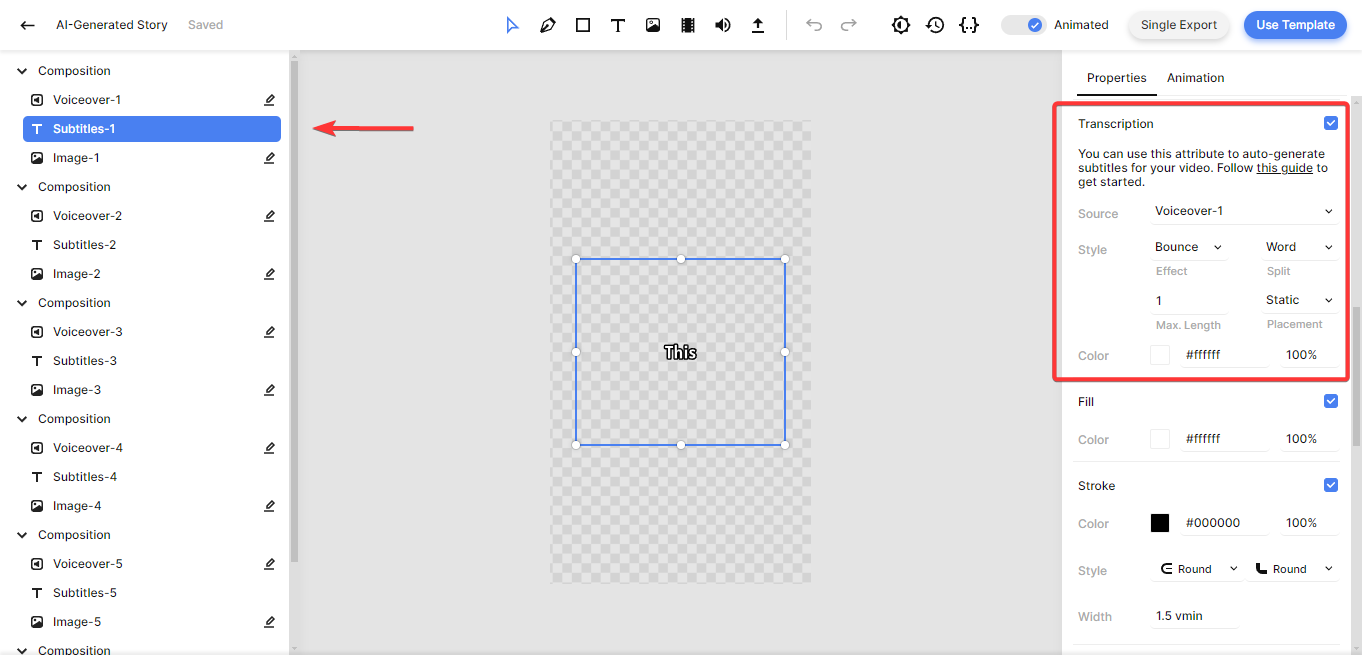
Let's have a quick look at the subtitles. No changes are needed here; I'll just show you how it works. Select the Subtitles-1 element, then scroll down to the Transcription property in the properties panel. Here you can customize the subtitles. As you can see, the Source points to the Voiceover-1 element. This tells Creatomate to generate subtitles based on the voice over. You can further customize the look and feel of the subtitles with the Style, Color, Fill, and Stroke attributes.
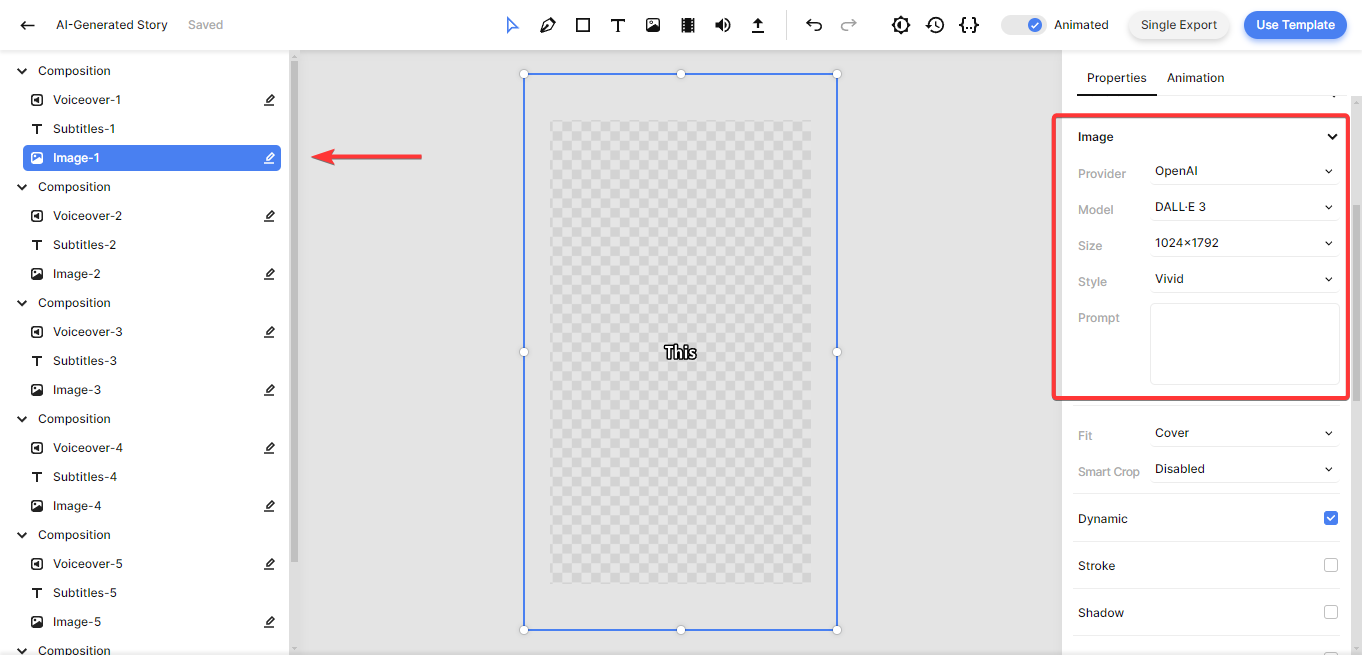
We've reached a crucial part of the template: the image elements. By default, this template uses Stability AI. However, we want to use DALL·E to generate AI images for our videos. Let's change that.
Select the Image-1 element from the left side menu. In the properties panel on the right, set the Provider to OpenAI:
We can now choose between DALL·E 2 and DALL·E 3. For best results, I recommend DALL·E 3. Check out OpenAI's documentation to see how they're different.
Given that we're making TikTok videos, set the Size to 1024x1792.
Style comes in two flavors; Vivid and Natural. With Vivid, the model tends to generate hyper-real and dramatic images. Natural produces more natural-looking images.
We'll leave the Prompt field blank because we'll provide this through Zapier.
Now that you know how to adjust the voiceover and image elements, apply these changes to the other compositions as well. To do this efficiently, hold down the Control key and select all the voiceover elements from the left side panel. Then, make the necessary changes as outlined above. Repeat this for all image elements.
And that's it! Your template is now ready for automation. Let's move on to the next step to set up the automated workflow in Zapier.
5. Set up the automation trigger
Every Zap starts with a trigger, which is the event that activates the process. You can choose any app for this, such as when a new record is added to an Airtable base or when a new row is added to your Google Sheet document. The trigger should also provide a topic for your TikTok videos.
For demonstration purposes, I'll show you how to use a Zapier table. This is one of the easiest ways to trigger a Zap, as it doesn't require any connections, installations, or paid services. But feel free to use an app that works best for you.
Log in to your Zapier account or sign up for free if you haven't already.
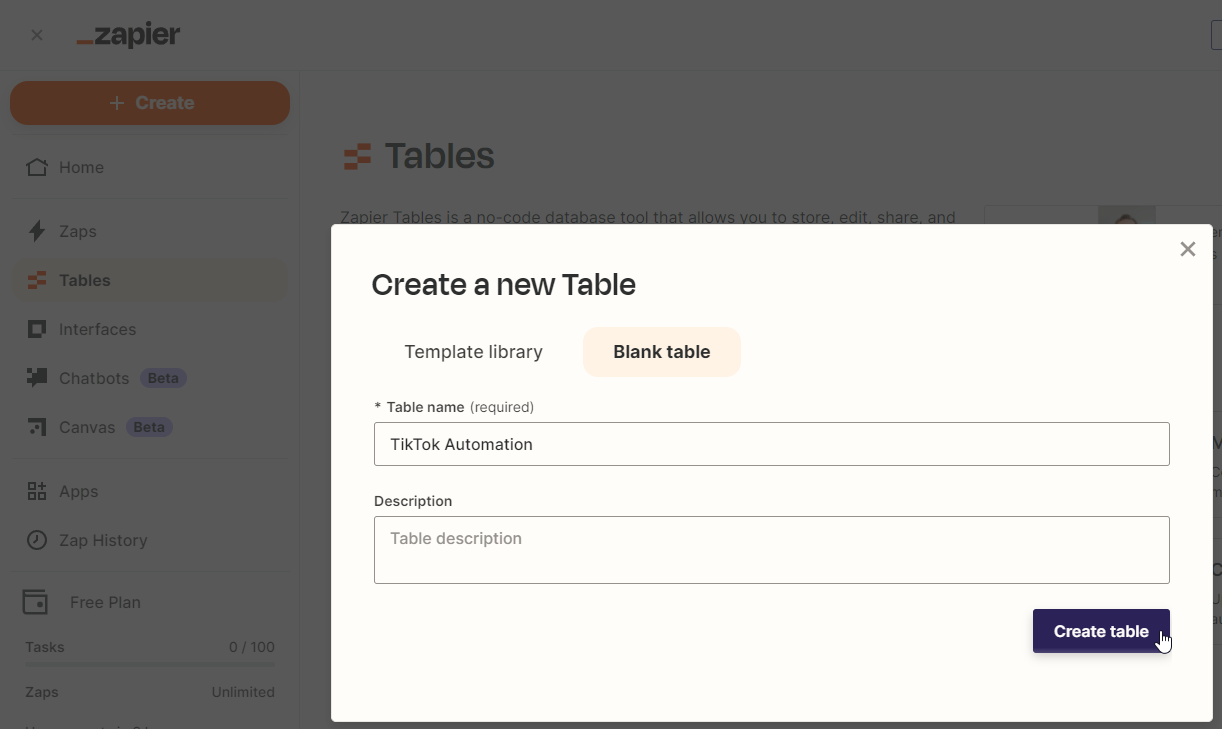
From the left menu, navigate to the Tables page. Click the Start blank button, enter a name, and hit Create table:
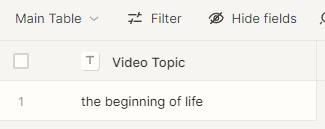
We only need to insert a video topic into our automation using this table. To do this, create a text field named Video Topic and enter the beginning of life for the first record:
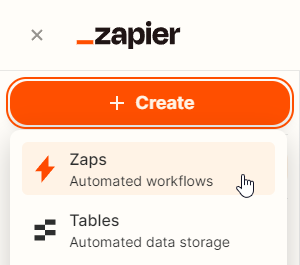
Now, return to your Zapier dashboard. Then, click the Create button, and choose Zaps:
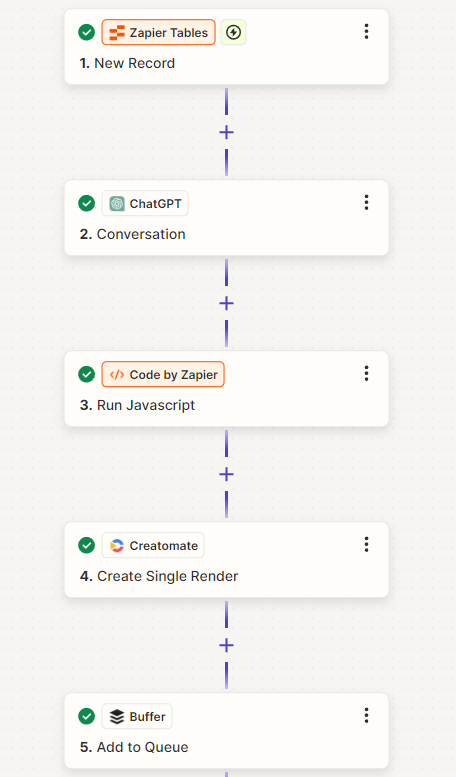
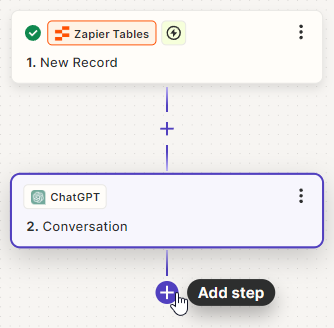
We're now in the workflow editor, where we'll set up our Zap. Start by clicking on the Trigger block. Search for and select Zapier Tables as the app, and choose New Record as the event. Then, click Continue.
In the Table ID field, select the table you just created:
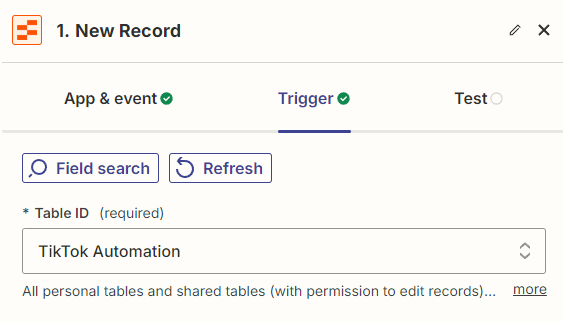
Then, click Continue.
Click Test trigger to see if Zapier can find our sample record. Once the test is successful, click Continue with selected record:
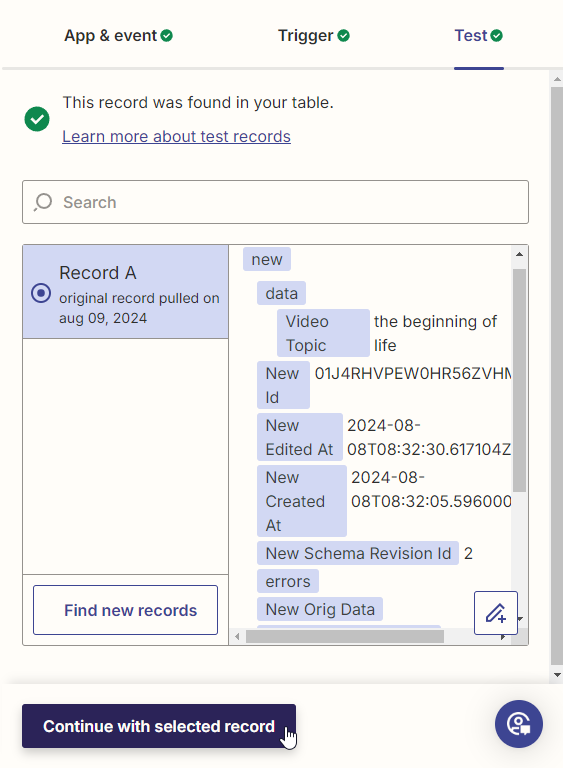
We can now use this video topic to set up the rest of our Zap.
6. Generate a video script with ChatGPT
This is where ChatGPT comes into play. In this step, we'll set up an action to create the content for our TikTok videos. Based on the topic provided by our trigger, ChatGPT will generate a script, caption, and image prompts for the background visuals.
Search for and select the ChatGPT app and choose the Conversation event. Continue by signing in to your OpenAI account using the API key from step 2.
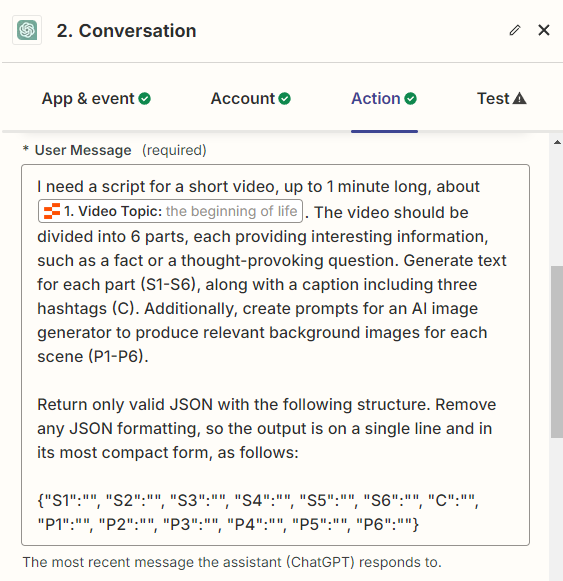
Next, copy and paste the following prompt into the User Message field:
I need a script for a short video, up to 1 minute long, about [topic]. The video should be divided into 6 parts, each providing interesting information, such as a fact or a thought-provoking question. Generate text for each part (S1-S6), along with a caption including three hashtags (C). Additionally, create prompts for an AI image generator to produce relevant background images for each scene (P1-P6).
Return only valid JSON with the following structure. Remove any JSON formatting, so the output is on a single line and in its most compact form, as follows:
{"S1":"", "S2":"", "S3":"", "S4":"", "S5":"", "S6":"", "C":"", "P1":"", "P2":"", "P3":"", "P4":"", "P5":"", "P6":""}
Make sure to replace [topic] with Zapier Tables -> Video Topic, like this:
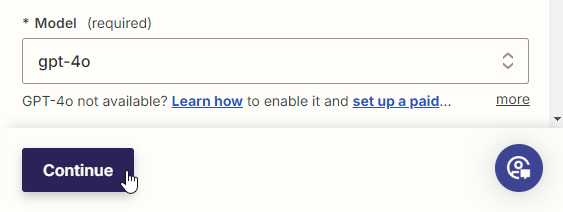
Select the Model you want to use, such as gpt-4o. You can keep the other settings as they are or adjust them as needed. Once you're finished, click Continue:
Click Test step to send a test request to ChatGPT. You can review ChatGPT's response under "Reply”:
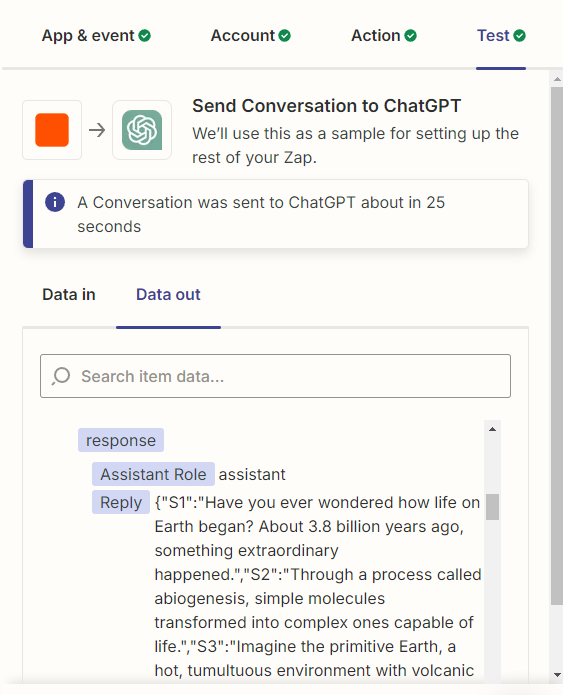
The response from ChatGPT is exactly what we requested – a JSON object with text for each scene, image prompts, and a caption. However, Zapier cannot interpret this format, so we'll need to convert it before generating the videos. That's what we're going to do next.
7. Parse the AI script
This step is simple, but essential. We're going to break down the JSON response into individual items.
Click + to add a step to your Zap:
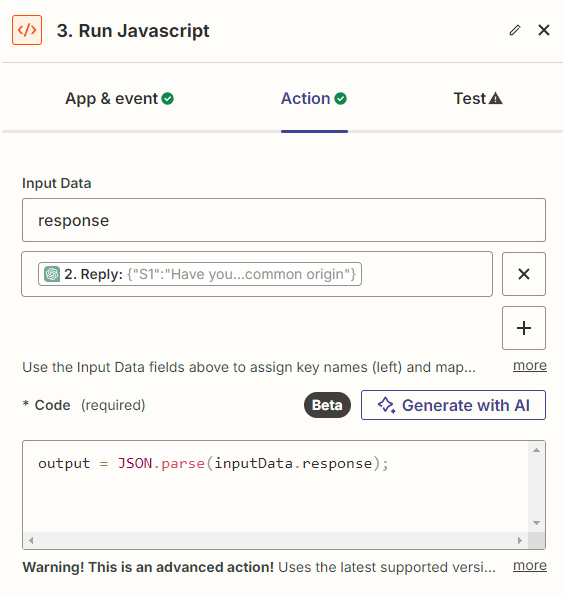
Search for the Code by Zapier app, and select the Run Javascript event. Then, click Continue.
Next, type response in the Input Data field, and select ChatGPT ->Reply. Then, in the Code field, copy and paste the following:
1output = JSON.parse(inputData.response);Here's what it should look like:
Then, click Continue.
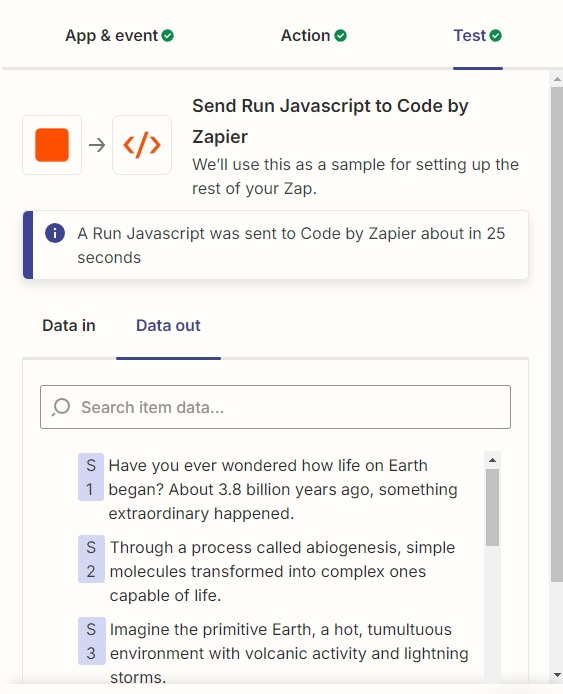
Click Test step to make sure everything works as expected. If the test is successful, you should see that the JSON has been broken down into single items: S1, S2, S3, etc.:
8. Generate videos
Here's where everything comes together. We can now map the script generated by ChatGPT to the video template we created earlier.
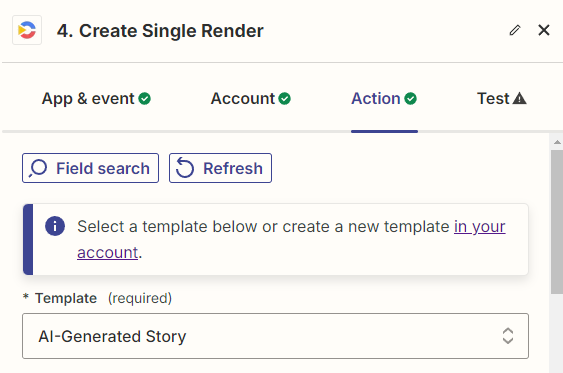
Click +, add the Creatomate app with the Create Single Render event. Continue by selecting your account or signing in with your project's API key, which you can find under Project Settings in your Creatomate dashboard.
Next, select the AI-Generated Story template in the Template field:
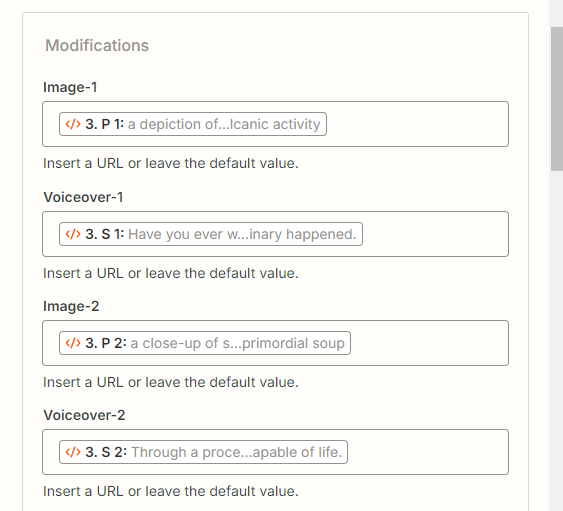
Zapier will now pull in the dynamic elements and list them under Modifications.
When text is passed to a voice-over element, it will be converted to speech. When text is passed to an image element, it will be used as a text-to-image prompt. This will be handled by our integration with ElevenLabs and OpenAI.
To instruct Creatomate to generate a video, connect the ChatGPT script to the template as follows:
- Set Image-1 to Code by Zapier -> P1
- Set Voiceover-1 to Code by Zapier -> S1
- Set Image-2 to Code by Zapier -> P2
- Set Voiceover-2 to Code by Zapier -> S2
- and so on.
When done, click Continue.
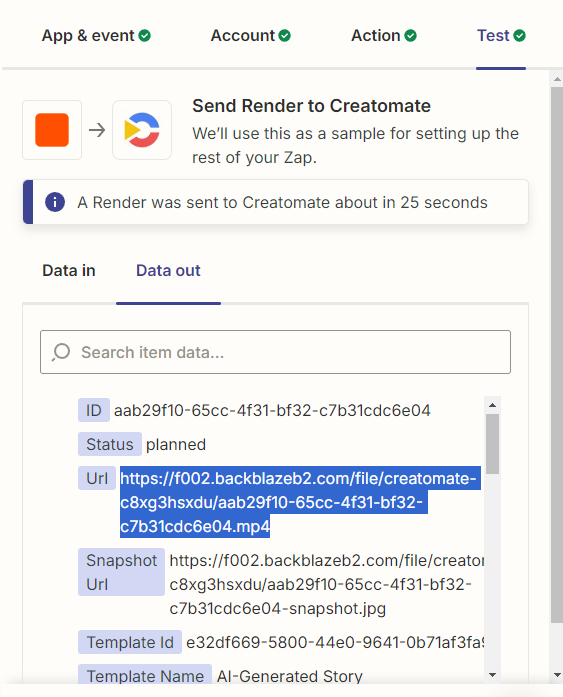
Click Test step to verify it works. If everything is set up correctly, Creatomate will perform several tasks. First, it invokes DALL·E to generate images. Next, it sends a request to ElevenLabs to produce the voice overs. It then auto-generates subtitles based on the AI voice overs. Finally, it compiles everything into a TikTok video.
This process may take a minute or two to complete. Once the video is generated, you can check it by visiting the URL provided in the test result. If you see a 'Not Found' message, wait a little longer as the video is still being processed. This only occurs during Zap setup. Once the workflow is active, it will wait for the video to finish before moving on to the next step.
Here's how my AI-generated TikTok video looks:
9. Post on TikTok (via Buffer)
At this point, we've successfully generated a TikTok video with AI voice overs, subtitles, and images. All that's left to do is send the video to Buffer to schedule it for automatic publishing.
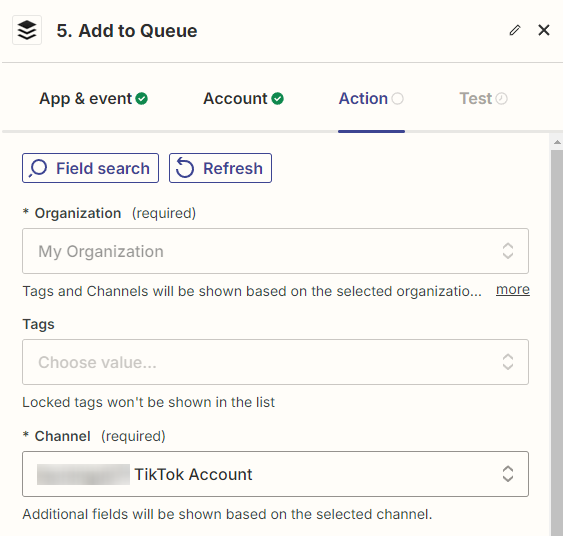
Add the Buffer app with the Add to Queue event. Continue by signing in to your Buffer account and the click Continue.
Select your Organization and Channel first:
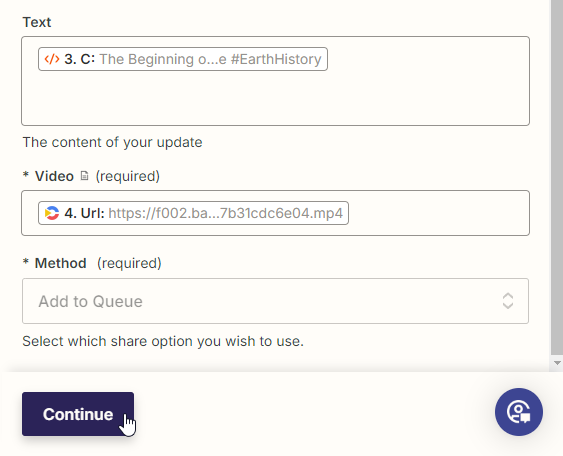
Next, to add the caption, select Code by Zapier - C in the Text field. In the Video field, select Creatomate -> Url. Lastly, for the posting Method, select Add to Queue to schedule the post for the next available time slot. When done, click Continue:
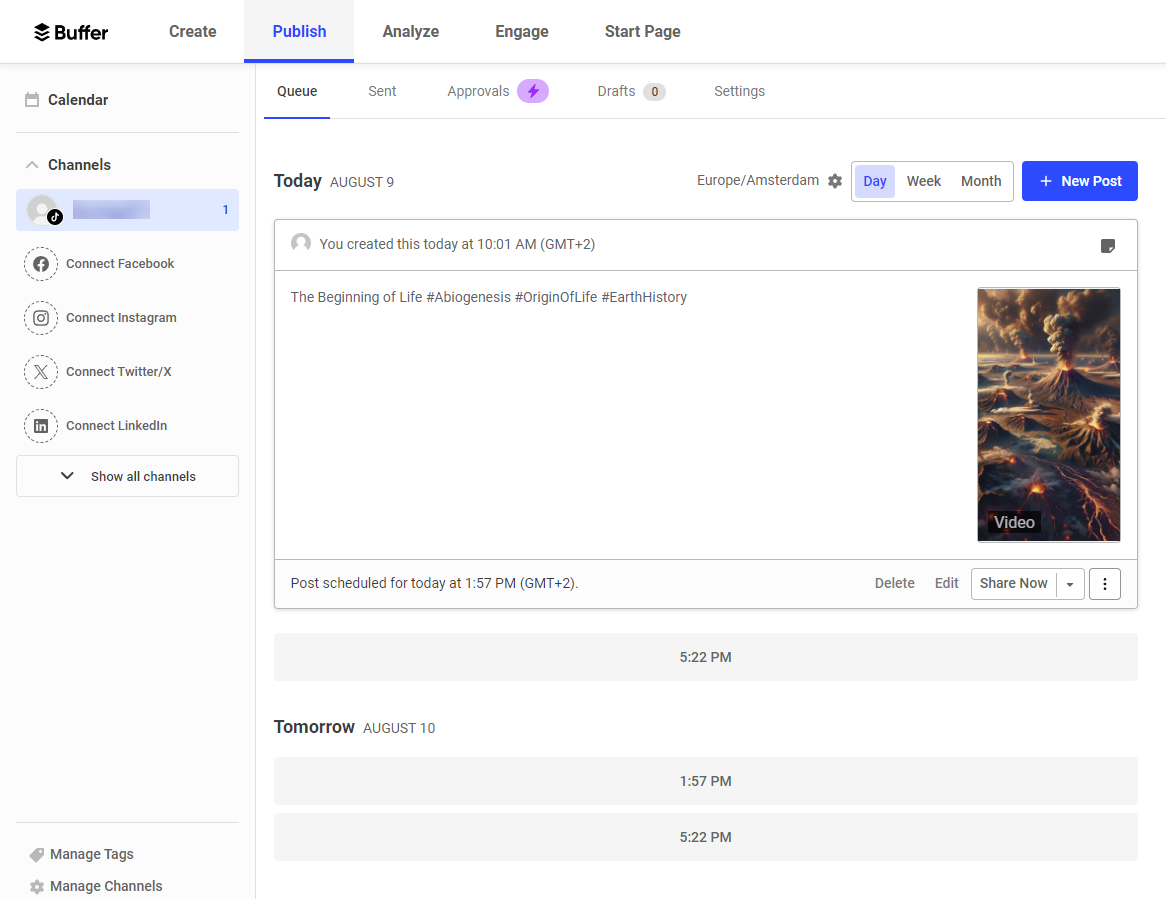
Click Test step to verify that Buffer can process your TikTok video. Once the test is successful, check your Buffer dashboard to confirm that the video has been scheduled:
Once you're happy with your automation, hit Publish and it'll be ready to go.
What's next for TikTok automation using AI?
And that's how you can automate your TikTok channel with AI-generated videos!
There are a few potential pitfalls to be aware of. Generative AI is getting better and better, but there's still a chance that ChatGPT or DALL·E may produce content that doesn't meet your expectations. A simple solution to this would be to receive the videos to your inbox first and posting them after you've reviewed and approved them.
If you're looking to automate more of your social media marketing, check out these tutorials next:
👉 How to Automate YouTube Shorts with AI-Generated Videos
👉 How to Automate Instagram Stories (No-Code Tutorial)
👉 Use ChatGPT to Auto-Create Social Media Content with Zapier
👉 How to Create Videos with AI Voice Overs using Zapier
👉 How to Use Stable Diffusion to Create Videos with Zapier
👉 How to Use AI Images from DALL·E to Create Videos with Zapier
👉 How to Automatically Add Subtitles to Videos using Zapier
You might also like these tutorials


Start automating today
Start with a full-featured trial with 50 credits, no credit card required.
Get started for free →