How to Create AI-Generated Videos in Bulk

In this tutorial, you'll learn how to batch-create YouTube Shorts, TikTok videos, and Instagram Reels with ChatGPT, including AI-generated voiceovers, images, and subtitles.
Take a look at the video below; from the story to the voiceover, subtitles, and even the visuals, everything was generated by AI. In this walkthrough, you'll learn to auto-generate these videos yourself – whether for use on YouTube, Instagram, or TikTok.
There is a reason they say garbage in, garbage out when it comes to AI. The quality of AI-generated videos mostly depends on your instructions. The goal here is to have a lot of control over the whole process; we'll let AI do 90% of the work, but we're still in charge and can intervene if necessary. Not happy with the AI results? Just fine-tune the AI-generated storyline a little and regenerate the video.
We'll also take a highly practical approach. We won't get into too much detail about each AI, but rather apply them and let their results speak for themselves. We will use ChatGPT for the storyline, ElevenLabs for the voiceovers, and DALL·E for the images. We will use a video template to put it all together. It's basically just integrating the AIs and connecting them all using a spreadsheet. You might be surprised at how simple it is.
The storyline video we'll create here is just one example of what you can accomplish by following this method. If you have a different type of short-form video in mind the process works essentially the same way. The video API we'll use, Creatomate, comes with an online video editor for you to create your own AI video templates.
Prerequisites
We'll use the following tools:
- Creatomate: to create a design and generate videos.
- ChatGPT: to create the storyboard for each video.
- DALL·E: to generate background images.
- ElevenLabs: to produce the voiceovers.
Tip: This tutorial focuses on bulk video generation using a spreadsheet. If you'd prefer to create similar videos entirely on autopilot, you can easily set up a no-code automation. Check out these tutorials to learn how to create AI-generated videos using Zapier or Make.com:
👉 Automatically Create Faceless Shorts using AI and Make.com
👉 Automate Videos for Shorts, Stories, and Reels using AI and Zapier
How to batch-create AI-powered videos?
To get started, we'll first create accounts for the AI tools we'll use: OpenAI for ChatGPT and DALL·E, and ElevenLabs for voiceovers. Then, we'll set up a video template in Creatomate, which will act as the design framework for our videos. As part of this setup, we'll connect to OpenAI and ElevenLabs using their API keys, so we can specify images and voiceovers directly in the template.
Next, we'll use ChatGPT to generate the video outline. Based on our template design, we'll instruct it to create text for narration, image prompts, and a social media caption.
Following that, we'll bring everything together by linking the ChatGPT-generated content to our template using Creatomate's spreadsheet feature. This allows us to produce multiple videos at once with just a few clicks. After the videos are generated, they'll be ready to download and use as needed.
Ready to dive in? Let's get started!
1. Create an OpenAI account for ChatGPT and DALL·E
Since we'll use ChatGPT to generate video outlines and DALL·E to create background images, we need an OpenAI account. The goal here is to create an account and retrieve an API key, which we'll use to connect DALL·E to Creatomate in step 3.
Create a free account or sign in if you already have one. Then, go to the API section:
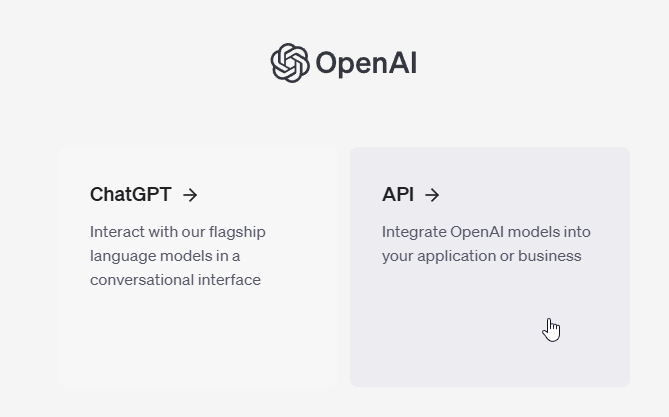
Next, navigate to your Dashboard and click the lock icon from the left side panel. Click on Create new secret key, give it a name, and click Create secret key:

Keep your API key on hand; you'll need it in a few moments.
2. Set up ElevenLabs for AI voiceovers
There are several text-to-speech tools available, but we find ElevenLabs to be one of the most advanced AI voice generators. It produces high-quality, lifelike audio with options for accents, emotions, and a variety of speaking styles.
It also offers several options for creating voices, including designing custom AI voices and even cloning your own. To keep things simple, I'll demonstrate how to use a voice from their extensive library. You can also choose a pre-made voice directly in the template editor, which we'll cover in the next step.
Note: OpenAI also provides its own Text-to-Speech service. While it has fewer customization options and its voice quality isn't as strong as ElevenLabs, it's a convenient choice if you prefer to stick with OpenAI instead of signing up for an ElevenLabs account. Here's a tutorial with step-by-step instructions.
Sign up for ElevenLabs or log in if you already have an account.
Navigate to the Voices page, then go to Library:

Here, you can choose a voice you want to use for your voiceovers. Click the Add button to add a voice to your account:
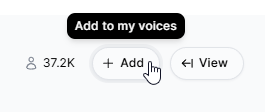
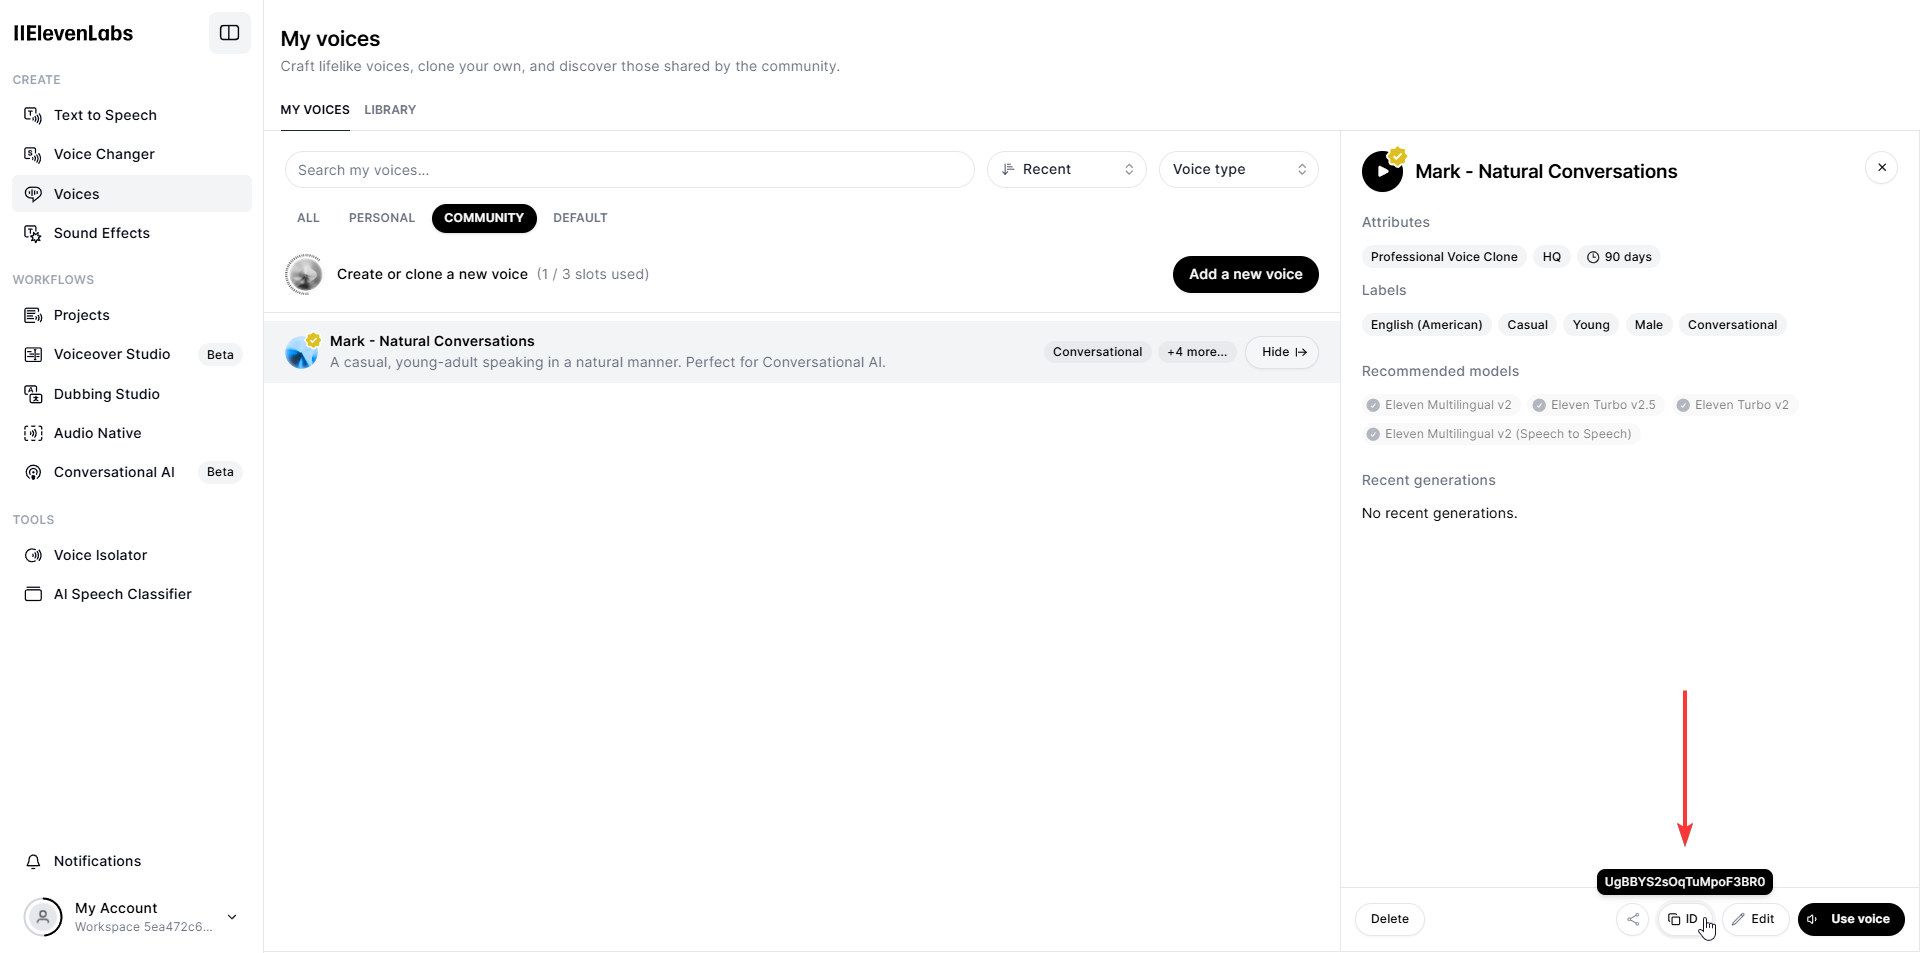
To use this voice, we need to specify it by its ID. Go back to the "My voices" page and open the Community tab, where you'll see the added voice. To get the voice ID, click View, then click the ID button to copy it. You don't have to do this right now, I just want to point out where you can find it:
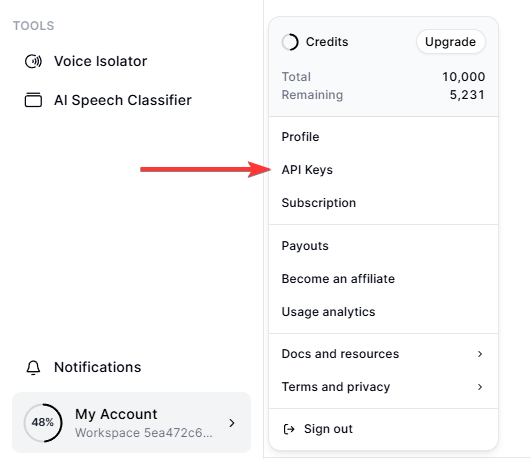
You'll also need your ElevenLabs API key to connect with Creatomate in the next step. You can create one by clicking on My Account in the bottom left corner, then choose API Keys:
Now that you've chosen a voice and created API keys for both ElevenLabs and OpenAI, let's move on to creating a video template.
3. Create a video template in Creatomate
Before creating a design for our videos, we first need to connect our OpenAI and ElevenLabs accounts.
Log in to your Creatomate account or create a free account if you don't already have one.
Click ... in the top left, then choose Project Settings. Under Integration, toggle the switch for OpenAI, paste your API key, and click Confirm. Do the same for ElevenLabs. Once you're done, close the Projects Settings menu:
Once both integrations are set up, Creatomate can send requests to ElevenLabs for voiceovers and to DALL·E for images to use in your videos.
Now, let's create a template. Navigate to the Templates page, and click the New button to open the template gallery. Go to the Voice Overs category and select the AI-Generated Story template. As we're creating short-form videos, choose the 9:16 Vertical size, then click Create Template to open it in the editor:
The template editor might seem intimidating at first, but don't worry – it's pretty easy to get started. Let me guide you through it.
If you've used video editing software before, much of this will feel familiar. However, Creatomate's editor is designed specifically for video automation, so it works a bit differently. Instead of creating a final video, you build a reusable design, called a template, which can generate endless unique videos with different content. Every part of the video is customizable, including text, images, subtitles, and more. This provides you with a huge amount of freedom when it comes to video automation. Even the templates themselves are open-source JSON, which can be generated through automation.
When we look at our AI-Generated Story template, you'll see that it contains six compositions, each corresponding to a scene in the video. Each composition includes a voiceover, subtitle, and image element. As you play with the template in the editor, you'll notice placeholders for the voiceovers, subtitles, and images. This is because the actual AI-generated content will be created during our automation process in step 6. If it doesn't make sense yet, don't fret – you'll see exactly how it works soon.
Our template is almost ready to use. The only things left are to specify the voice for the voiceover (optional) and configure the image elements for DALL·E. I'll demonstrate how to do this with the first composition, and then you can apply the same steps to the remaining five compositions.
In the left side panel, click on the Voiceover-1 element. Then, navigate to the properties panel on the right, where you'll find the Audio property. This is where you can customize the voiceover. The Provider is already set to ElevenLabs. Under the Model setting, you'll see four different text-to-speech models. For the best results, stick with Multilingual v2, as it delivers high-quality speech synthesis and supports many languages.
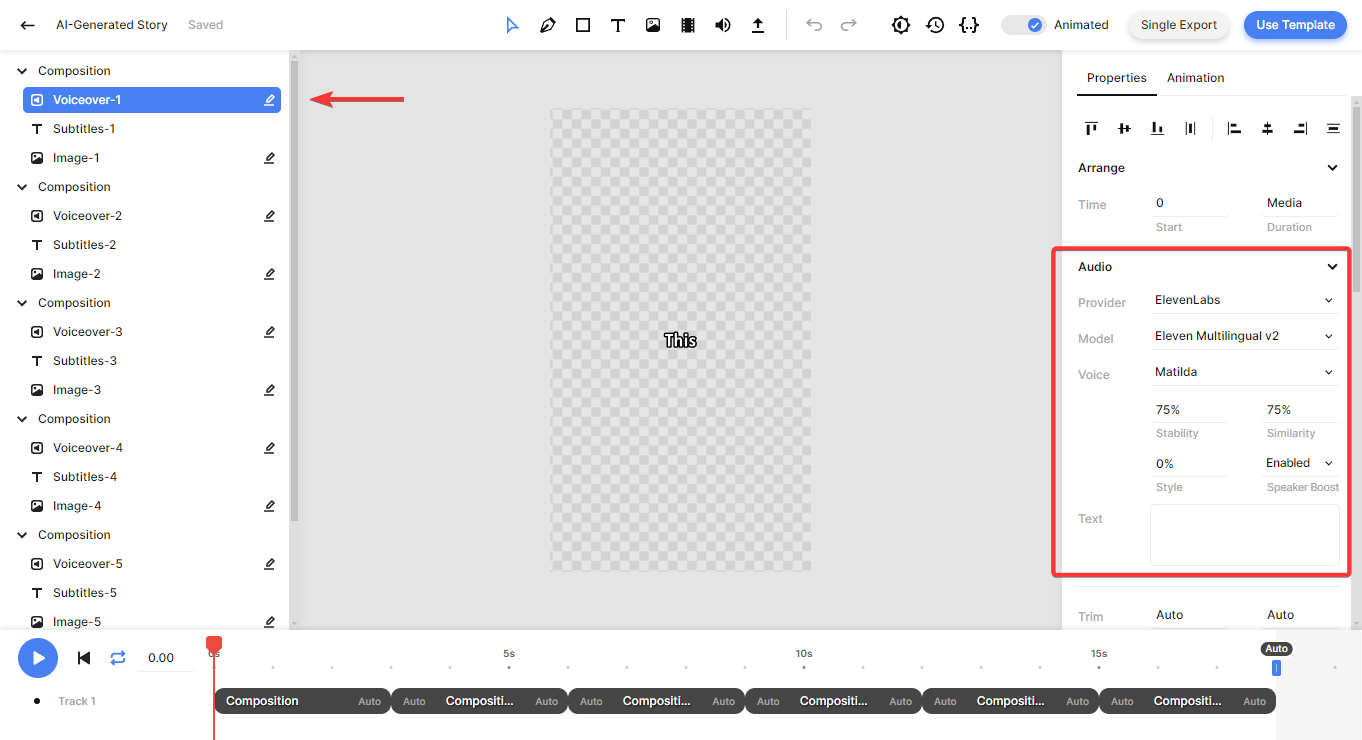
For the Voice option, Matilda is the default, a pre-made voice from ElevenLabs. If you'd like to use a different pre-made voice, select one from the drop-down menu. You can listen to samples of each voice on the Speech Synthesis page in your ElevenLabs dashboard. And if you prefer to use a voice from their library, click Matilda, scroll up, select Custom Voice, paste the voice ID, and click OK:
You can also adjust Stability, Similarity, Style, and Speaker Boost. These AI parameters help you fine-tune the voiceover generated by ElevenLabs. For instance, Stability controls the level of emotion and randomness in the voice. Unless you have a specific need to adjust these, we recommend leaving them at their default values, which work nicely for most purposes. For more information on each setting, refer to ElevenLabs' Voice Settings documentation.
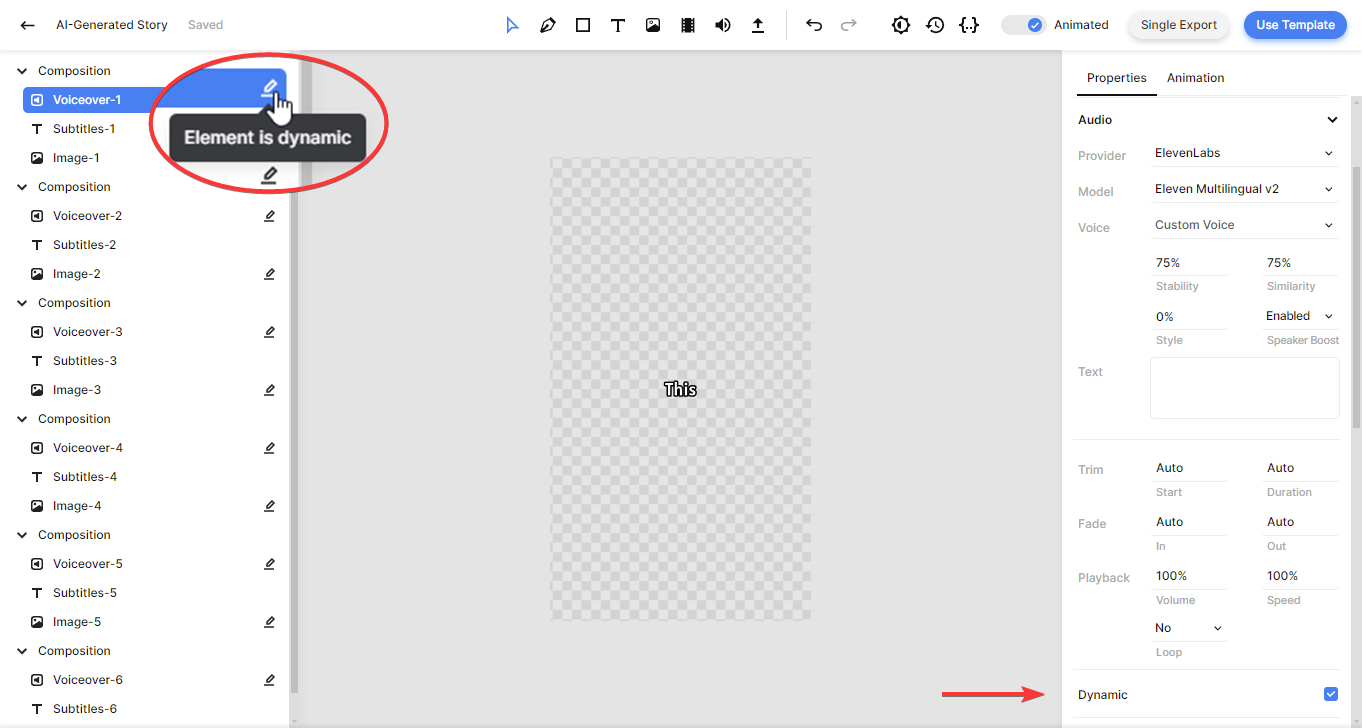
Another important aspect of the voiceover elements is that they're marked as dynamic, just like the image elements. This enables us to input a dynamic text prompt to automatically generate the AI content.
Now, let's take a quick look at the subtitles. No changes are needed; I'll just show you how they work.
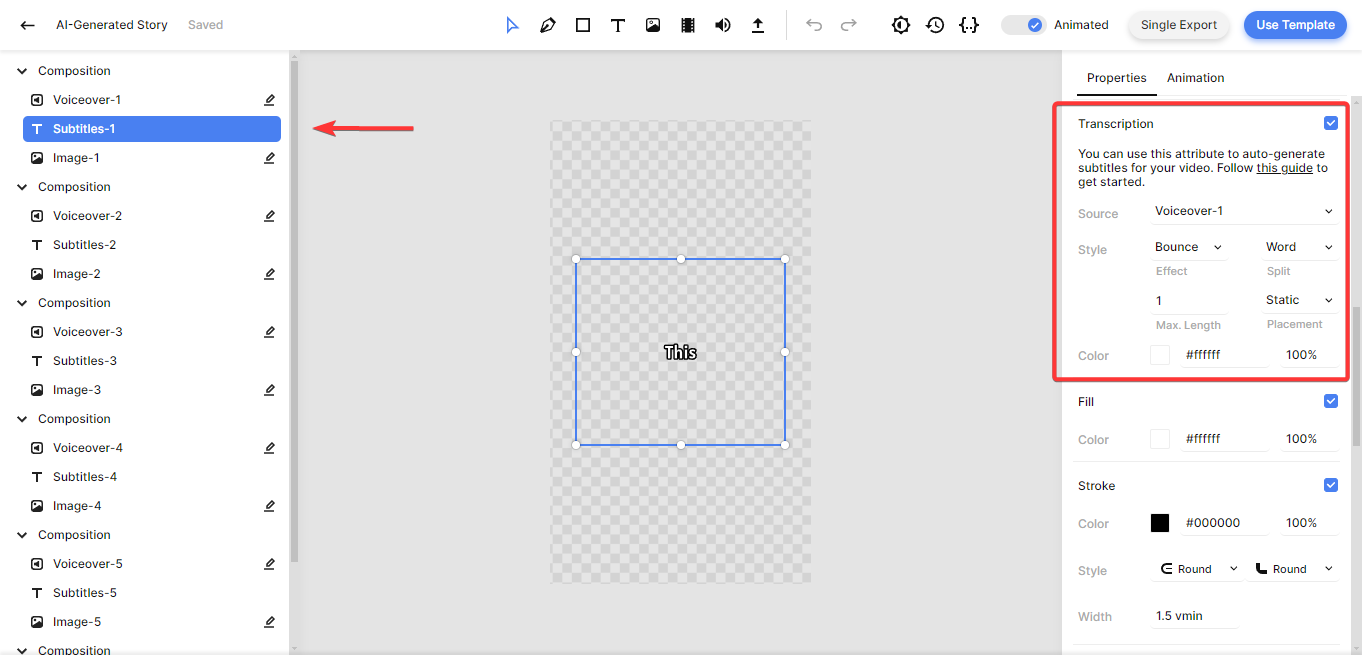
Select the Subtitles-1 element, then scroll down to the Transcription property in the properties panel. Here, you have the option to customize the subtitles' styling and animation. You'll also notice that the Source is set to the Voiceover-1 element, which tells Creatomate's auto-transcription feature to generate subtitles from that voiceover. If desired, you can further customize the look and feel of the subtitles using the Style, Color, Fill, and Stroke attributes.
So far, we haven't needed to make any changes to this template. But now we've reached an important part: the image elements. By default, this template is set to Stability AI. However, we want to use DALL·E to generate AI images for our videos. Let's change that.
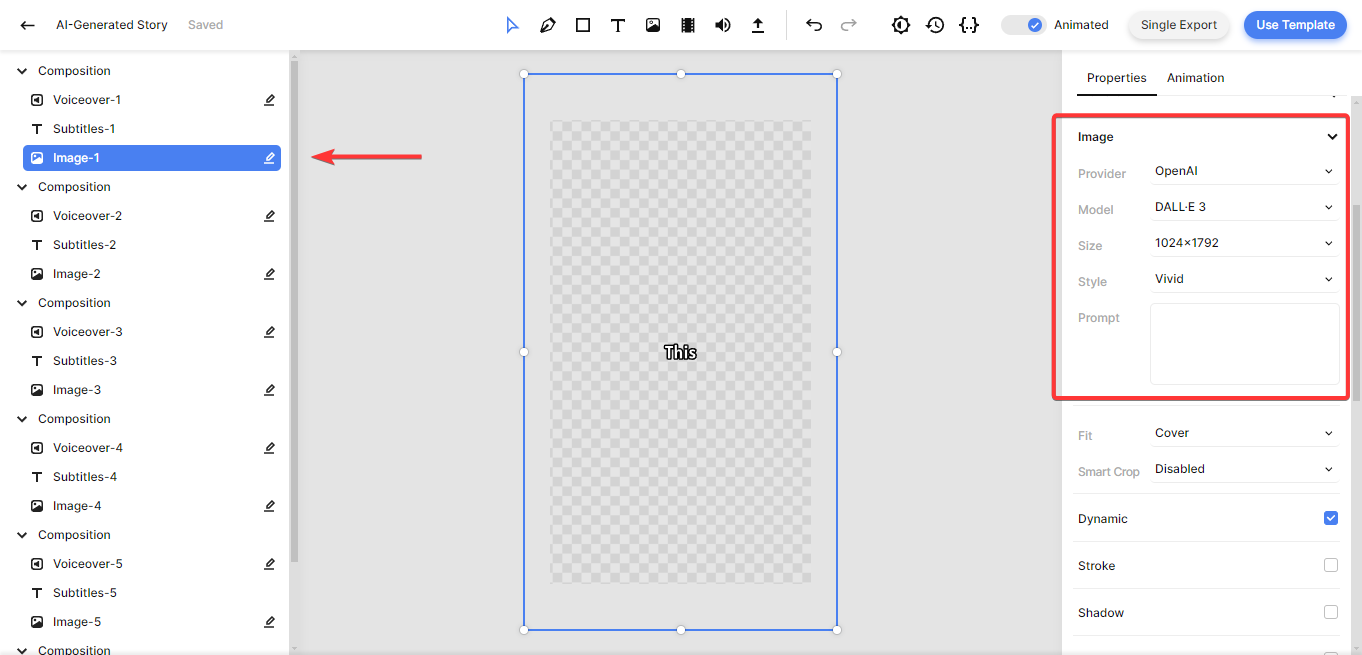
Select the Image-1 element on the left, then go to the properties panel on the right and set the Provider to OpenAI:
Now, we can pick the Model, choosing between DALL·E 2 and DALL·E 3. For best results, I recommend using DALL·E 3. If you'd like to learn more about the differences between the two, check out OpenAI's documentation.
Since we're creating vertical videos, set the Size to 1024x1792.
The Style option offers two choices: Vivid and Natural. Vivid generates dramatic, hyper-realistic images, while Natural produces more realistic and natural-looking visuals. Select the style that best suits your needs.
You can skip filling out the Prompt field manually. Because the image elements are dynamic, we'll automatically insert a text-to-image prompt for each video using the spreadsheet.
That's it! Now that you know how to adjust the voiceover and image elements, go ahead and apply these changes to the other compositions as well. To do this efficiently, hold down the Control key and select all the voiceover elements in the left panel, then make the necessary adjustments as described above. Repeat this process for the image elements.
Your template is now ready for automation.
4. Generate video storyboards with ChatGPT
Now it's time to use ChatGPT to generate video content. We'll give it a topic for our batch of videos and ask it to create stories, image prompts, and a social media caption. Feel free to customize the prompt to meet your own needs.
Go to ChatGPT and start a new conversation. Then, copy and paste the following prompt:
I want to create a batch of 30 AI-generated shorts for YouTube, TikTok, and Instagram. The theme of these videos is 'Geography', and each video should follow this structure:
- Scene 1: Start with an engaging introduction, such as, "Ready to learn more about [city/country/etc.]?"
- Scene 2: Share an interesting fact, tip, or piece of information about the topic.
- Scenes 3, 4, 5, and 6: Provide additional facts, tips, or details related to the topic.
Generate the text for each video. It will be narrated by an AI voiceover, and the total video duration should be under 60 seconds. Each scene should also include an AI-generated image, so provide prompts for producing these images. Additionally, write a social media caption for each video.
Please output all of this information as a downloadable CSV file with the following columns: Caption, Voiceover-1, Image-1, Voiceover-2, Image-2, and so on for all scenes.
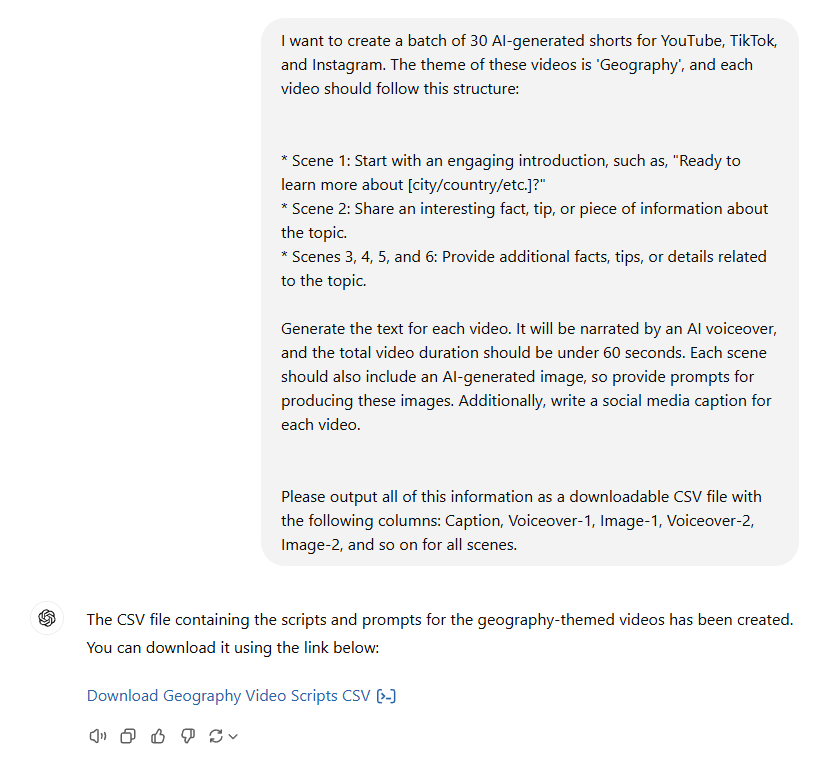
After sending this prompt, ChatGPT returns a CSV file, as shown in the screenshot above. Click the link to download it to your device.
Tip: Sometimes, ChatGPT may respond with a message like, "I can't do more advanced data analysis right now." If that happens, try asking it to present the information as a table with the same columns. If it still struggles, request a smaller number of rows, such as five at a time. Combine these smaller batches into a single file by copying and pasting them into a Google Sheets document. From there, you can easily download the sheet as a CSV file, achieving the same result: a CSV file containing the content for your videos.
5. Set up a spreadsheet
Back in Creatomate, click the Use Template button in the top right corner of the template editor. Choose the Spreadsheet to Video option, select Create new feed, and click Continue:
We've created a new spreadsheet, also known as a feed, to produce videos in bulk. This feed is linked to our video template, with each dynamic element corresponding directly to a column in the spreadsheet.
Each row in the feed will be turned into an AI-generated video. Here's how it works: the text entered in the voiceover columns gets converted into speech, while the text in the image columns is used as prompts to generate visuals.
Before uploading our CSV file, let's add a column for the captions. Although the captions won't appear in the videos, it will be useful when exporting the videos in step 7. To do this, click on Edit Columns, then Add column. Rename the new column to Caption and drag it to the top so it appears as the first column. Click OK to save your changes:
Now, let's upload the video content created by ChatGPT. Click Import Data and upload the CSV file you downloaded previously. Since ChatGPT has already named the items to match the template's dynamic elements, the system should automatically map the columns correctly. Check the mapping and make any changes if needed. Then, click Continue. If you plan to update the feed later, select a merge column – I recommend using the Voiceover-1 column for this. Click Continue to proceed. Finally, review the summary to make sure everything looks correct, then click Import Data:
Once the data is inserted, click Save:
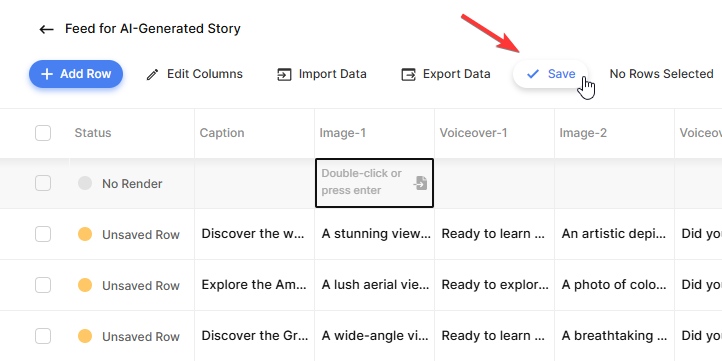
Tip: Have you noticed the first row is empty? This is because it was generated with template values, which were placeholders and didn't contain any data. You can simply ignore this row or delete it.
If you wish, you can edit the data in the feed or manually add new rows. You can do this now or at any time later.
In the next step, we'll start producing the videos!
6. Produce the videos
It's time for a test! Let's create our first video to make sure everything works as expected.
Click on a cell in the second row to select it. On the right, you'll see a preview of the video. Since the AI content is generated during the creation process, the preview shows only placeholders, similar to the template in the editor. Now, click the Create render button below the preview to start generating the video:
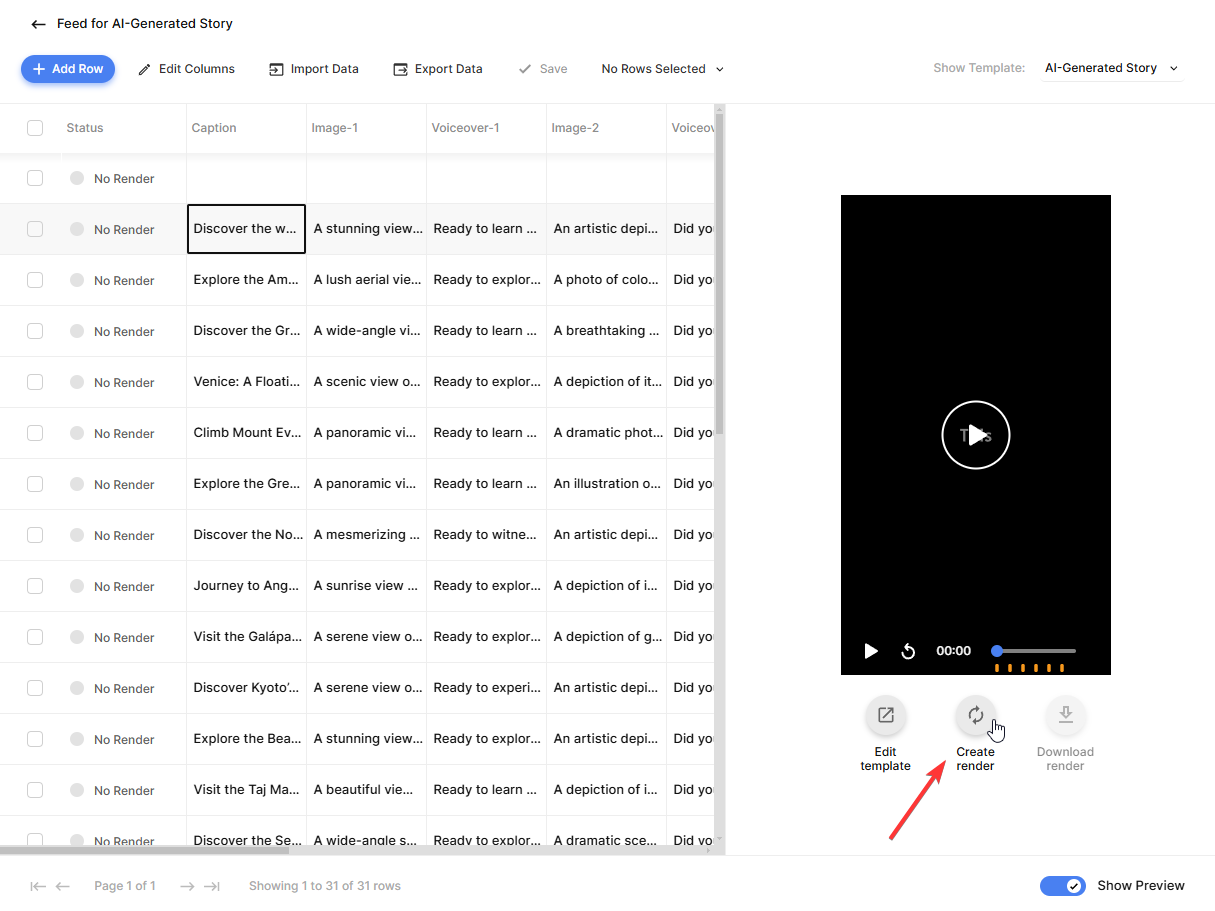
In the status column, “No Render” will change to “Rendering”. Creatomate then sends requests to ElevenLabs for the voiceovers and to DALL·E for the images. Once the status changes to “Transcribing”, Creatomate's auto-transcription feature will transcribe the voiceover and generate subtitles. The status will switch back to “Rendering” as Creatomate combines everything together. Finally, when the status shows “Rendered”, the video is ready.
To view the video, click the Download render button below the preview. The video will open in a new tab.
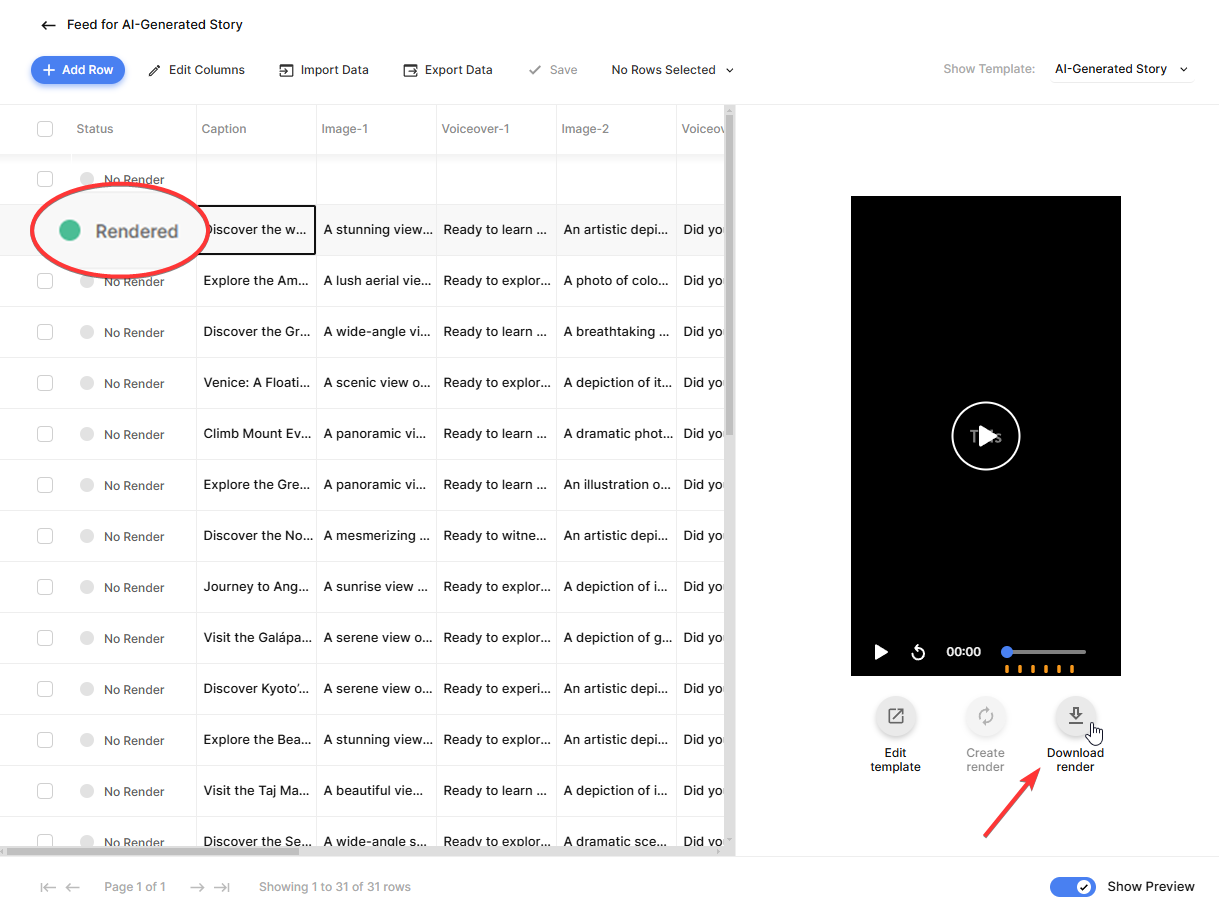
If everything went as planned, the video will include voiceovers, subtitles, and background images. Here's how my video turned out:
Now that you've confirmed the AI integrations are working correctly, you can generate multiple videos at once. Simply select the rows you want, click N Rows Selected, and then click Create Renders. The video generation process may take a bit longer, as ElevenLabs and OpenAI have their own request limits. However, Creatomate manages everything for you, so once the process starts, no further action is needed on your end.
The videos are ready once all the rows show ”Rendered”. Next, I'll show you how to download them.
Tip: If the rendering process did not go as expected, the status for that row will indicate as ”Failed”. When this occurs, hover over the label to see the error details and instructions for fixing it. The issue may be related to integrations with ElevenLabs or OpenAI, such as an invalid API key or reaching billing limits.
7. Download the videos
There are two ways to access your videos, and I'll guide you through both. Choose the download option that best fits your needs based on how you plan to use the videos.
The easiest way is to download the videos as a ZIP file to your device. From the same N Rows Selected menu, choose Download Renders. You can select a column, such as Voiceover-1, to use as the filename, then click Download:
The other option is to export the entire feed, including any columns you need, such as the captions. Instead of downloading the video files, you'll receive links to them. You can then import the exported feed into tools like Google Sheets to help create your content calendar.
Click Export Data, select the columns you want to include, and then click Continue. Next, choose the AI-generated Story template to include these renders and click Continue again. Finally, review the summary to ensure everything is correct, then click Export Data to finish:
The videos are now yours to use in any way you wish.
What's next for auto-generated AI videos
Congratulations on completing this tutorial! You now know how to create your first batch of AI-generated videos. Whether you're looking to create faceless shorts or any other type of video, the template editor gives you the flexibility to design exactly what you need. Just provide ChatGPT with the right instructions, and with the power of AI tools like ElevenLabs and DALL·E, plus Creatomate, the work will be done for you!
This spreadsheet-based approach is perfect for creating videos and images at scale. But sometimes, you may want the entire process to run on autopilot. For example, you might want videos generated at specific times of the day, whenever a new article is published, or as soon as a new row is added to a Google Sheets document or Airtable base.
You can easily set this up using a no-code automation platform like Zapier or Make.com. Just provide a topic for each video, and it will automatically be generated in minutes. As a bonus, the videos can also be posted directly to your chosen social media platforms!
Check out the tutorials below for step-by-step instructions, or visit our blog page to explore the full collection of tutorials.
👉 How to Automate YouTube Shorts with AI-Generated Videos
👉 TikTok Automation: How to Create TikTok Videos using AI
👉 How to Automatically Convert Text to Video using AI and Make.com
👉 Automate Videos for Shorts, Stories, and Reels using AI and Zapier