How to Auto-Generate Videos using Google Sheets and Zapier

Learn how to use Zapier to automate video creation from Google Sheets data, generating content for social media, personalization, advertising, and more.
No matter what kind of information is kept in your Google Sheets, whether it's products, leads, tips, quotes, or anything else, you can easily automate the creation of videos using a simple Zapier workflow.
This tutorial will teach you how to use Zapier to transform text and video clips from Google Sheets into short-form video content. To automatically generate these videos, we'll be using Creatomate, which is a video editing API. Once the videos are generated, the rows in Google Sheets will be updated with a link to the videos. Alternatively, you can also share the videos on social media, send them via email, or process them with any other app supported by Zapier.
We will create videos similar to the one below. However, don't forget to browse the gallery for ready-made templates for social media, advertising, quotes, real estate, prospecting, eCommerce, and more. And also try out the editor if you wish to create your own video designs.
Note: This tutorial focuses on automated video generation, but the same process can be used for creating images. The only difference is that in step 1, you'll need to create a static image template instead of a video design.
Prerequisites
Here are the tools we'll be using:
- Creatomate: to create a template and generate videos.
- Google Sheets: to organize video content and store links to the generated videos.
- Zapier: to automate the video creation process.
How to create videos with Google Sheets and Zapier?
We'll start by designing a template in Creatomate, which will serve as the foundation for the videos we'll produce. Then, we'll set up a Google Sheets document to organize the content for each video.
With these ready, we'll head to Zapier to build an automated workflow. Our Zap will trigger whenever new rows are added to Google Sheets. Creatomate will then use that data to fill in the template and generate a video. Finally, a link to each video will be added back to the spreadsheet – or, if you prefer, shared directly on social media, email, etc. Here's how our Zap will look:
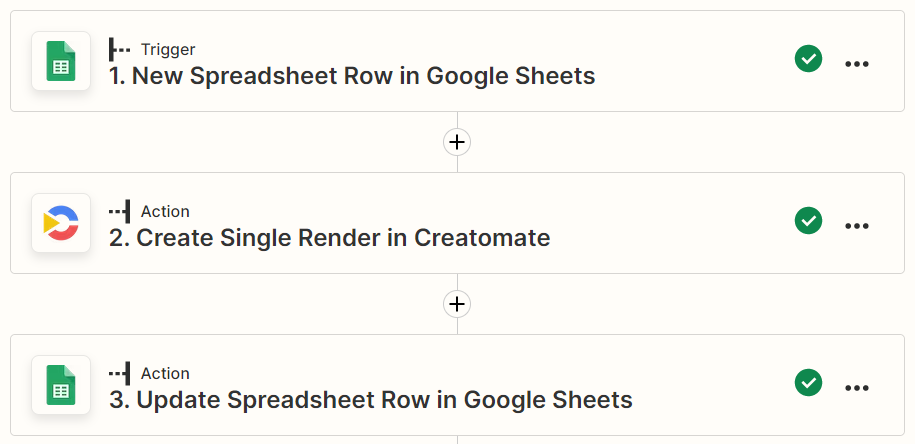
Tip: If you'd rather convert your entire Google Sheets document into videos all at once, you can do so as well. Take a look at this tutorial for step-by-step instructions.
All right, let's get started!
1. Create a video template in Creatomate
Log in to your Creatomate account or sign up for free if you don't already have one.
Go to the Templates page and click the New button to open the template gallery. You can choose one of these ready-made templates, but you can also design your own from scratch. For this tutorial, let's use the Quick Promo template from the Featured category. Select a size, like 1:1 Square, and click Create Template to open it in the editor:
Now, let's take a look at the left-hand panel, where we can find the elements that make up our template. Certain elements, like Text-1, Text-2, and Video, are marked as dynamic. This means we can replace them with different content – in this case, data from our Google Sheets document – allowing us to automatically generate unique videos each time:
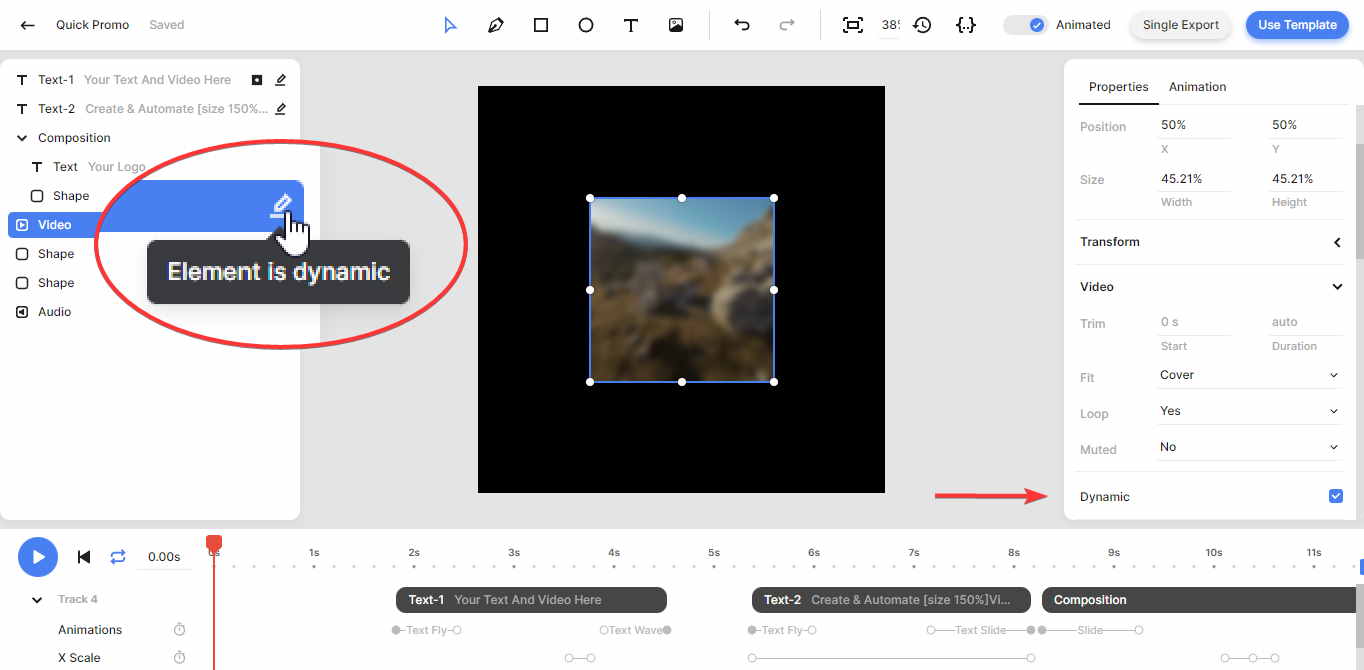
You can further customize the template if you'd like, but that's beyond the scope of this tutorial. For more details on using the editor, check out this quick guide.
With the template set, let's proceed to the next step: setting up our spreadsheet.
2. Set up a Google Sheets document
Log in to your Google Drive account and create a new spreadsheet. Let's name it Video Generation.
For the first row, we'll add the following headers: Text-1, Text-2, Video, and VideoURL.
Next, we'll create a sample row that we'll use to set up the automation in Zapier. In the second row, enter this data:
- Text-1 -> Hi Google Sheets users 👋
- Text-2 -> Zapier makes creating videos fast and easy.
- Video -> https://creatomate-static.s3.amazonaws.com/demo/video1.mp4
- Leave the VideoURL cell blank for now, we'll update it with the link to the video in step 5.
Your Google Sheet should look like this:

Add as many rows to your spreadsheet as needed. You can enter your data now or at any time that works best for you.
Now that we have at least one sample record in our document, let's move on to setting up the automated workflow.
Tip: If you want to create personalized content, such as sales videos for cold outreach, or social media content like shorts, stories, and reels, you can customize your spreadsheet to fit these needs. For example, set up columns to populate the dynamic elements of your template, add a column for your prospect's email address if you plan to send videos directly via email, or add a column for captions that you can link to during the posting setup (step 5).
3. Trigger your Zap for new spreadsheet rows
Log in to your Zapier account or create a free account if you don't have one yet.
From your dashboard, click Create, then choose Zaps:
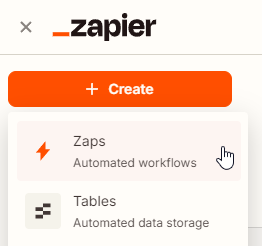
Once you're in the Zap editor, click on the Trigger block. Search for and select Google Sheets as the app, then choose New Spreadsheet Row as the trigger event. If this is your first time using Google Sheets with Zapier, connect your account by signing in. If you've used it before, select your account from the list:
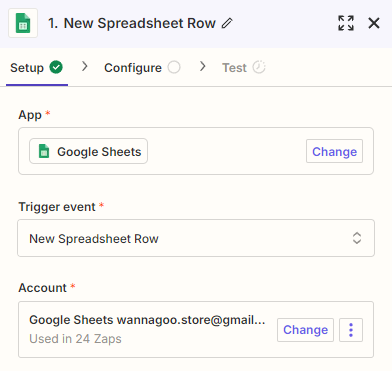
When done, click Continue.
To configure the action, select your Video Generation spreadsheet with the Sheet1 worksheet:
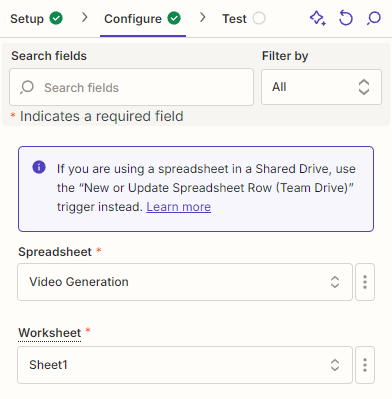
When done, click Continue.
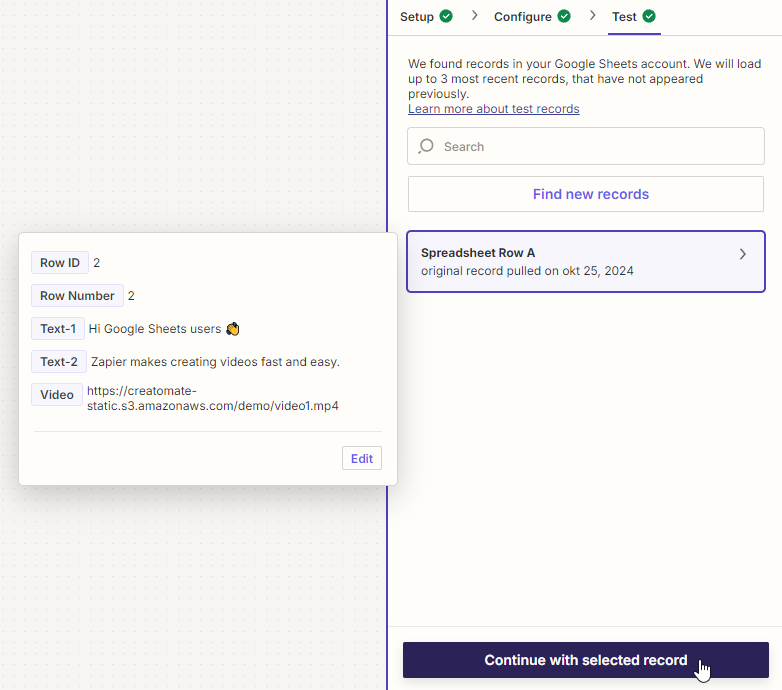
Then, click Test trigger to make sure Zapier can find the sample row. When the test is successful, click Continue with selected record and move on to the next step:
4. Generate the video
In this step, we'll set up an action for Creatomate to generate a video. To do this, we'll map the data from our Google Sheets row to the template we created in step 1.
Search for the Creatomate app and select the Create Single Render action event. Next, connect your account by entering your project's API key, which can be found in the Project Settings of your Creatomate dashboard:
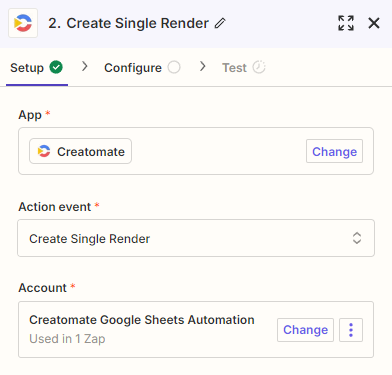
Then, click Continue.
To configure the action, select the Quick Promo template in the Template field first.
Zapier will then automatically detect the dynamic elements and list them under Modifications.
Next, map the Google Sheets data to the template as follows:
- Set Video to Google Sheets -> Video
- Set Text-1 to Google Sheets -> Text-1
- Set Text-2 to Google Sheets -> Text-2
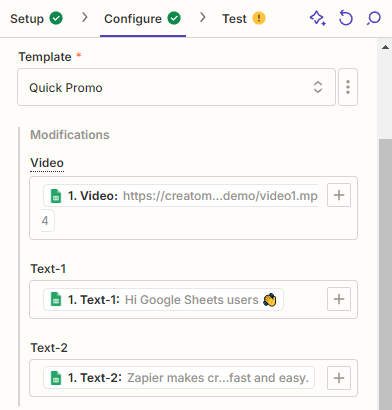
When done, click Continue.
Click Test step to send a request to Creatomate and confirm that it can generate a video from the provided data. You can verify this by visiting the URL given in the test result. Keep in mind that the video may take some time to render, so if you receive a "Not Found" message, simply reload the page. This will only happen during testing; once the Zap is live, the workflow will wait for the video to finish rendering before proceeding to the next step:
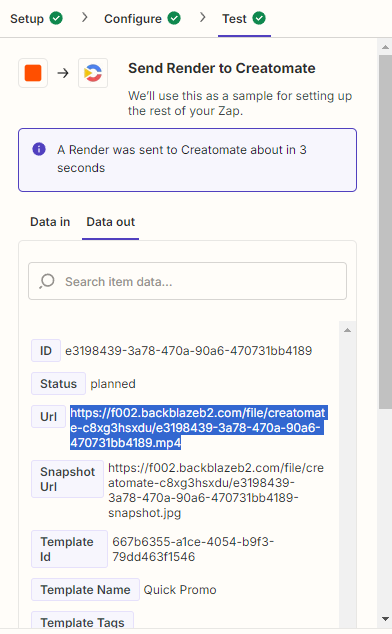
If the test is successful, we can move on to the final step of this tutorial.
5. Further process the video
In this step, we'll connect an app to process the videos. As an example, I'll show you how to upload the video link back to the spreadsheet. If you've created personalized videos or social media content, take a look at one of these tutorials to learn how to send videos via email or post them on Instagram, YouTube, TikTok, or Facebook.
Click + to add a step to your Zap:
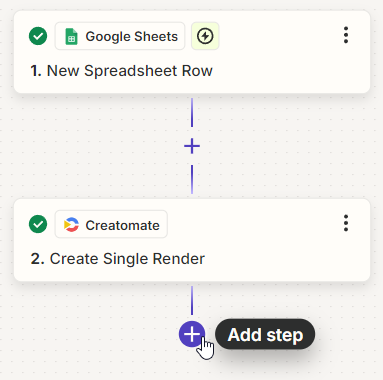
Search for the Google Sheets app, but this time select the Update Spreadsheet Row action event. Make sure to choose the same connection you used with the first Google Sheets module:
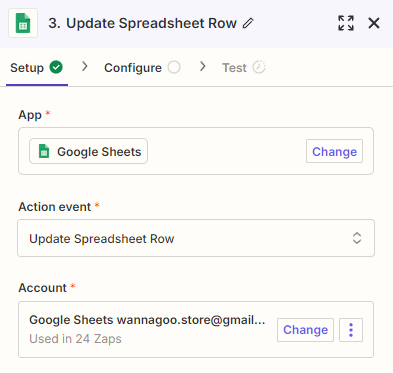
When done, click Continue.
To set up the action, select the same drive, spreadsheet, and worksheet as you did with the trigger:
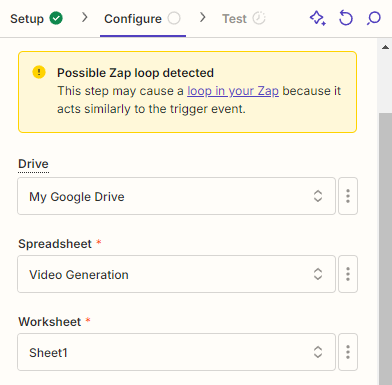
Note: You will likely receive a warning about a "Possible Zap loop detected". However, in this step, the rows are only being updated, while the trigger is set for new rows. This should work without any issues.
Then, select Google Sheets -> Row ID from the Custom tab in the Row field:
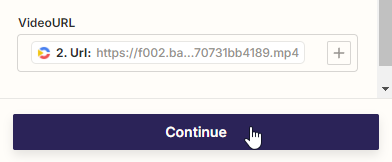
Now, select Creatomate -> Url in the VideoURL field. When done, click Continue:
Finally, click Test step to make sure everything works as expected. Then, let's go back to the spreadsheet to see if Zapier successfully updated the row with the video link:

Once the test is successful and you're happy with your workflow, click Publish to activate your Zap.
What's next for content automation using Google Sheets
That's it! You now know how to automatically generate videos using Google Sheets and Zapier. It's pretty simple, right? However, you might run into issues with the "New Spreadsheet Row" trigger – especially when you manually enter data and Google Sheets saves it automatically, causing the Zap to trigger before the row is fully completed. In this case, it's helpful to use the "New or Updated Spreadsheet Row" trigger instead. This allows you to link a specific column, ensuring that the Zap only activates when that item is filled in. For more information, check out Zapier's Help Center.
If you want to take things to the next level, consider adding generative AI. With a simple automated workflow, you can create faceless TikTok videos and YouTube Shorts complete with voiceovers, images, and subtitles – just by entering a video topic. Check out this detailed tutorial that walks you through the process step by step.
And here are some other tutorials you might find useful:
👉 Using AI and Automation to Create Social Media Videos Every Day
👉 How to Automatically Turn Blogs and Articles into Videos using AI
👉 Auto-Generate Videos & Images in Multiple Languages with Zapier
👉 How to Use AI Images from DALL·E to Create Videos with Zapier
👉 How to Create Videos with AI Voice Overs using Zapier
👉 Use ChatGPT to Auto-Create Social Media Content with Zapier
👉 How to Automatically Add Subtitles to Videos using Zapier