How To Automatically Create Instagram Posts Using Zapier

Learn how to set up an automated Zapier workflow to auto-generate and post Instagram videos and images using Airtable, SocialBee, and Creatomate.
Instagram has become a go-to platform for businesses to promote their products and services, engage with customers, and attract new ones. But consistently creating and posting great content that matches the image of your brand can be very time-consuming. Fortunately, there's a way to automate the process of creating Instagram content.
A very popular automation tool for this purpose is Zapier. This is a no-code platform that lets you set up workflows that run entirely automatically. Best of all, there's no need to be tech-savvy – it's simply a matter of connecting the apps you're already using daily. When combined with a video and image automation tool like Creatomate, you can transform your text, photos, quotes, tips, and more into captivating images or short videos.
This tutorial will guide you through the process of setting up an automatic workflow that takes data from Airtable, generates videos or images using Creatomate, and automatically posts them on Instagram. Below is an example of an automated video post. However, the process is the same for any video or image post, as the editor allows you to create your own custom designs:
Prerequisites
Here are the tools we'll use:
- Creatomate: to create a template and generate videos or images. Sign up for free.
- Zapier: to set up the automated workflow.
- Airtable: or any other app to provide content for our Instagram posts.
- Instagram for Business (optional): to share image posts.
- SocialBee (optional): to schedule Instagram video or image posts.
Even though Zapier integrates with Instagram directly, it only works with images and not videos. As a solution to this, we can use the social management tool SocialBee to automate video posts. Additionally, SocialBee has post scheduling options you might find useful. In any case, using SocialBee is optional, so you can either use it or post directly to Instagram. We'll cover both methods in this tutorial.
Note: In this tutorial, we'll be using Airtable to provide content for our Instagram posts. However, any application will work. Feel free to use a tool that works for you.
How to auto-generate Instagram posts using Zapier
The first step to auto-generating Instagram posts is creating a social media template in Creatomate. Once we have this set up, we can use Zapier to automate a workflow based on this template. We'll set it up to run automatically whenever a new record is added to Airtable, generating a video or image from the data, then sending it directly to Instagram or SocialBee.
Let's get started!
1. Create a template in Creatomate
Log in to your account and navigate to the Templates page. Click the + New button to browse the template gallery. You can pick any template you like or design your own from scratch. For this tutorial, let's go with the Questions & Quizzes template from the Social Media category. The 1:1 Square size is fine and click Create Template to open it in the editor:
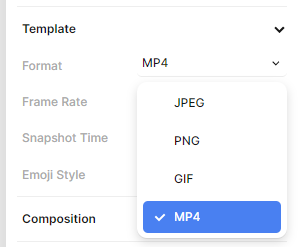
Although this template generates videos, the Format setting allows you to generate images or GIFs as well. To find this setting, make sure you haven't selected an element, then look in the right-hand property panel:
Let's take a look at the left side panel. Here we can find the elements that make up the template. An important thing to know is that elements can be marked as Dynamic. In our template, the Title, Shape, Question, Answer, and Video elements are dynamic. This means that you can automatically substitute these elements with other content to generate new and unique videos:
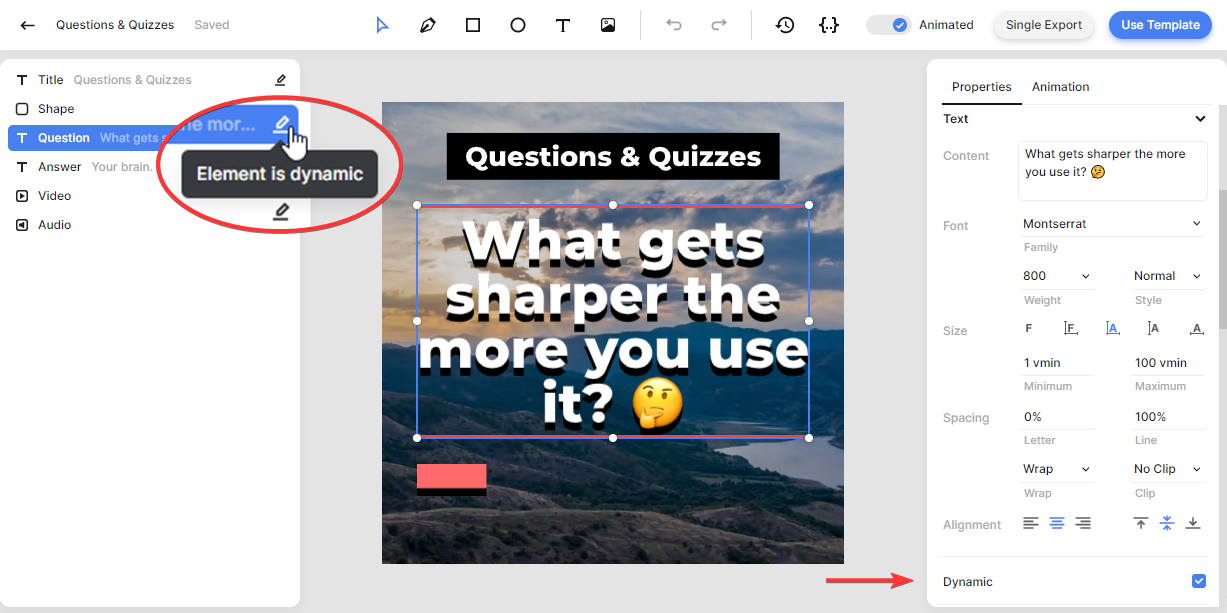
You can customize the template however you want. To make an element dynamic, select it and check the Dynamic property in the right-hand panel, as shown above.
To keep things simple, let's use the template as-is. You can always customize it later, or design a template from scratch. Now that we've got a template, let's set up the automated workflow.
2. Add trigger: New Record in Airtable
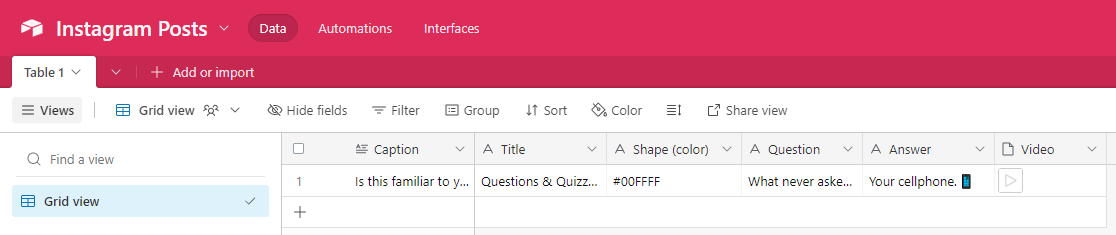
Here is the structure of the Airtable document that we will be using. Each field is named after a dynamic element in the template, so we can easily replace its content. In addition, I have also included a column where we can write captions for our Instagram posts:
Tip: You may replace Airtable with any other application that fits your needs. For example, the post content could also be sourced from Slack, Google Forms, or ChatGPT.
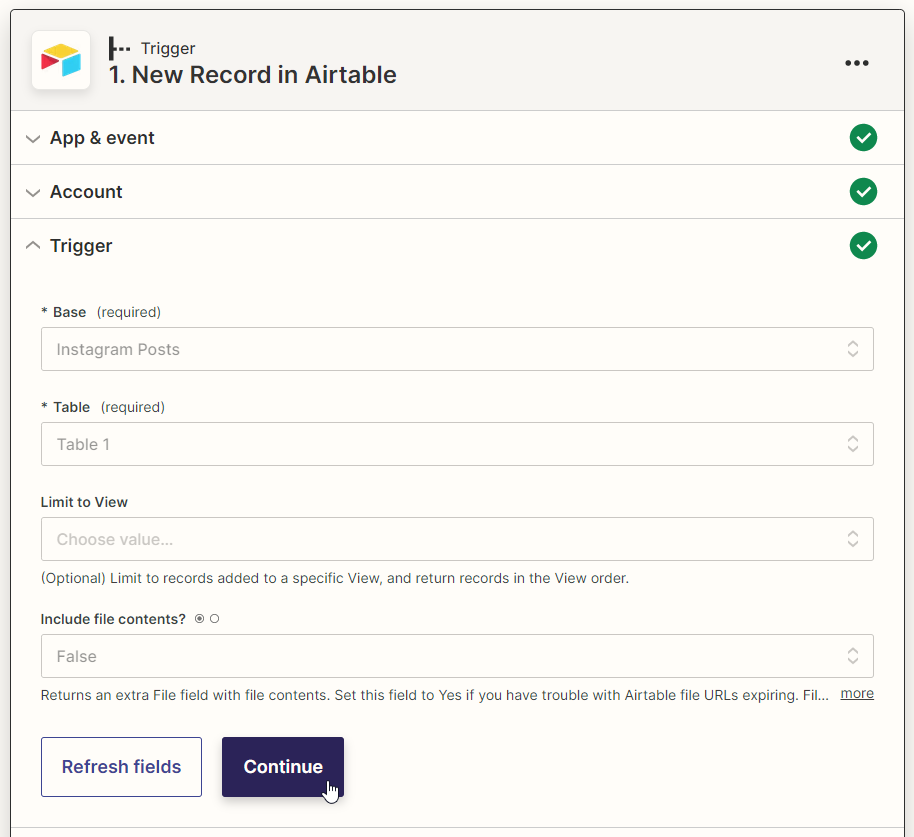
Log in to your Zapier account. From your dashboard, click + Create Zap. Search for the Airtable app and select the New Record event. Continue by selecting your account or signing in first.
On the Trigger page, select your Base and Table. Then, click Continue:
Click Test trigger on the Test page to make sure Zapier can find a record. When the test is successful, click Continue and move on to the next step.
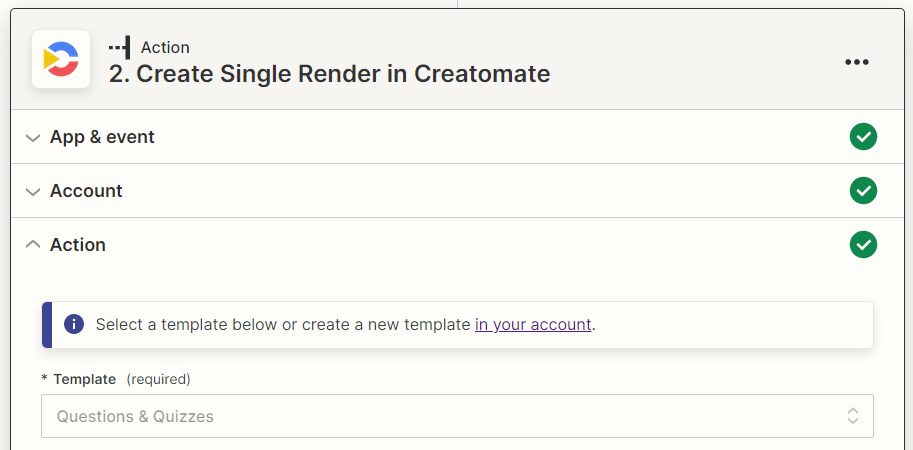
3. Add action: Create Single Render in Creatomate
Search for the Creatomate app and select the Create Single Render event. Continue by selecting your account or signing in with your project's API key first. Then, click Continue.
On the Action page, select the Questions & Quizzes template in the Template field first:
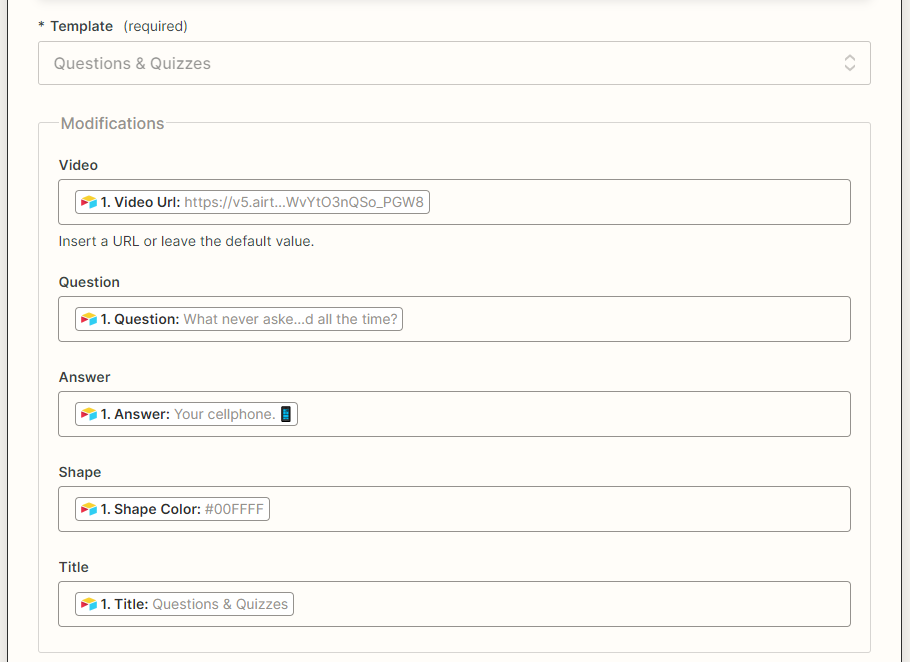
Then, the templates' dynamic elements appear under Modifications. Let's map our Airtable fields to the template as follows:
- Set Video to Airtable -> Video Url
- Set Question to Airtable -> Question
- Set Answer to Airtable -> Answer
- Set Shape to Airtable -> Shape Color
- Set Title to Airtable -> Title
When done, click Continue:
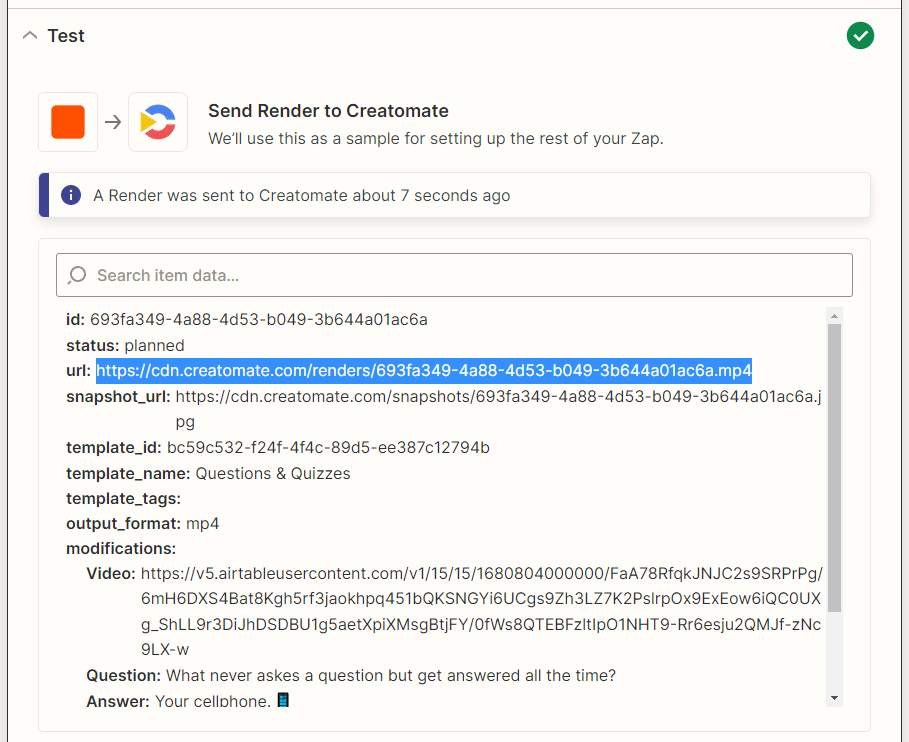
Click Test step on the Test page to see if Creatomate can generate a video or image from the data we provide. The generated visual can be viewed by visiting the URL given in the test result. Rendering can take some time, so if you encounter a Not Found message, simply wait a few seconds before revisiting the URL. If the test is successful, proceed to the next step:
4a. (Optional) Add action: Publish Photo in Instagram for Business
Use this step if you want to post images directly on Instagram. If you want to post videos through SocialBee, you can skip this step.
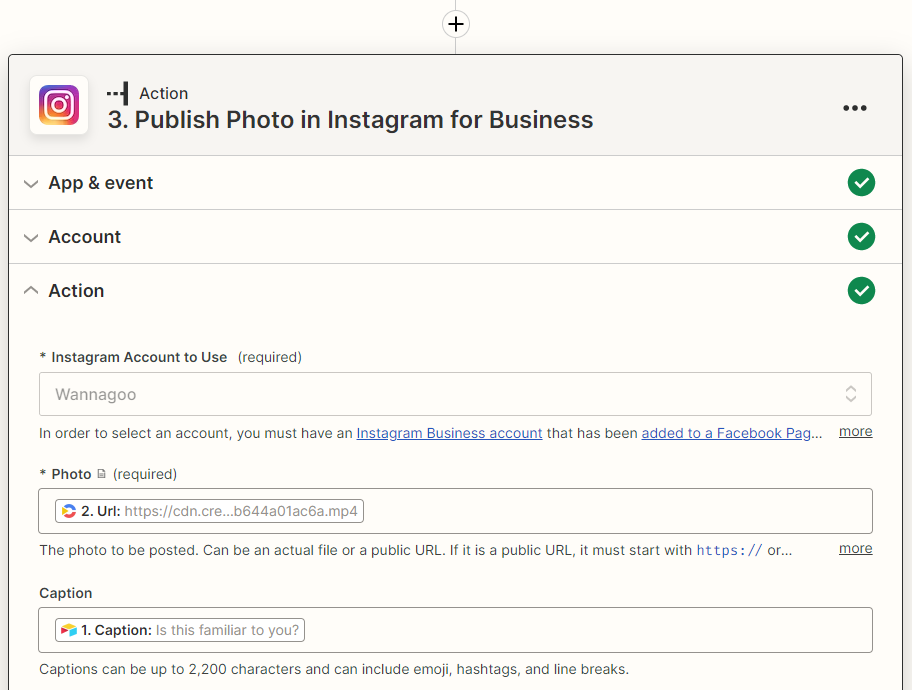
Click +, search for the Instagram for Business app, and select the Publish Photo event. Continue by selecting your account or signing in first.
On the Action page, select the Instagram account you want to use first. To add the image, select Creatomate -> Url in the Photo field. Then, select Airtable -> Caption in the Caption field. When done, click Continue:
On the Test page, click Test step to make sure it gets posted on Instagram. When the test is successful and you're happy with your workflow, click Publish Zap to activate it.
4b. (Optional) Add action: Create Post in SocialBee
You only need this step if you want to post videos on Instagram using SocialBee.
You need a SocialBee account with your Instagram account configured for scheduling. Do this first if you haven't already. Sign up for a free trial account, connect your Instagram for Business account, and set up a posting schedule.
In Zapier, click +, search for the SocialBee app, and select the Create Post event. Continue by selecting your account or signing in first.
On the Action page, select your workspace first. Next, select a category and your social profile. In the Text field, you can select Airtable -> Caption. Lastly, select Creatomate -> Url in the Media Url field. When done, click Continue:

Click Test step on the Test page to make sure SocialBee is able to schedule the post. When the test is successful and you're happy with your workflow, click Publish Zap to activate it.
Wrapping up
With just four simple steps, you can automate your Instagram posts by using Zapier and Creatomate. You can customize this workflow to your liking by using the apps that work best for you. This is an excellent way to streamline your content creation process specifically for Instagram.
In addition to Instagram, you might want to automate all your social media outreach and automatically post videos on Facebook, Twitter, and YouTube as well. See this tutorial next to find out how.
To take it a step further, we can integrate ChatGPT into the automated workflow, so we can make fully automated social media posts where even the text captions are generated by AI. Check out this Zapier tutorial to learn more.
You might also like these tutorials


Start automating today
Start with a full-featured trial with 50 credits, no credit card required.
Get started for free →