How to Automate Content Creation with Airtable and Zapier

Learn how to auto-generate videos and images for social media (Instagram, YouTube Shorts, TikTok, and Facebook) with Airtable, Zapier, and Creatomate.
Whether your marketing strategy involves sharing detailed articles, in-depth interviews, or quick social media updates, keeping a consistent content schedule is key to your success. The challenge is that creating all this content can be time-consuming and may distract you from more important tasks. Luckily, there's a better way to handle it. With automated content creation, you can hand off the workload to automation tools.
In this tutorial, you'll learn how to automatically produce videos and images for social media platforms like Instagram, Facebook, TikTok, and YouTube Shorts. We'll be using Airtable, a flexible database tool that's perfect for a variety of tasks, including content creation. While Airtable has its own automation features, it also integrates seamlessly with no-code tools. Our main focus will be on connecting it with Zapier, an automation platform that lets you connect to thousands of other applications, allowing you to build your own custom workflows. One of these apps is Creatomate, an API designed specifically for generating videos and images.
By the end of this tutorial, you'll understand how to connect all three tools to fully automate your social media posting – from creating visuals to publishing them on your chosen platforms.
We'll be automating a motivational quote video similar to the one above. This is just an example, so keep reading if you have a different type of social media visual in mind. The concepts discussed here can be applied to any content, whether it's videos or images. Creatomate comes with an online editor that allows you to create your own designs and video templates.
Prerequisites
To keep this tutorial simple and easy to follow, we'll take a straightforward approach. If you're already familiar with any of the tools we'll be using, you probably know they offer a lot of flexibility. You can customize each step to fit your needs – whether it's modifying the Airtable base for your own data, selecting which social media platform to connect in Zapier, or designing custom templates in Creatomate. You can even integrate generative AI if you like. At the end of this post, I'll also share some ideas for what you can explore next.
These are the tools we'll use:
- Airtable: to organize content ideas.
- Creatomate: to automatically generate videos or images.
- a social media platform: like YouTube, Instagram, TikTok, or Facebook to share the content.
- Zapier: to automate the content creation process.
How to create social media posts with Airtable and Zapier?
To automatically generate social media content, we'll start by creating a template in Creatomate. This template will serve as the foundation for all the videos or images we'll produce. Next, we'll set up an Airtable base that contains the data to populate the template, along with a caption for the social media post and fields to configure the automation trigger.
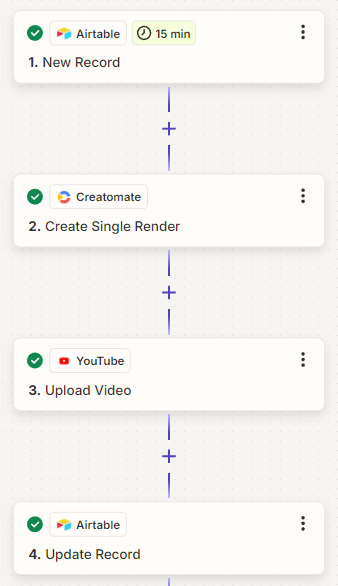
Once this setup is complete, we'll move to Zapier to build the automation. Our Zap will kick off when new records are added to our Airtable view. Creatomate will then use that data to generate a video or image, which will be posted to social media. Finally, we'll update the Airtable base to indicate that the post has been published.
Here's what the workflow looks like:
Let's get started!
1. Create a template in Creatomate
Log in to your Creatomate account or sign up for free if you don't already have one.
Navigate to the Templates page and click the New button to open the template gallery. You'll find a variety of templates, including both static images and video clips. You can choose the one that best suits your needs or design your own from scratch. For this tutorial, go to the Marketing category and select the Image w/ Quote On Top template. Pick a size that works best for your project. Since I'll be showing you how to create shorts, stories, and reels, let's select the 9:16 Vertical format and click Create Template to open it in the editor:
This template is designed to generate videos, but you can easily convert it into an image template if you prefer. To do so, choose a specific moment in the timeline, like the 4-second mark, that you'd like to use as an image. Then, in the properties panel on the right, change the template Format to either PNG or JPEG:
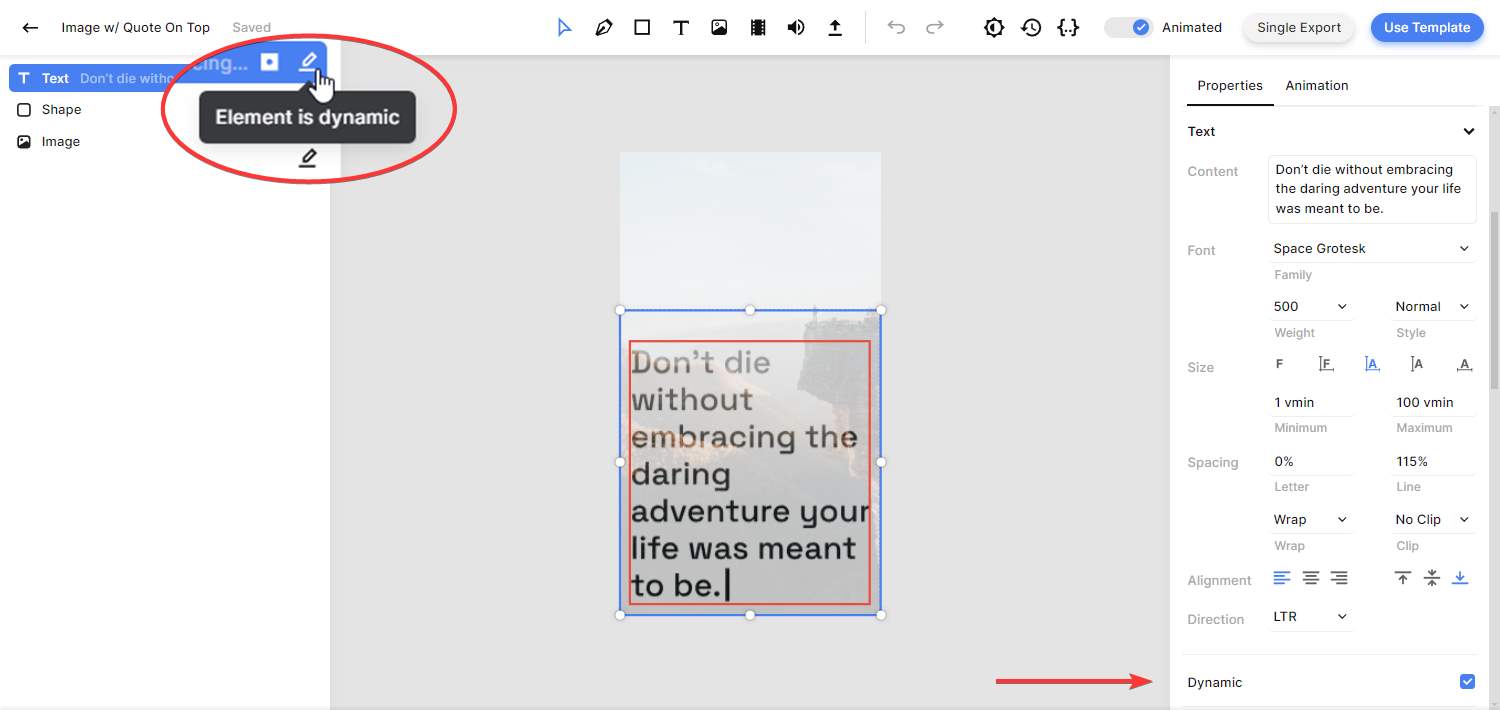
Let's look at the template more closely and see how it works with our automation plans. In the left panel, you'll see that the design consists of three elements: Text, Shape, and Image. Additionally, the Text and Image elements are marked as dynamic, meaning we can replace them with a unique quote and image for each video generated by our automated workflow:
You can further customize the template if you wish, but that's outside the scope of this tutorial. For more details on using the editor, feel free to check out this quick guide.
Now that the template is ready, let's move on to the next step: setting up our Airtable document.
2. Prepare your Airtable base
In this step, I'll walk you through creating an Airtable document to serve as the basis for our content creation process. We'll set up fields to populate the template, add a caption for social media, and track the status – essential for building the Zapier automation. If you'd rather use an existing Airtable base, just make sure it's compatible with this setup.
Go to Airtable.com and sign in to your account. If you don't have an account, you can sign up for free.
Let's create a new base from scratch: Automate Content Creation. On Table 1, set up the following fields:
- A Single line text field: Quote
- An Attachment field: Image
- A Long text field: Caption
- A Checkbox field: Ready?
- A Checkbox field: Posted
Your table setup should look like this (click the screenshot to view in full screen):

Next, let's create a dummy record that we will use to configure the automation. For the first record, enter the following data:
- For Quote, insert: The future belongs to those who believe in the beauty of their dreams.
- For Image, upload a file from your device or download the image from this URL: https://cdn.creatomate.com/demo/mountains.jpg
- For Caption, insert: Believe in your dreams and watch the future unfold. 🌟✨ #DreamBig #FutureIsBright #BelieveInYourself
- For Ready?, check the box (✅)
- Leave the Posted field unchecked for now. We'll update it in step 6.

Then, we need to set up a way to trigger our Zap. To do this, we'll add a new view. Click the + button next to Grid, name it In Progress, and then click Create new view:
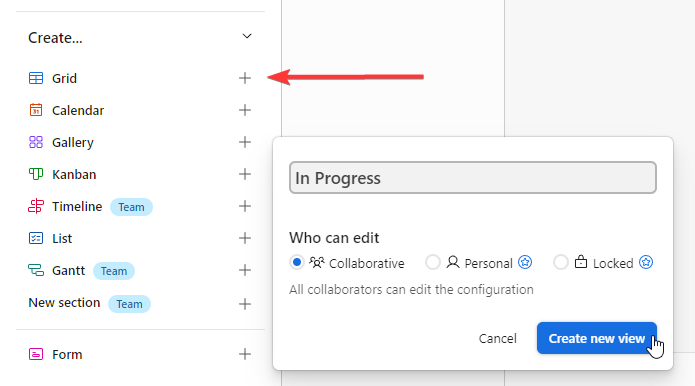
For this new view, we want to show only records where the Ready? checkbox is checked and the Posted checkbox is unchecked. This setup allows us to review and verify the content before it's used and helps us keep track of which records are not ready yet, which are currently being processed, and which have already been posted.
To achieve this, we need to add a filter with the following two conditions: show records “Where Ready? is checked (✅)” “and Posted is unchecked (🟩)”:

Here's how it works: when a record is ready, checking the Ready? box will move it to the In Progress view and trigger our Zapier workflow. After the post is published on social media, the Posted checkbox will be automatically checked (as we set up in step 6), which will remove the record from the In Progress view.
If everything went according to plan, you should see the dummy record appear in the In Progress view:

Did it work? Fantastic! Now, let's dive into Zapier.
3. Trigger your Zap for new Airtable records
Here's where everything comes together. We're going to create a Zapier automation that triggers whenever a new record appears in our In Progress view. This will prompt Creatomate to generate a video or image, which will then be posted to your preferred social media channel. Finally, the record will be updated to indicate that the post has been published.
Log in to your Zapier account or create a free account if you don't have one yet.
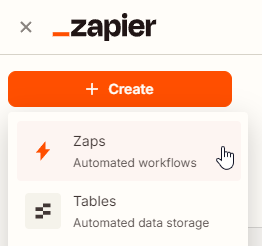
From your dashboard, click Create, then choose Zaps:
Once in the Zap editor, click the Trigger block. Search for and select Airtable as the app and New Record as the trigger event.
Next, sign in to your Airtable account by clicking Sign in and entering your credentials. If you've connected Airtable to Zapier before, simply click Select, then Create a new connection. Then, click Add a base, search for the Automate Content Creation base, and click Grant access:
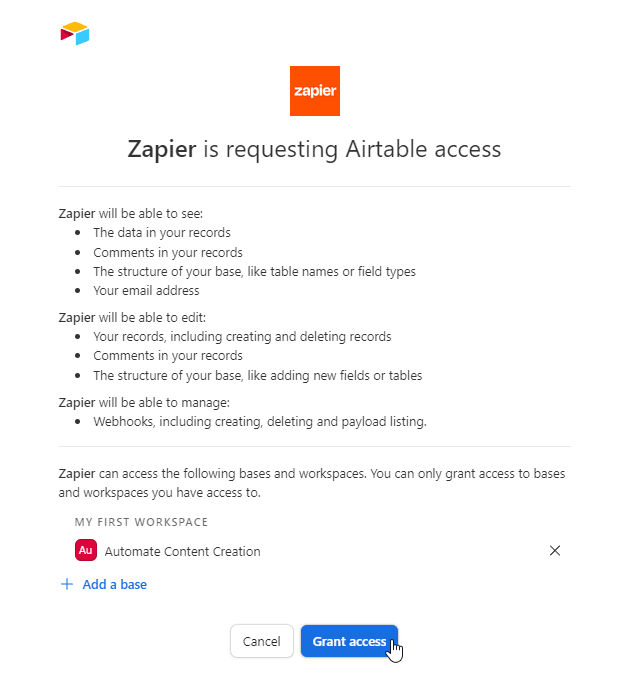
Your Airtable account should be connected and you're able to click the Continue button.
Next, configure your trigger as follows:
- Set Base to Automate Content Creation
- Set Table to Table 1
- Set Limit to View to In Progress
- Set Include file contents? to False
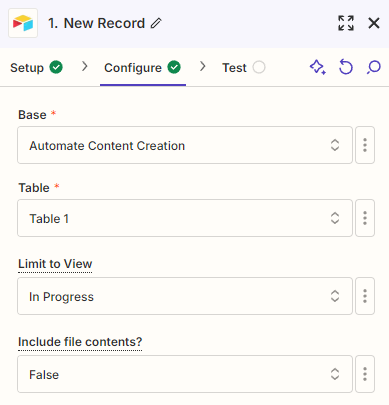
Then, click Continue.
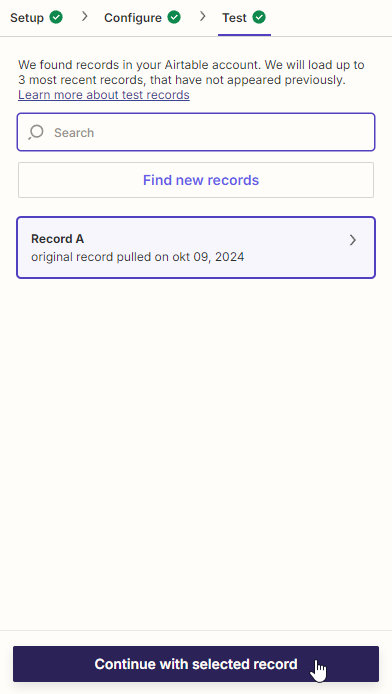
Zapier should be able to find the dummy record if you click Test trigger. Once the test succeeds, click Continue with selected record and proceed to the next step:
4. Generate a video or image
In this step, we'll set up an action in Creatomate to generate a video or image. To do this, we'll map the data from our Airtable record to the template created in step 1.
Search for the Creatomate app and select the Create Single Render action event. Next, connect your account by entering your project's API key, which can be found in the Project Settings of your Creatomate dashboard:
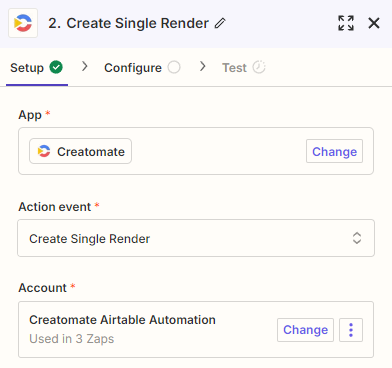
Then, click Continue.
To configure the action, first select the Image w/ Quote On Top template in the Template field.
Zapier will then automatically detect the dynamic elements and list them under Modifications.
Next, map the Airtable data to the template as follows:
- Set Image to Airtable -> Image Url
- Set Text to Airtable -> Quote
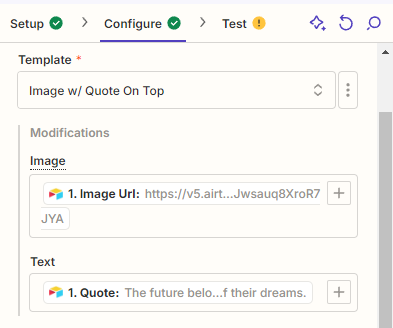
Once done, click Continue.
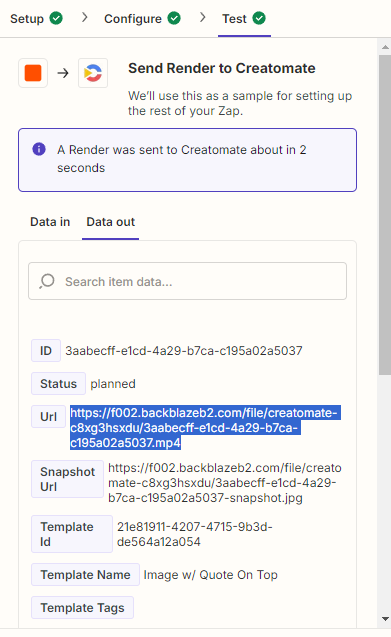
Click Test step to send a request to Creatomate and verify if it can generate a video or image based on the setup.
Since video generation takes a moment, you might initially see a "Not Found" message when visiting the URL provided in the test result. Wait a few seconds, then refresh the page. This only occurs during Zap setup. Once the workflow is live, it will automatically wait for the video or image to finish before proceeding to the next step.
5. Post on social media
At this point, Creatomate has successfully generated a video or image, and you can now process it as needed. I'll demonstrate how to upload it as a YouTube Short, but you can also connect to any other app to further process the content. If you're interested, here are options for sharing it on Instagram, TikTok, or Facebook.
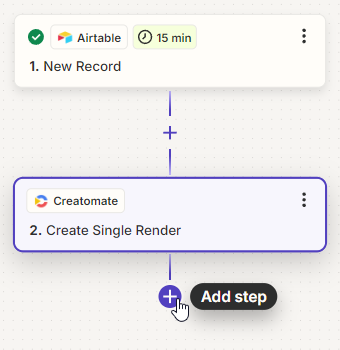
Click + to add another step to your Zap:
Search for the YouTube app with the Upload Video action event. Also, create a connection by signing in with your Google account:
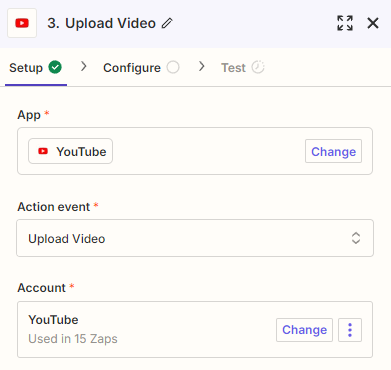
When done, click Continue.
Set up at least the required fields, for example, as follows:
- Set Title to Airtable -> Quote
- Set Description to Airtable -> Caption
- Set Video to Creatomate -> URL

Configure the remaining options as you prefer. When done, click Continue.
Click Test step to confirm that Zapier is sending the correct data. While some apps process the video during testing, YouTube will not publish the video at this stage; it will only be uploaded once the Zap goes live.
Once the test is successful, we can move on to the final step of this tutorial: updating the Airtable record.
6. Update the Airtable record
In this step, we'll update the record to indicate that the post has been published.
Add the Airtable app with the Update Record action event. Select the same Airtable account you used for the trigger. When done, click Continue.
Also, choose the same Base and Table:
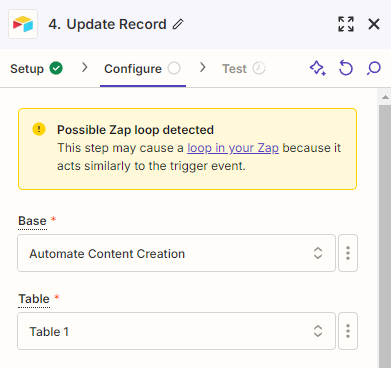
Note: You might see a warning about a "Possible Zap loop detected". To prevent this, we've set up a special view to trigger our Zap. This module updates records in the Grid view, not the In Progress view, so it should work without any issues.
To update the correct record, choose Airtable -> ID from the Custom tab in the Record field:
Next, type true in the Posted field to check the box. Then, click Continue:
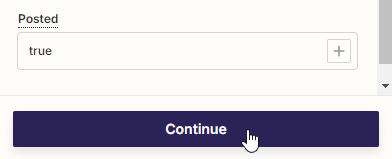
To verify that Zapier can update our Airtable record correctly, click Test step. If the test is successful, return to your Airtable base. You should see that the Posted checkbox for the dummy record is checked and that it has been moved out of the In Progress view:

All that's left is to click the Publish button to activate your Zap.
What's next for automated content creation with Airtable
Now you know how to create videos and images using Airtable, Zapier, and Creatomate – pretty simple, right? But this is just the beginning; there's so much more you can do. For example, you can use Airtable as a social media scheduler, which I explain in this tutorial. You can also configure Airtable to store the content generated by Creatomate directly in your database. Here's how to do that.
One popular way to use generative AI is by producing faceless shorts for platforms like YouTube, TikTok, or Instagram. Once the automation is in place, all you need to do is enter a video topic, and AI tools will take care of the rest. For example, ChatGPT can write a script based on your topic, create social media captions, and even produce image prompts for DALL·E. ElevenLabs can produce AI voice overs, while Creatomate's auto-transcription feature adds animated word-by-word captions. To explore this use case further, check out this detailed tutorial.
Here are a few other tutorials you may find helpful:
👉 How to Automatically Turn Blogs and Articles into Videos using AI
👉 Auto-Generate Videos & Images in Multiple Languages with Zapier
👉 Use ChatGPT to Auto-Create Social Media Content with Zapier
👉 How to Create Videos with AI Voice Overs using Zapier
👉 How to Automatically Add Subtitles to Videos using Zapier
👉 How to Use AI Images from DALL·E to Create Videos with Zapier
👉 Using AI and Automation to Create Social Media Videos Every Day