How to Turn Text Into Videos using AI and Zapier

In this no-code tutorial, you'll learn how to use ChatGPT, Creatomate, and Zapier to convert video topics into Shorts, Stories, and Reels, and automatically share them on social media.
Through this article, I will take a very practical approach to social media video automation using a LLM such as ChatGPT and Zapier. We'll set up a workflow to automate both video creation and posting to your favorite social media platforms.
Using Creatomate, a video API, and ChatGPT, we'll build an automated system that turns a simple video topic into a complete ready-to-post social media video, all through AI and automation. Other than supplying a topic, the system will run entirely by itself. For example, the video below was automatically generated from just the input "polar bears":
But this quiz-style video is just one example of what's possible with text-to-video AI. Have a different type of social media video in mind? No problem! Creatomate comes with an online template editor that lets you design videos exactly the way you want.
💡 AI tip: Looking to create faceless videos with AI-generated voiceovers, animated subtitles, and background visuals? Check out this tutorial instead. It walks you through using ElevenLabs for text-to-speech, DALL·E for image generation, and Creatomate's auto-transcription feature for subtitles.
Prerequisites
Here are the tools we'll use:
- Creatomate: to create a template and generate videos.
- Zapier: to set up the automated workflow.
- ChatGPT: to create video content along with a title and description for posting.
- a social media account: like YouTube, Instagram, or TikTok to share the videos.
How to use AI to convert text into videos
To get started, we need to prepare the AI tools we'll use. So first, we'll create an OpenAI account to access ChatGPT. Then, we'll design a video template in Creatomate, which will serve as the foundation for all our videos. In this template, we can specify which elements will be replaced with AI-generated content from ChatGPT.
Once that's set up, we'll turn to Zapier to build the automation. First, we'll create a table to trigger the workflow by inserting a topic. ChatGPT will then generate the video content, along with a title and description for posting. Next, we'll reformat the output so that Creatomate can use it to create a video. Finally, we'll share the video on social media. I'll show you how to post it as a YouTube Short, but you can connect to any platform you prefer. Here's what our Zap will look like:
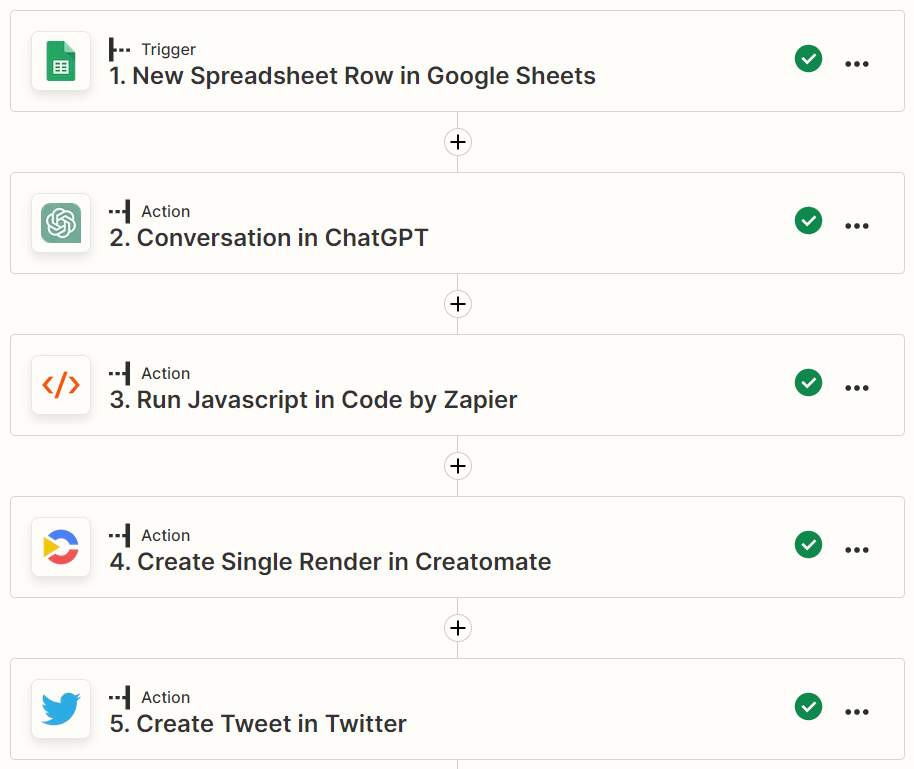
Let's get started!
1. Set up an OpenAI account for ChatGPT
In this first step, we'll create an OpenAI account and get our API key, which we'll need in step 4 to connect ChatGPT with Zapier.
Create a free account or sign in if you already have one. Then, go to the API section:
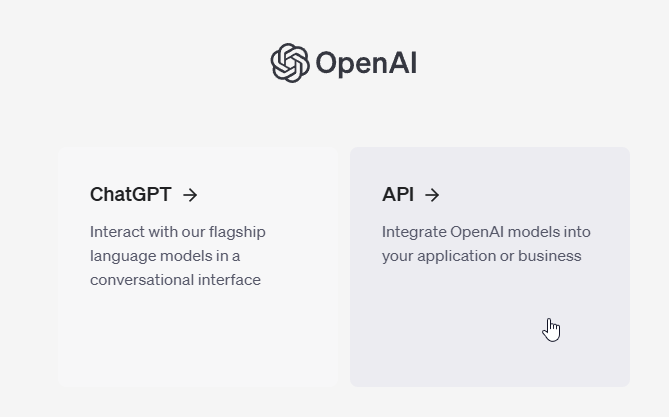
Next, navigate to your Dashboard and click API keys from the left side panel. Click on Create new secret key, give it a name, and click Create secret key:
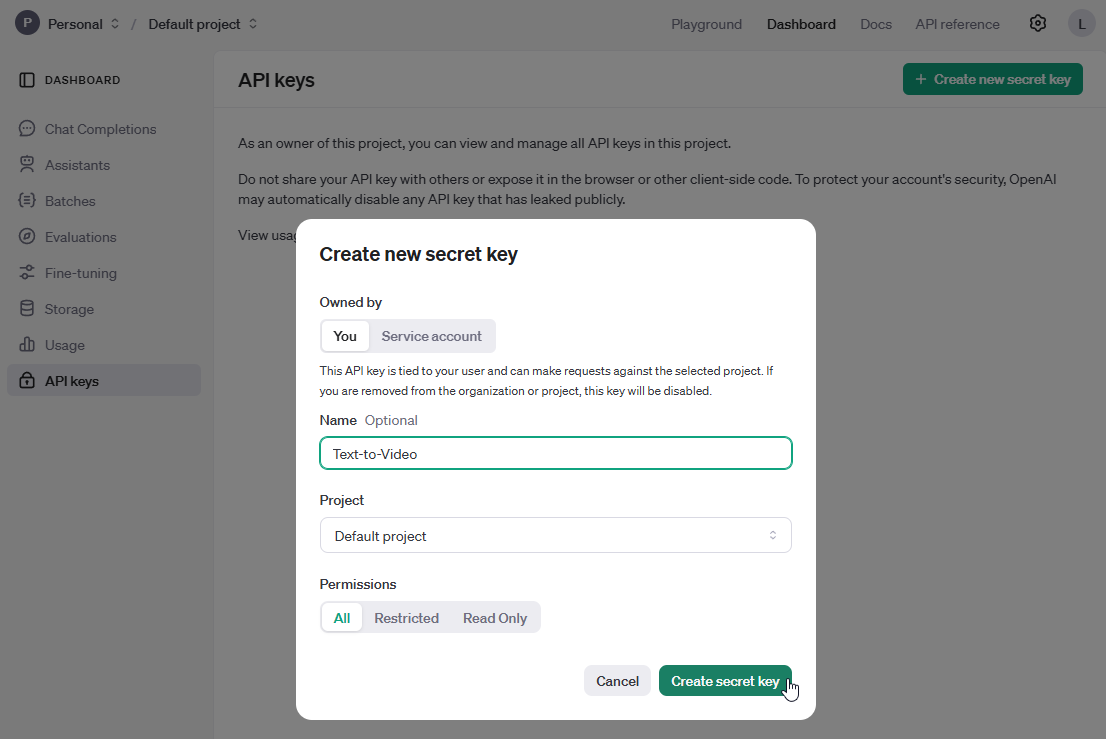
Keep your API key handy; you'll need it shortly.
2. Create a video template in Creatomate
Log in to your Creatomate account or sign up for free if you don't already have one.
Navigate to the Templates page and click New to browse the template gallery. You can choose any template you like or design your own from scratch. But for this tutorial, let's use the Questions & Quizzes template from the Social Media category. Since we're creating videos for YouTube Shorts, TikTok, and Instagram Reels, let's select the 9:16 Vertical size. Then, click Create Template to open it in the editor:
Now, let's take a look at our video design and how it fits into the automation process. In the left side panel, you'll find the elements that make up our template. Some of these elements are marked as dynamic, such as Title, Shape, Question, Answer, and Video. This means they act as placeholders, allowing us to modify their content through our automated Zapier workflow. As a result, the text generated by ChatGPT will be used to create new and unique videos.
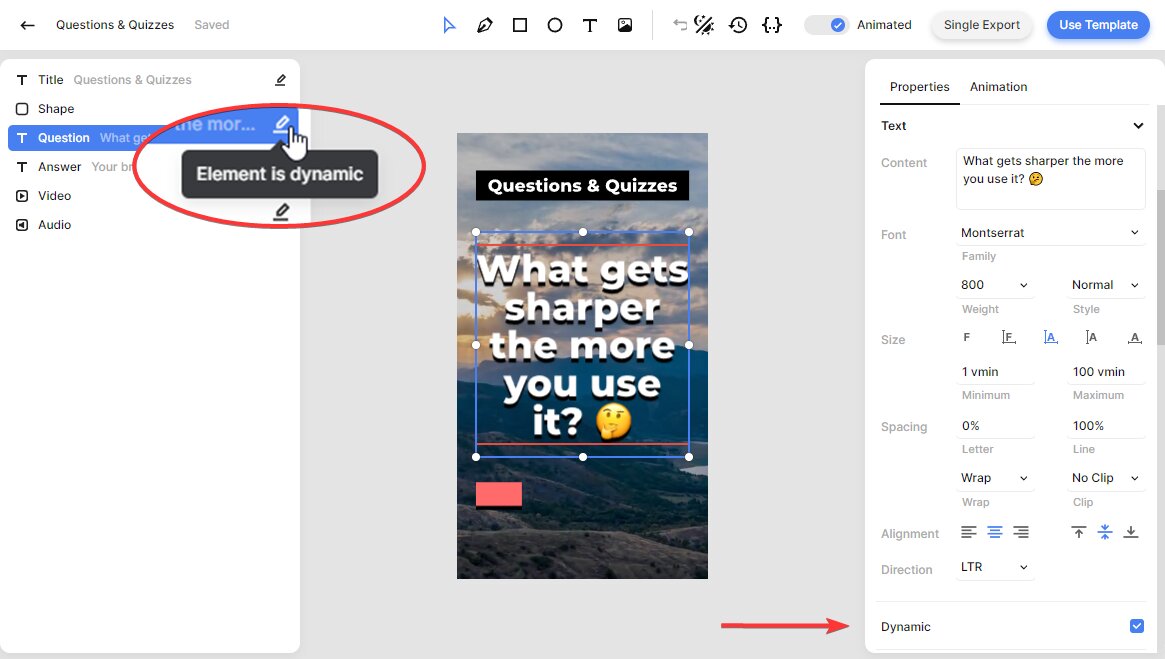
To keep things simple, I'll use the template as it is. But feel free to change it however you like. If you want to learn more about how the editor works, refer to this quick guide.
Now, let's proceed with setting up our Zap.
💡 AI tip: In this tutorial, we'll use ChatGPT exclusively to generate riddles for our videos. However, generative AI can be applied in other ways as well. One great practical application is creating unique background visuals.
In our template, the video element is also dynamic, allowing each video to have a custom background. To use AI-generated visuals, the best approach is to replace the video element with an image placeholder and set the provider to OpenAI. This lets you connect your OpenAI account for using DALL·E. In the ChatGPT step, you can also instruct it to generate an image description. This prompt can then be mapped to the template during video production (step 6). Creatomate will send a request to DALL·E, which generates the image and uses it as the video background.
It might sound a bit complicated, but it's actually quite simple to set up. Just follow the steps in this tutorial to learn how!
3. Trigger the automated workflow
Every Zap starts with a trigger – a specific event that activates the automation. In this tutorial, we'll focus on the AI video generation process rather than the trigger app itself, so we're using a basic table to keep things simple. But Zapier integrates with thousands of apps, so once you grasp the concept, you can replace the table with any app that fits your needs. For example, you could set a trigger for new Airtable records or new rows in a Google Sheets spreadsheet.
Log in to your Zapier account or sign up for free if you haven't already.
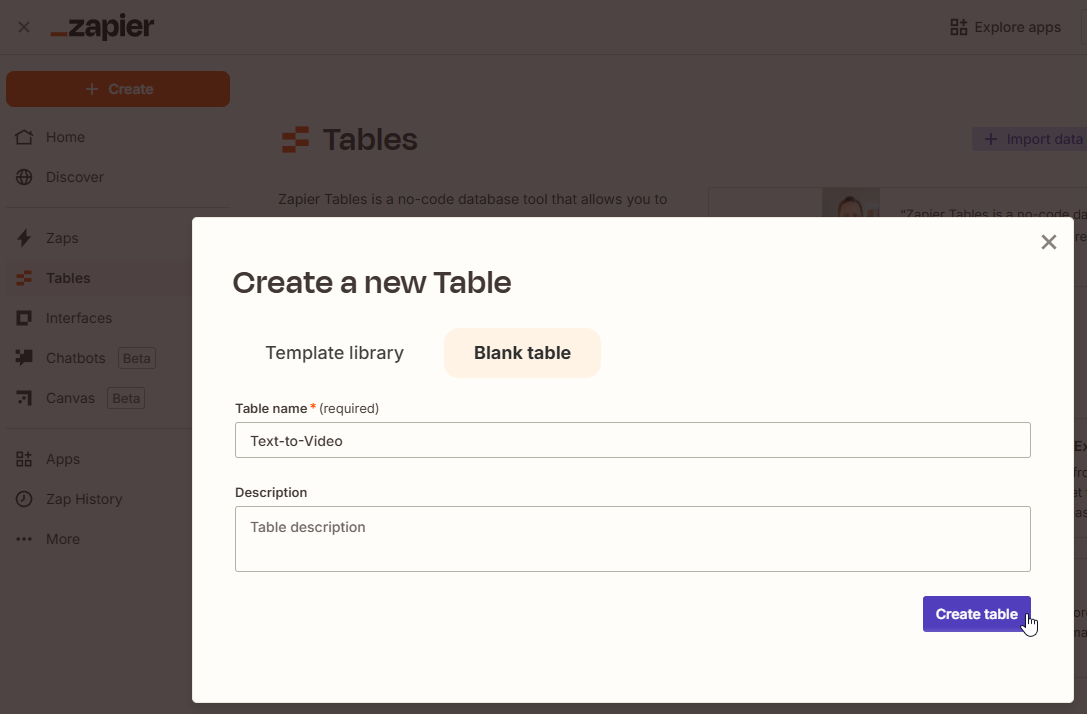
From the left menu, navigate to the Tables page. Click the Start blank button, enter a table name, and hit Create table:
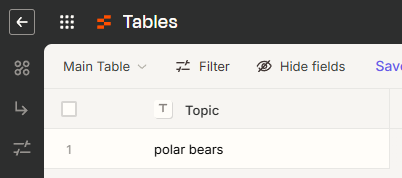
We only need to insert a video topic into the workflow using this table. To set it up, create a table with a single field labeled Topic. For the first record, enter the topic polar bears:
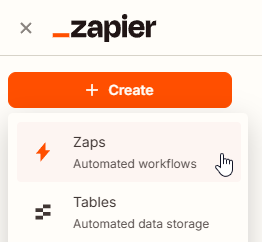
Next, return to your Zapier dashboard, click Create, then choose Zaps:
Once in the Zap editor, click on the Trigger block. Search for Zapier Tables as the app, and select New Record as the trigger event. Then, click Continue.
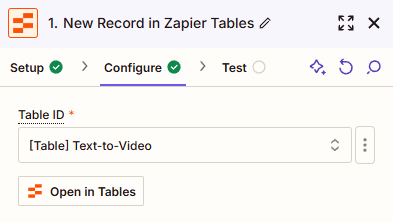
In the Table ID field, select the table you just created:
Then, click Continue.
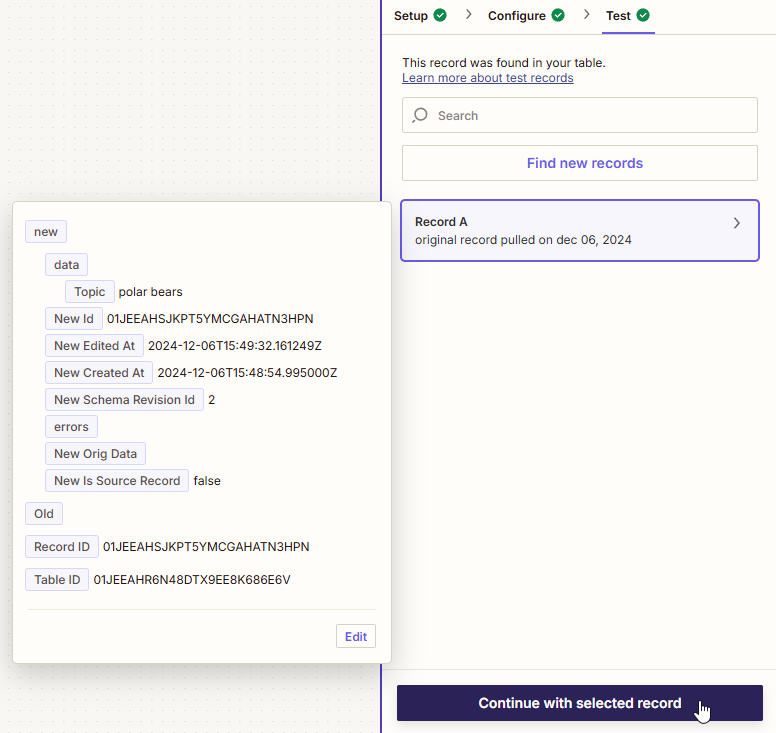
Click Test trigger to see if Zapier can find our sample record. Once the test is successful, click Continue with selected record:
4. Generate video content with ChatGPT
Search for the ChatGPT app and select the Conversation action event. Sign in to your OpenAI account using the API key from step 1. Once you're done, click Continue.
Next, we'll create a prompt for ChatGPT to generate video content based on the topic provided by the trigger. It's important to provide clear instructions so ChatGPT knows exactly what we want it to generate. Feel free to customize this prompt to suit your specific requirements or create one from scratch.
Copy and paste the following prompt into the User Message field:
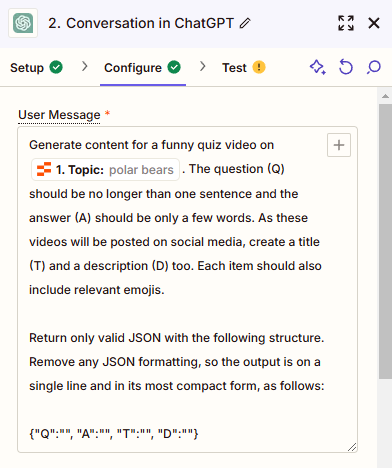
Generate content for a funny quiz video on [topic]. The question (Q) should be no longer than one sentence and the answer (A) should be only a few words. As these videos will be posted on social media, create a title (T) and a description (D) too. Each item should also include relevant emojis.
Return only valid JSON with the following structure. Remove any JSON formatting, so the output is on a single line and in its most compact form, as follows:
{"Q":"", "A":"", "T":"", "D":""}
Make sure to replace [topic] with Zapier Tables -> Topic. Check out the screenshot below to see what it should look like:
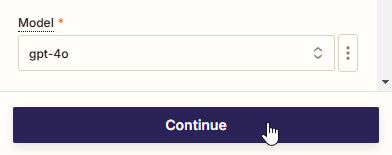
If you wish, you can select the model of your choice, but this is optional. Leave the other settings as they are, and click Continue to proceed:
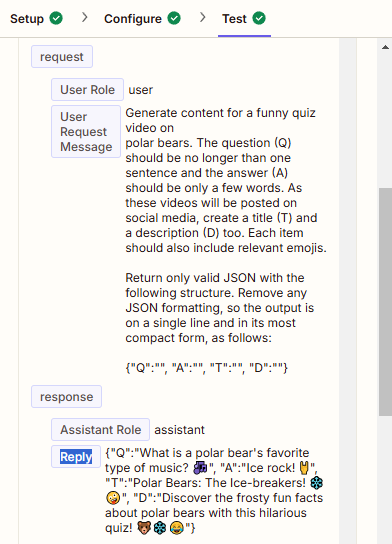
Click Test step to check if ChatGPT has generated content as instructed. You can view the response in the "Reply" field. If the test is successful, proceed to the next step.
5. Parse the AI content
In this step, we'll convert the JSON output from ChatGPT into a structure that Zapier can work with. This involves a small snippet of JavaScript code, but don't worry – it's as simple as copying and pasting a few lines.
Click + to add a step to your Zap:
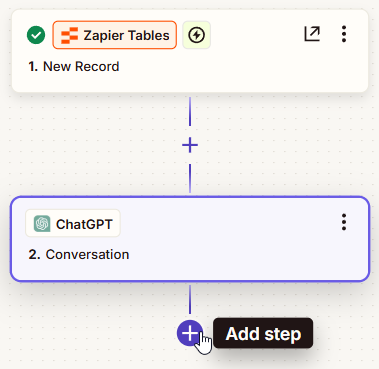
Search for the Code by Zapier app, and select the Run Javascript action event. Then, click Continue.
To configure the action, type response in the Input Data field and select the ChatGPT -> Reply value. Then, in the Code field, copy and paste the following:
1output = JSON.parse(inputData.response);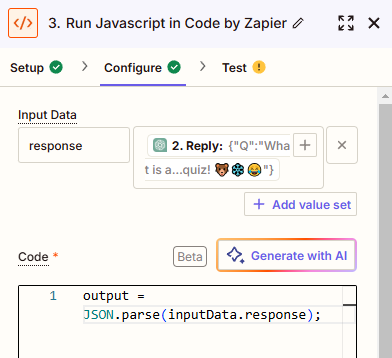
When done, click Continue.
Then, click Test step to make sure it works. If all went well, you should receive output similar to the screenshot below. The response provided by ChatGPT should be divided into four separate items: Q, A, T, and D:
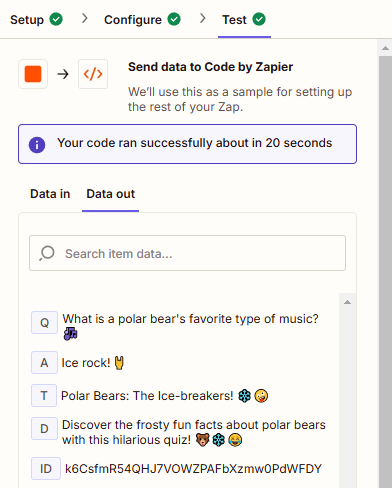
Once the test is succesful, let's move on the next step and use this content to create a video.
6. Generate a video
Add the Creatomate app, and select the Create Single Render action event. Continue by selecting your account or signing in with your project's API key first:
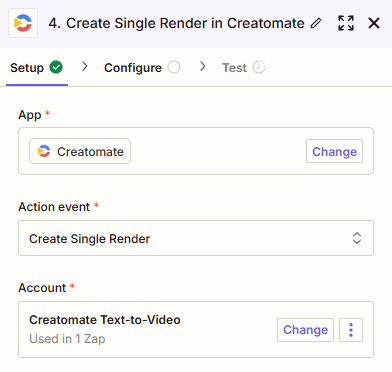
Then, click Continue.
To set up the action, select the Questions & Quizzes template in the Template field first:
Zapier will then automatically detect the dynamic elements in the template and list them under Modifications. Now, let's map the question and answer to the template as shown below:
- Set Question to Code by Zapier -> Q
- Set Answer to Code by Zapier -> A
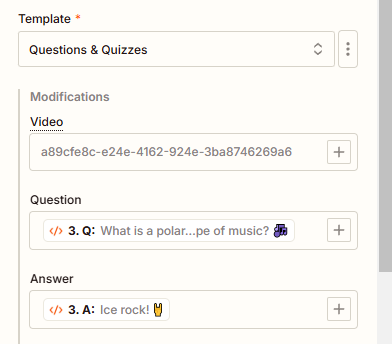
Note: Video, Shape and Title are also dynamic elements. In this tutorial, we won't modify them, so the default values of the template will be used for each video.
When done, click Continue.
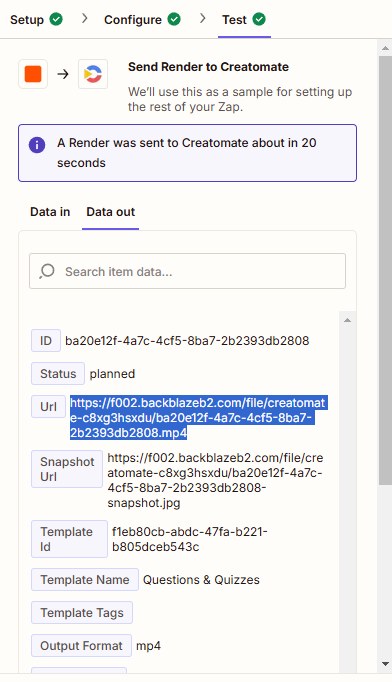
Then, click Test step to check if Creatomate can generate a video from the provided data. You can view the generated video by visiting the URL given in the test result. Please note, rendering may take some time, so if you see a 'Not Found' message, just wait a few seconds and try again. This only occurs during Zap setup; once the workflow is published, it will wait for the video to finish before moving to the next step. If the test is successful, proceed to the final step of this tutorial.
7. Post on social media
Now that the video has been successfully generated, you can use it however you like. As an example, I'll show you how to upload it as a YouTube Short, but feel free to connect to the platform that works best for you – other social media platforms are also supported. If you need help, check out one of our tutorials on posting videos to TikTok, Instagram, or Facebook.
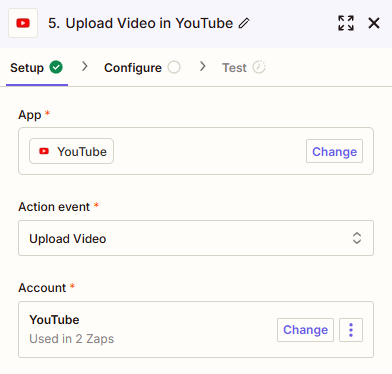
Add the YouTube app, and select the Upload Video action event. Continue by selecting your account or signing in first:
To configure the action, you need to fill out at least the required fields. For example, set it like this:
- For Title, select Code by Zapier -> T
- For Description, select Code by Zapier -> D
- For Video, select Creatomate -> Url
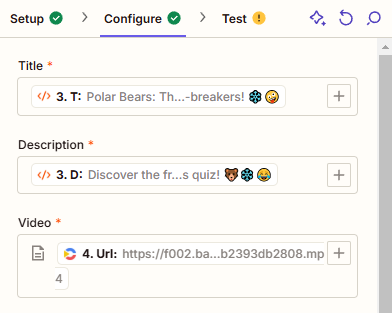
You can adjust the other settings as needed, but it's optional. When you're finished, click Continue.
Finally, click Test step to make sure Zapier sends the correct data to YouTube. Please note that the video won't be posted to your channel during the test; this will only happen once the automation is live.
Once the test is successful and you're happy with your workflow, click Publish to activate your Zap.
What's next for text-to-video using AI
With just a few simple steps, you can set up a workflow that automatically converts text into videos and posts them on social media. This system lets you create all kinds of videos, such as quotes or stories, all based on a customizable video template.
As explained with the quiz video created in this tutorial, the automated workflow can be fully customized to meet your specific needs. For example, you can design your own video layouts using the template editor, choose a trigger app that fits your workflow, and connect it to your preferred social media platform.
You can even take generative AI to the next level. Imagine creating popular faceless shorts with AI-generated voiceovers, animated subtitles, and captivating background visuals - completely on autopilot.
Here's how it works: ChatGPT generates a video script based on your chosen topic. Creatomate integrates with tools like ElevenLabs and OpenAI TTS for voiceovers, DALL·E and Stable Diffusion for generating visuals, and even includes a built-in auto-transcription feature for animated subtitles.
Although it might sound complex, it's surprisingly simple. Follow our step-by-step Zapier tutorial, and you'll have your own AI-powered video creation system up and running in no time.
👉 How to use AI to Automate Videos for Shorts, Stories, and Reels