How to Create Videos using Text-to-Speech AI and Zapier

In this tutorial, you'll learn how to automatically turn text into spoken audio using OpenAI's text-to-speech API, to create voiceover videos using Zapier and Creatomate.
AI voiceovers are great for almost any video; whether it be social media videos, explainers, personal, or instructional videos. All it needs is a written script to generate a natural-sounding voice that represents your desired seriousness, emotion, or tone.
You've probably heard of OpenAI, the company behind ChatGPT and DALL·E. However, many don't know they also offer text-to-speech AI. This tutorial will show you how to automatically generate voiceovers using OpenAI TTS, and convert them into short-form videos with Creatomate, a video automation platform. We'll streamline the process by setting up a custom workflow on Zapier. This approach isn't limited to social media videos; if you have a different video concept in mind, keep reading!
Here's a video featuring a computer-generated voiceover. Combined with its auto-generated subtitles, it's a great example of social media content made through video automation.
In fact, the video you see above is generated entirely through AI; right down to its subject, script, voiceover, subtitles, and images. This article won't dive into AI too much. Rather, we'll just focus on setting up a workflow for generating voiceovers. But as we go, I'll point you to other tutorials that show how to further automate this video using ChatGPT and DALL·E.
Zapier offers excellent integration with OpenAI and Creatomate, so setting up an automated workflow is straightforward. Using this approach is also highly flexible and customizable; Creatomate comes with an online video editor that allows you to create your own automation templates quickly and easily.
Prerequisites
Here are the tools we'll use:
- Creatomate: to create a design and generate voice over videos. Sign up for free.
- OpenAI: to turn text into audios.
- Zapier: to automate the entire process.
Note: Before we start, I want you to know that OpenAI's text-to-speech service only generates basic voiceovers. As of this writing, there's a limited selection of voices available, and the audio quality may not match other AI voice generators. As an alternative, you might want to consider ElevenLabs. We've found this text-to-speech provider to be one of the most advanced options on the market, delivering high-quality audio that sounds like a natural human voice. Moreover, ElevenLabs offers a wide range of voice options and customization features, including the ability to use your own voice. If you want to give it a try, check out this tutorial demonstrating how to create voiceover videos using ElevenLabs, Creatomate, and Zapier.
How to auto-generate voiceover videos using Text-to-Speech AI?
To begin, we'll create an OpenAI account, and select the voice we want to use for our voice overs. Then, we'll integrate with Creatomate, and set up a design for our videos.
Next, we'll automate the video creation process using Zapier. To keep things simple, I'll demonstrate how to set up a basic Zap using a Zapier Table. In this table, we'll input the text we want to be read aloud by the voiceover, as well as the images to be used as the video background. Also, we'll use this table to store a link to the voiceover video once it's generated.
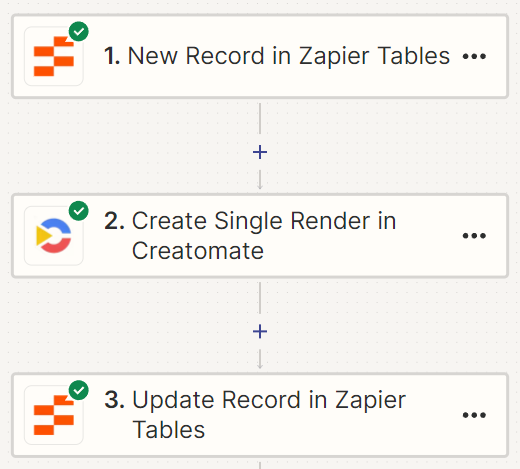
In real-life scenarios, you can use the apps that suit your needs best, such as Google Sheets or Airtable. With Zapier supporting over 6000 app integrations, you can always build a customized workflow tailored to your specific use case. For instance, a Zap can be as simple as the one shown below.
Let's get started!
1. Choose an AI voice and get your API key in OpenAI
First, we'll select a voice. OpenAI comes with six preset voices: Alloy, Echo, Fable, Onyx, Nova, and Shimmer. Let's head to the voice options page, where you can preview each voice, and choose the one you prefer for your voiceovers.
Next, to use the text-to-speech service, you'll need an API key. To get one, create a free OpenAI account first, or sign in if you already have one.
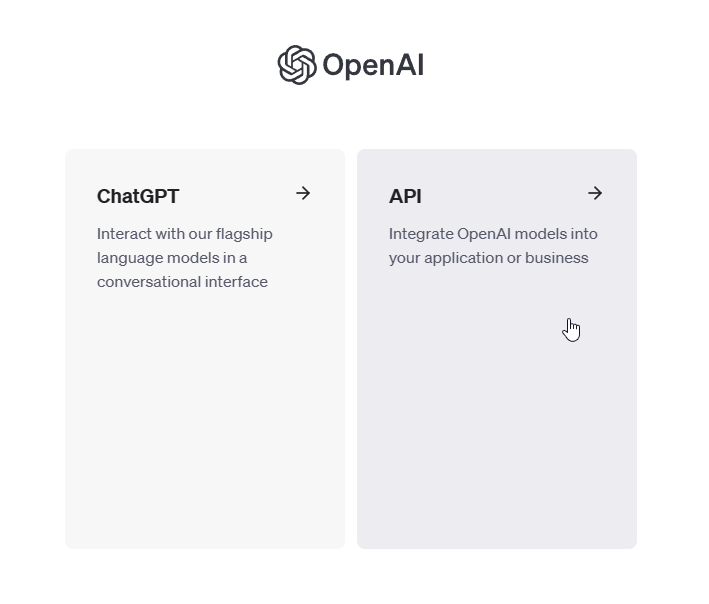
Then, go to the API section:
From the left side menu, click API keys. Then, click on Create new secret key, enter a name, and click Create secret key:
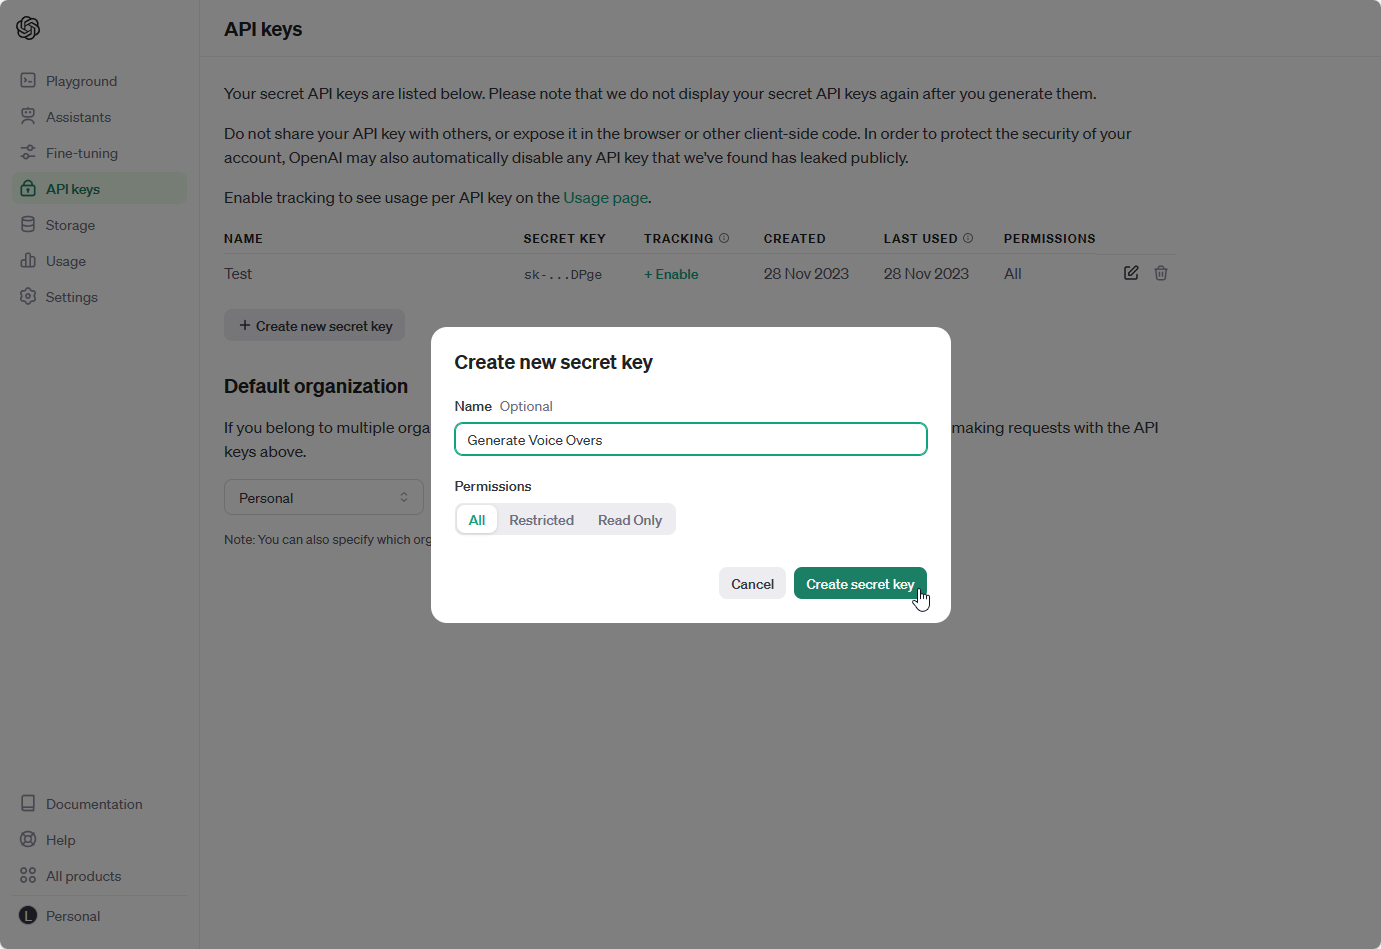
Keep your API key close by, you'll need it in the next step.
2. Create a video template in Creatomate
Log in to your Creatomate account or create a free account if you haven't already.
Let's connect to our OpenAI account first. To do so, click ... on the left, then choose Project Settings. Within the Integration section, toggle the switch to enable OpenAI. You'll then be prompted to enter your API key. Once done, click Confirm, and close the Project Settings menu:
Your OpenAI account is now connected to Creatomate. You'll see how this is used during the rest of this tutorial.
Now, it's time to create a video template. Navigate to the Templates page, and click the New button. For the purpose of this tutorial, go to the Voice Overs category, and select the Short-form Voice Over template. Choose a size you want for your videos, then click Create Template to open it in the editor:
The video editor might seem intimidating at first. No worries, it's pretty easy to get started.
Creatomate is a video editor specifically intended for video automation. There are many similarities between Creatomate and other editing tools, but there are some differences that make Creatomate unique. Instead of producing the final video, you can create a reusable design, called a template, capable of generating hundreds of unique videos. Every aspect of the video is customizable, including text, images, subtitles, and more. This provides you with a huge amount of freedom when it comes to video automation – not just the idea we'll use in this tutorial. Even the templates themselves are open source JSON that can be generated through automation.
Let's take a look at our voiceover template. As you can see, there are 4 compositions, each corresponding to a scene in the video. Each composition includes a voiceover, subtitle, and image element. When previewing the template in the editor, you'll notice that the voiceover and subtitles haven't been created yet; instead, they appear as placeholders. This is because the actual voiceovers won't be generated until we automate the workflow in Zapier. We'll see how that works later in this tutorial.
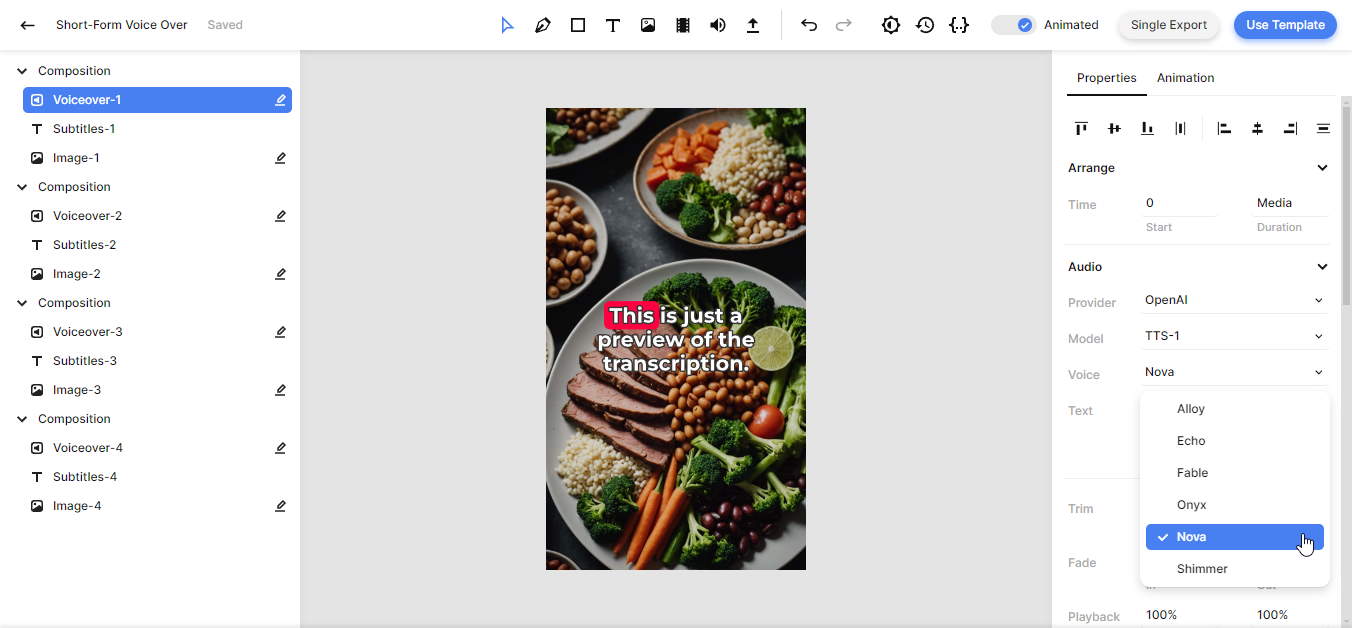
Our template is almost ready to use; the only thing left to do is specify the voice you want to use for the voiceover. Let me demonstrate this in the first composition. Afterward, you can do the same for the other voiceover elements.
Begin by selecting the Voiceover-1 element from the left-side panel. Then, navigate to the properties panel on the right, and find the Audio property. This is where you can customize the voiceover. By default, the Provider is set to ElevenLabs. For this tutorial, let's change it to OpenAI.
For the Model, let's select TTS-1. You should not use TTS-1-HD here; it has a rate limit of 3 generated voiceovers per minute. Given that our video contains 4 voiceover elements, it would exceed this limit.
Next, you can specify the Voice you prefer to use. Personally, I find Nova to be the best option, but you can pick the one you like most.
💡 AI tip: In this tutorial, we're using our own text for the voiceovers. But did you know you could also use AI to generate a video script for you? It's as simple as adding a ChatGPT module to your Zap; there's no need to make any adjustments to your template for this.
To complete the template setup, we'll also look at the subtitle and image elements – but no changes are needed here.
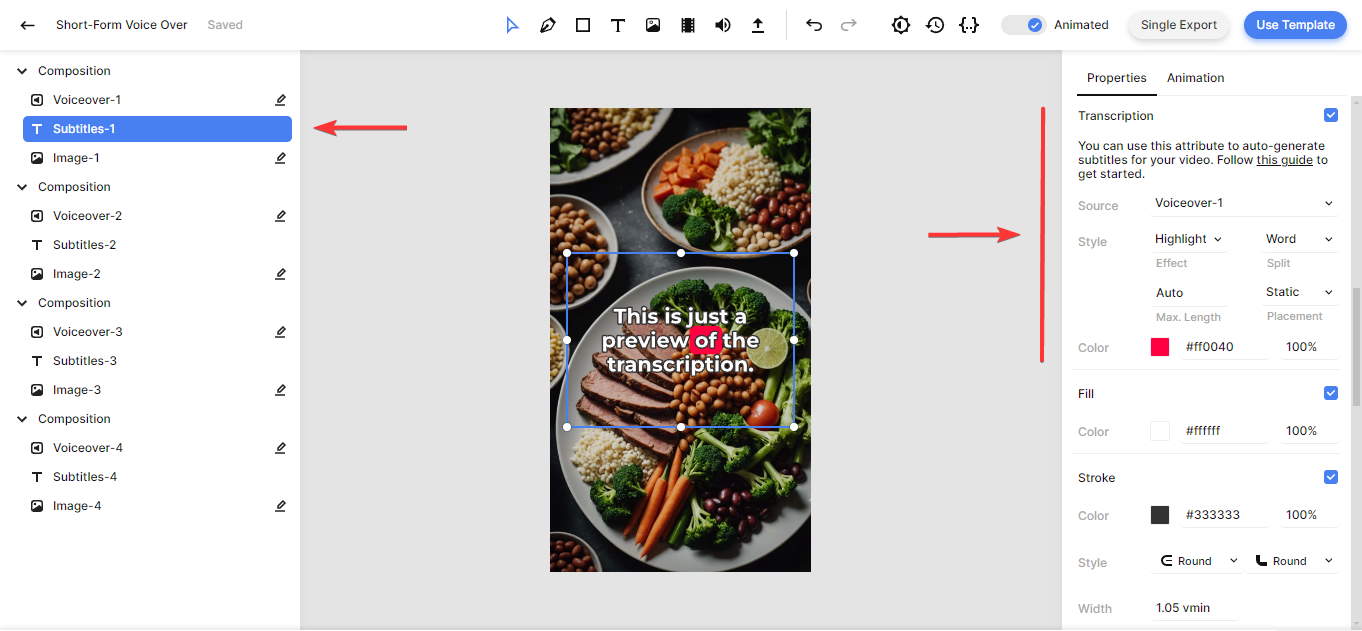
From the left side panel, click on the Subtitles-1 element. In the properties panel on the right, scroll down until you find the Transcription property. Here you can customize the subtitles. As you can see, the Source points to the Voiceover-1 element. This tells Creatomate to generate subtitles based on the voice over.
Last but not least, there's the Style, Color, Fill, and Stroke properties allowing you to further customize the look and feel of the subtitles.
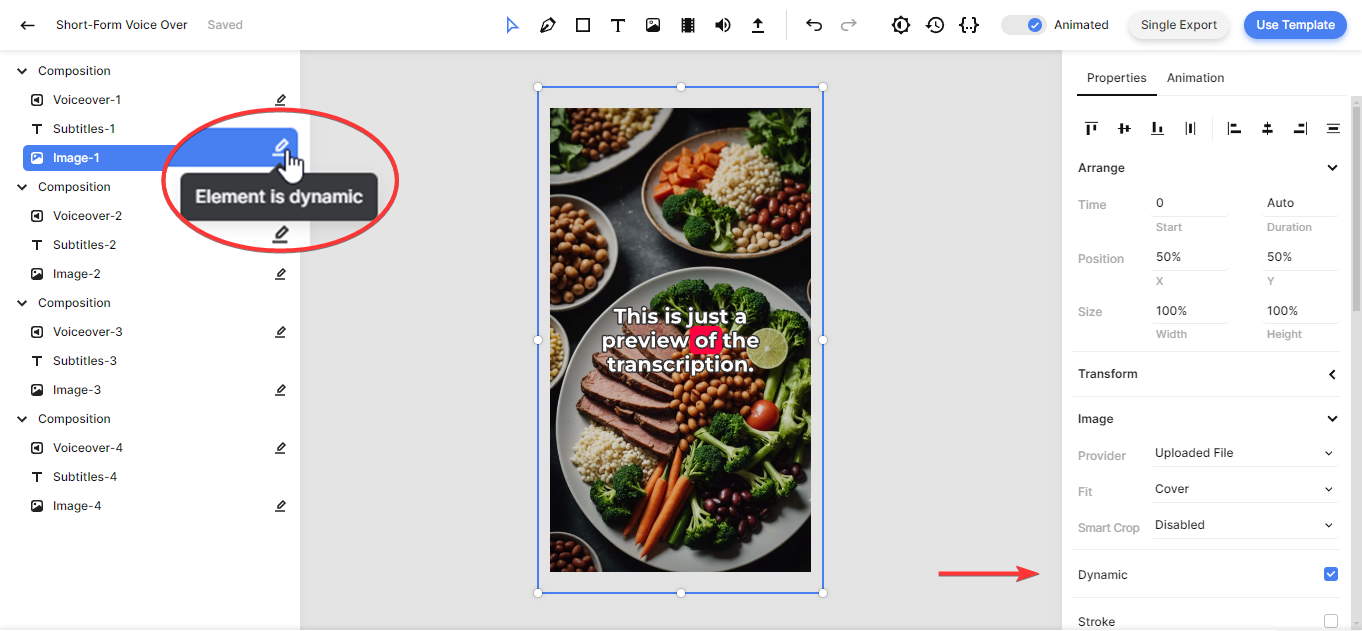
Finally, let's take a look at the image element. Notice that it's marked as dynamic, just like all the voiceover elements. This means we can supply it with a different value. We'll see how that works in the next step; setting up the automation workflow.
Once you've set the desired voice for each of the four voiceover elements, let's move on to Zapier.
💡 AI tip: Just like generating scripts for the voice overs, you also have the option to create images using generative AI. If you're interested in doing this, you'll need to change the image element's provider from "Uploaded File" to OpenAI or StabilityAI. This allows you to provide a text-to-image prompt in your Zap, rather than an image URL. Your OpenAI account for using DALL·E is already connected to Creatomate. However, if you wish to use Stable Diffusion, you'll first need to connect using your Stability.ai API key.
3. Set up a Zapier trigger
Now that our video template is set up, we'll proceed to generate the voiceover video using a Zapier workflow. I'll show you how to create a Zapier Table that supplies both the text for the voiceover and the images for the video background. However, feel free to use any other trigger app for this purpose.
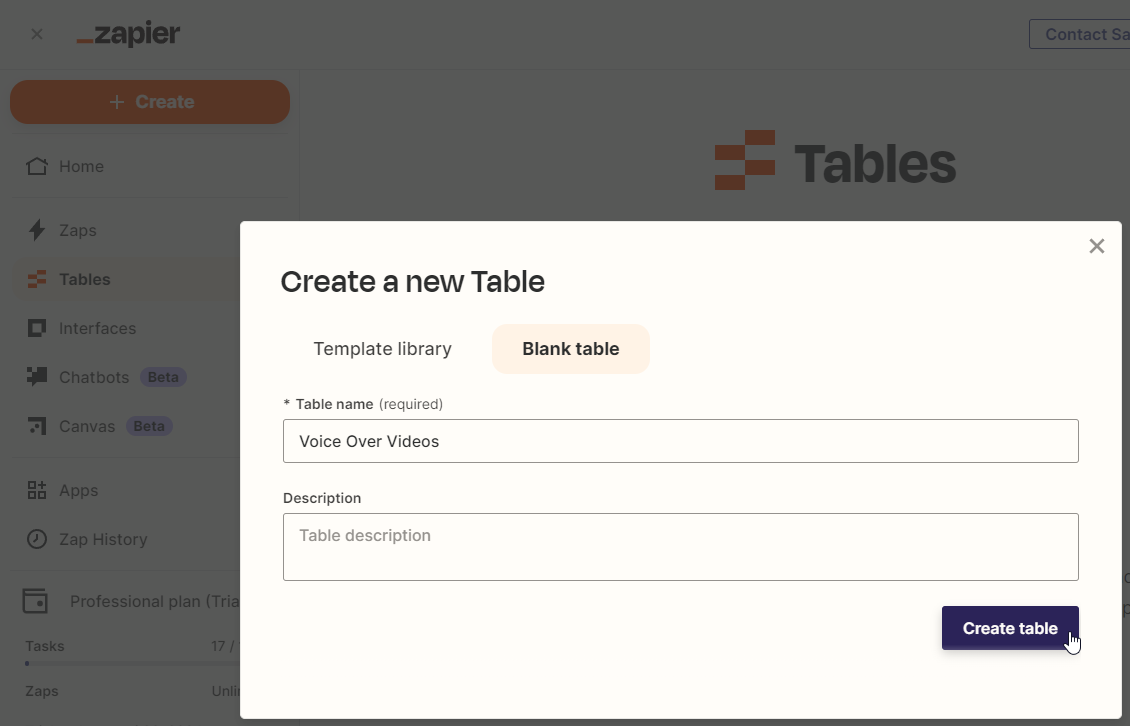
Log in to your Zapier account or sign up for free if you haven't already. Once logged in, navigate to the Tables page on the left. Click Create, choose Blank table, enter a table name, and click Create table:
Once in the table editor, let's create four text fields and four link fields, and insert the following data for the first record:
- A Text field: Text-1 -> The 3 Best Tips for Better Sleep
- A Text field: Text-2 -> Create a Relaxing Bedtime Routine: Wind down before bed with activities like reading, taking a warm bath, or practicing relaxation techniques.
- A Text field: Text-3 -> Maintain a Consistent Sleep Schedule: Go to bed and wake up at the same time every day, even on weekends, to regulate your body's internal clock.
- A Text field: Text-4 -> Exercise Regularly: Stay active during the day, but avoid vigorous exercise close to bedtime for better sleep quality.
- A Link field: Image-1 -> https://cdn.creatomate.com/demo/better-sleep-1.jpg
- A Link field: Image-2 -> https://cdn.creatomate.com/demo/better-sleep-2.jpg
- A Link field: Image-3 -> https://cdn.creatomate.com/demo/better-sleep-3.jpg
- A Link field: Image-4 -> https://cdn.creatomate.com/demo/better-sleep-4.jpg
Your table should look like the screenshot below:

As you might have noticed, I've also included another link field: Video URL. In step 5, we'll update it with the link to the generated voiceover video, so let's leave it blank for now. However, this field is optional. If you plan to share the video directly on social media or process it using your own app, there's no need to create this additional field.
💡 AI tip: Instead of including the text and images in your trigger, consider adding a step to your Zap to generate them using AI. For example, you can instruct ChatGPT to write a story on a specific topic, or have DALL·E produce images based on your description. While these AI tools can be used independently, you can also combine them to create fully AI-powered videos. This AI video automation tutorial provides step-by-step instructions.
Once your table is set up, go back to your Zapier dashboard, click Create, and select Zaps. In the workflow editor, click the Trigger block. Search for and choose Zapier Tables as the app and select New Record as the trigger. Then, click Continue.
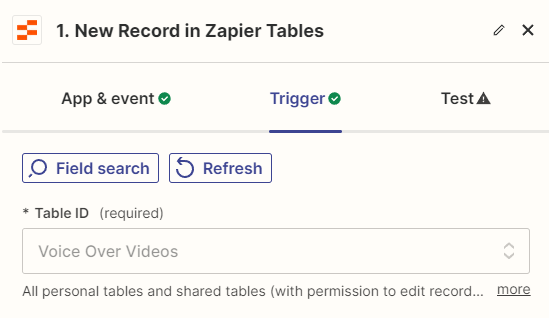
On the Trigger page, select your table in the Table ID field. Then, click Continue:
Click Test trigger on the Test page to make sure Zapier can access our newly created table along with the sample record. Once the test is successful, click Continue with selected record, and move on to the next step.
4. Generate the voice over video
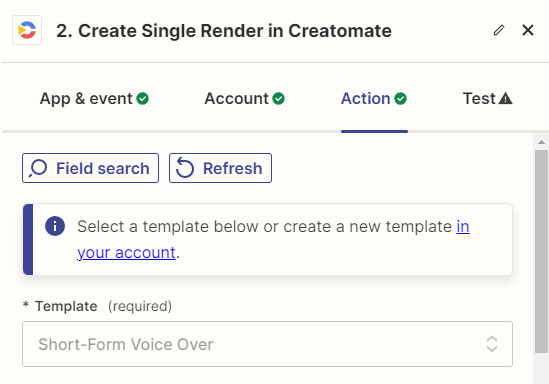
Search for and select the Creatomate app, and choose the Create Single Render event. Continue by selecting your account or signing in with your projects API key, which you can find under Project Settings in your Creatomate dashboard. Then, click Continue.
On the Action page, select the Short-Form Voice Over template in the Template field first:
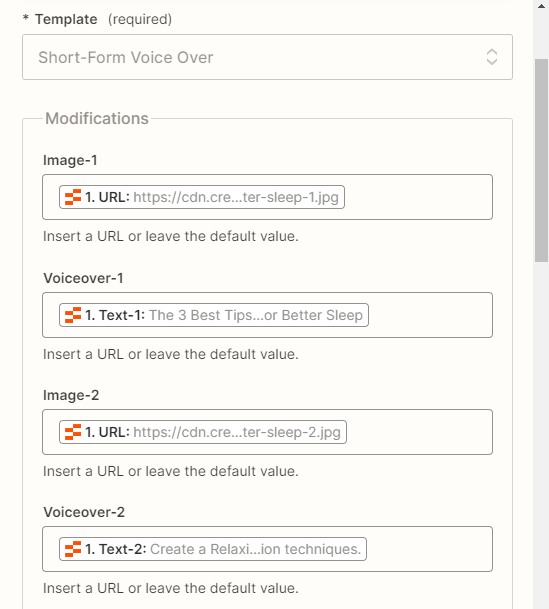
Then, map the video script and the background images to the template as follows:
- Set Image-1 to Zapier Tables -> URL (ending at 1.jpg)
- Set Voiceover-1 to Zapier Tables -> Text-1
- Set Image-2 to Zapier Tables -> URL (ending at 2.jpg)
- Set Voiceover-2 to Zapier Tables -> Text-2
- Set Image-3 to Zapier Tables -> URL (ending at 3.jpg)
- Set Voiceover-3 to Zapier Tables -> Text-3
- Set Image-4 to Zapier Tables -> URL (ending at 4.jpg)
- Set Voiceover-4 to Zapier Tables -> Text-4
When done, click Continue.
With everything set up correctly, we're ready to test if it works as expected. On the Test page, click Test step. Zapier will now send the image URLs and the text values to our template. With this data, Creatomate will automatically generate the voiceovers using your OpenAI account, create the subtitles accordingly, insert the images, and then render the final video.
This process can take a few minutes to complete. If you want to preview the generated video, wait a moment, then go to the URL given in the test result. If you see a “Not Found” message, it means the video is not ready yet. Keep in mind this only occurs during Zap setup. Once the workflow is activated, Zapier will wait for the video to complete before executing the next Zap action.
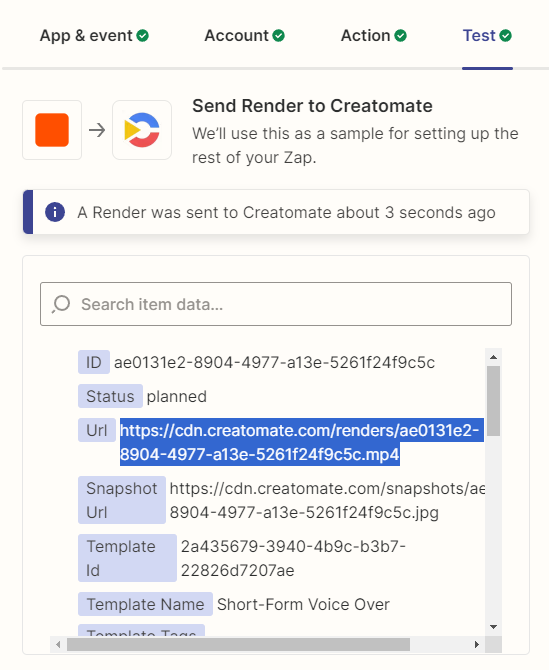
Once the test is successful, let's move on to the final step.
5. Process the video
By now, we've successfully generated a voiceover video, which you can use however you like. As an example, I'll demonstrate how to place it back into our table, but feel free to use the app that works for you. If you would like to share it on social media, we've written tutorials on how to post videos on YouTube Shorts, Instagram, TikTok, and Facebook. Alternatively, you can also send it via email. The choice is yours.
Click + to add another step to your Zap. Search for the Zapier Tables app, and select the Update Record event. Then, click Continue.
On the Action page, select your table in the Table ID field first:
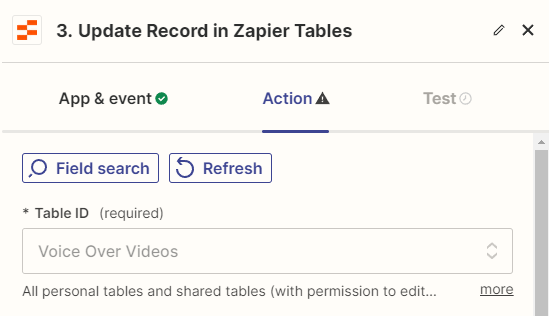
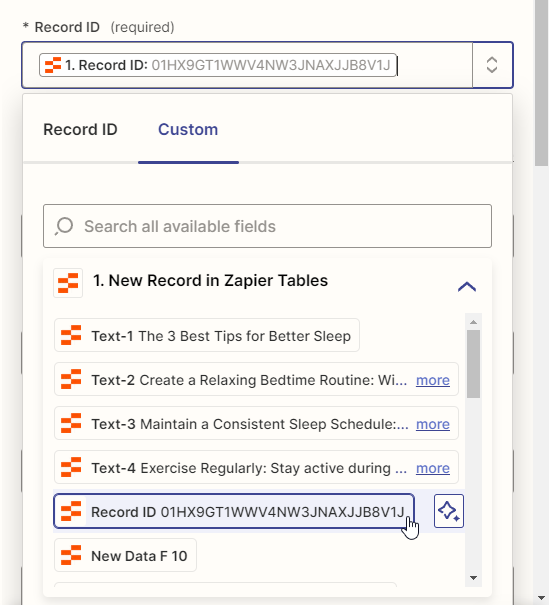
Next, in the Record ID field, select Zapier Tables -> Record ID, which you can find under the Custom tab:
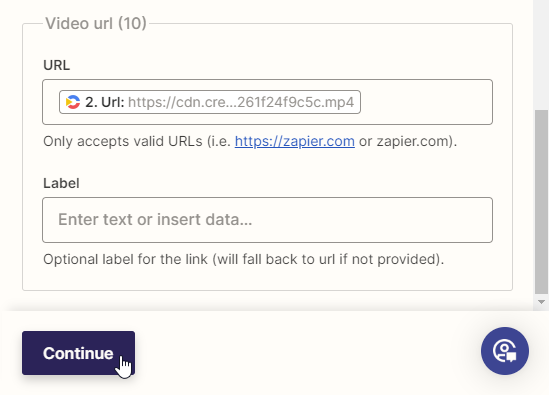
Then, select Creatomate -> Url in the Video url field, and click Continue:
Click Test step on the Test page to make sure Zapier is able to update the record with a link to the video. After that, return to your table. You should then see that the video link has been added to the right cell:

Last but not least, when you're happy with your workflow, click Publish Zap to activate it.
Well done! You've built a workflow that automatically generates voiceover videos, thanks to the combination of text-to-speech AI and video automation.
Next steps for video automation with AI
Now you know how to use AI to automatically generate voiceover videos, but this is just scratching the surface of video automation. With Creatomate, you can do so much more than simply create voiceover videos with subtitles. We've compiled a collection of step-by-step tutorials on producing different types of social media and marketing videos, both with and without AI. You can find them on our blog page.
As mentioned throughout this post, we've taken a simple approach by pulling video content from a Zapier Table. If you're ready to take it to the next level, why not try using generative AI for this? OpenAI is a great platform to pair with Creatomate, and it's well supported by Zapier, so implementing it should be straightforward. Check out our tutorials on ChatGPT, GPT-3, and DALL·E to learn more. We also have a tutorial on fully generated AI videos, which you can find here.
Lastly, I'd like to remind you about ElevenLabs, an AI voice generator. We have found it to be superior to OpenAI's text-to-speech feature. ElevenLabs provides a diverse collection of pre-made voices, the ability to design custom voices, and even the option to use your own voice. In addition, there's a range of customization options available to adjust aspects such as emotions, accents, and more, resulting in top-notch audio quality. If you're open to exploring other options, we highly recommend giving ElevenLabs a try. Here's a tutorial to help you get started.