How to Create Videos from New RSS Feed Items using Zapier

In this tutorial, I'll show you how to automate news video creation by turning RSS feed posts into short, engaging highlight videos for social media with Zapier and Creatomate.
With most people spending their time on social media, it's a great platform to get traffic to your website or articles. Especially videos do wonders in term of engagement. But creating a teaser video every time you post new content can be tedious. Luckily, this part can be fully automated!
In this walkthrough I'll show you how to build a Zapier automation workflow for creating videos based on a RSS feed. This Zap will generate a promo banner to share on YouTube Shorts, TikTok, Instagram, or Facebook – complete with an AI-generated voiceover and subtitles. Let's dive in.
At the end of this tutorial, we will have set up a pipeline that generates the above video using the article's primary image as the background, as well as an AI reading the summary aloud. For extra engagement, the video features animated captions.
We will create the video using Creatomate's template editor, which allows you to customize the video from beginning to end. Keep reading if you have a totally different idea – it works with any video template.
Prerequisites
These are the tools we'll use:
- Creatomate: to create a design and generate news videos;
- ElevenLabs: to produce AI-powered voiceovers;
- an RSS feed: to monitor newly posted articles;
- a social media account: such as Instagram, TikTok, Facebook, or YouTube, to post the videos;
- Zapier: to automate the entire process.
Tip: If your RSS feed gets more than three new articles each day, consider creating daily news summary videos instead. I've put together a detailed tutorial on how to set up such an automation with Make.com, which you can find here.
How to automatically generate news videos from an RSS feed
To automate news video creation, we'll start by signing up for an ElevenLabs account and getting our API key. Next, we'll create a template in Creatomate, which will serve as the design for all our videos. In this step, we'll connect to ElevenLabs, choose a voice for the voiceover, and customize the subtitle style (optional).
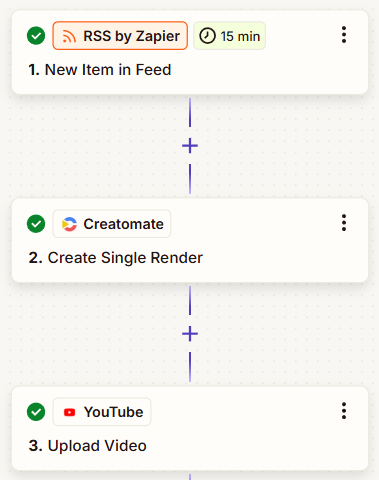
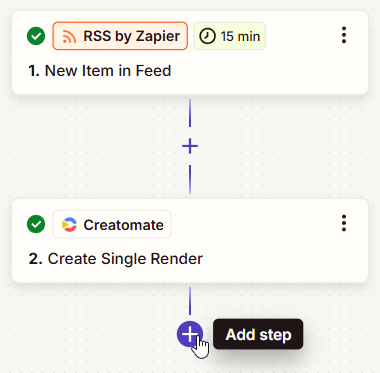
Once the template is ready, we'll move on to Zapier. We'll set up a Zap that triggers whenever a new item appears in the specified RSS feed. Creatomate will then take the article's details, insert them into the template, and generate a video. After the video is created, you can use it however you like. For example, I'll show you how to upload it as a YouTube Short, but you can post it on any platform you prefer. Here's what our Zap will look like:
Let's get started!
1. Set up ElevenLabs for AI voiceovers
There are many text-to-speech tools available, but we consider ElevenLabs the best. It stands out as one of the most advanced AI voice generators, producing high-quality, natural-sounding audio with a variety of accents, emotions, and speaking styles.
ElevenLabs also offers multiple ways to create voices, such as designing custom AI voices or cloning your own. For simplicity, I'll show you how to use one of the voices from their extensive library. As an alternative, you can also select a pre-made voice directly in the template editor, which we'll cover in the next step.
Note: As of now, ElevenLabs offers a free plan with 10,000 credits, so you can start using it for free.
Sign up for ElevenLabs, or log in if you already have an account.
Navigate to the Voices page, then go to Library:
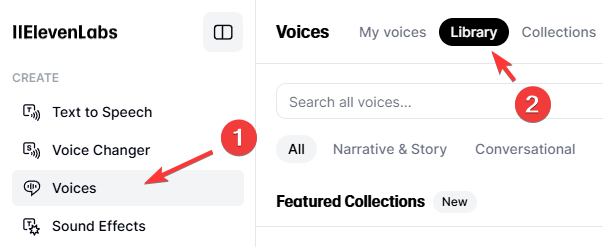
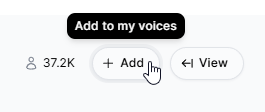
Here, you can choose a voice you want to use for your voiceovers. Click the Add button to add a voice to your account:
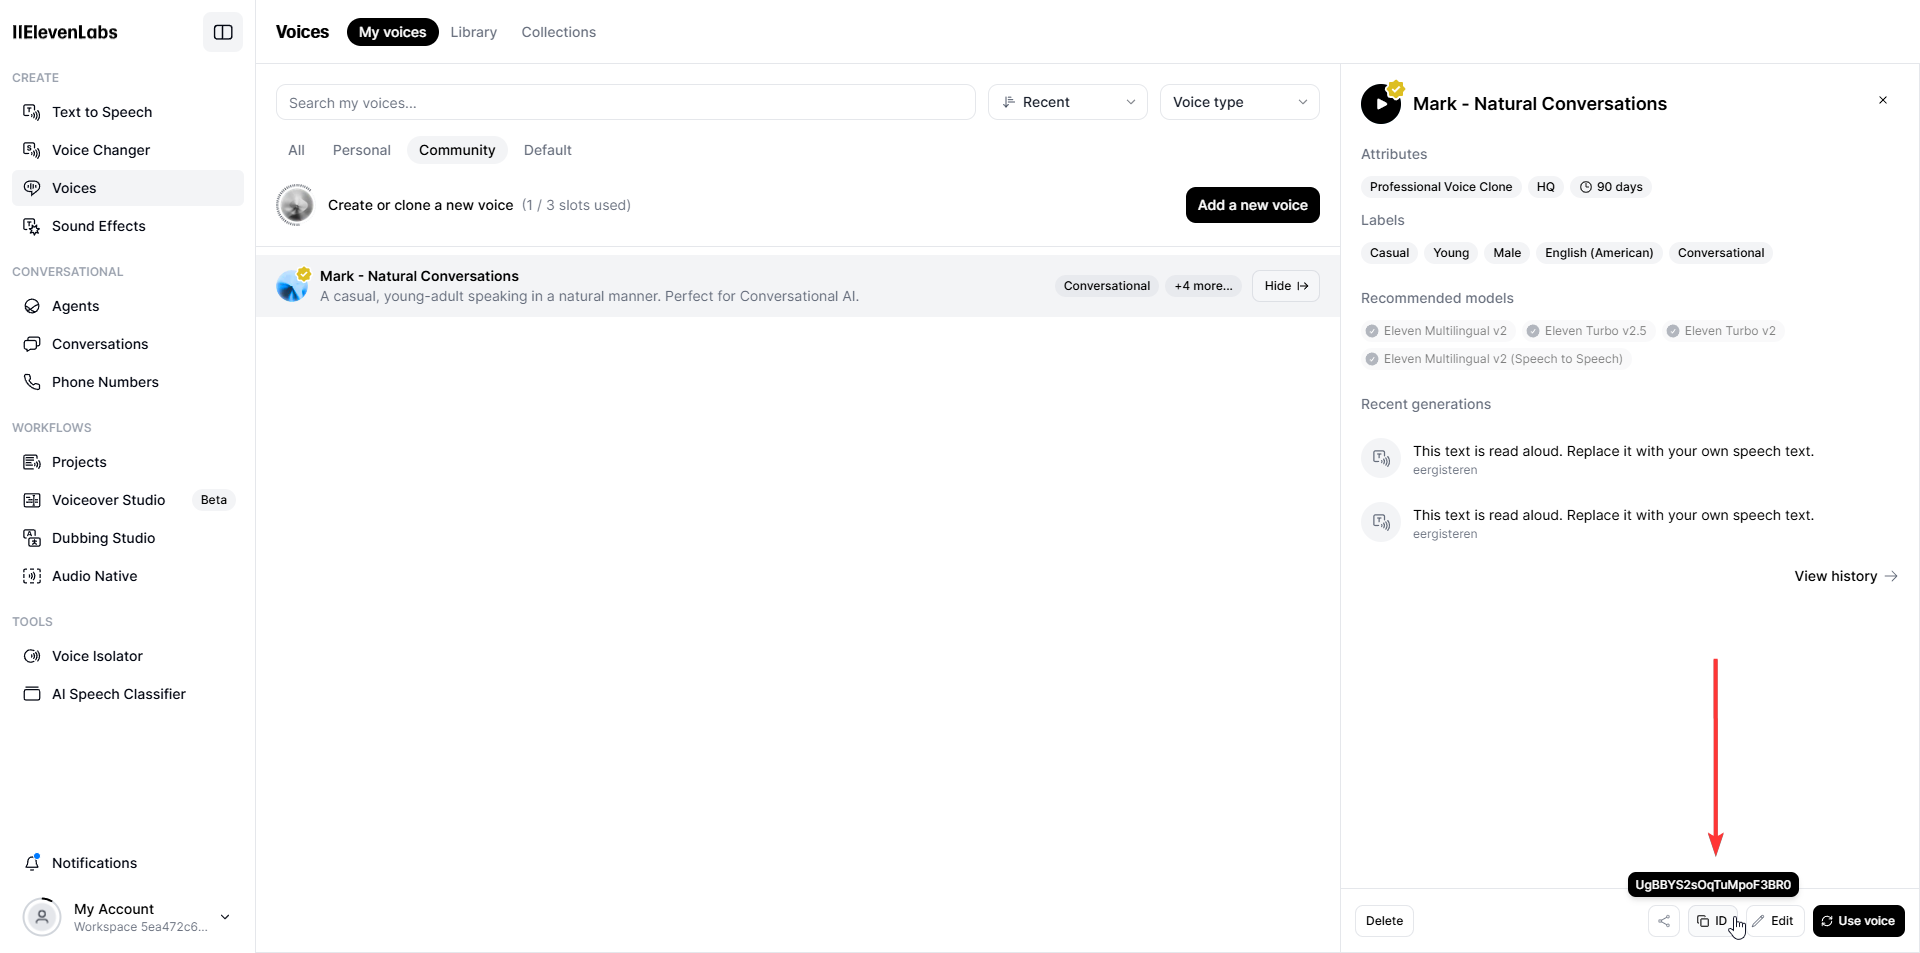
To use this voice, you'll need its unique ID. Go to the "My Voices" page and open the Community tab to find the added voice. To copy the voice ID, click View, then the ID button. You don't need to do this right now – I just want you to know where to find it when you need it: (Click the screenshot to view it in full screen)
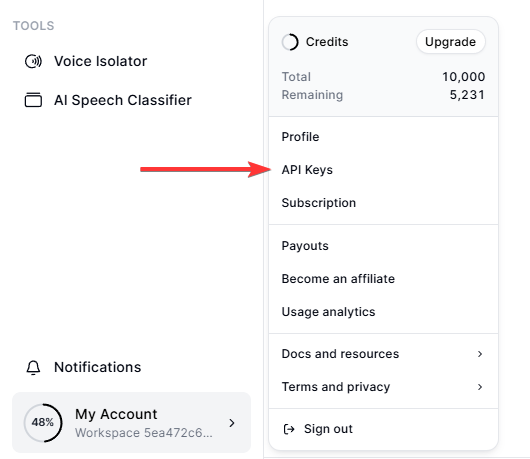
You'll also need your ElevenLabs API key to connect with Creatomate in the next step. You can create one by clicking on My Account in the bottom left corner, then choose API Keys:
Now that you've chosen a voice and generated an API key, let's move on to creating a video template.
2. Create a news video template in Creatomate
Log in to your Creatomate account or create a free account if you haven't already.
Before setting up the template, we need to connect to our ElevenLabs account. To do this, click ... on the left and choose Project Settings. Under Integration, toggle the switch to enable ElevenLabs. Then, paste your API key, click Confirm, and close the Project Settings menu:
With this integration in place, Creatomate can send requests to your ElevenLabs account to generate voiceovers for your videos.
Next, let's create a template. Head to the Templates page and click New to open the template gallery. If you have a specific design in mind, you can create your own template from scratch. To follow along with this tutorial, go to the Voice Overs category and select the News Highlight template. Since I'll be showing you how to post the video as a YouTube Short, choose the 9:16 Vertical size, then click Create Template to open it in the editor:
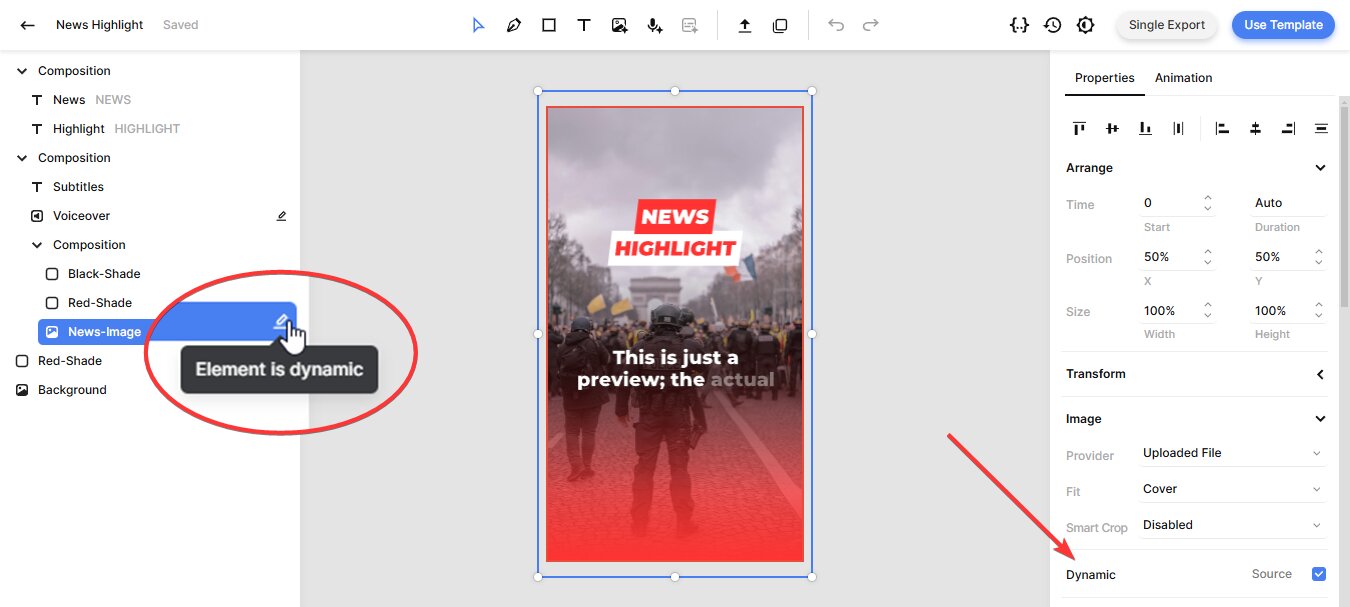
Let's take a look at our video design, and I'll quickly explain how it works with our automation plans. In the left side panel, you'll find the elements that make up our template. One thing to note is that the Voiceover and News-Image elements are marked as dynamic. This allows the summary to be read aloud and the article's image to be used as the video background – automatically generating unique videos for each news article:
Another thing you'll notice when playing the video is that there's no voiceover yet, and the subtitles are just placeholders. This is because they can only be created once we provide the content through our Zap.
Both the voiceover and subtitle elements can be customized, but it's not required. If you'd like to change anything, I'll show you how.
Select the Voiceover element and find the Audio property in the panel on the right. Here, you can customize the voiceover. For this template, the Provider is already set to ElevenLabs. For the Model, we recommend using Eleven Multilingual v2, as it offers excellent speech synthesis and supports multiple languages:
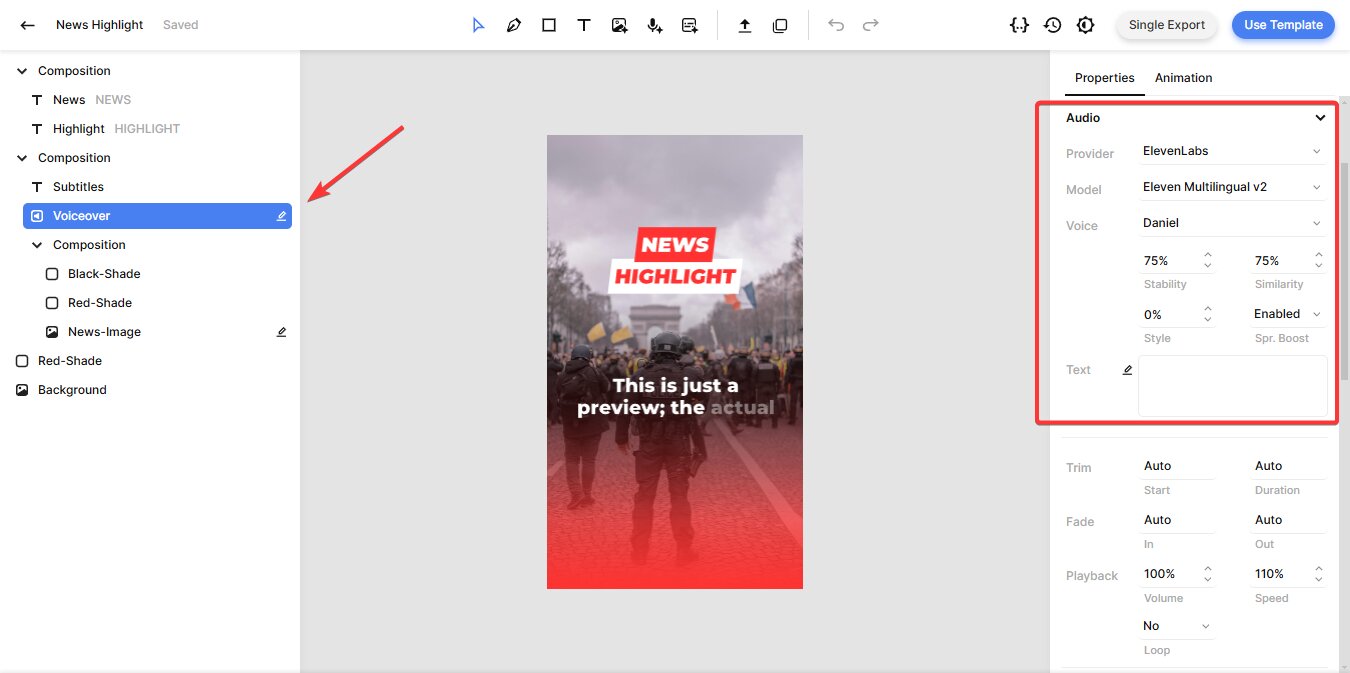
By default, the Voice is set to Daniel. If you selected your own voice in the previous step, you can change it here. To do this, click on Daniel, scroll up, and select Custom Voice. Then, paste the voice ID from your voiceover and click OK:
You can also adjust settings like Stability, Similarity, Style, and Speaker Boost to fine-tune the voiceover. For example, the Stability parameter controls the level of emotion and randomness in the voice. Unless you have a specific reason to adjust them, I recommend leaving these settings at their default values, as they work well for most purposes. For more information on each setting, check out ElevenLabs' Voice Settings documentation.
Tip: Under Playback, you'll find the Speed setting, which lets you adjust the voiceover speed if it's too slow. A value of 110% works great if you find the voiceover a little slow.
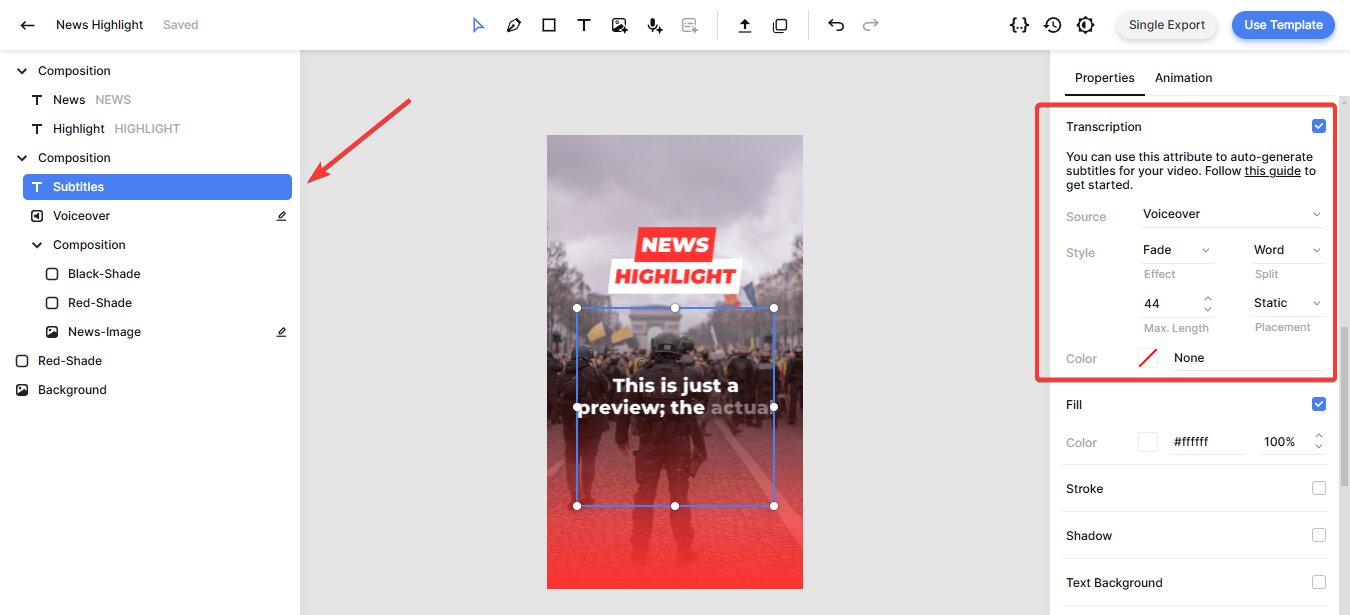
Now, let's take a look at the subtitles. Select the Subtitles element and scroll down to the Transcription property. Here, you can customize them. As you can see, the Source is set to the Voiceover element, which tells Creatomate to generate subtitles based on the voiceover. You can adjust the Style, Color, Fill, and Stroke attributes to further customize the appearance of the subtitles:
Once your template is ready, it's time to set up the automation in Zapier.
3. Trigger your Zap for new RSS feed items
Log in to your Zapier account, or create a free account if you don't have one yet.
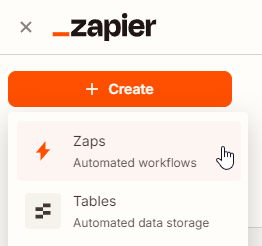
From your dashboard, click Create, then choose Zaps:
Once in the Zap editor, click the Trigger block. Search for and select RSS as the app and New Item in Feed as the trigger event:
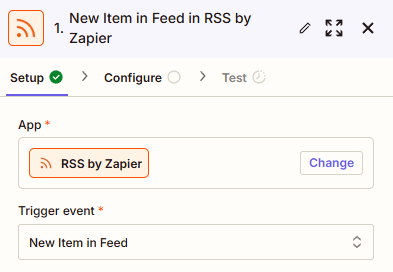
Then, click Continue.
Next, specify the RSS feed you want to monitor. Enter the Feed URL, and if needed, add a username and/or password. As an example, I'll use an RSS feed with news about space: https://www.space.com/feeds/all
In the What Triggers a New Feed Item? field, I suggest selecting Different Guid/URL (the recommended option), though you can choose whichever option best suits your needs:

When you're finished, click Continue.
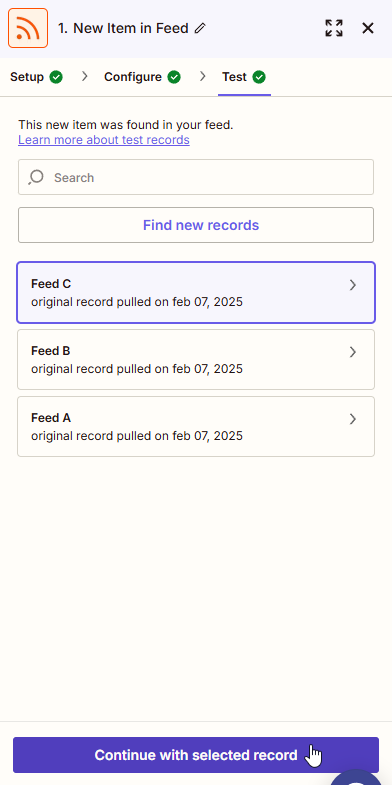
To make sure Zapier can find an item in the RSS feed, click Test trigger. Select an item to use for setting up the rest of your Zap, then click Continue with selected record to proceed to the next step:
4. Generate the video
In this step, we'll set up an action for Creatomate to generate the video.
Search for the Creatomate app and select the Create Single Render action event. Next, connect your project by entering its API key, which you can find under Project Settings in your Creatomate dashboard (on the same screen where you added the ElevenLabs API key):
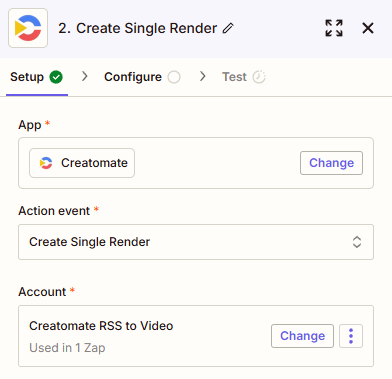
Then, click Continue.
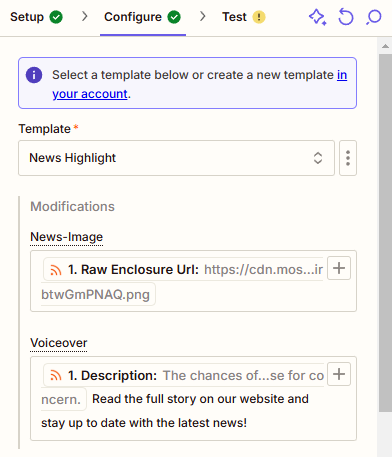
In the Template field, select the News Highlight template. The dynamic elements will automatically be detected and listed under Modifications.
Next, map the article data to the template as follows:
- Set News-Image to RSS by Zapier -> Raw Enclosure Url
- Set Voiceover to RSS by Zapier -> Description. You can also add static text to be read aloud, such as a call to action like: Read the full story on our website and stay up to date with the latest news!
When done, click Continue.
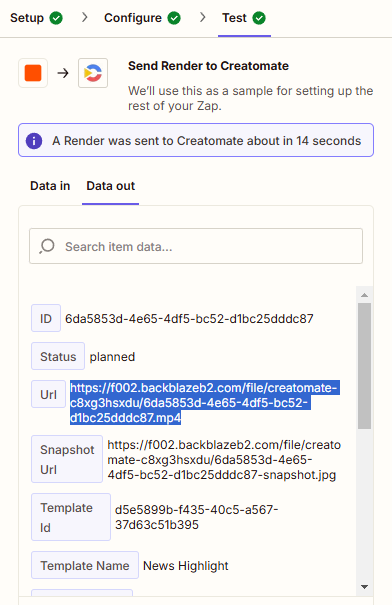
Click Test step to send a request to Creatomate to generate a video. In the background, the system asks ElevenLabs to create a voiceover based on the article description. It then automatically transcribes the voiceover and generates animated subtitles. Finally, the image is added to the template, resulting in a complete news video.
The video generation process may take a few minutes. Once the video is ready, you can view it by visiting the URL provided in the test results. If you see a "Not Found" message, the video isn't ready yet – just wait a little longer and try again. This only happens during Zap setup. Once the automation is live, it will wait for the video to finish before moving on to the next step.
Once the test is successful, it's time for the final step: processing the video.
5. Process the video
Last but not least, we'll set up an action to use the generated news video. I'll show you how to upload it as a YouTube Short, but you can also share it on Instagram, TikTok, or Facebook.
Click + to add another step to your Zap:
Search for and select the YouTube app with the Upload Video action event. Continue by selecting your account or signing in first:
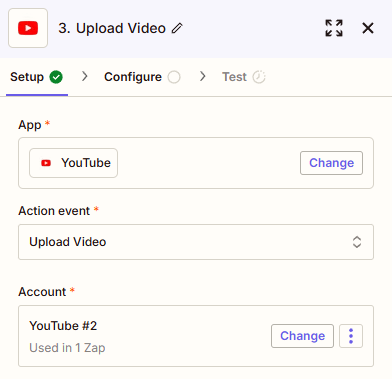
When done, click Continue.
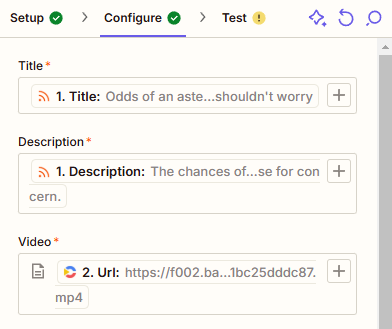
To set up the action, map the title and description (which can be pulled from the RSS step) For the Video, select Creatomate -> Url:
You can adjust the other settings however you like. When done, click Continue.
Finally, click Test step to verify that Zapier is passing the correct data. Keep in mind that the YouTube app won't publish the video at this stage – it will only do so once the Zap is live. After confirming the data is correct, click Publish to activate your Zap.
What's next for automated news videos
And that's it – pretty straightforward, right? With this setup, a news video will automatically be created and shared with your audience whenever an article is published in your RSS feed. The great thing about this approach is how flexible it is thanks to Zapier and its support for thousands of apps.
Here is another idea. If your news feed publishes multiple articles daily, consider creating news summary videos instead. For example, you could set up a workflow that gathers a number of news items at a specific time each day. ChatGPT can then pick the three most interesting or engaging stories, and Creatomate will turn them into a daily news summary video, ready to be shared on social media.
Want to see how? I've written another tutorial with step-by-step instructions:
You might also like these tutorials


Start automating today
Start with a full-featured trial with 50 credits, no credit card required.
Get started for free →