How to Create Many Images in Bulk using a Spreadsheet

In this image automation tutorial, you'll learn how to batch-create images using a simple spreadsheet or CSV file.
Whether it's banner ads, personalized images, or social media visuals, producing a large number of images by hand takes a considerable amount of time. Especially when we want to create dozens, if not hundreds, of images, it can quickly become overwhelming and repetitive.
The good news is that image automation is here to help, as most marketing images follow a similar design, just with different content. This process, called bulk image creation, involves using a spreadsheet to generate hundreds of images based on a single image template. It's easy, and it only takes a few minutes to create large quantities of images.
This tutorial shows you how to batch-create images like the one below, however it works for any kind of image as it includes an online editor that allows you to create your own templates:

Tip: The focus of this tutorial is about creating images in bulk, but it works just as well for videos. To find out how to create videos with a spreadsheet instead, check out this guide.
How to bulk-create images using a spreadsheet
To follow along, you'll need a Creatomate account. You can sign up for free here.
We'll start by creating an image template. Following that, we'll set up a feed that creates images in bulk based on that template. Lastly, the images can be downloaded directly to your device or you may choose to automate the process even further.
Let's dive in!
1. Create an image template
Log in to your Creatomate account. Navigate to the Templates page and click + New. For this tutorial, let's use the Real Estate Banner template from the Real Estate category. However, you can choose any template you like, be it static or animated, or design your own from scratch. Choose a size, like 1:1 Square, and click Create Template to open it in the editor:
In the left-hand panel, you can see the elements that make up the template. Several of them have been marked as Dynamic, such as the photos, price, and description. This means that these elements simply serve as placeholders, and can be easily replaced in bulk, as you will see in the next step.
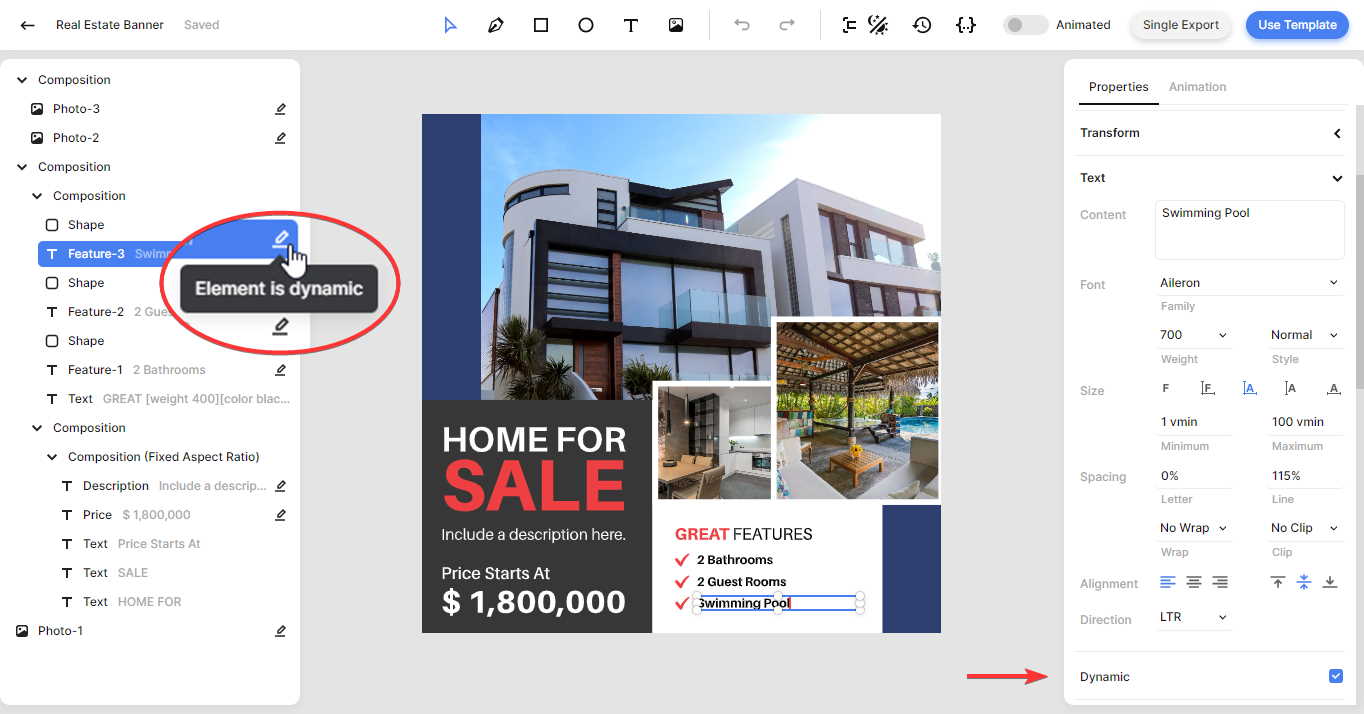
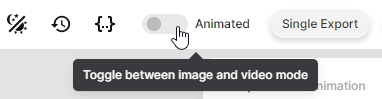
Tip: We just created an image template. In case you'd rather generate animated banners instead of still images, simply switch the Animated toggle to video mode.
You can customize the template however you like. For now, let's keep things simple and use the template as it is. Next, we'll create a feed.
2. Create a feed
While in the template editor, click Use Template in the top-right corner. Choose Spreadsheet to Video and make sure Create new feed is selected. After clicking Continue, we'll be taken to our newly created feed:
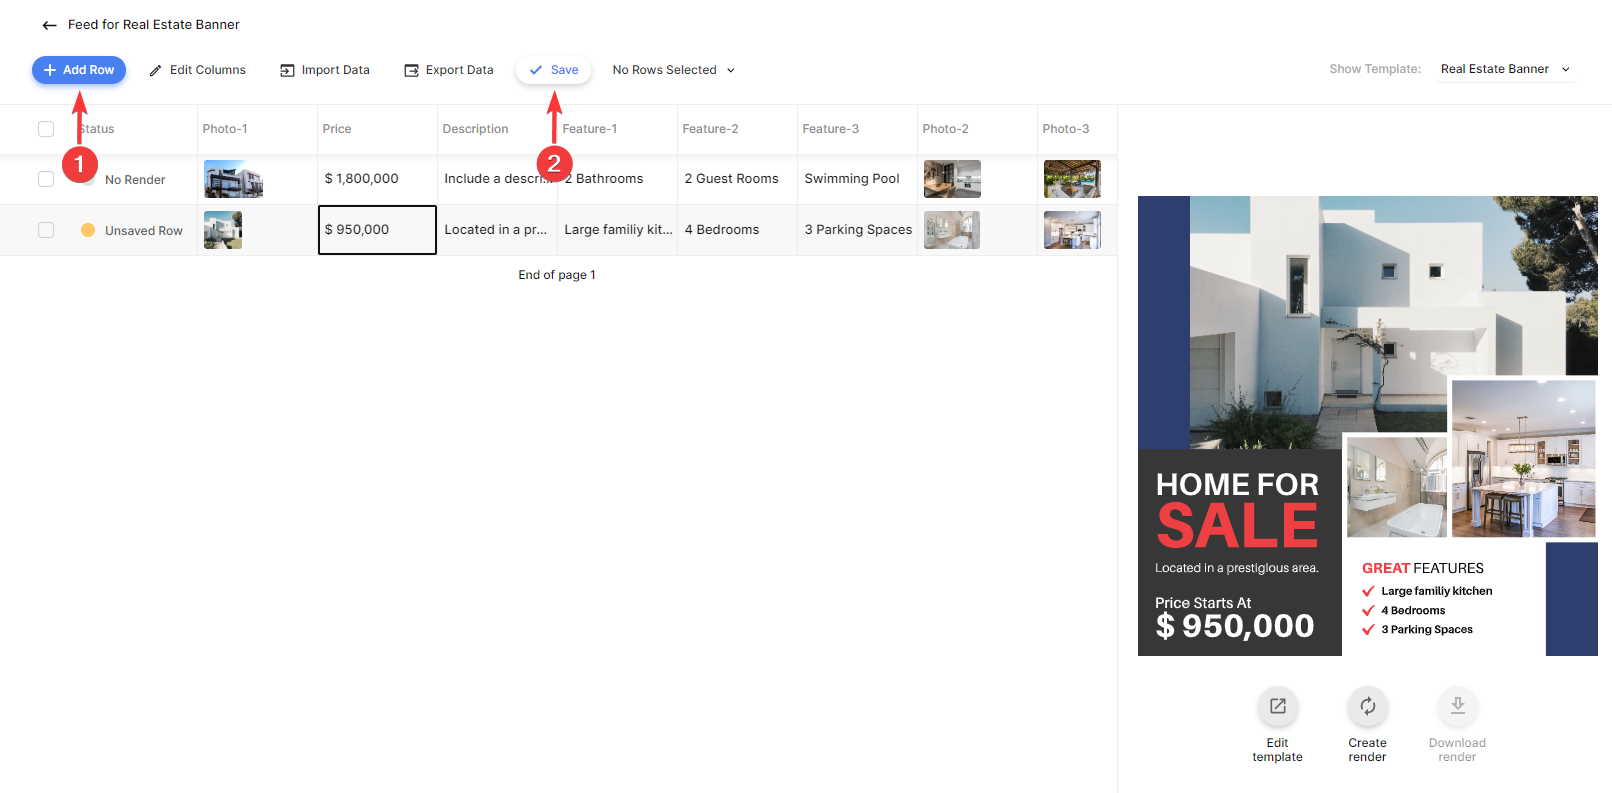
Essentially, a feed is a spreadsheet in which each row generates a unique image. In order to do that, the feed inserts data from the corresponding row into the image template. In the feed that was just created, several columns were automatically mapped to the dynamic elements within the template; Photo-1, Price, Description, Feature-1, Feature-2, Feature-3, Photo-2, and Photo-3.
There are several ways to insert data into a feed. The easiest method is to manually enter text and upload pictures to the spreadsheet. To do so, click Add Row. Whenever you edit the content of a row, the resulting image will appear on the right.
When done, click Save. After saving, the status column updates from Unsaved Row to No Render, which means your data is saved, but no images has been generated yet (which is called a render):
A feed can also be populated by data from an uploaded file, such as a CSV (comma-separated values). A CSV is a spreadsheet format you can export from almost any application, like Google Sheets, Airtable, or Shopify. To import a CSV, click Import Data and select the CSV file from your device. The CSV can now be mapped to the feed so that data is imported into the appropriate columns. Whenever you re-import a CSV file, such as when you only want to import changed or new rows, you can choose a merge column. To finish, click Import Data, then click Save:
Now let's proceed to the next step, where we will actually create and download the images.
3. Render and download the images
On the right, you can preview the generated image corresponding to each row. You can create the final image by clicking Create render. As soon as the status indicates Rendered, the image is ready for downloading:
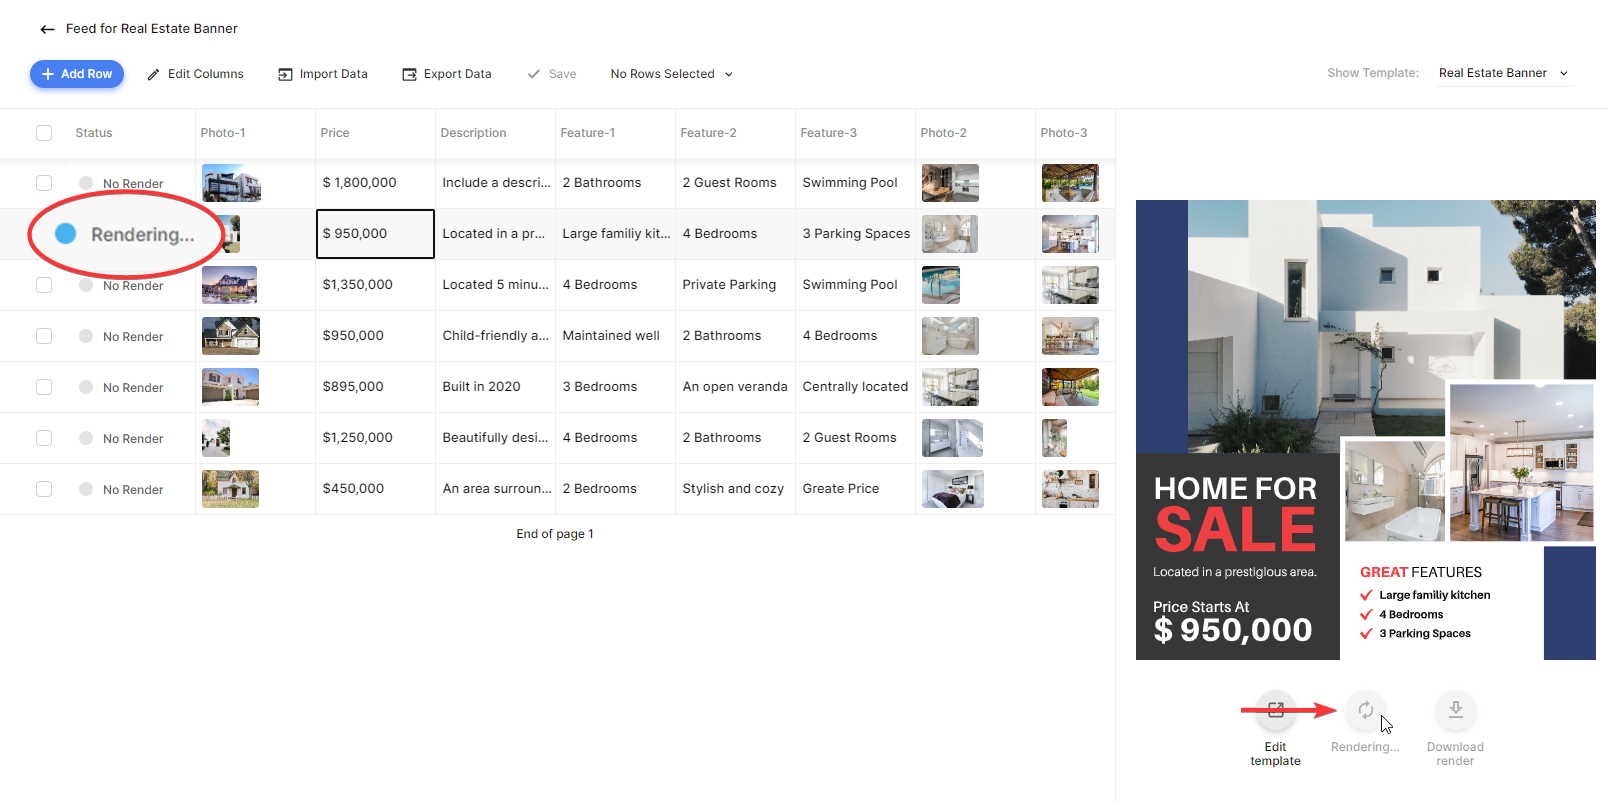
Alternatively, you can create multiple images at once. You can do this by selecting the rows you want, then clicking Create Renders:
As soon as all images have been generated, as indicated by the Rendered status, you can download them as a ZIP file by clicking Download Renders. This will allow you to select a file name for each image based on a column:
Tip: You can also export the spreadsheet with the generated videos as a CSV file. You can do this by clicking the Export Data button located at the top of the spreadsheet.
Wrapping up
Now you know how to create images in bulk – quick and easy, right? All you have to do is create an image template, and then fill in a spreadsheet. The whole process takes just a few minutes.
Here's what you can do next:
- Integrate with Zapier or Make (formerly Integromat). As an example, you could set up an automated workflow that posts the images automatically to social media whenever they are finished being generated by the feed.
- Export the entire feed using the Export Data button, including images, and use it elsewhere.
- Instead of images, create videos in bulk. The process is exactly the same, except that you start with a video template instead. You could make personalized videos for year-in-review campaigns, prospecting videos for sales outreach, social media videos for making a month's worth of video content in advance, or product videos for your e-commerce store.
You might also like these tutorials


Start automating today
Start with a full-featured trial with 50 credits, no credit card required.
Get started for free →