Automate Creating Videos using Spreadsheets and Zapier

This tutorial shows how to create videos in bulk using a spreadsheet, then automate any further actions with Zapier, such as posting to social media or sending personalized videos by email.
Let's say you have a spreadsheet filled with data that you want to turn into videos, then use those videos in an automated workflow you've set up in Zapier:
- Perhaps you want to create multiple social media posts at once and then publish them over a period of time, each with a unique auto-generated video.
- Maybe you want to send personalized videos to a list of contacts for cold outreach.
- Or what if you've got a list of subscribers and want to send each one a dynamic video customized to them, such as Spotify does every year with Spotify Wrapped?
All of these are excellent use cases for Zapier and video batch creation. Whatever you store in your spreadsheet, you can make videos out of them in bulk – and Zapier will do the rest. This tutorial shows you how. We'll use this video template as an example, but you can make your own highly-dynamic templates using the video editor:
Prerequisites
Sign up for these tools so you can follow along:
- Creatomate: to automatically generate the videos. Create your free account here.
- Zapier: to set up an automated workflow to process the videos.
How to create videos with spreadsheets and Zapier?
We'll start by creating a video template in Creatomate. Next, we create a feed, which is basically a spreadsheet that generates videos based on a template. Last but not least, we'll set up an automated Zap to use the generated video with any of the 7,000 apps available on Zapier. In this example, the video will be sent via email.
Let's get started!
1. Create a video template in Creatomate
Log in to your account, go to the Templates page and click the New button. Now we can pick a ready-made template from the gallery or create our own from scratch. Let's go with the Quick Promo template from the Featured category. The 1:1 Square size is fine, so let's click Create Template to open it in the editor:
Here, we are able to customize the template. We could, for example, replace the placeholder logo with our own. For now, let's leave the template as-is; we can always edit it later. A key factor to remember about templates is that they contain dynamic elements; in this case the Text-1, Text-2, and Video elements:
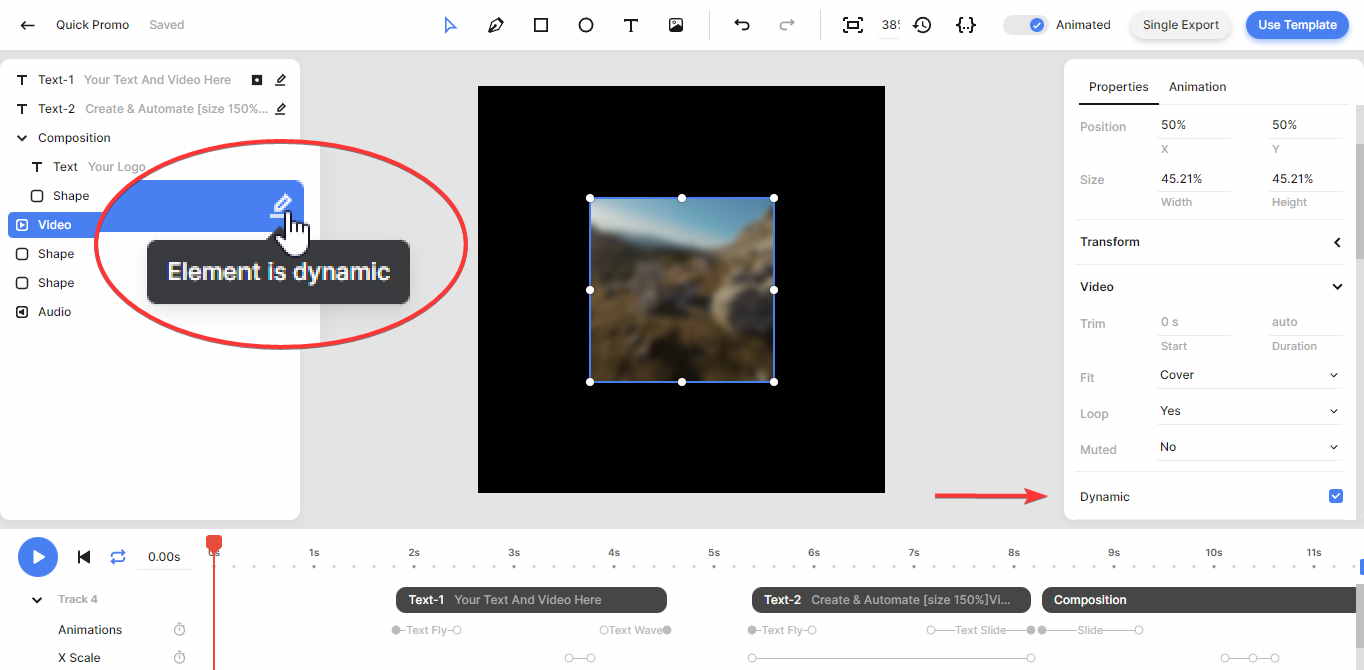
When creating a feed, these elements are automatically assigned to a column in the feed, allowing us to create a unique video for every row. We will see how that works in the next step.
2. Create a spreadsheet
Click Use Template at the top right of the template editor. Let's choose the Spreadsheet to Video option. Next, select Create new feed and click Continue:
Here is the feed that was just created based on the video template. You can see the Text-1, Text-2, and Video columns that were created based on the dynamic elements in our template. With each row we add to our feed, we can generate a unique video with its own text, images, videos, and colors.
Before we do that, let's set up a Zapier workflow that gets triggered whenever a video is created.
3. Trigger your Zap for new videos
Log in to your Zapier account and click the + Create Zap button from your dashboard. Choose Creatomate as the app and New Render as the event. Then, click Continue.
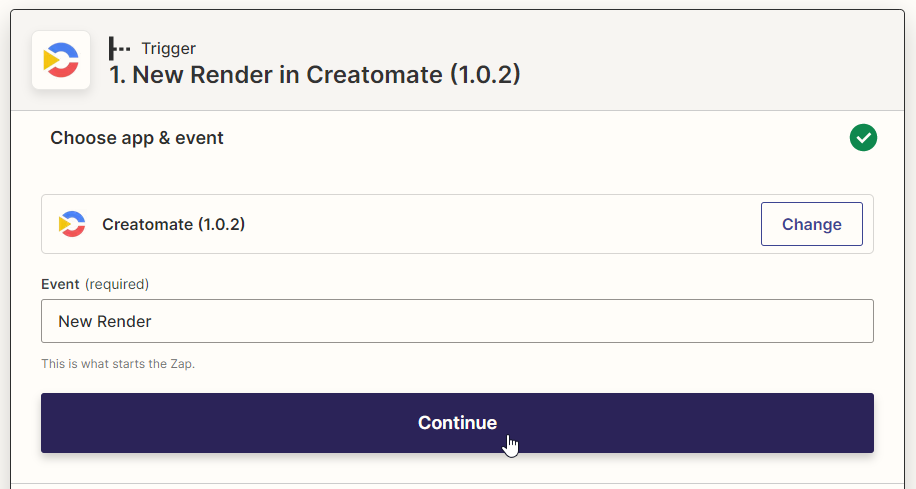
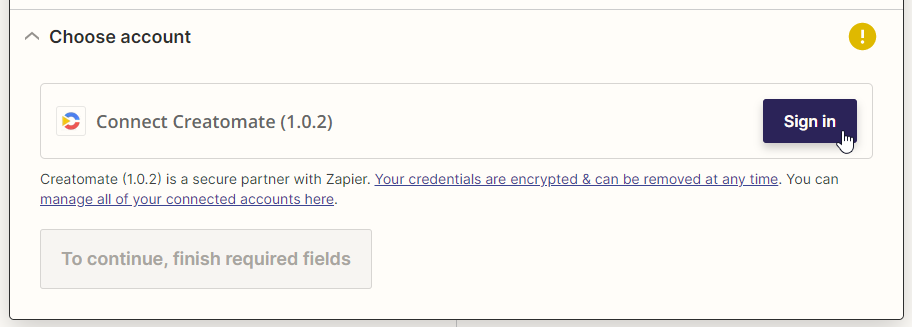
Choose your account from the list. If you're using Creatomate within Zapier for the first time, you have to connect your account first. Click Sign in and enter your API key. You can find your API key under Project Settings in Creatomate. Once your account is selected, click Continue.
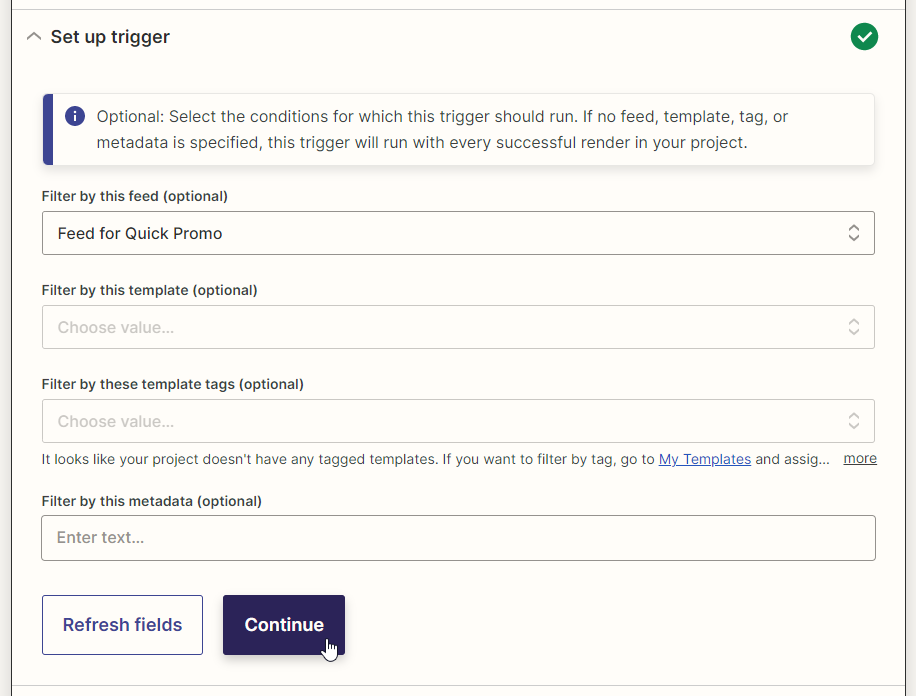
Let's set up the trigger. As we want this Zap to run for generated videos from the feed we created in step 2, select Feed for Quick Promo in the "Filter by this feed" field. Then, click Continue:
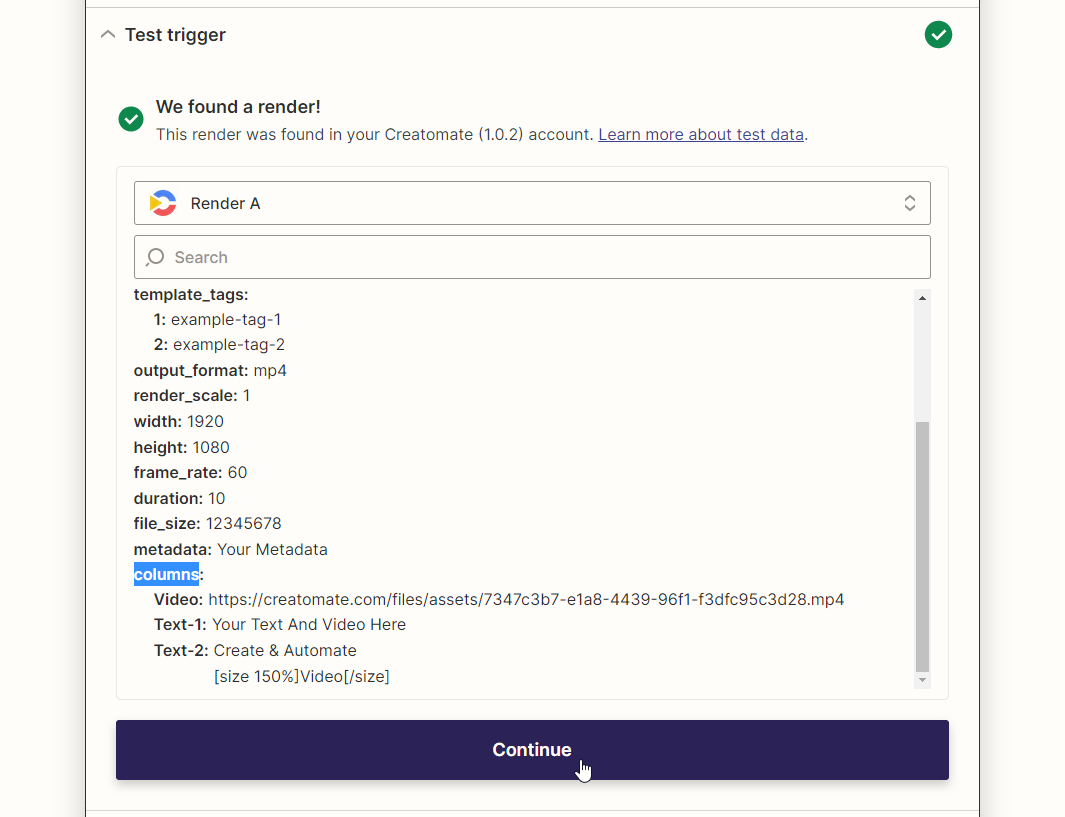
Finally, click Test trigger to make sure everything is set up correctly. As a result, Zapier will return columns from the feed as well as example data. When the test was successful, click Continue:
4. Further process the videos
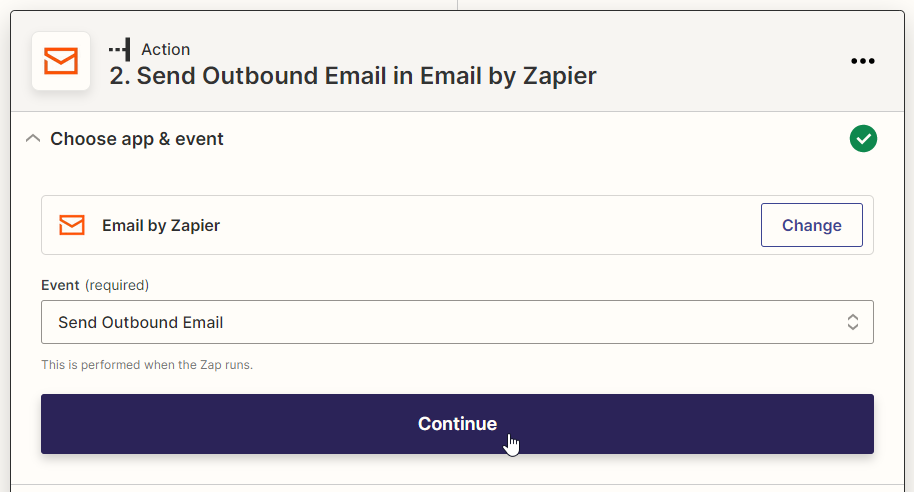
Now you can select which app you want to use the videos with. As an example, we'll use the Send Outbound Email event from the Email by Zapier app. Click Continue:
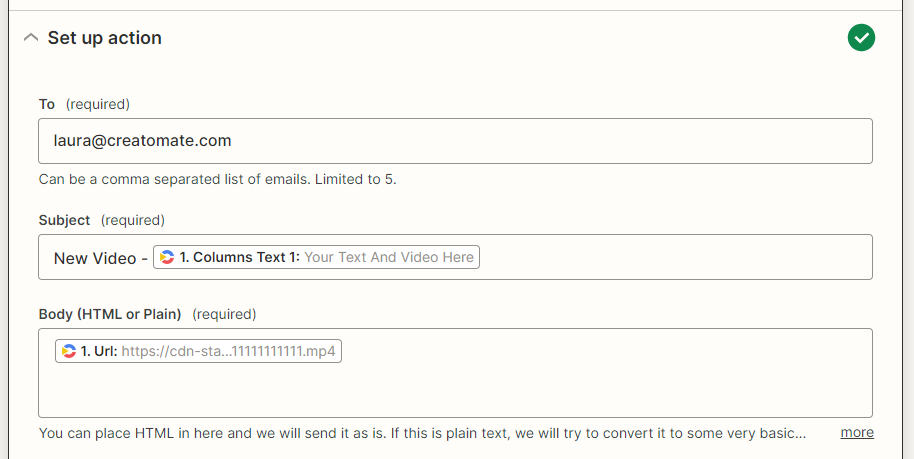
You can set this up however you like, but as you can see, I'm emailing the video to my own inbox with a value from the feed in the subject line, and inserting the URL to the video in the body. When done, click Continue:
To make sure this works as expected, click Test step. Since no actual video has been generated yet, the URL in this email is merely a placeholder, but it will point to the render once your Zap is published. Click Publish Zap to do that now.
Tip: If you want to send each video to a different email address, add a column to your feed, and set up your Zap to map that column to the To field.
5. Test the automation
Awesome! We now have set up a feed to generate videos and whenever one is rendered, you'll get an email with a link via Zapier.
Let's take it for a spin. Return to the feed, click Add Row and input some data:
- Video column: you can upload a video from your computer or enter a URL to a publicly accessible video. For example: https://cdn.creatomate.com/demo/video1.mp4
- Text-1 & Text-2 columns: feel free to enter any text here. As an example, let's enter Hello World! 👋 in the Text-1 field.
If a cell is left blank, the template's default value will be used. As you can see below, I did that with the Text-2 column. Click Save when everything looks right. As soon as you do that, you'll see No Render in the Status column. To generate the actual video, click the Create render button below the preview. As soon as the video is completed, Zapier will trigger an automated workflow, sending us an email with the video:
Here's what I got shortly after. Take note of the text "Hello World! 👋" as well as the video clip inserted from our feed:
Next steps for video automation using a spreadsheet
Now you know how to automate video creation in bulk using Creatomate and Zapier. This method allows us to build highly customized, automated workflows for a wide range of tasks based on just a simple spreadsheet. And as the number of apps supported by Zapier grows every day, so do the automation opportunities.
Here are some things you can try next:
👉 Replace the Email by Zapier app with a different action to handle your videos. A common use case is sharing videos on social media. Check out one of these tutorials for posting on Instagram, TikTok, YouTube Shorts, and Facebook.
👉 Create your own video templates. Creatomate includes an online template editor packed with lots of customization features, allowing you to design video templates exactly the way you want.
👉 You can also create videos and images in bulk using the spreadsheet method, without doing any further processing in Zapier. Here's a tutorial on how to do it.
👉 Alternatively, you can set up a fully automated Zapier workflow without using a spreadsheet. For example, you can have videos created daily at a set time, when a new record is added to your Airtable base, or for new messages in Slack, just to name a few. We've written a series of step-by-step tutorials on video automation with Zapier, covering a wide range of use cases. Check them our on our blog page.