How To Create Prospecting Videos For Sales Outreach In Bulk

In this video automation tutorial, you'll learn how to generate personalized sales outreach videos at scale using a spreadsheet or CSV file.
The use of videos is an excellent method of connecting with people. The same applies to cold outreach. However, if you want to reach out to many prospects, you'll need a lot of videos. Making each video by hand would take forever.
Fortunately, we don't have to. A much more efficient way of creating prospecting videos is by generating them all at once. This is where video automation comes in. Using a video generation spreadsheet and a reusable template, you can automatically create personalized videos for all your prospects and leads. In this tutorial, you'll learn how to produce sales outreach videos efficiently and on a large scale.
Below is an example of a prospecting video we will produce in the hundreds or even thousands. The greeting and website screenshot shown in the video will automatically be replaced with your prospects' using a simple spreadsheet. This video uses an AI avatar, but you can easily replace it with your own face recording. It's also possible to create your own video templates using the editor, so you can design videos that perfectly fit your outreach needs.
An alternative method for creating prospecting videos is using a no-code platform like Zapier. Take a look at this guide to learn how.
Prerequisites
To follow along, you'll need a Creatomate account. You can create your free account here.
Additionally, you'll need information from your prospects for personalizing the video. In our case, we'll use their name and the URL of their website. Furthermore, you also need a pre-recorded video to use in your template. Perhaps you would like to introduce yourself, tell your prospects what you can do for them, or give them a brief overview of the product or service you offer. We can use the same face recording for all videos, so you do not need to make a separate face recording for each prospect. Nevertheless, if you would like to make a personalized recording for each prospect, this is possible as well.
Optional: To capture a screenshot of the prospect's website, we'll use ApiFlash. With their free plan, you can take up to 100 screenshots a month. You can sign up for free here. You can skip this step if you don't want to use a screenshot.
Tip: You can also use a screenshot of your prospect's LinkedIn profile instead of a website.
How to bulk-create prospecting videos?
We'll start by creating a video template. This will be the foundation of our prospecting videos. Next, we will create a feed. In essence, this is a spreadsheet that generates videos by combining the video template with the information we have on each prospect. We'll get a screenshot of the prospect's site using ApiFlash. Then, with a couple of clicks, all prospecting videos will be generated in one go. Now all you have to do is download them and send them to your prospects. Better yet, using a no-code platform like Zapier, this process can be automated too. Check out this guide for details.
Let's get started!
1. Create a prospecting video template
Log in to your Creatomate account, navigate to the Templates page and click the + New button. For this tutorial, let's go with the Personalized Cold Outreach Video template from the Personalization category. Select a size, like 16:9 Landscape and click Create Template to open it in the editor:
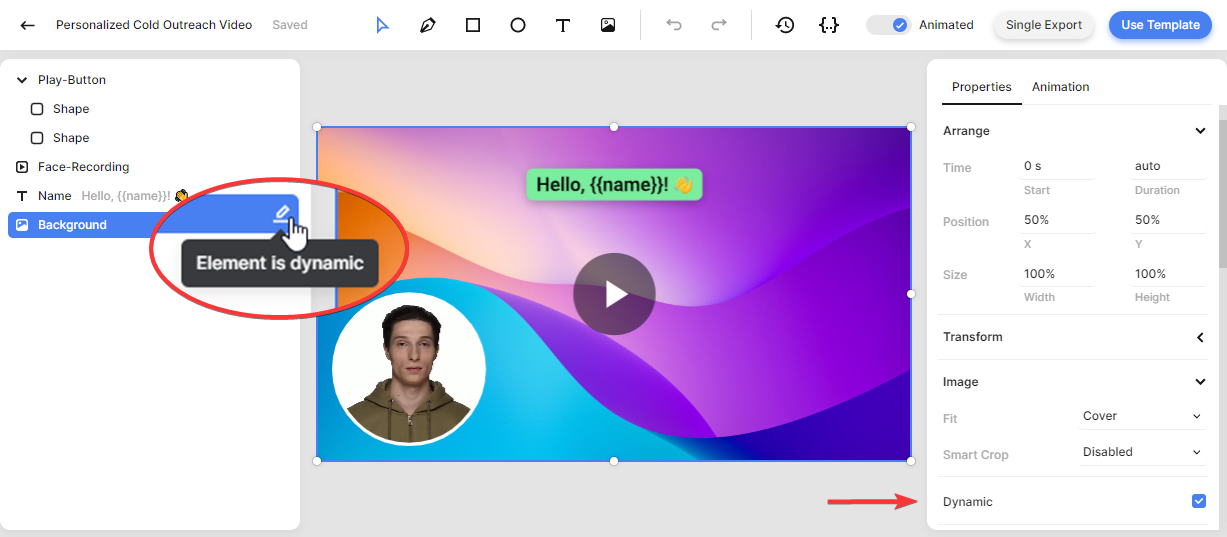
In the left-hand panel, you can see the elements that make up our template. An important thing to know about templates is that they can include dynamic elements, merely serving as placeholders for the data from our spreadsheet. The dynamic elements in this template are Name and Background. This means its content can be replaced with other text and media, using an automation spreadsheet that we'll create in the next step.
Next, replace the Face-Recording with your own pre-recorded video. You can do this by selecting the element, right-clicking it, and selecting Replace Media. Then, choose a video from your device:
Now that your template is ready, let's create a feed to automate the video creation process.
2. Create a feed for your prospect data
Click the Use Template button at the top right of the template editor. Click on Spreadsheet to Video and select Create new feed. After clicking Continue, we'll be taken to the newly created feed:
Think of the feed as a spreadsheet for generating a large number of videos based on a template. As you can see, the template's dynamic elements are mapped to the columns of the feed: Background and Name. Every row in the feed generates a unique video based on the data we enter. A data cell can contain text, images, video recordings, or even audio clips.
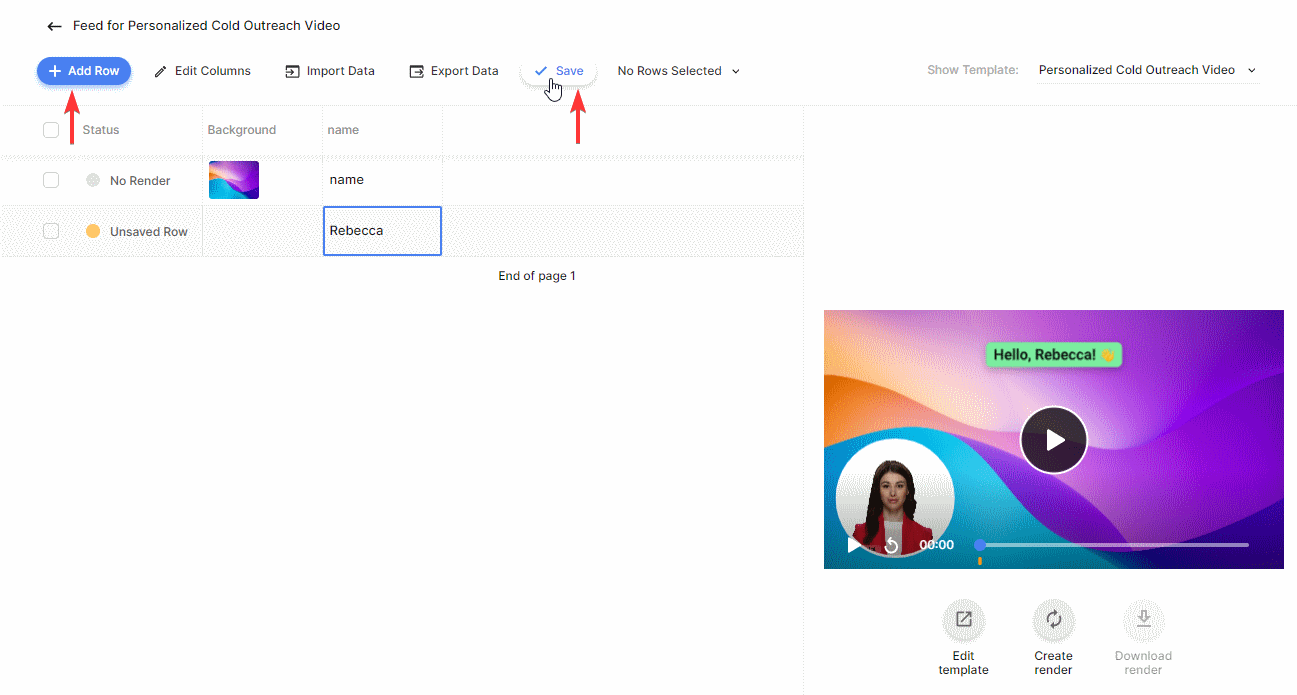
Let's fill the feed with some data. By clicking Add Row, you'll add another row to the feed. A preview of the video can be seen on the right side of the table. So, in the Name column, enter a name. For now, let's leave the Background column blank, we'll come back to it later. Make sure to click Save. The status column updates from Unsaved Row to No Render. This means your data is saved, but no video has been made yet (which is called a render):
Tip: Data can also be imported from a CSV file using the Import Data button.
Just add as many rows as you need to create prospecting videos for all your leads. In the next step, we'll use ApiFlash to capture screenshots.
3. Optional: Create screenshots using ApiFlash
If you don't need website screenshots, you can skip this step.
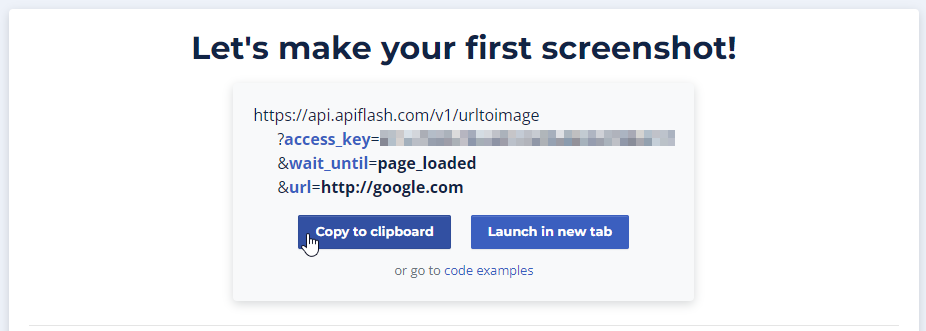
Log in to your ApiFlash account or sign up for free first. From the Get started page in your dashboard, click Copy to clipboard:
Return to your feed and paste the URL in the Background column. You'll need to replace the Google URL with the URL of your prospect's website. Here's an example:
https://api.apiflash.com/v1/urltoimage?access_key=***&url=https://www.creatomate.com
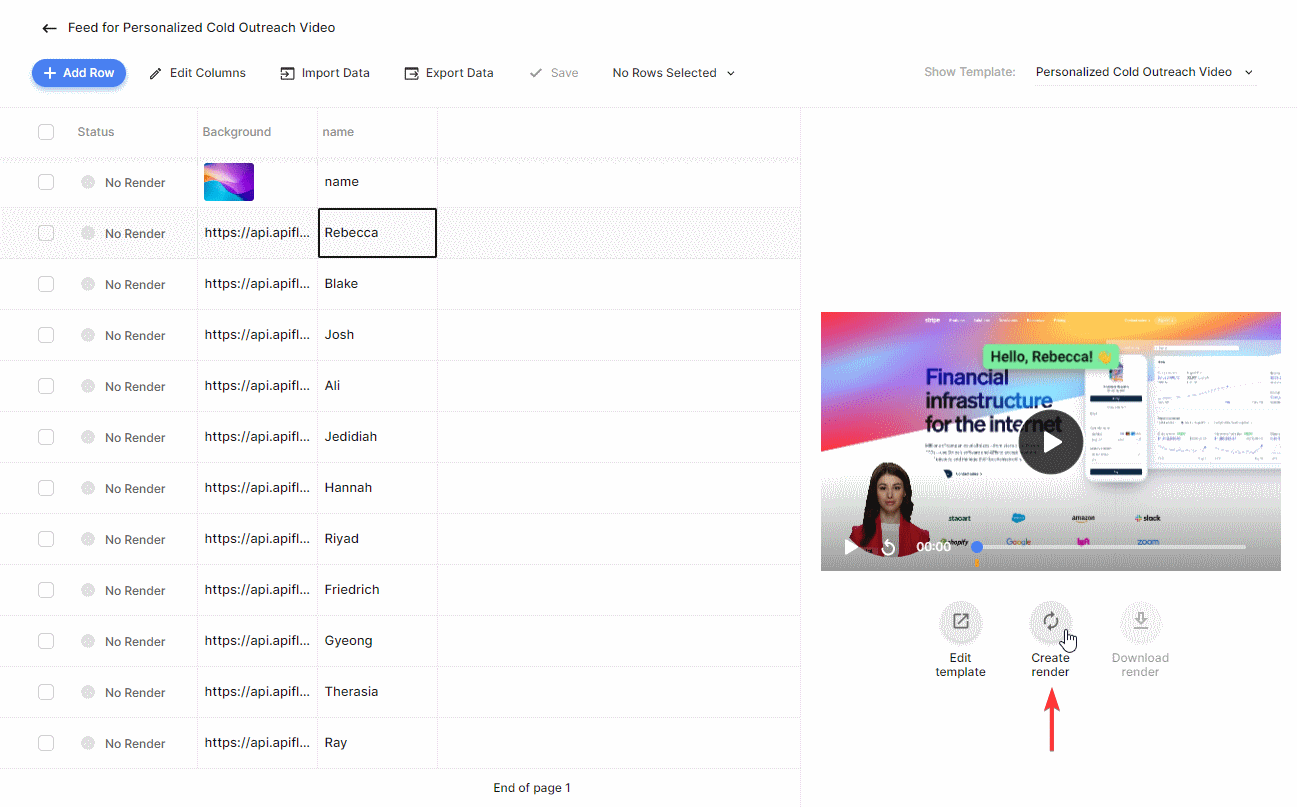
As soon as you enter the URL into one of the cells, ApiFlash will generate a screenshot, which is then used in the corresponding video. The right-hand side preview shows what the video will look like. Don't forget to click Save:
Once you've filled in the feed, let's move on to the next step and generate the videos.
4. Generate and download the videos
Just below the video preview, you can click Create render to generate the video for that row. The video is finished when the status changes to Rendered:
If you want to make multiple videos at once, select the corresponding rows, click × Rows Selected, and click Create Renders:
After all rows indicate the videos are rendered, you can download them to your device. To do that, click × Rows Selected, then Download Renders. From the popup that appears, select a file name based on one of the columns and then click Download.
Tip: You can download a single video by clicking Download render under its video preview.
Alternatively, you can export the entire feed, including data and renders, as a CSV file. Click Export Data, make sure both columns are checked, then click Continue. Next, make sure your template is selected and click Continue. Click Export Data on the summary page to download the entire feed as a CSV file:
Wrapping up
With nothing more than a template and spreadsheet, we made prospecting videos in no time at all. Even though we have only produced a few videos in this tutorial, the process is exactly the same for hundreds, if not thousands, of videos. It is as simple as importing a CSV file, selecting the rows you'd like to use, and clicking a few buttons to generate the videos all at once.
As most of the software you are already familiar with allows you to export or import CSV (e.g. Lemlist, Apollo, and Airtable), it is very easy to integrate this into your existing workflows. For example, you could create a CSV with another prospecting tool and then import it into Creatomate to create the videos. In the other direction, you can export the whole feed as a CSV that contains all the videos you've created, which can then be imported into another tool.
Alternatively, you can create a fully automated workflow using a no-code platform such as Zapier. To find out how, check out this guide next.
You might also like these tutorials


Start automating today
Start with a full-featured trial with 50 credits, no credit card required.
Get started for free →