How to Bulk-Create Visual Content for Social Media

Learn how to batch-create videos, images, and GIFs for Instagram, TikTok, YouTube, Twitter, and Facebook using a simple bulk generation spreadsheet.
Bulk content creation is an efficient way to produce videos, images, and GIFs for social media. Rather than creating Instagram Reels, Facebook Stories, YouTube Shorts, TikTok videos, and other visuals on the spot, you'll be a lot more productive if you make them all ahead of time. So you can post on-brand content consistently without stressing about in-the-moment content creation.
It takes only three easy steps to complete this task. With Creatomate, a video automation solution, you can automate and scale video, image, and GIF production using APIs and no-code tools. Using its bulk generation spreadsheet and a reusable template, you can create social media visuals all at once. This no-code tutorial will walk you through it.
We're going to create videos like this. However, you should also check out the gallery with ready-made templates and the editor if you want to create your own video, image or GIF designs.
How to create visual content for social media in bulk?
To follow along, you'll need a Creatomate account. You can sign up for free here.
We'll start by creating a template that will serve as the foundation for our visuals. Depending on what kind of visual you want to make, you can create a video, image or GIF template. There's a template gallery with ready-made designs you can choose from. These can be customized to fit your needs, and you can even create your own templates.
The next step is to create a feed. In essence, it's a spreadsheet that generates lots of visuals based on our template and the data we provide. Here's where we put our text and media for the visuals. We can then generate our visuals at the click of a button and download them to our device.
As a final note, I'll give you some suggestions on what you can do next to make your workflow even more efficient.
1. Create a template
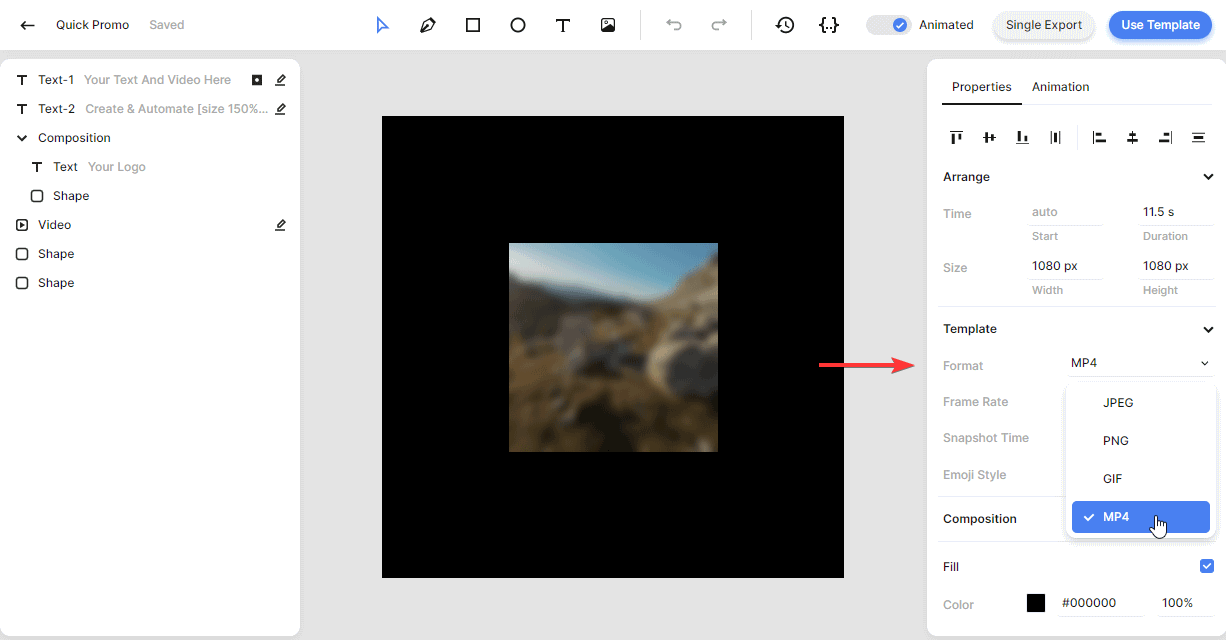
Log in to your Creatomate account, navigate to the Templates page and click + New. For this tutorial, let's go with the Quick Promo template from the Fundamentals category. Take the 1:1 Square size, for instance, and click Create Template to open it in the editor:
There are many customization features available for both video and image templates as well as GIFs. To begin with, make sure you select the appropriate format for your social media visuals:
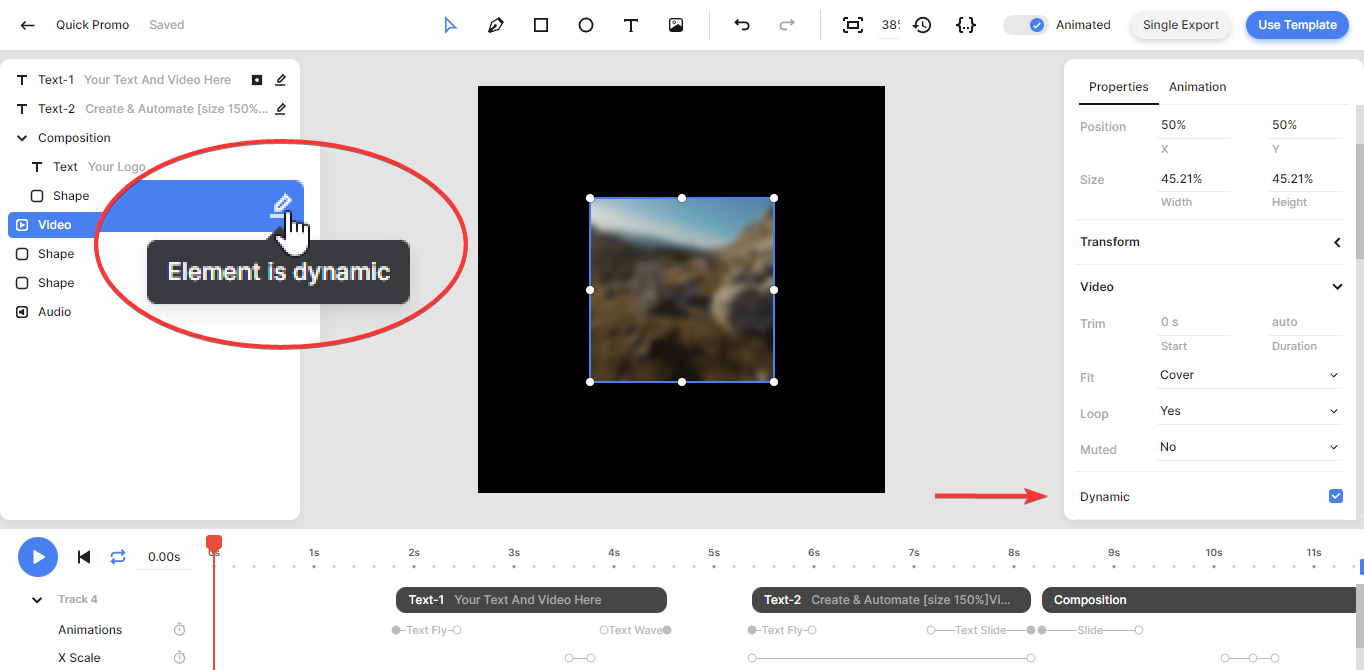
Now let's take a look at the left-side panel. Here we can find the text and media elements that make up the template. An important thing to know about a template is that an element can be marked as dynamic. In our template, the Text-1, Text-2, and Video elements are all dynamic. This means that we can replace them with other text and clips using the feed we're about to make:
To keep things simple, I'm going to use the template as is, but you can customize it however you want. After you're happy with your template, let's move on to creating a feed.
2. Create a feed
Click the Use Template button at the top right of the template editor. Click on Spreadsheet to Video and select Create new feed. After clicking Continue, we'll be taken to our newly created feed:
Feeds are like spreadsheets based on your template. As you can see, the template's dynamic elements are mapped to the feed's columns: Text-1, Text-2, and Video. Because we're going to add different text and videos to each row, we're getting unique visuals.
Let's create some visuals by clicking Add Row. When you enter data, you'll see a preview of your visual on the right:
- Video column: select a video file from your device or enter a URL to a public video.
- Text-1 and Text-2 columns: enter any text here.
You can add as many rows to create all the social media visuals you need. Make sure you click Save after you're done. After saving, the status column updates from Unsaved Row to No Render, meaning the rows are saved but no visual has been created yet (which is called a render):
Tip: Alternatively, you can import assets and data as a CSV file using the Import Data button rather than entering every row by hand.
Our next step will be to generate and download the visuals.
3. Generate and download the visuals
The right side shows a preview of the final visual for each row. If the preview looks fine, click Create render to generate it. The visual is complete when the status is Rendered:
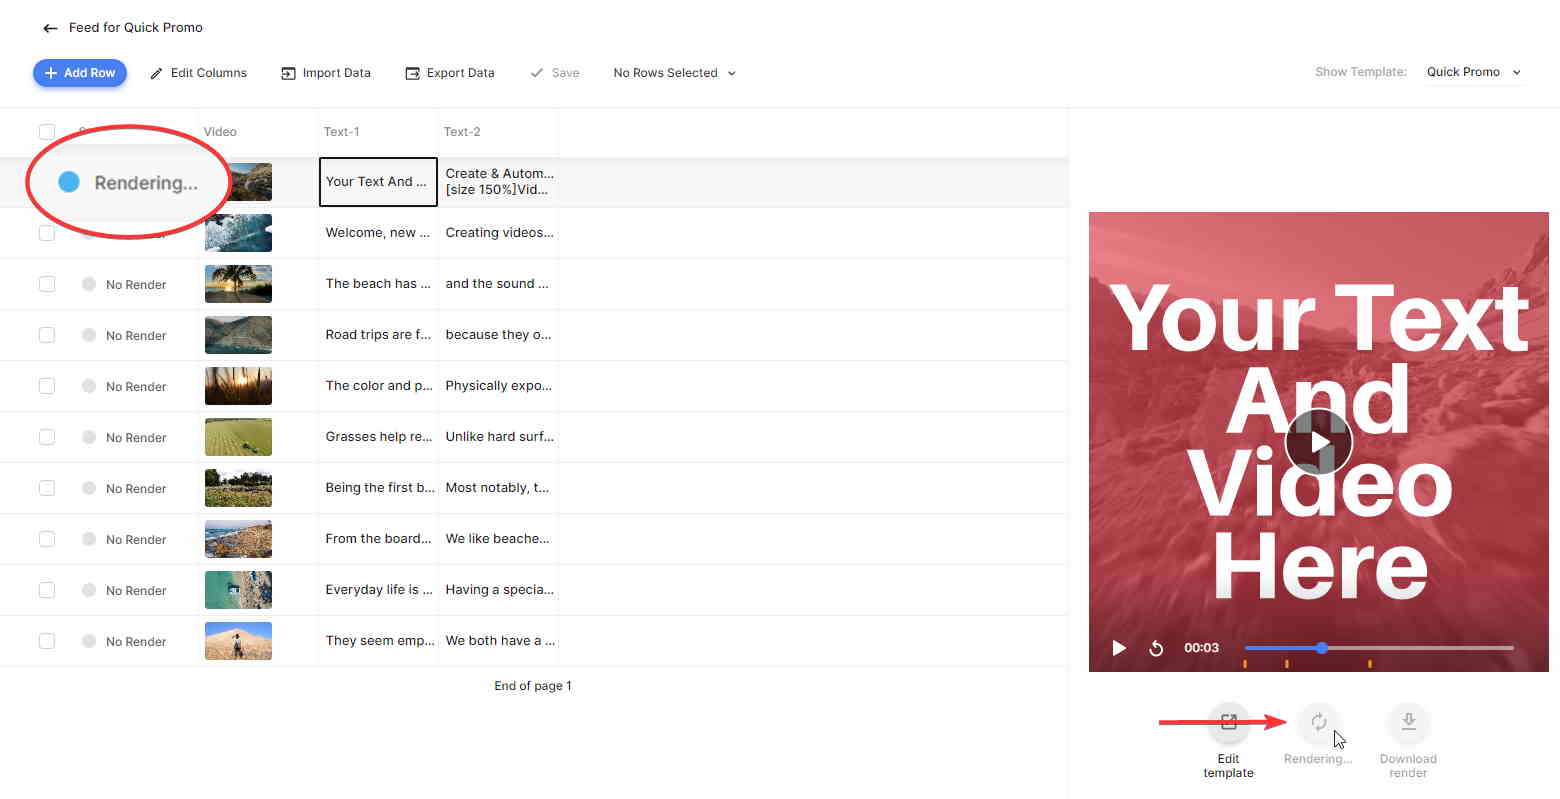
There is an even easier way to render multiple visuals, and that's by selecting the corresponding rows, clicking × Rows Selected and clicking Create Renders:
In the same way as we created renders, we can download rendered visuals in bulk. Again, select some rows, click × Rows Selected and click Download Renders. We can choose the file names by selecting a column. Then, click Download to get a ZIP file with the visuals:
Tip: A single video can be downloaded by clicking the Download render button below its preview.
Next steps
That's it! It only takes three steps to create visual content for social media at once. You can get even more out of it and make your workflow even more efficient by doing the following:
👉 Create multiple templates
So far, we've only used one template, but you can make multiples and render them at once with the same feed. This is helpful if you want to make both images and videos from the same data feed, or if you want a different design for each social media channel. You can accomplish this by assigning the same tag to these templates on the Templates page. Then, select this tag in the top right corner of the feed.
👉 Invite team members
Mostly, content creation for social media involves multiple people. That is why it is useful to invite members to projects (available at the Growth and Beyond plans). Project sharing allows you to collaborate with others while restricting access to templates or feeds. This way, a designer can create on-brand templates, and a marketer can make visuals from them.
👉 Schedule your social media posts
Once you've created your visuals in advance, you can schedule the posts too. Buffer and Later are great tools for planning your posts.
👉 Auto-post the visuals directly to social media
Even better, you can connect the feed to automation tools like Zapier and Make. As a result, you will be able to set up custom automated workflows that will automatically post your visuals on social media once they have been created. Steps 4, 5, and 6 from this tutorial will help you do it.
👉 Fully automate your social media process
To take it one step further, you can also create and post visuals completely on autopilot - without human intervention. You can do this by setting up a custom automated workflow using no-code tools like Zapier or Make (Integromat). For instance, when you add a new record to Airtable or upload a new file to Google Drive, Creatomate automatically generates a visual based on a template. These visuals can also be automatically processed and posted to Instagram, YouTube, Twitter, Facebook, as well as LinkedIn. Click here for guided tutorials.
You might also like these tutorials


Start automating today
Start with a full-featured trial with 50 credits, no credit card required.
Get started for free →