How To Create E-commerce Product Videos In Bulk

Learn how to auto-generate social media videos, video ads, and product listing videos at scale for Shopify, WooCommerce, BigCommerce, and more.
Video marketing is a crucial aspect of the eCommerce industry. Videos are widely used for social media, product pages, and advertising to present products in a captivating way and drive customer engagement, surpassing the effectiveness of static content. However, creating videos to promote hundreds or thousands of products can be a daunting and ongoing challenge for marketing professionals and small business owners alike. Thankfully, video automation solves this problem.
Creatomate is a video automation platform that helps you automate and scale video production by code and no-code tools. The easiest way to create product videos in bulk is by using a video generation spreadsheet. However, you can also use the REST API and no-code platforms like Zapier, Make (Integromat), or Pabbly. In this tutorial, we'll show you how to bulk-generate product videos for your eCommerce store using the spreadsheet method.
We're going to create videos like the one below. Each video will feature a product's image, name, description, and price. Do you have a different type of video in mind? Take a look at the gallery of pre-made templates or use the editor to create your own designs.
Prerequisites
To follow along, you'll need a Creatomate account. You can create a free account here.
We'll also need a few products to make videos for, which can be your entire product catalog or a selection of specific products. It's most convenient to export them as a CSV file from your store.
How to bulk-generate product videos for eCommerce
To begin with, we need to create a template that will serve as the basis for our videos. After that, we'll create a feed, which is essentially a spreadsheet that generates a lot of videos at once based on a template and data. Here, we will import our products so we can include titles, descriptions, prices, and images into our videos. Once we've done that, we can easily generate our videos with just a few clicks and download them to our computer.
Let's get started!
1. Create a product video template
Log in to your Creatomate account and navigate to the Templates page. Click + New to browse the template gallery. You can pick any template you like or design your own from scratch. But for this tutorial, let's use the Product Hero Discount template from the eCommerce category. Let's go with 1:1 Square for now, but you can pick any size according to the videos you want to create. Click Create Template to open it in the editor:
Now let's take a look at the left-hand panel. Here we can find the elements that make up our template. It's good to know that elements can be marked as dynamic. In our template, Discounted-Price, Normal-Price, Product-Description, Product-Name, and Product-Image are dynamic. This means its content can be replaced with other text and images through the feed we're about to create:
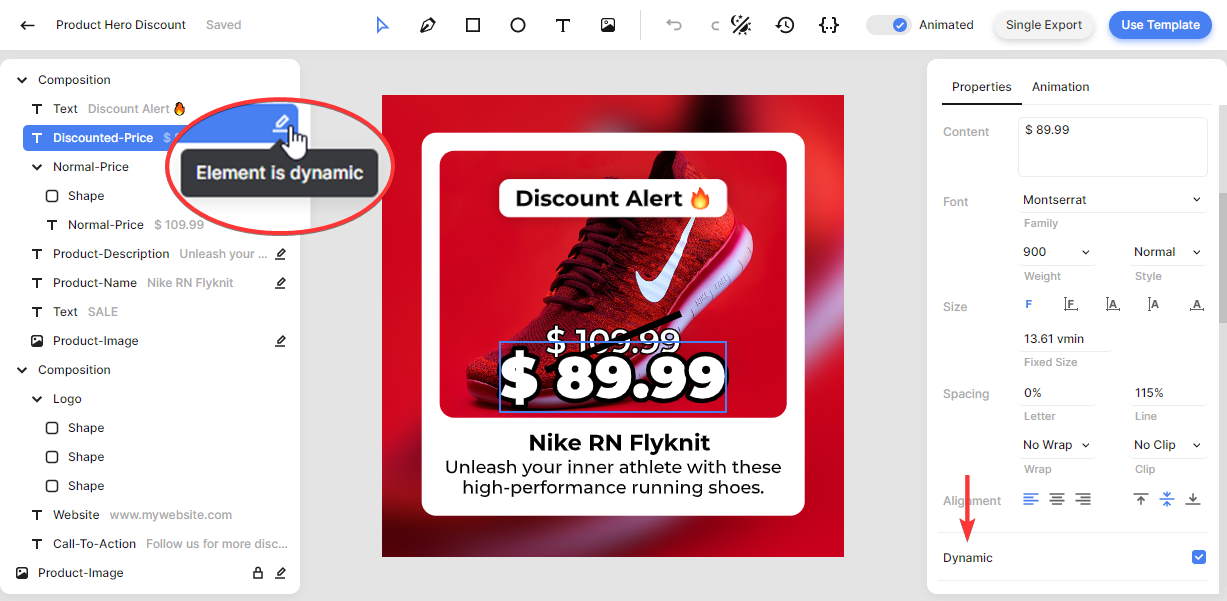
You can customize the template however you like. For example, you can replace the placeholder logo and website with your own. If you want to make an element dynamic or non-dynamic, simply select it and check the Dynamic property from the right side panel, as shown above.
To keep things simple, I'll use the template as it is. Let's move on to the next step: creating a feed.
2. Create a feed for your products
Click the Use Template button at the top right of the template editor. Click on Spreadsheet to Video and select Create new feed. After clicking Continue, we'll be taken to the newly created feed:
Think of the feed as a spreadsheet for generating videos based on a template. As you can see, the template's dynamic elements are mapped to the columns of the feed; Product-Image, Product-Name, Product-Description, Normal-Price, and Discounted-Price. Once we enter different descriptions, names, prices, and images for each product, a unique video will be created for every row.
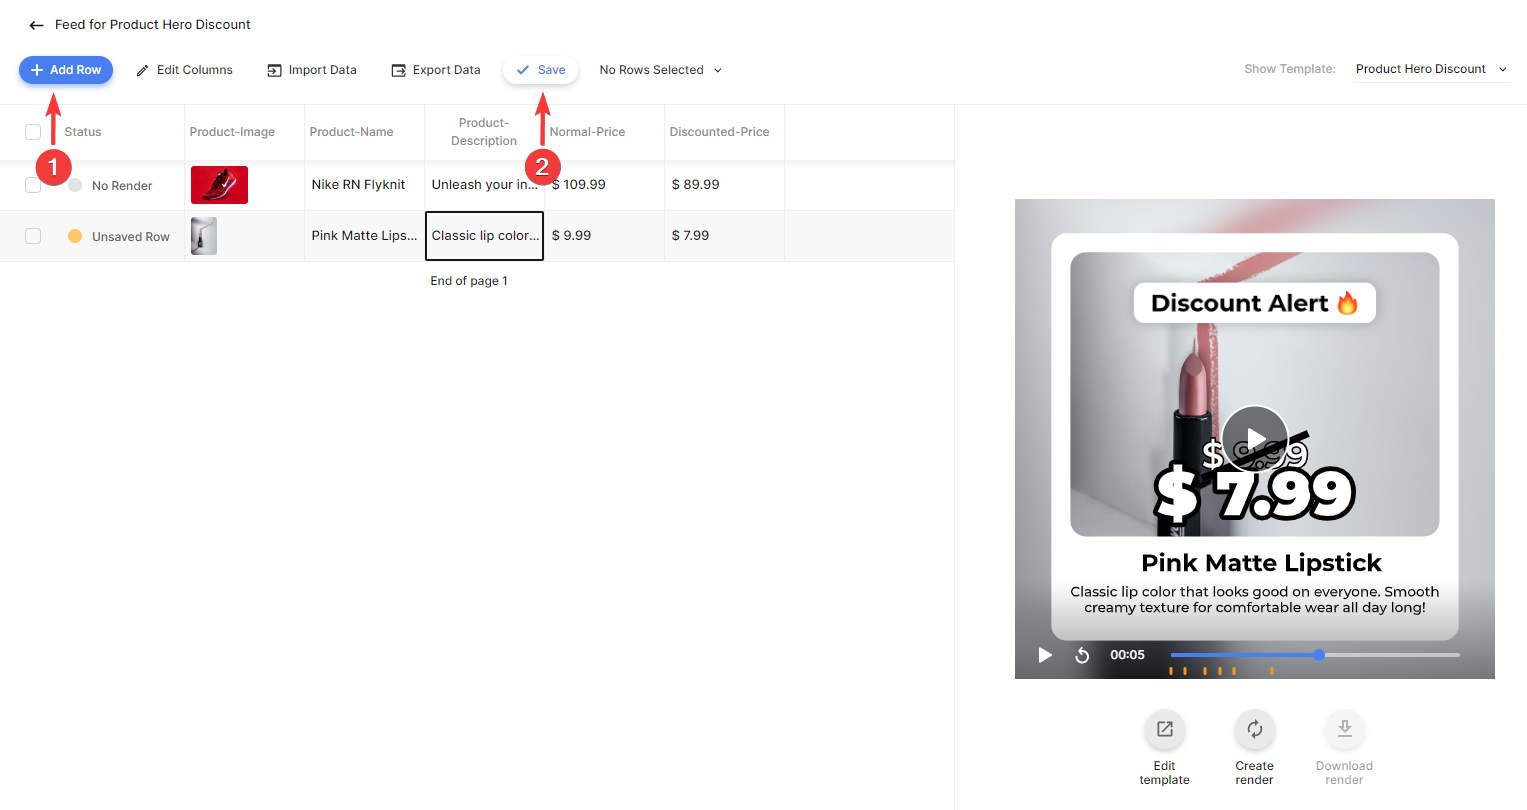
There are a few ways to insert data into your feed. The easiest way is to enter it manually. By clicking Add row, you'll add another row to the feed. Let's upload an image for the Product-Image column (or paste a URL to a publicly accessible image) and enter some text values for the other four columns. We can see a preview of the video on the right side of the feed. When you're done, click Save. After saving, the status column updates from Unsaved Row to No Render, which means your data is saved, but no video has been generated yet (which is called a render):
Importing a CSV file is a more efficient method for adding your products. Start by clicking on Import Data and select a file from your computer. Here you can map the columns in the CSV to the columns in the feed, then click Continue. It is recommended to select a merge column with unique data, such as Product-Name, before proceeding. Click Continue once more. If the summary is correct, you can add your products to the feed by clicking Import Data. After completion, remember to click Save:
As soon as you've added all the products you want videos for, we'll move on to the next step, where we'll actually render and download the videos.
3. Render and download the videos
On the right side, you can preview the final video for each row. When you're satisfied with the result, you can generate the videos. Let's select some rows, click × Rows Selected, and click Create Renders. When the status says Rendered, the videos are ready:
After your videos are rendered, you can download them by selecting the corresponding rows, clicking × Rows Selected, and choosing the Download Renders option. You can choose a file name by selecting a column, like Product-Name, and click Download. A ZIP file will be downloaded to your computer:
Tip: You can also use the Create render or Download render buttons below the preview if you just want to render and download one video.
Alternatively, you can export the entire feed, including data and renders, as a CSV file. Click Export Data, make sure all columns are checked, then click Continue. Next, make sure your template is selected and click Continue. Click Export Data on the summary page to download the entire feed as a CSV file:
Wrapping up
It's that simple. In just three steps, you can create various types of videos for eCommerce products. Even though we've only made a few videos here, the process is the same for hundreds, if not thousands. It's just a matter of creating a template once and importing your products. Within a few clicks, you will have your videos ready.
As a next step, instead of using a bulk generation spreadsheet, you could use a no-code tool like Zapier to automate video creation. For instance, you could automatically generate a video when a new product is added to your store, which would be published on social media. This is just one of the many possibilities available with Zapier and Creatomate. To get started, check out this tutorial next.
You might also like these tutorials


Start automating today
Start with a full-featured trial with 50 credits, no credit card required.
Get started for free →