How to Auto-Generate Social Media Videos from Customer Reviews

This tutorial shows how to turn reviews (Google My Business, Etsy, TrustPilot, G2, Yelp, etc.) into video shorts for Instagram, TikTok, Facebook and more using video automation.
If you run a business, you'd like your customers to leave reviews about their experience with your product or service. It's these reviews that help new customers decide whether or not to buy from you. But collecting reviews alone isn't enough. They should be used in your marketing. Social media works well for this, as it's a great place to build trust and engage your audience.
Nowadays, social media is all about visual content, particularly videos. But it's time-consuming to make videos by hand for every review. Here's where video automation comes in. With a reusable template, you can turn all your customer reviews into on-brand social media videos – in a matter of minutes. Better yet, you could even automatically post the video on social media using a no-code platform like Zapier and Make. That's what this tutorial is all about.
For this guide, we're going to automate the following video. However, be sure to check out the template editor as well, which lets you make your own video templates.
Note to developers: you can also build custom solutions with the video generation API.
Prerequisites
To follow along, you'll need a Creatomate account. You can sign up for free here.
We'll also need a few reviews from your customers from which to create our videos. Maybe you collect them on your website, keep them in a spreadsheet, or use third-party tools like G2, TrustPilot, TripAdvisor, etc. In any case, you'll probably want to cherry-pick the reviews for your videos, and you can do so by copy-pasting the reviews into Creatomate. Alternatively, you can import them from a CSV file. This tutorial will show you how.
Once the review videos have been created you might want to share them on social media. This can be done manually by downloading all the videos at once, but it's also possible to automate this process as well (see optional steps 4 to 6 in the outline). This article doesn't cover scheduling posts using Buffer or Hootsuite, but you can do so perfectly by using the Zapier or Make workflows discussed further in this guide.
How to automatically create social media videos from customer reviews?
The first step in automating our videos is to create a video template. This is the design of the video that serves as the foundation for our review videos. You can choose from ready-made templates, but you can also create your own designs with the template editor.
Next, we'll create a feed. A feed is essentially a spreadsheet that generates lots of videos at once based on a video template.
Lastly, I'll show you how to use Zapier and Make to post the generated videos automatically to social media. You can skip these step if you want.
Let's get started!
1. Create a video review template in Creatomate
Log in to your account and navigate to the Templates page. Click the + New button to browse the template gallery. Pick a template you like, for example, the Animated Review template from the Social Media category. Select a size based on the type of video you want to post. Let's go with 1:1 Square size for now and click Create Template to open it in the video editor:
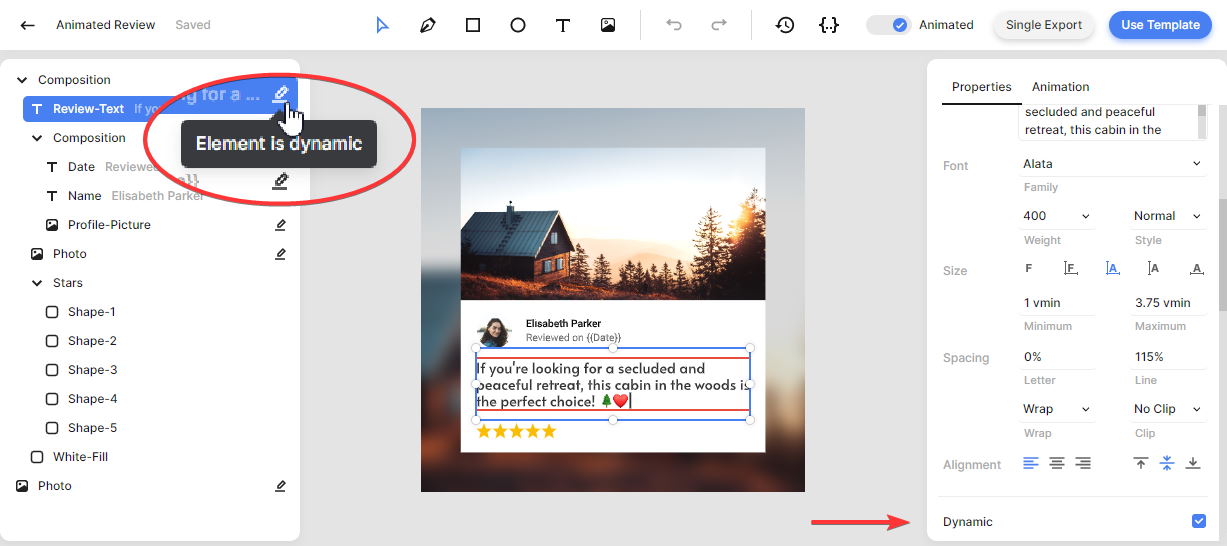
Let's take a look at the left-side panel. Here we can find the text and image elements that make up the template. An important thing to know about a template is that an element can be marked as dynamic. This just means that it's a placeholder, that we'll later replace in our automated workflow. In this example, the Review-Text, Date, Name, Profile-Picture, and Photo elements are all dynamic:
To keep things simple, I'll use the template as-is. Let's move on to the next step: creating a feed.
2. Create a feed for your customer reviews
Click the blue Use Template button at the top right of the template editor. Click on Spreadsheet to Video and select Create new feed. After clicking Continue, we'll be brought to our newly created feed:
You can think of a feed as a spreadsheet based on a video template. As you can see, the template's dynamic elements are mapped to the columns of the feed; Photo, Profile-Picture, Name, etc. As a result, each row of the feed will create a unique video since it corresponds to different text values or images.
There are a few ways to insert data into your feed. One of them is adding them manually. By clicking Add row, you'll add another row to the feed. A preview of the video is shown at the right side of the table. Let's upload an image from our device or enter a URL to an image for both the Photo and Profile-Picture columns. Enter some text in the Name, Date, and Review-Text columns. When you're done, click Save. After saving, the status column updates from Unsaved Row to No Render. This means your data is saved, but the video has not yet been generated (which is called a render):

There's another, more efficient way: import existing data. If you want to use reviews from, say, Trustpilot or Shopify, you can export them as a CSV and import it into the feed. Click Import Data and choose the file from your computer. Here you can map the columns in the CSV to the columns in the feed. Then click Continue. It's optional, but recommended, to select a merge column with unique data, like Name, then click Continue. The summary tells you how many rows will be updated or imported. If everything looks okay, click Import Data to add your reviews to the feed. And don't forget to click Save:
In the next step, we'll generate the videos.
3. Generate and download the videos
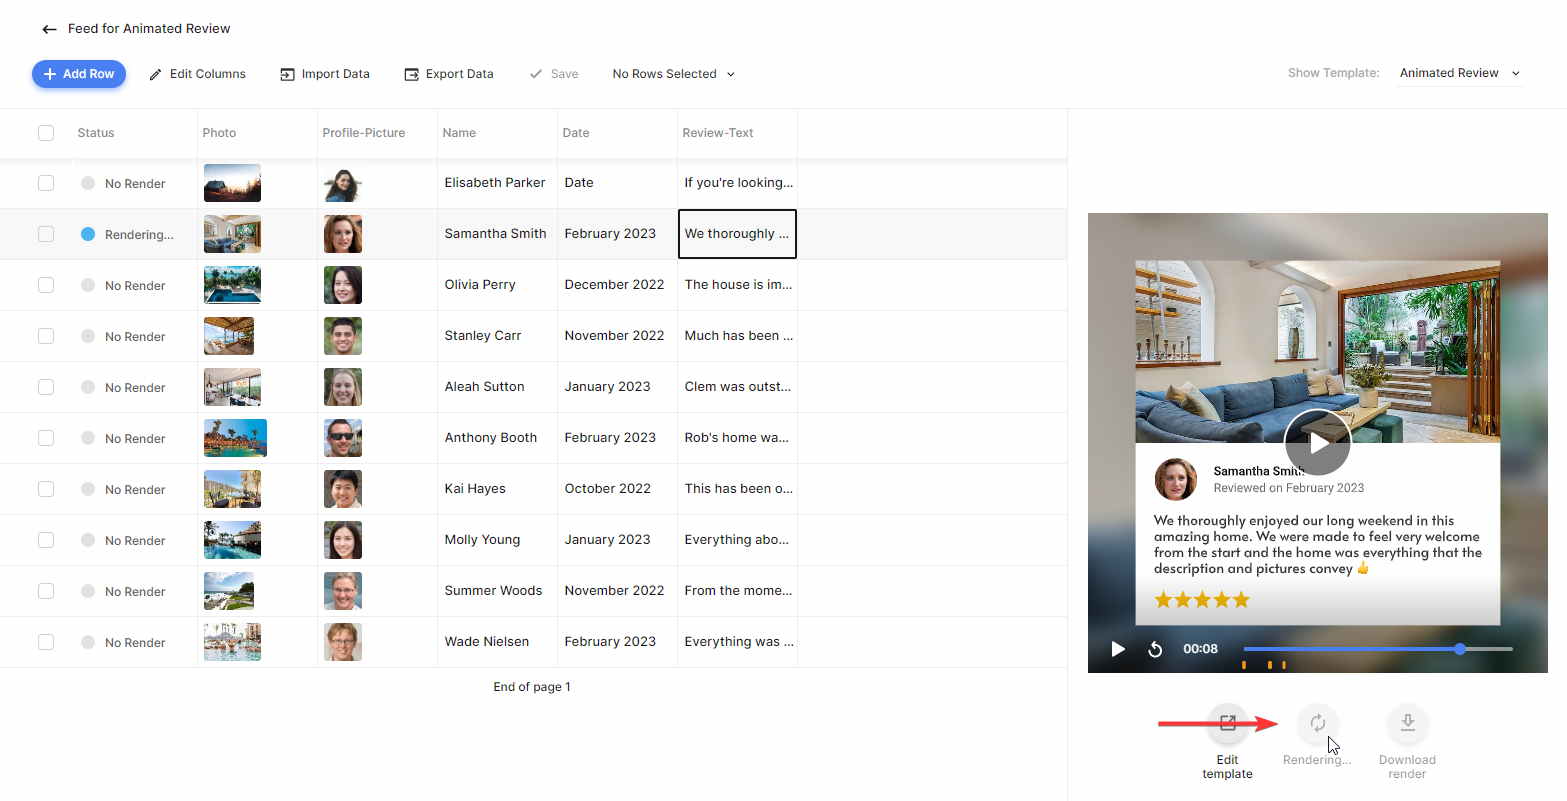
The right side shows a preview of the final video for each row. If the preview looks as desired, click Create render to generate this video. The video is complete when the status is Rendered:
You can also render multiple rows at once. This can be done by selecting some rows, clicking × Rows Selected, and clicking Create Renders:
When your videos are ready, you can download a single video by clicking the Download render button under the preview screen. Alternatively, you can download multiple videos at once by selecting the corresponding rows, clicking × Rows Selected and select the Download Renders option. You can choose a file name by selecting a column and click Download. A ZIP file will be downloaded to your computer:
You can now use the videos wherever you want. This concludes the tutorial when there is no need to automate the workflow any further.
However, if you want to automatically process the videos once they have been rendered, I will show you how in the following steps through the use of the no-code platforms Zapier and Make.
4. Optional: Add columns to the feed
The following steps are only necessary if you want to automate your workflow even further.
Say you intend to post the review videos on social media. If that is the case, it would be cumbersome to download the videos, and then manually post each of them on social media. Fortunately, there is a better way, and that is by creating a workflow that runs automatically when a video has finished rendering. That's what we'll do in the remainder of this tutorial.
For this example, we will automatically post the videos that were created in our feed on YouTube, Facebook, Instagram, and LinkedIn. This means that once we click the Create render button, we will not need to perform any further manual tasks, since the automated workflow will handle them for us.
We will automatically post videos to social media, so we will need to pass along the content of the posts. To accomplish this, we can add additional columns to the feed, which we can then access through our automated workflow.
From your feed, click Edit Columns. Click + Add Column and give it the name Title. Let's click + Add Column again with the name Description. You can reorder the columns as shown in the video below. When done, click OK:
5. Optional: Auto-post the videos using Zapier
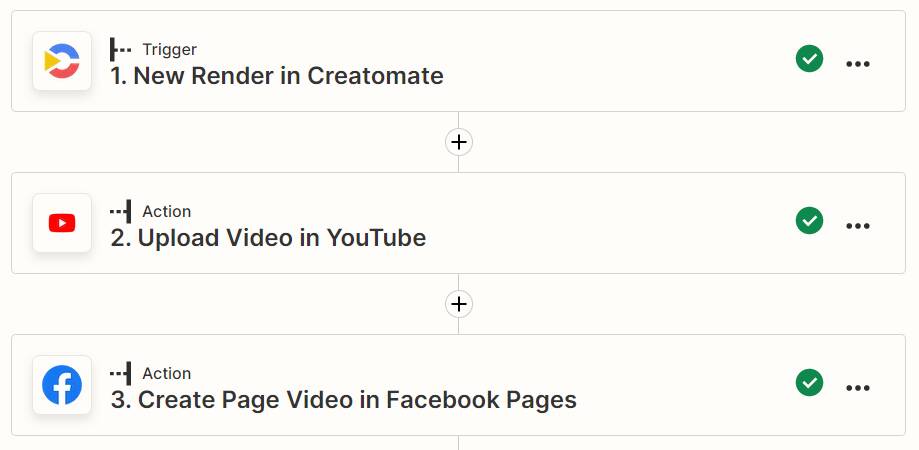
We will begin by using Zapier, which is the recommended no-code platform for automating video with Creatomate. Zapier provides integrations with YouTube and Facebook. In this case, we will create a Zap as follows:
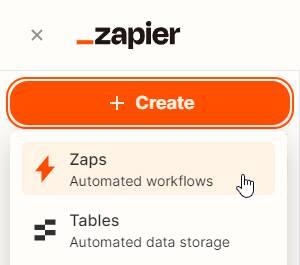
Log in to your Zapier account or sign up for a free account first. From your dashboard, click the Create button and choose Zaps:
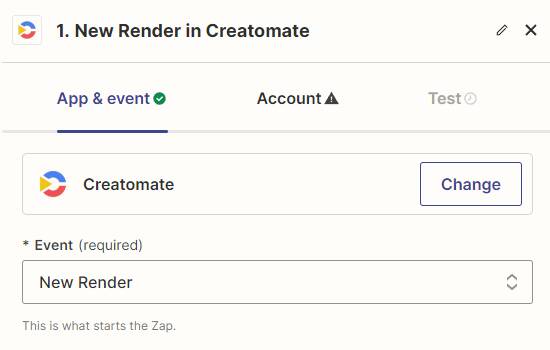
Click the Trigger block. Then, search for the Creatomate app and select the New Render event:
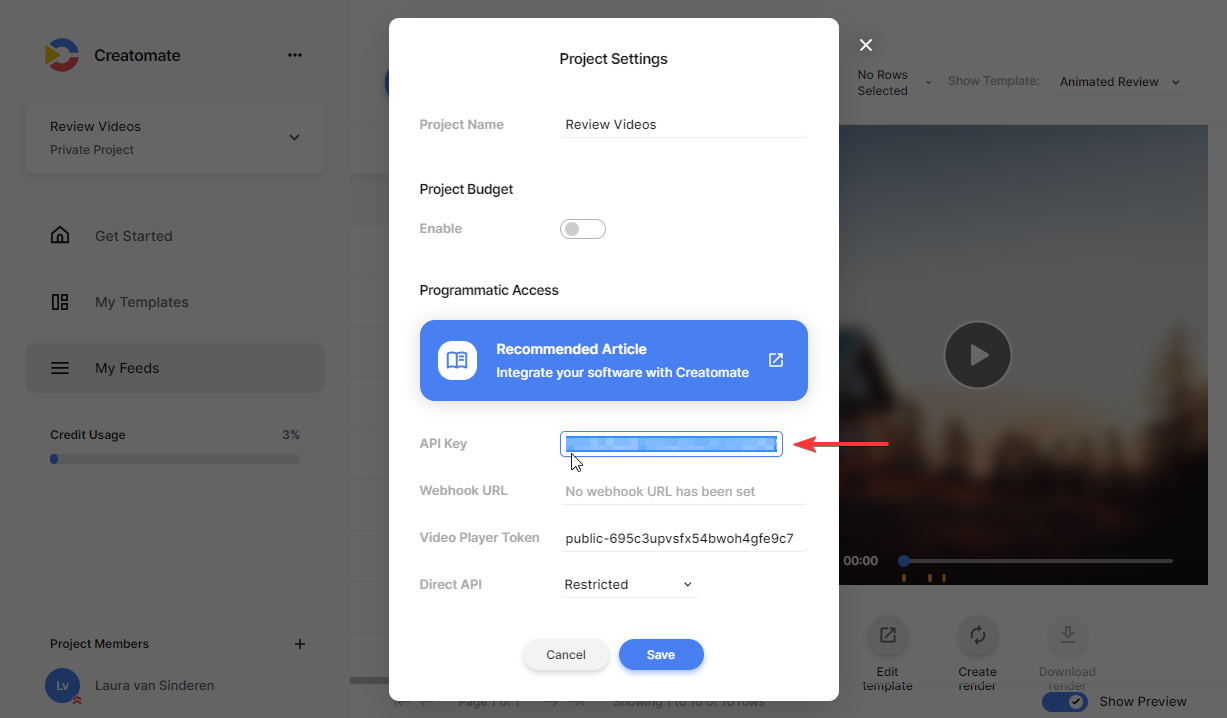
Continue by selecting your account from the list or signing in with your project's API key. You can find it under Project Settings in your account:
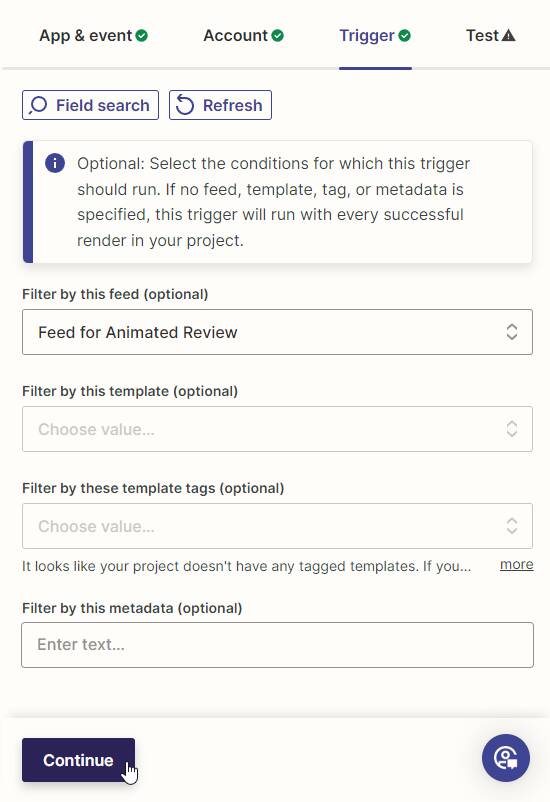
To set up our trigger, we'll select our Feed for Animated Review in the Filter by this feed field. Then, click Continue:
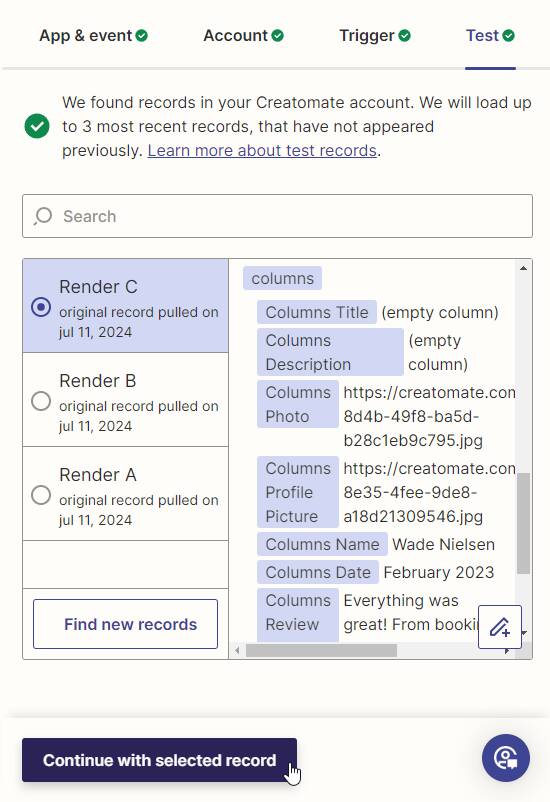
Click Test trigger to make sure Zapier is able to find the videos from our feed. This should result in a test video along with all the info, like the Title and Description columns. Earlier in this tutorial, we rendered some videos without titles and descriptions, so you'll see 'empty column'. This is fine, because we just need Zapier to find them so we can link to them in our next actions. Click Continue with selected record when the test was successful:
Add action: Upload Video in YouTube
Find the YouTube app, select Upload Video and click Continue. You'll need to select your account or sign in with Google first. Then, click Continue.
To set up the action, map the columns and the video to the required fields as follows:
- Set Title to: Creatomate -> Columns Title
- Set Description to: Creatomate -> Columns Description
- Set Video to: Creatomate -> Url
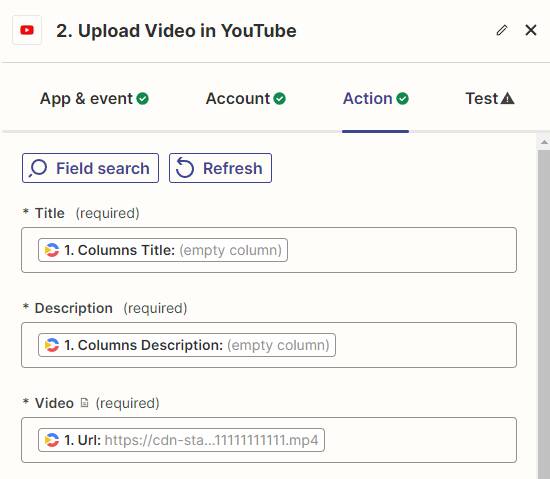
You can set the optional fields according to your needs. When done, click Continue.
Click Test step on the last page to make sure Zapier passes the right data. This won't upload a video to your YouTube channel, as it's just a test.
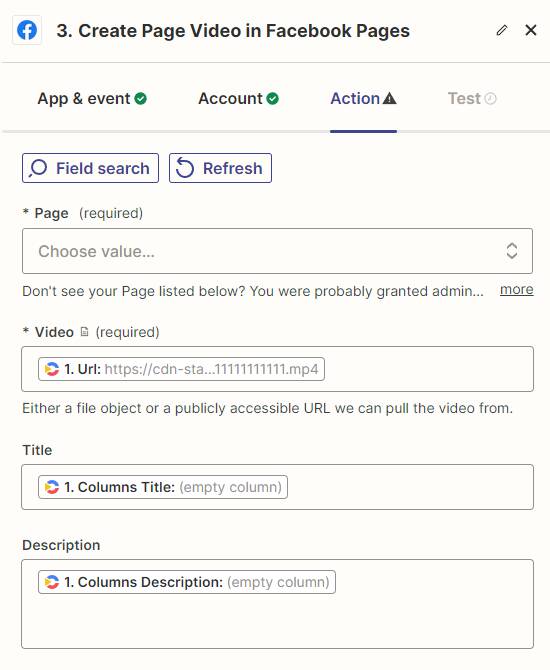
Add action: Create Page Video in Facebook Pages
Click + to add the Facebook Pages app and select the Create Page Video event. Continue by selecting your account or signing in first. Then, click Continue.
To set up the action, select your page first. In the Video field, select Creatomate -> Url. You can add a title and description to your posts by linking to one of the feed columns. When done, click Continue:
You can check if everything is set up right by clicking Test step. There will be a test video posted right away, so you might want to delete it.
Once you're happy with your workflow, turn on your Zap by clicking Publish.
Next, I'll show you how to use Make auto-posts videos to Instagram and LinkedIn.
6. Optional: Auto-post the videos using Make
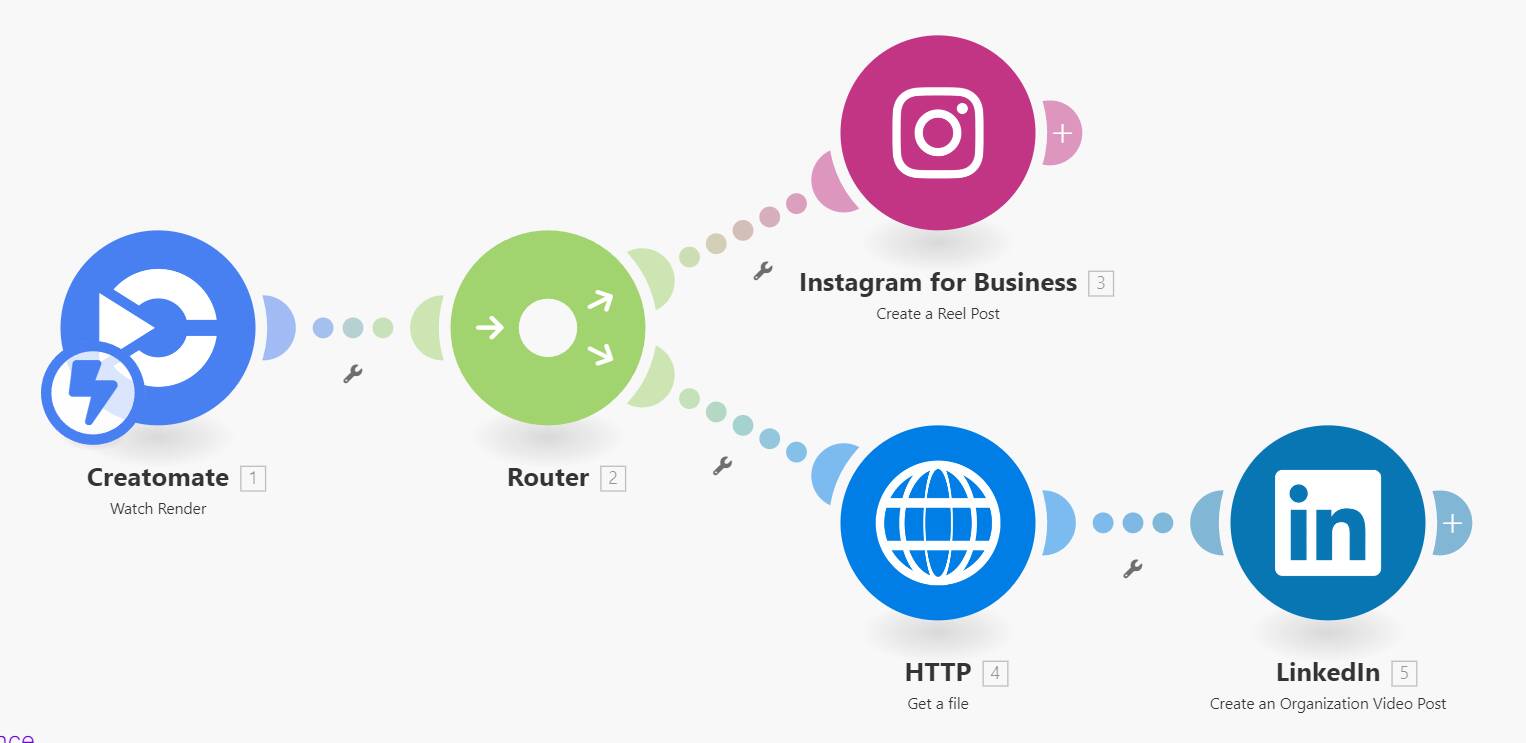
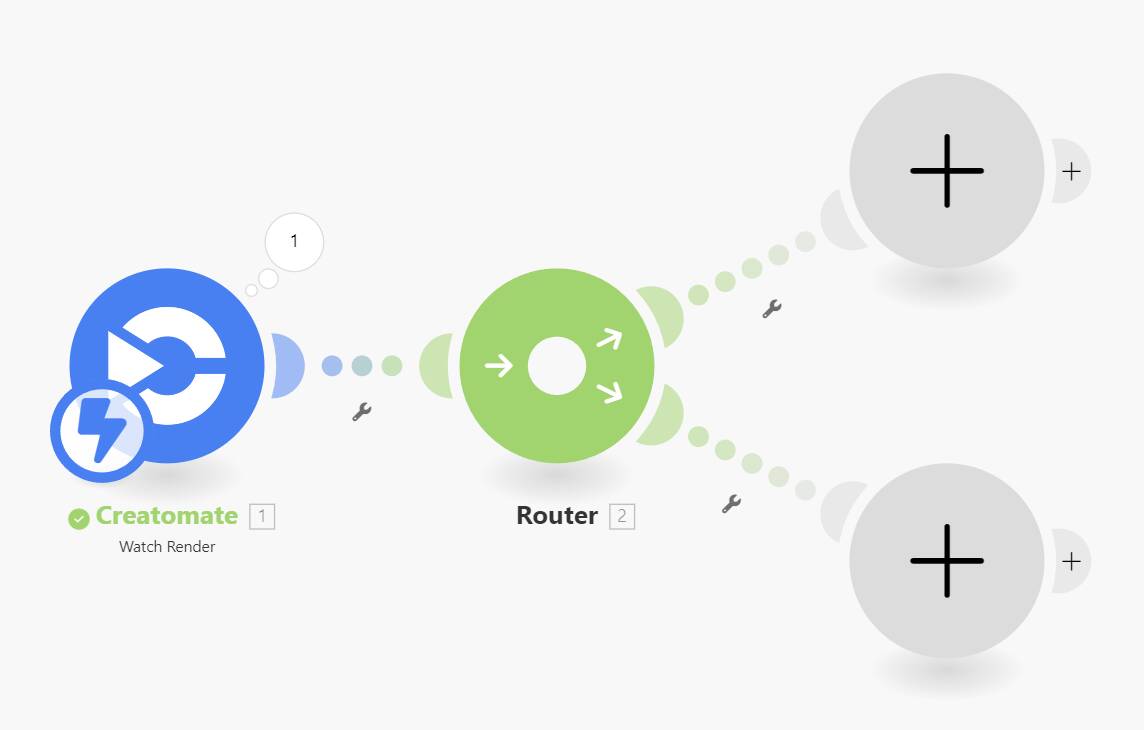
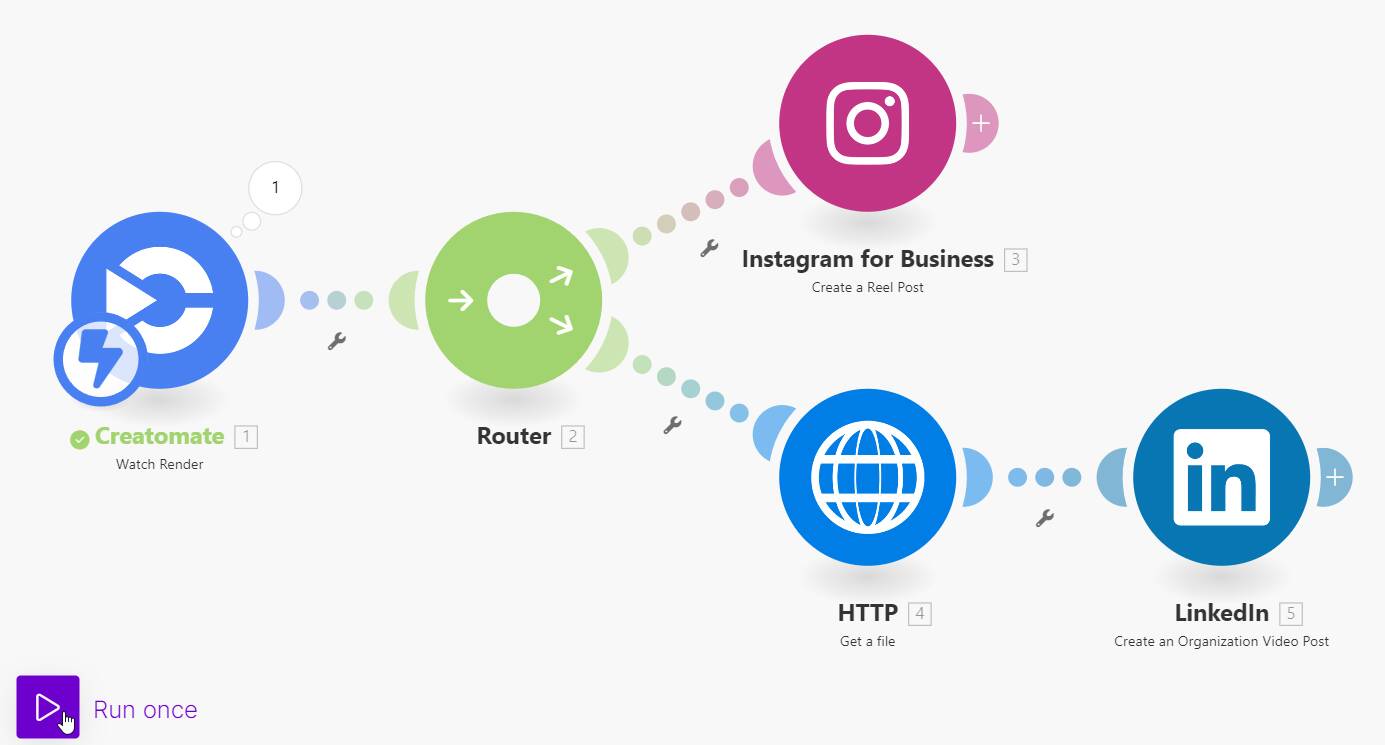
Next, we'll take a look at Make. Unlike Zapier, Make lets you post videos to Instagram and LinkedIn. Here's the scenario we're going to set up:
Log in to your Make account. Click + Create a new scenario from your dashboard. As a trigger, we'll choose the Creatomate app with the Watch Render trigger.
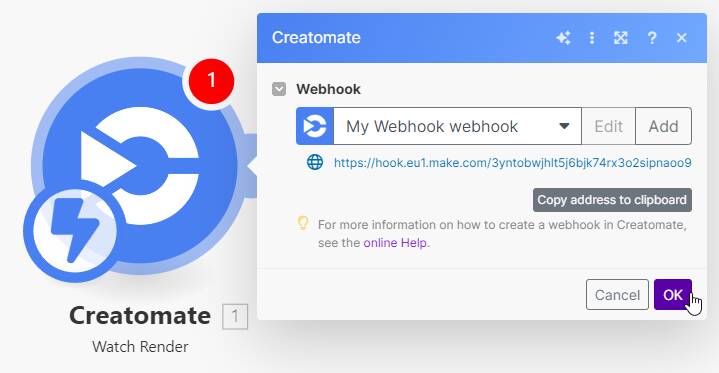
To fetch the videos generated with our feed, we'll have to create a webhook first. You can do this by entering your project's API key, which you can find under Project Settings in your Creatomate dashboard.
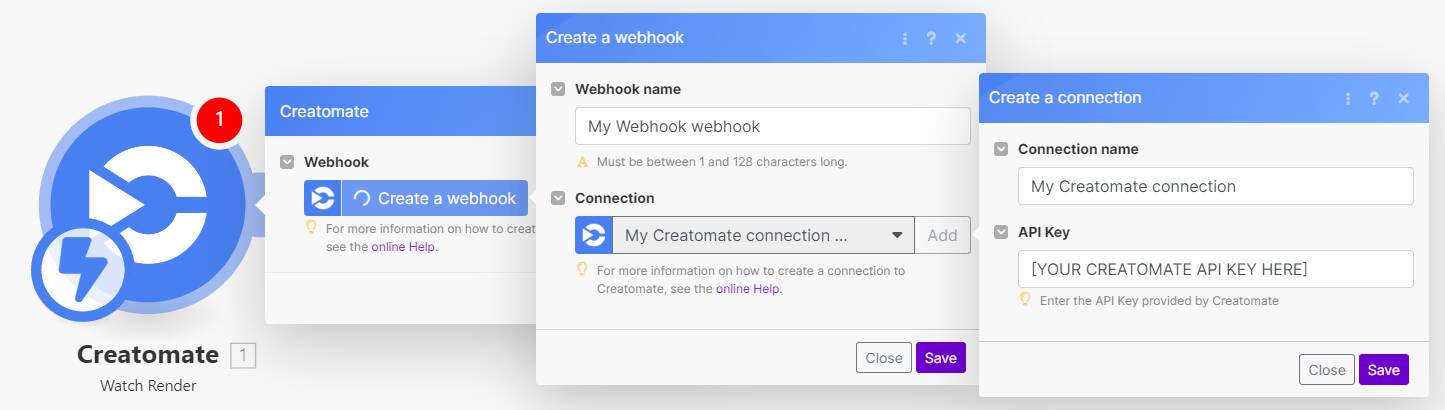
Copy the URL of the newly generated webhook and click OK:
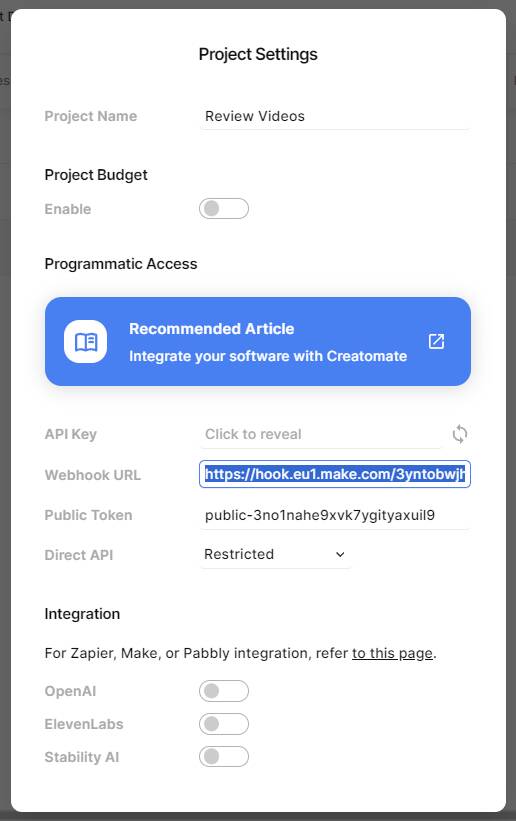
We have to connect the webhook to our Creatomate project so we can get our feed videos. In your Creatomate dashboard, click …, and select Project Settings. Then, paste the webhook URL in the corresponding field:
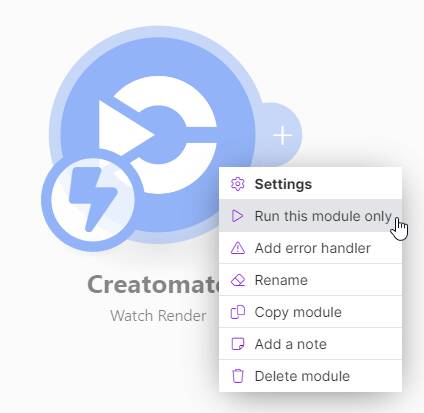
Back in Make, right-click the module and select Run this module only to test it:
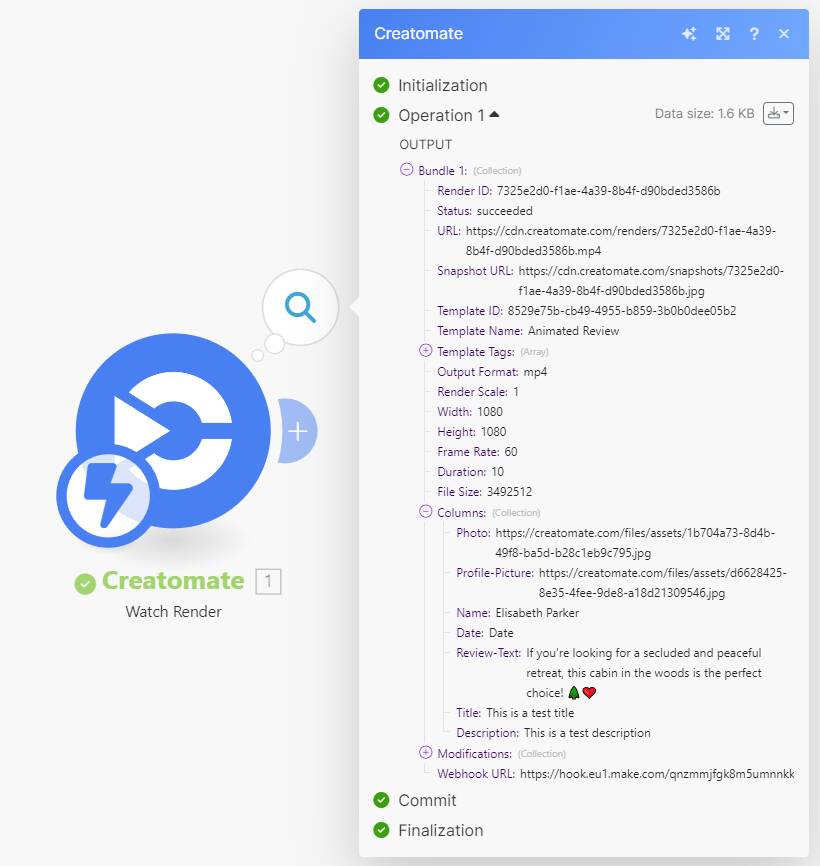
The trigger module is now waiting for data, so let's return to your feed and render a video. Once the video is complete, Creatomate will call the webhook that was set up in the Project Settings. Back in Make, it should now report that it has received data:
The webhook trigger is set up correctly. We'll now proceed to setting up the scenario to post the video to Instagram and LinkedIn.
Add module: Router (optional)
By adding a router to our scenario, we will be able to use both the Instagram and LinkedIn modules in the same Make scenario. However, you can skip this step if you're only going to post on one social media platform.
Let's click + to add another step to your scenario. Search for the Flow Control app and select Router. This will create two routes:
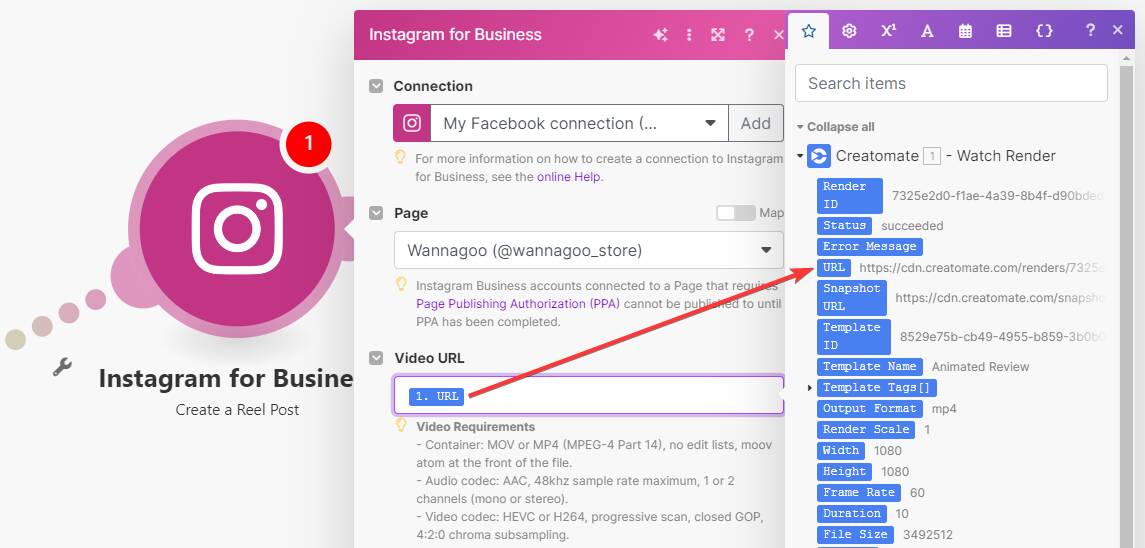
Add module: Instagram for Business - Create a Reel Post
Click the big + at the top. Add the Instagram for Business app with the Create a Reel Post action. First, connect your Instagram account and select your page.
Let's set up our post now. Select Creatomate - Watch Render -> URL in the Video URL field:
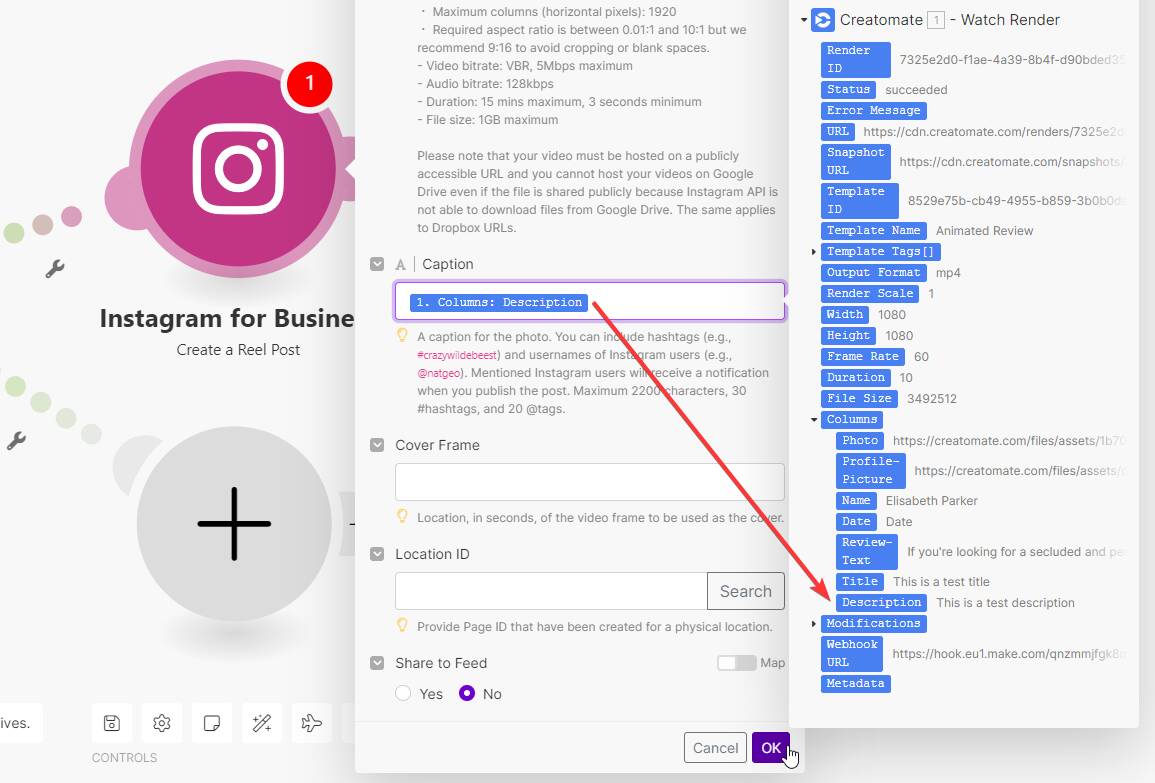
Then, select the Creatomate - Watch Render -> Columns: Description in the Caption field. When done, click OK:
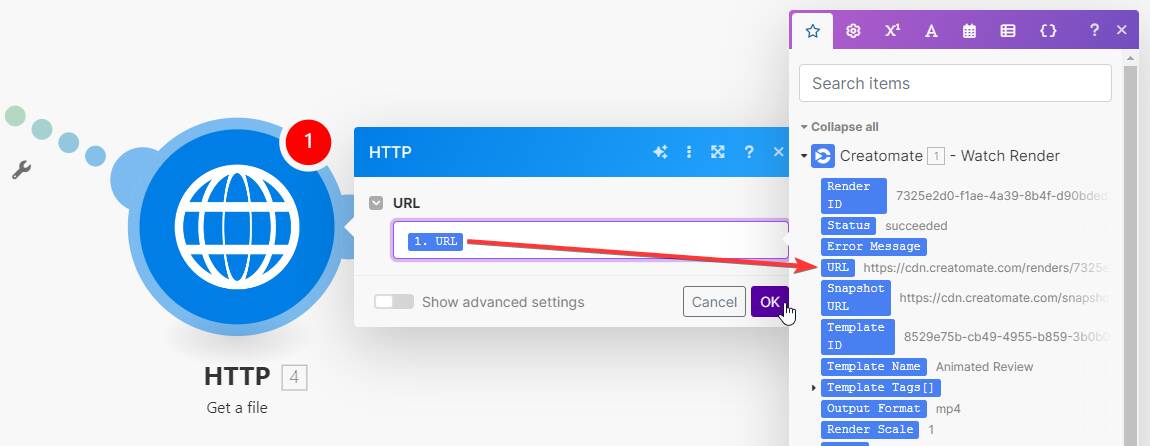
Add module: HTTP - Get a file
This module will let you download the videos. We have to do this because LinkedIn expects a file, not a URL.
For the other route, select the HTTP app with the Get a file action. Select Creatomate - Watch Render -> URL and click OK:
Note: There's a maximum file size that you can process depending on your Make subscription. Free accounts are limited to 5 MB.
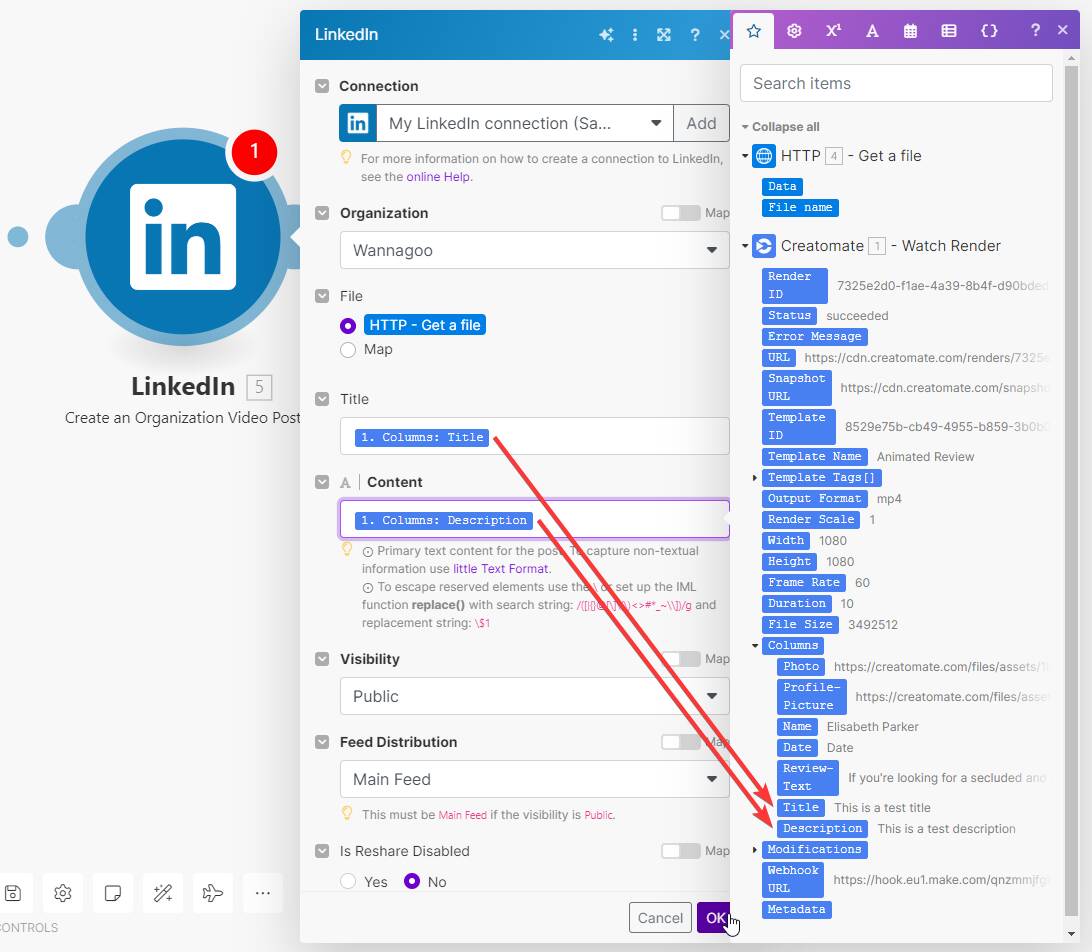
Add module: LinkedIn - Create an Organization Video Post
Add the LinkedIn app and select the Create an Organization Video Post action. Then, connect your account and select the organization first.
For the File field, make sure to select HTTP - Get a file. You can link to the appropriate columns for the Title and Content fields. Set the other options however you like and click OK when you're done:
To make sure everything is set up correctly, click Run once:
Then, return to your feed and create a render. If it works as expected, the video should be posted on your Instagram and LinkedIn accounts.
Last but not least, switch the Scheduling button to ON to active your workflow.
Next steps for social media automation
There you have it. As you can see, it takes only a few simple steps (steps 1 to 3) to convert your customer reviews into social media videos. If you want to go even further, you can automate the video processing with Zapier or Make (steps 4 to 6).
Want to automate more of your social media marketing, check out one of these tutorials next:
👉 How to Automatically Create YouTube Shorts using Make
👉 How to Automatically Create Instagram Posts using Make
👉 How to Automatically Create and Post TikTok Videos using Zapier
👉 How to Automatically Add Subtitles to Videos using Zapier
👉 Create Videos with Voice Overs using Text-to-Speech AI and Make
👉 How to Automate YouTube Shorts with AI-Generated Videos
👉 How to use AI to Automate Videos for Shorts, Stories, and Reels
You might also like these tutorials


Start automating today
Start with a full-featured trial with 50 credits, no credit card required.
Get started for free →