How to Use Stock Videos and Photos from Pexels with Zapier

In this tutorial, you'll learn how to use the Pexels API to randomly pick images and video footage for creating videos using Zapier and Creatomate.
When diving into the world of automated video creation, finding the right images and video clips for your content can be a challenge. If you've got the perfect visuals on hand, great! But if not, don't stress – stock footage is here to save the day. Pexels, an online stock library, has a treasure trove of free images and video clips ready for you to use in your videos.
In this tutorial, I'll walk you through the process of connecting the Pexels API with Zapier. This integration allows you to retrieve random, relevant video clips and photos based on a keyword. Creatomate can then use these stock footages to automatically generate video content, including YouTube Shorts, TikTok videos, Instagram Reels, and even AI-generated stories.
Let's make a social media video similar to the one above, with a Pexels video clip serving as the background. Additionally, you can also replace other elements, like the riddle, using the automated Zapier workflow. Keep in mind, this is just an example; if you have a completely different video concept in mind, you can use the editor to create your own video designs.
Prerequisites
To keep this tutorial easy to follow, we'll set up a simple workflow. Once you understand how the process works, feel free to use any of the 5000 supported apps to customize it according to your preferences.
These are the tools we'll use:
- Creatomate: to create a template and generate videos. Sign up for free.
- Zapier: to automate the entire process.
- Pexels: to randomize images or video clips.
How to use stock footage from Pexels with Zapier
Our first step is to create a template in Creatomate, forming the design basis of all the auto-generated videos. You have the option to choose from a collection of ready-made templates or create your own.
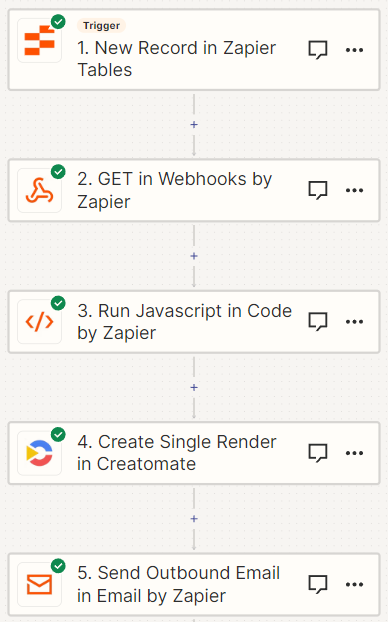
Next, we'll move onto Zapier. Here, we'll set up a table to specify the keyword for the desired stock footage and add text content for our social media video. Following that, our Zap sends a request to the Pexels API and retrieves a random video or photo based on the provided keyword. Creatomate then generates a video using the template from step 1, the text input from our table, and the stock footage from Pexels. Once the video is generated, it will be sent to our inbox.
Let's get started by creating a video template.
1. Create a video template in Creatomate
Log in to your Creatomate account. Go to the Templates page and click the + New button. Let's use the Question & Quizzes template from the Social Media category. Select a size, for example 1:1 Square, and click Create Template:
The template editor allows you to customize templates as you wish. To keep things simple, we won't delve into too much detail in this tutorial. If you're curious about how the editor works, you can check out this quick tutorial.
What's important to know is that elements can be marked as dynamic, turning them into placeholders we can easily replace with other content in our Zapier workflow. On the left side panel, you can see that the Title, Shape, Question, Answer, and Video elements are all dynamic. If you want to make an element dynamic or not, simply select it in the left side panel and (un)check the Dynamic property in the right-hand panel:
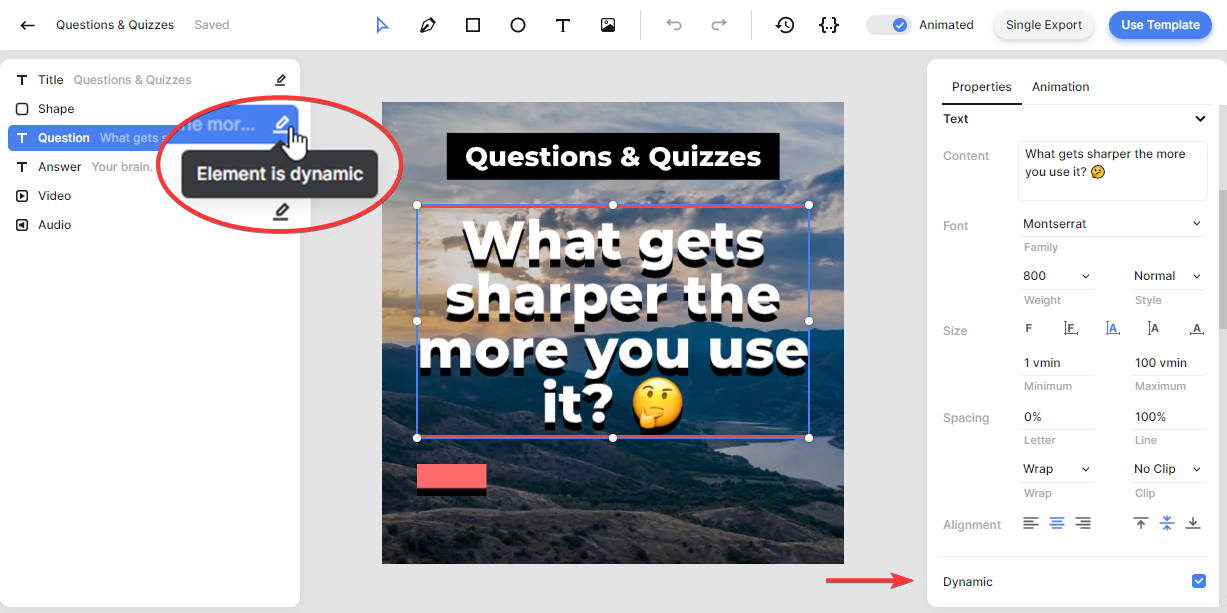
For the purpose of this tutorial, we'll substitute the Video element with a stock video clip from Pexels. Furthermore, we'll also replace the Question and Answer with different content. Our template is ready to use; there's no need for any adjustments.
Now, let's proceed to Zapier.
2. Set up a Zapier trigger
Every Zap starts with a trigger, a specific event that initiates the workflow. As an example, I'll set up a Zapier Table for this, but feel free to use any other app that suits your needs.
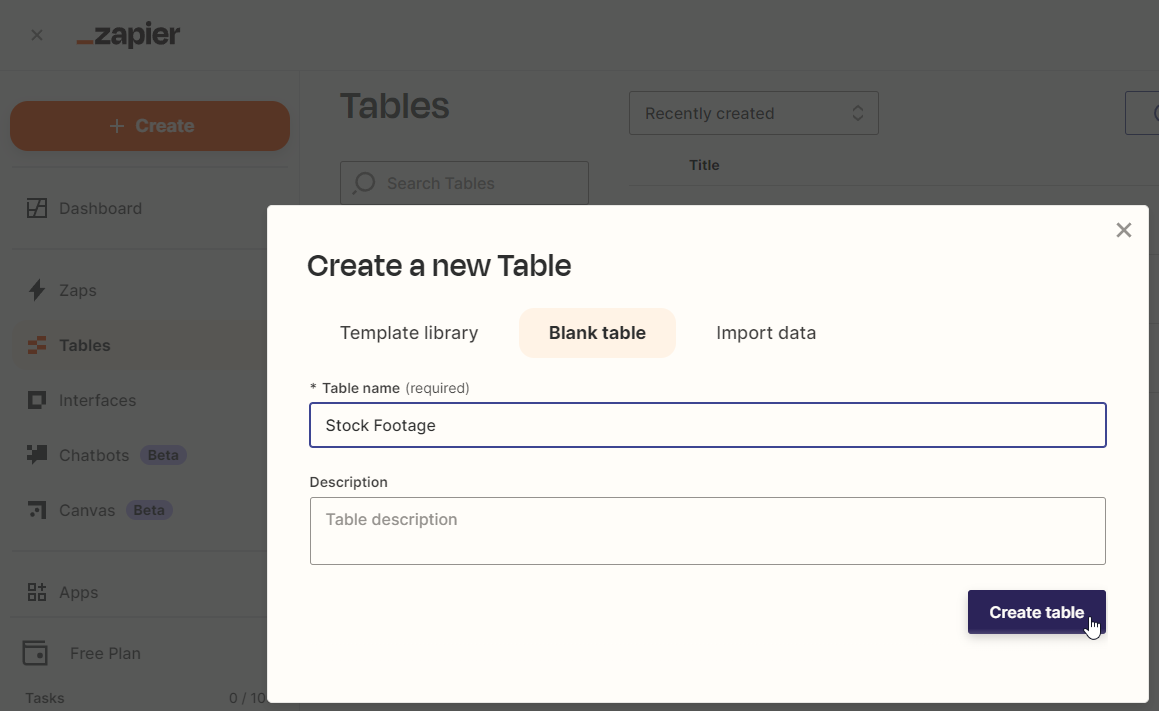
Log in to your Zapier account and navigate to the Tables page. Click the + Create button, choose Blank table, enter a table name, and hit Create table:
In the table editor, let's create three text fields and insert the following data for the first record:
- Keyword -> ocean
- Question -> What did the ocean say to the other ocean?
- Answer -> Nothing, they just waved 👋🏻 😂

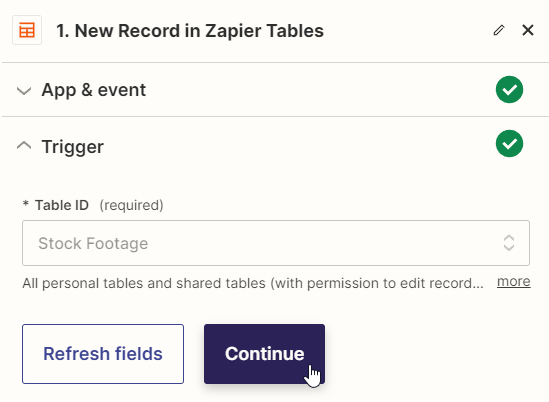
Once you're done, go back to your Zapier dashboard, click + Create, and select Zaps. When you're in the workflow editor, click the Trigger block. Search for and choose the Zapier Tables app, and select the New Record trigger. Then, click Continue.
On the Trigger page, select the table you've just created, and click Continue:
Click Test trigger on the Test page to make sure Zapier can find our sample record. When the test is successful, click Continue with selected record, and move on to the next step.
3. Retrieve a Pexels video or image with Zapier
To set up this action, you need a Pexels API key. To get one, you need to create an account first.
Go to Pexels.com, click the Join button in the top right corner, and go with the I want to download option. Enter your first name, last name, email address, and a password. Then click Create an account. Alternatively, you can also sign up using your Google, Apple, or Facebook account.
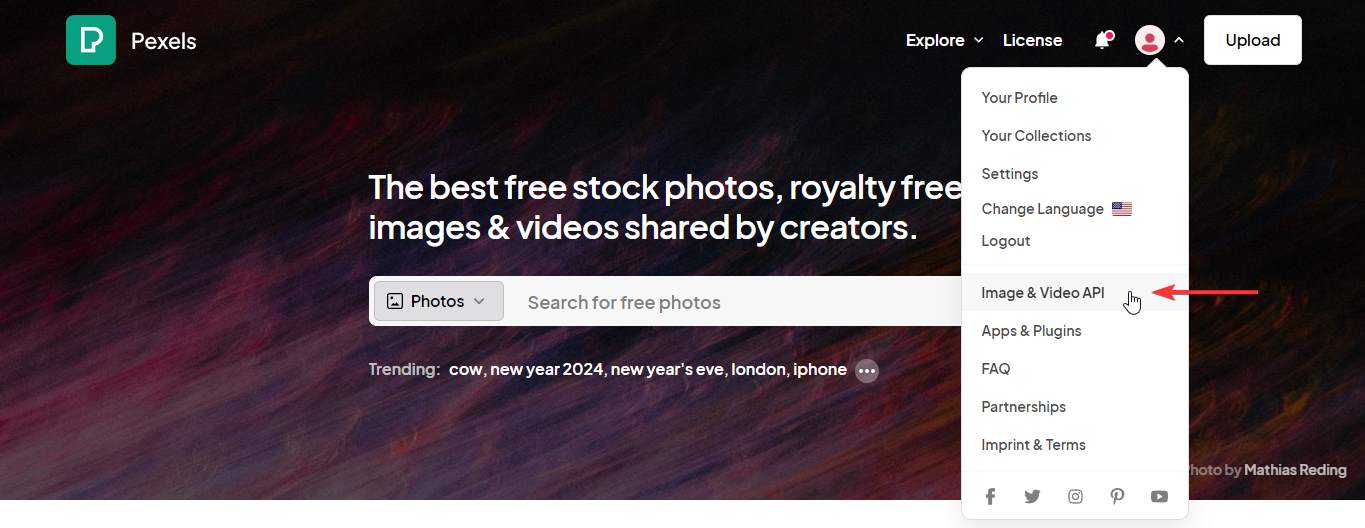
Once logged in, go to your profile icon, and click Image & Video API:
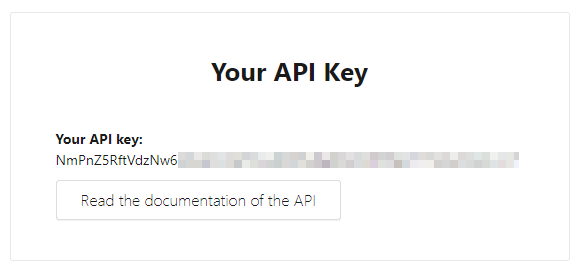
Then, click the Your API Key button. Pexels generates an API key for each project. To get yours, fill out the form with your project details and agree to their terms and conditions before clicking on Generate API Key.
You should now have gotten an API. Keep it handy; you'll need it soon.
Now, let's get back to Zapier. Search for and select Webhooks by Zapier as the app, and choose GET as the event. Then, click Continue.
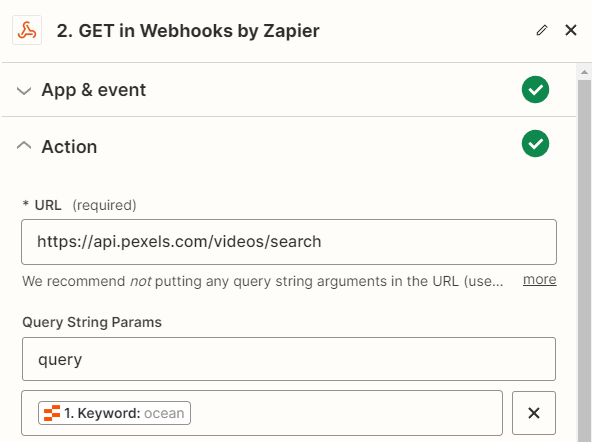
On the Action page, we'll set up a request for Pexels. In the URL field, paste one of the following links depending on whether you want to retrieve a video clip or an image:
- For a video clip -> https://api.pexels.com/videos/search
- For an image -> https://api.pexels.com/v1/search
Under Query String Params, enter query, and select Zapier Tables -> Keyword:
Optionally, if you desire more control over the stock footage, you can include additional parameters, such as orientation. Please refer to Pexels' API documentation if you wish to do so.
Scroll down to find the Headers section. Enter Authorization, and paste the Pexels API key you just received. Then, click Continue:

Click Test step on the Test page to send a test request to Pexels. This action will return URLs for 15 videos or images. Since we only need one image or video clip, we'll add another action step to randomly select one of those.
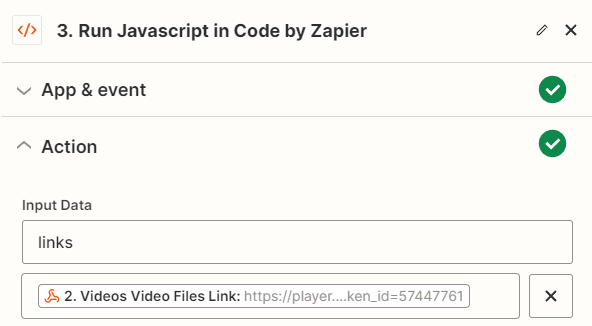
Let's click +, search for and select Code by Zapier as the app, and choose Run Javascript as the event. Then, click Continue.
On the Action page, enter links in the Input Data field. Next, you have to select one of the following values, based on whether you've requested a video clip or an image:
- For a video clip: Webhooks by Zapier -> Videos Video Files Link
- For an image: Webhooks by Zapier -> Photos Src Original
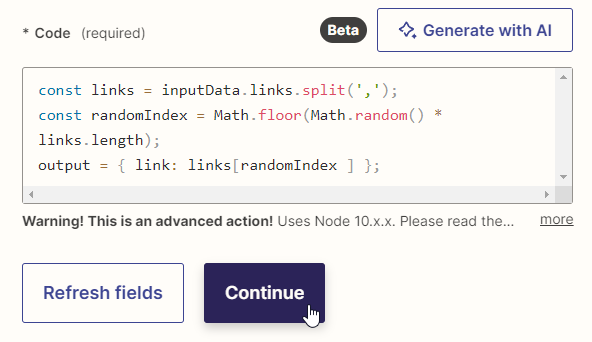
Then, in the Code field, copy and paste this script:
1const links = inputData.links.split(',');
2const randomIndex = Math.floor(Math.random() * links.length);
3output = { link: links[randomIndex ] };
Then, click Continue:
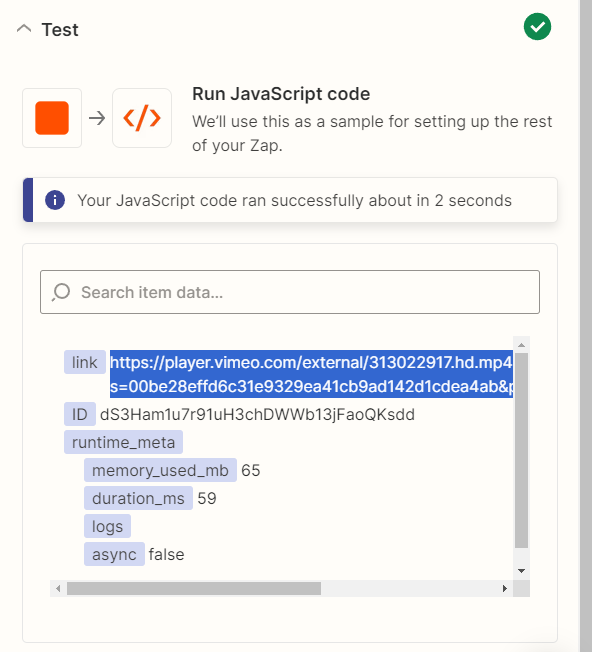
Make sure to click Test step on the Test page. This should return a link to a random video or image. By visiting that link, you can check out the stock footage provided by Pexels. Once the test is successful, proceed to the next step.
4. Generate the video
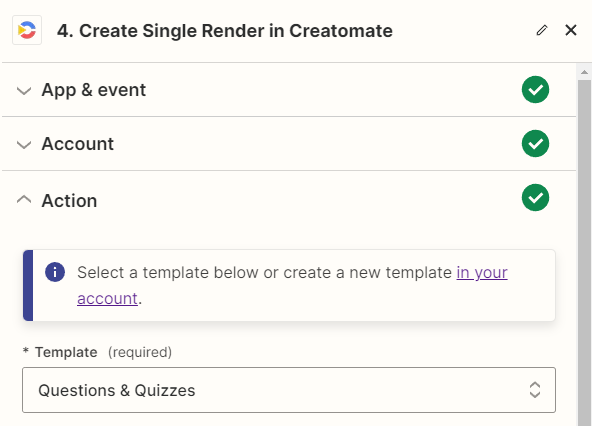
Click +, search for the Creatomate app, and select the Create Single Render event. Continue by selecting your account or signing in with your project's API key first. Then, click Continue.
On the Action page, select the Question & Quizzes template first:
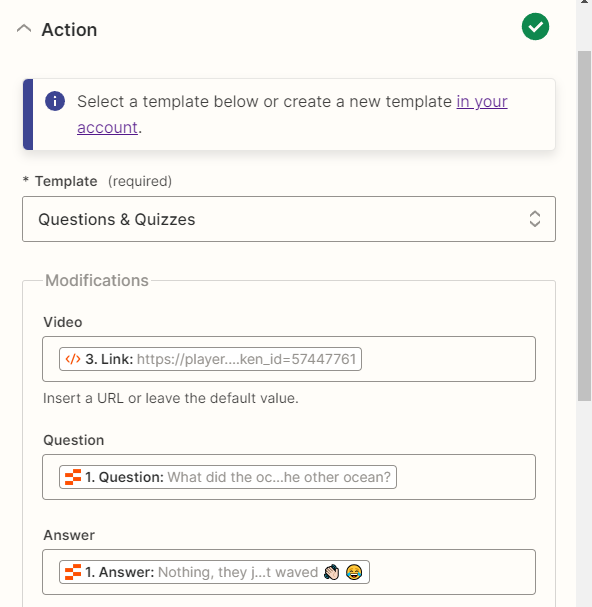
The dynamic elements in your template show up under Modifications. You can connect the riddle from your trigger and the footage from Pexels like this:
- Set Video to Code by Zapier -> Link
- Set Question to Zapier Tables -> Question
- Set Answer to Zapier Tables -> Answer
When done, click Continue.
Note: The other dynamic elements in our template are also listed as modifications. But we won't replace them. Leaving them empty will use the template's default values.
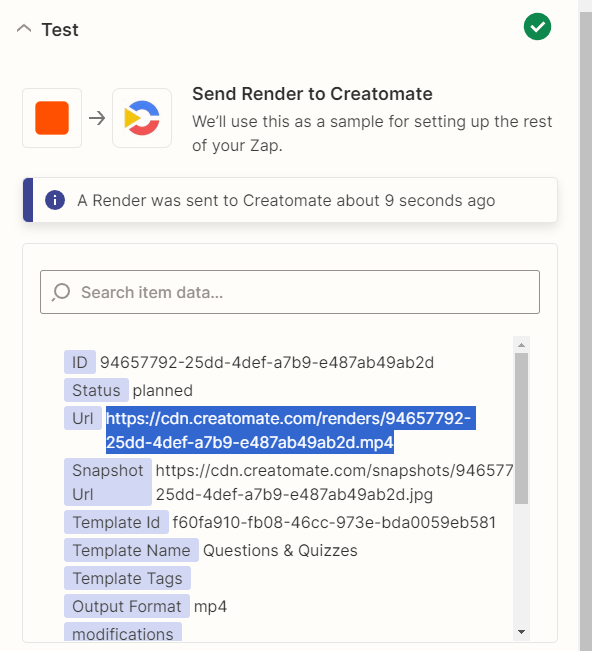
Click Test step on the Test page to see if Creatomate can generate a video from the provided data. You can check it by visiting the URL given in the test result. Rendering may take some time, so if you get a Not Found message, just wait a few seconds before refreshing the page. This only happens during Zap setup; once the Zap is live, it will wait for the video to finish before proceeding to the next step. If the test is successful, move on to the final step:
5. Process the video
At this point, we've successfully generated a video ready for your use. As an example, I'll send the video via email, but feel free to use any app that suits you. If you plan on sharing the video on social media, explore our tutorials on YouTube Short, TikTok videos, Instagram Reels, or Facebook videos. Alternatively, you can upload it to Google Drive or place it back in your Zapier table. The choice is yours.
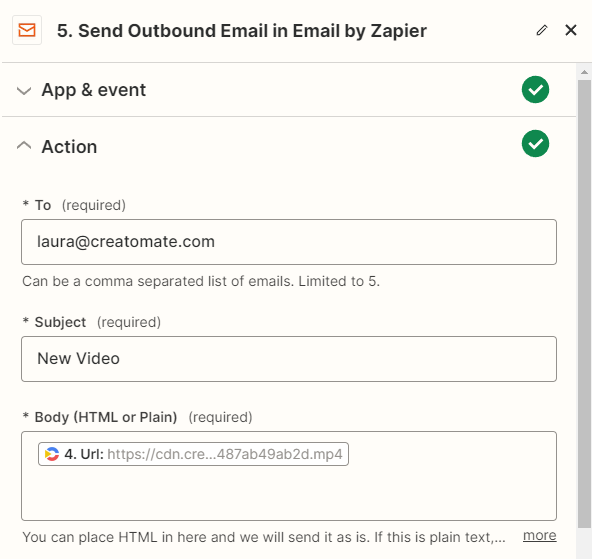
Click +, and add the Email by Zapier app with the Send Outbound Email event. Click Continue.
In the To field, input the email address of the recipient you want to send the video to. If available, you can also use a value from any previous apps. Then, create a subject line for your email. To include a link to the video, select Creatomate -> Url in the Body field:
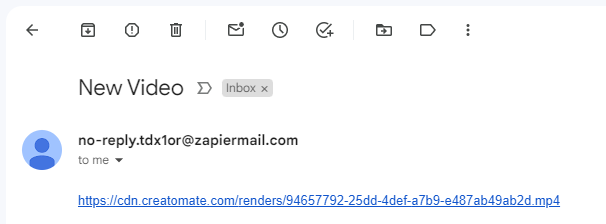
Customize the other options if needed. Once done, click Continue. On the Test page, click Test step to ensure it works. Now, check your inbox, and you should see an email with the video link:
Once the test is successful and you're happy with your workflow, click Publish to activate your Zap.
What's next for video automation?
And that's it! Creating videos with Pexels, Creatomate, and Zapier is quick and easy. In this tutorial, I've shown you how to set up a basic video automation workflow that you can customize to fit your needs.
Creatomate and Zapier open up a world of exciting video marketing opportunities! This tutorial only scratches the surface of what video automation can do. Check out one of these tutorials to find out even more possibilities:
👉 Create social media content in bulk
👉 Automatically add subtitles to videos
👉 Use AI to create social media videos
You might also like these tutorials


Start automating today
Start with a full-featured trial with 50 credits, no credit card required.
Get started for free →