How to Automatically Add Watermarks to Videos with Zapier

In this tutorial, you'll learn how to use Zapier and Creatomate to automatically watermark videos in a folder on Google Drive using no-code tools only.
Watermarking is the process of adding a logo or text to a video, usually to protect the video from being copied without attribution. Another use is branding videos with a company's logo. Anyone who's ever dealt with a large number of videos knows how tedious this process can get. You can't just add a fixed-size logo to a video; it has to fit the exact resolution and format of the video, which can vary.
Luckily, watermarking can be done completely automatically through Zapier and Creatomate. In this article, we'll show you how to set up an automated workflow that takes videos from Google Drive, adds an appropriate-sized watermark, and then uploads them back. Let's use the following example where we insert the Wannagoo logo into a video. However, you can make the overlay anything you want, such as an image, text, or even an animated GIF.
Tip: In this tutorial, we’ll use Google Drive. But you can also use another cloud storage service such as Amazon S3, Dropbox or your own SFTP server.
Prerequisites
To follow along, you’ll need the following tools:
- Google Drive: to store the videos.
- Zapier: to set up the automated workflow.
- Creatomate: to auto-generate watermarked videos. Don’t have an account? Sign up for free.
How to add watermarks to videos using Zapier?
Our first step will be to prepare our Google Drive. We’re going to create one new folder with two subfolders and make it publicly accessible. This is just for demonstration purposes, you can use your existing folders instead.
Then, we’ll create a template in Creatomate to watermark the videos. We're using a responsive template, so the watermark will properly align and size according to the video's format and duration.
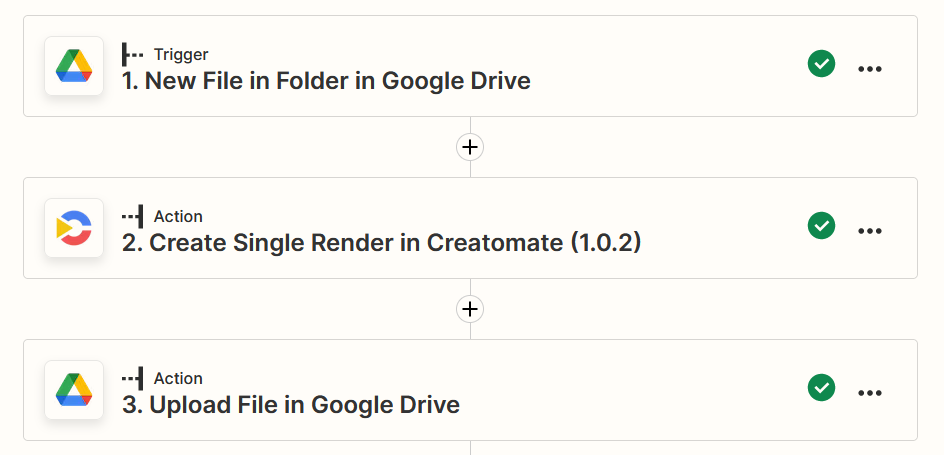
And lastly, we'll build a Zap that watches a Google Drive folder, automatically inserts watermarks into new videos in that folder, and uploads them back to another Google Drive folder:
Let’s get started!
1. Prepare Google Drive
Log in to your Google Drive account. In the top left corner, click + New and select New folder. Let’s name it Watermarks and click Create.
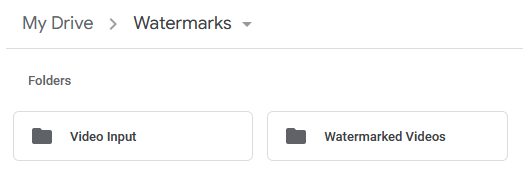
Enter the new Watermarks folder by double-clicking. Now, right-click and select New folder to create two subfolders: Video Input & Watermarked Videos.
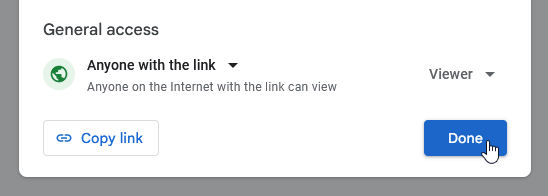
To enable Creatomate to download our input videos, we have to make the Video Input folder publicly accessible. So right-click this folder and select the Share option. Set the General access to Anyone with the link and click Done.
Let’s upload a video file to our Video Input folder as a test for Zapier. You can download and use this video as an example.
Once we've prepared our Google Drive, let’s move on to the next step where we’ll create a template in Creatomate.
2. Create a template in Creatomate
Log in to your Creatomate account. Navigate to the Templates page and click + New. We’re going to use the Watermark A Video template from the Fundamentals category. Select the Automatic format and click Create Template to open the template editor:
The only thing we have to do is to replace the placeholder logo with our own logo. So right-click the Image element in the left side menu. Select the Replace Media and select a file from your computer.
Next, let's set up our Zapier workflow.
3. Trigger the Zap whenever a video is added
Log in to your Zapier account, click Create, then choose Zaps. Search for Google Drive as the app and New File in Folder as the event. Continue by selecting your account from the list or sign in to connect Google Drive first. Then, click Continue.
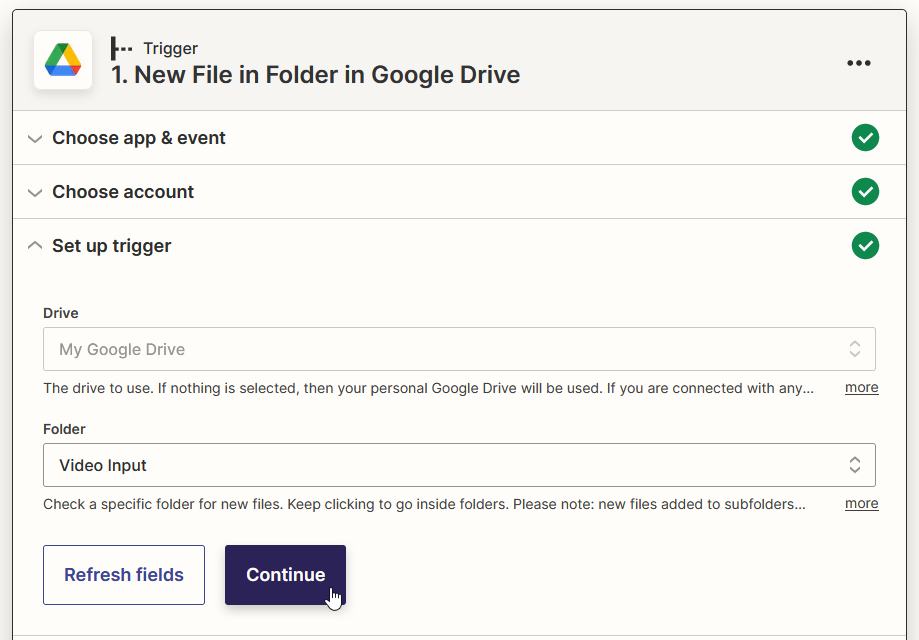
Now, we’re going to set up the trigger by selecting My Google Drive in the Drive field first. As we want this Zap to start when new video files are added to our Video Input folder, let’s select it in the Folder field. You can find the Video Input (sub)folder in the Watermarks main folder. Then, click Continue.
On the next screen, click Test Trigger to make sure Zapier can find the video file we’ve just uploaded. When the test was successful, click Continue.
4. Add a watermark to the video
Choose Creatomate as the app and Create Single Render as the event.
Continue by selecting your account from the list or signing in with your project's API key first. Then, click Continue.
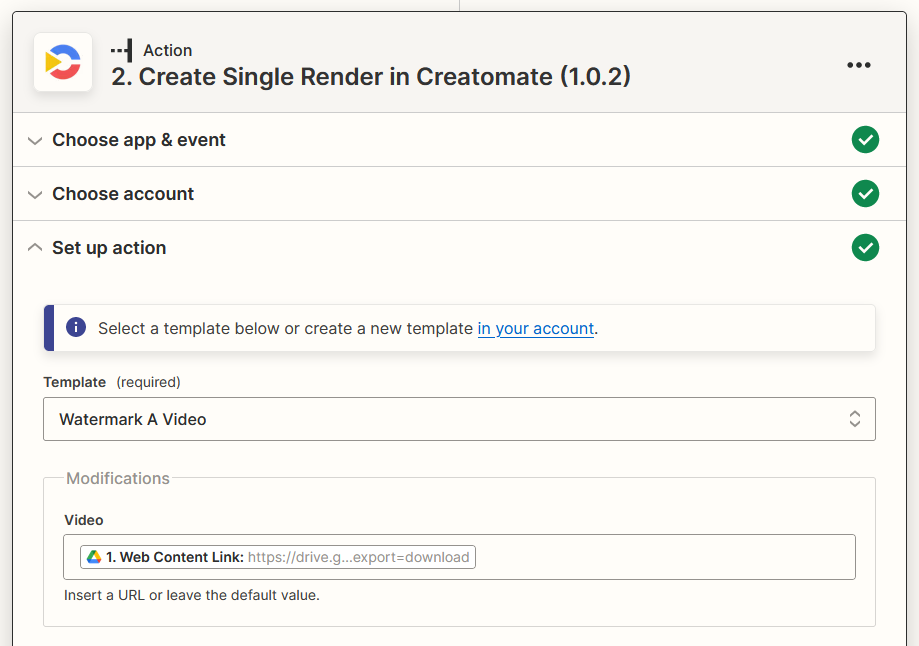
We’ll set up the action to automatically watermark our videos. Let’s choose our Watermark A Video template in the Template field. Then, select the Google Drive - Web Content Link in the Video Modification field. Click Continue.
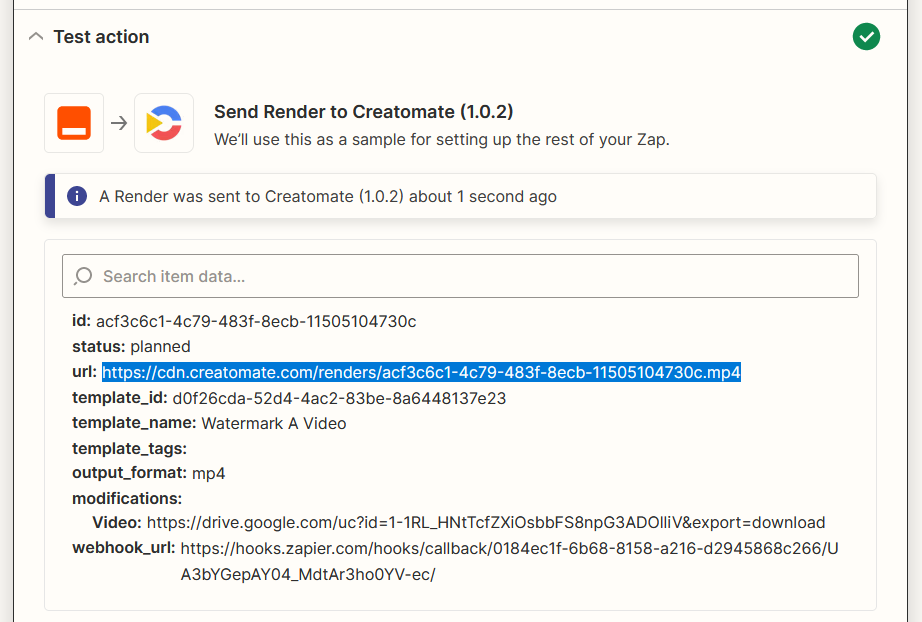
On the next screen, click Test step to send a request to Creatomate to render the video. You can check out the video by visiting the URL. Rendering takes a moment, so if you land on a Not Found page, refresh the page. This only occurs during Zap setup. Once the workflow is live, it will automatically wait for the video to finish before proceeding to the next step.
5. Send the videos back to Google Drive
Click +, choose Google Drive as the app and Upload File as the event. Continue by selecting your account from the list.
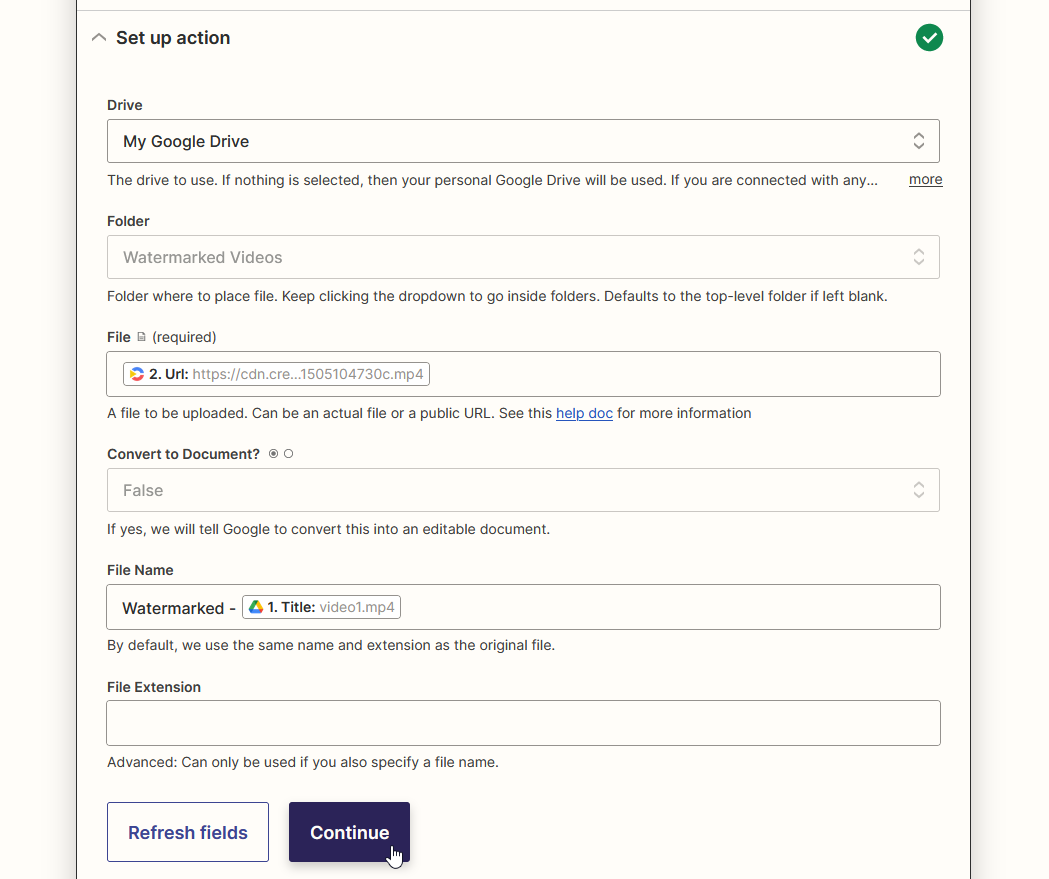
We want to upload the watermarked video to our Watermarked Videos folder. Let’s set up the action as follows:
- Set Drive to My Google Drive
- Set Folder to Watermarked Videos
- Set File to Creatomate -> Url
- Set Convert to Document to False
- Set File Name to Watermarked - Google Drive -> Title
Click Continue.
Finally, click Test step to upload the video to Google Drive. When we move over to our Watermarked Videos folder, we’ll see that the watermarked video has been uploaded! When you’re happy with your automated workflow, click Publish Zap to turn it on.
Next steps for automating watermarks on videos
That's all it takes! Whenever you need to watermark videos, simply upload them to the Google Drive folder. A watermarked video will be automatically uploaded back a few moments later.
Adding watermarks to videos is just one of the many things you can do with Creatomate. With its online template editor, you can create custom video designs tailored to your specific needs. For example, you can generate shorts, stories, and reels for platforms like Instagram, TikTok, and YouTube, each featuring unique text and images. If you're interested in generative AI, you can even create fully AI-powered faceless videos, complete with voiceovers, images, and subtitles.
You might also like these tutorials


Start automating today
Start with a full-featured trial with 50 credits, no credit card required.
Get started for free →