How to Generate Subtitles using Whisper and Zapier

In this tutorial, you'll learn how to automatically transcribe video to text using the Whisper API, OpenAI's speech-to-text AI service, and Zapier.
When dealing with lengthy videos or audio recordings, such as podcasts or interviews, having a written transcript alongside the spoken content can be incredibly helpful. This transcript serves various purposes - from creating captions to facilitating reading instead of listening, and even making the content searchable. Now that AI is everywhere, there are plenty of speech-to-text tools available to help you convert your spoken language into written text. One standout tool for this purpose is Whisper, an automatic speech recognition system provided by OpenAI.
In this tutorial, you'll learn how to use Whisper to automatically transcribe audio or video files into text. To do this, we'll set up a custom workflow in Zapier, a no-code automation platform. Once it's up and running, you have an automation that runs whenever a new video or audio file is uploaded. It will then automatically be transcribed, and you'll receive written text as a result.
with animated subtitles added by Creatomate.
Let's take a podcast clip as our example. As you can see, the video above includes subtitles, which is essential when sharing content on social media. However, these subtitles weren't created using the transcript generated by Whisper. There's actually a more efficient method for this, which I'll explain shortly.
While Whisper can generate SRT files for subtitles, syncing them with the video can be tough. However, this synchronization is crucial to ensure that the words appear precisely at the right time. Also, these SRT files typically contain multiple words in a single timestamp, which limits how they can be animated.
Let me introduce you to another solution for adding subtitles to videos: Creatomate. Simply put, Creatomate is a video automation platform equipped with an auto-transcription feature, which generates subtitles and seamlessly integrates them into your videos. It supports word-by-word animations and a wide range of styling options, allowing you to customize subtitles to your liking. Stay tuned or skip ahead, as I'll show you what's possible later in this tutorial. Or, jump straight into our tutorial on automatically adding subtitles to videos using Zapier.
So, if you're considering using Whisper to transcribe videos for subtitles, it might not be the best choice. But don't worry; there is an alternative approach. However, if your goal is solely to transcribe videos and audios into text files, then Whisper is an excellent tool for the job. This tutorial shows you how to do exactly that.
Let's dive right in!
Prerequisites
In this tutorial, we'll use Dropbox to upload a video file for transcription and save the resulting text file. It's just to show you how it works; you can use any other application that suits your needs best.
These are the tools we'll use:
- Whisper: to transcribe videos.
- Dropbox: to provide video files and upload the transcripts.
- Zapier: to set up the automated workflow.
How to transcribe videos with Whisper and Zapier?
Let's start by organizing our folders and uploading a sample video to Dropbox. Next, we'll move on to Zapier and set up a trigger for newly added files in our input folder. After that, we'll format the share link for easy downloading. Whisper will then handle the transcription of our input videos, providing us with the written version. Finally, we'll upload this text to our Dropbox folder.
1. Prepare Dropbox (optional)
If you don't want to use Dropbox, you can use another app, such as Google Drive.
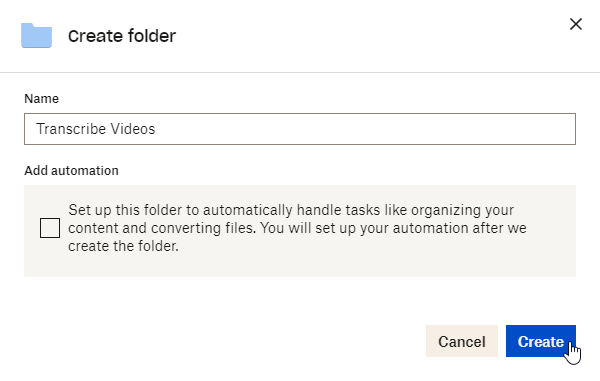
Log in to your Dropbox account or sign up for a free account first. Click Create folder, enter a folder name (e.g., Transcribe Videos), and click Create:
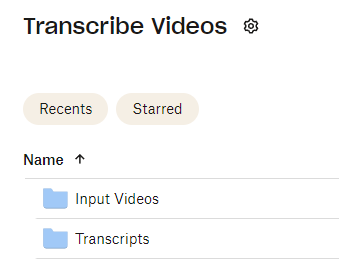
Once you're inside the Transcribe Videos folder, use the Create folder button to make two subfolders. Let's name them Input Videos & Transcripts:
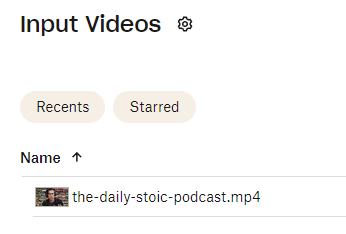
Head to your Input Videos folder and upload a video file as a test for Zapier. You can upload a video from your computer or download this video as an example:
Note: Ensure that your video or audio is under 25 MB, as Whisper only supports files that are less than 25 MB.
Our Dropbox folders are set up correctly. Now, let's proceed to Zapier to set up our automated transcription workflow.
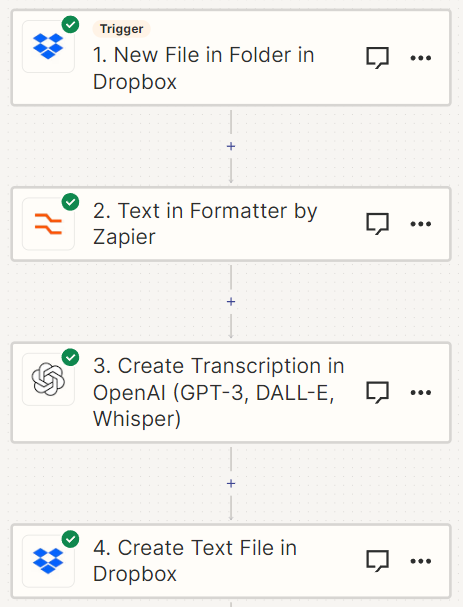
2. Set up a Zapier trigger
Log in to your Zapier account, click the + Create button, and choose Zaps. Once in the workflow editor, click the Trigger block. Search for and select Dropbox as the app, and choose New File in Folder as the event. Continue by selecting your account or signing in first.
On the Trigger page, configure the following settings:
- Set Space to Personal
- Set Folder to /Transcribe Videos/Input Videos
- Set Include file contents? to No
Then, click Continue:
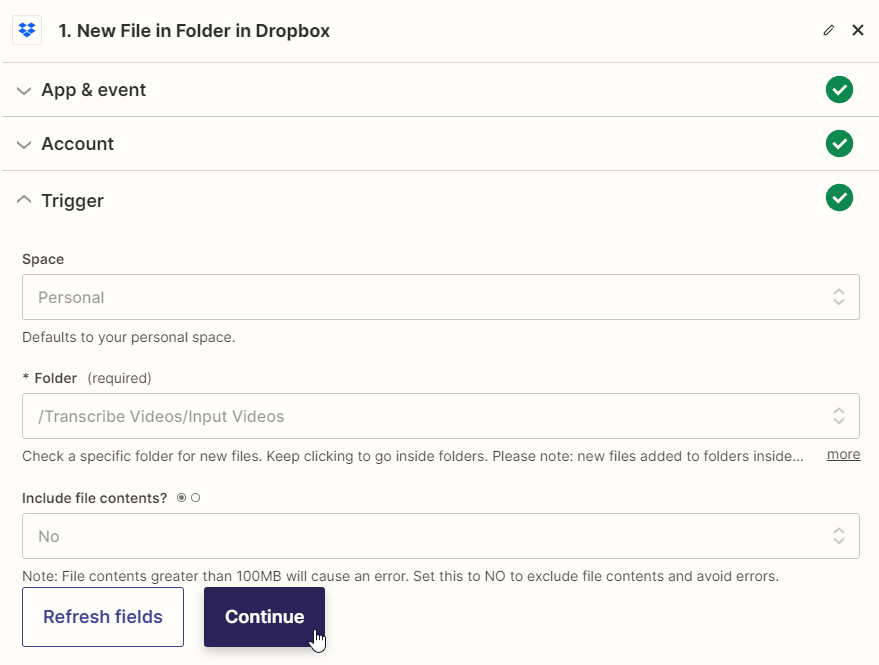
Click Test Trigger on the Test page to make sure Zapier can find our test video. Once the test is successful, click Continue with selected record, and proceed to the next step.
3. Change the link
Dropbox provides a link for sharing files, but by default, it's not configured for direct downloading. In this step, we'll modify the share link to enable downloading. It might sound a little complicated, but it's actually quite simple to do.
Search for and select the Formatter by Zapier app, and choose the Text event. Then, click Continue.
On the Action page, select Replace in the Transform field first. Then, select Dropbox -> Share Link in the Input field. Set the Find field to dl=0 and the Replace field to dl=1. Once you've done that, click Continue:
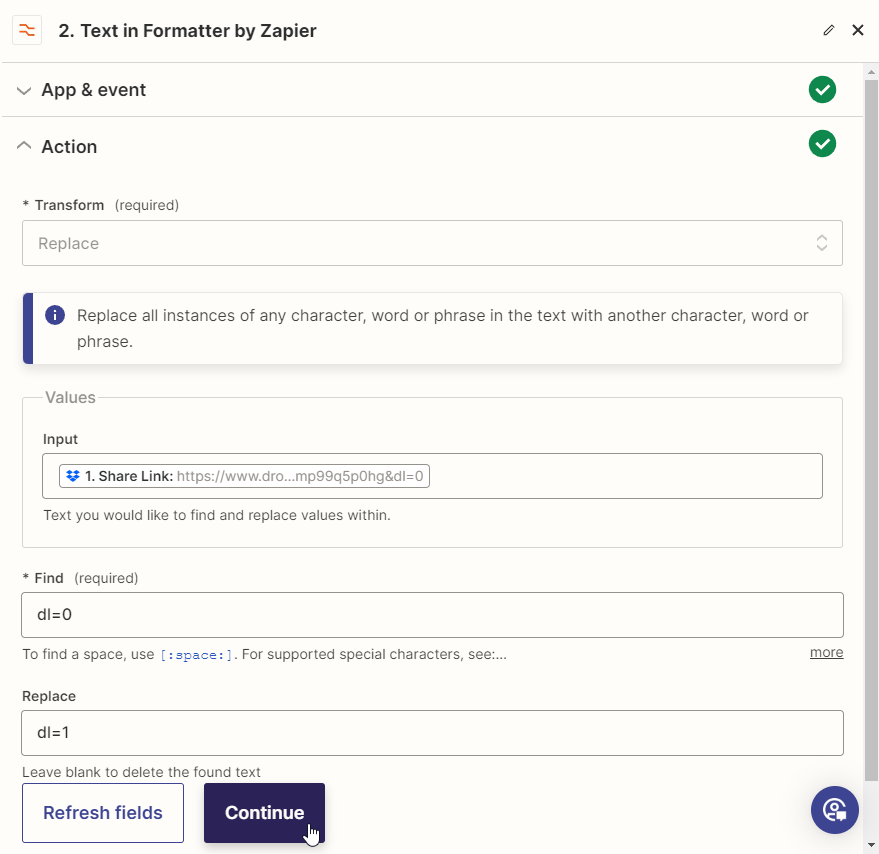
By changing 'dl=0' to 'dl=1', we're telling the server that we want to download the file, which allows us to do so.
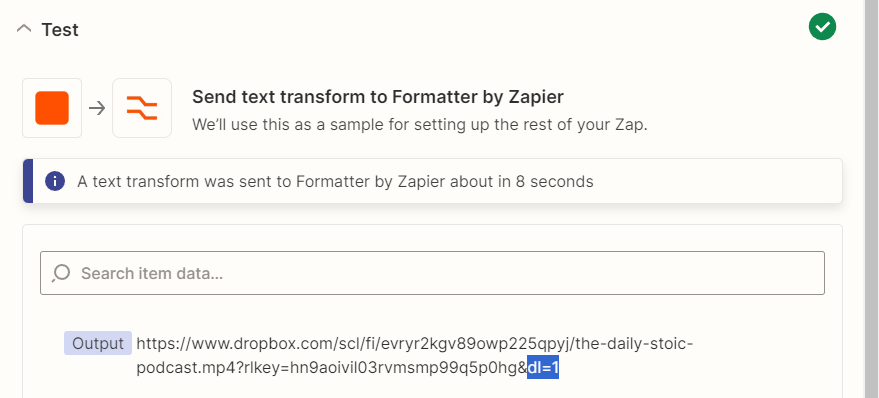
Click Test step on the Test page to ensure that the link will be adjusted correctly. The test result should show a URL ending with 'dl=1'. Once the test is successful, move on to the next step.
4. Create a transcript with Whisper
Click the + icon to add a step to your Zap. Search for and select the OpenAI (GPT-3, DALL-E, Whisper) app, and choose the Create Transcription event. Continue by selecting your account or signing in first.
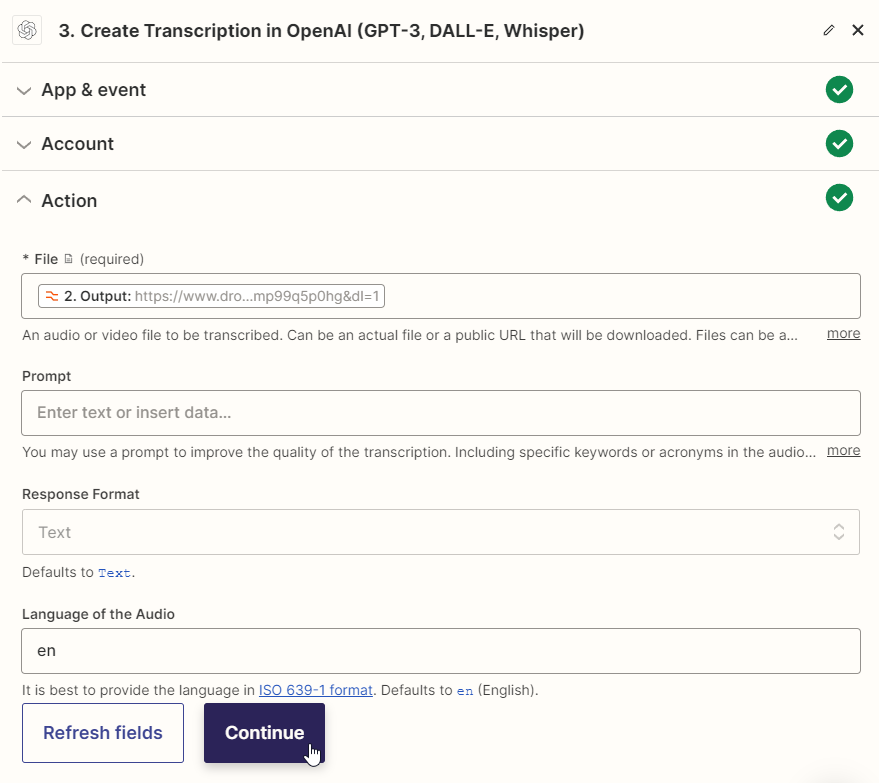
Set up the Action page like this:
- Set File to Formatter by Zapier -> Output
- The Prompt field can be used to improve the quality of the transcript. It allows you to correct specific words, add punctuation, filler words, and more. While it's not necessary for our sample video, if you're interested in learning more, you can refer to OpenAI's documentation.
- Set Response Format to Text
- Set Language of the Audio to en
Once done, click Continue:
Click Test step on the Test page to verify that Whisper can transcribe our video. In the screenshot below, you can see how the test result should look. If the test succeeds, proceed to the final step.
5. Process transcript
We'll upload the written text to our special Dropbox folder. However, you're free to use any other application you prefer, such as email, for instance.
Click on the + icon to add the Dropbox app, then choose the Create Text File event. Continue by selecting the same account as before.
Here's how to set up the Action page:
- Set Space to Personal
- Set Folder to /Transcribe Videos/Transcripts
- In the File Name field, you can name your transcript anything you want, for example, Transcript - Dropbox -> File Name
- Set File Content to OpenAI (GPT-3, DALL-E, Whisper) -> Content
- Set Overwrite to No
When done, click Continue:
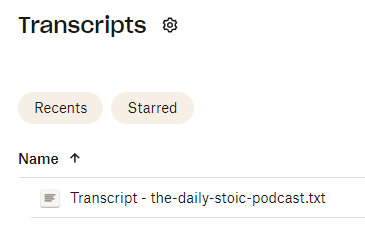
Finally, click Test step on the Test page page to make sure Zapier can upload the transcript to Dropbox. You should see that the text file has been added to your Transcripts folder:
When the test is successful and you're happy with your workflow, you simply need to click Publish to activate it.
That's it! You now know how to create transcripts from video or audio files using Whisper, Dropbox, and Zapier. And it only takes a few simple steps.
If you're also interested in adding subtitles to your videos, keep reading.
Automatically add subtitles to your videos
As promised in the introduction, I will now go over the possibilities that Creatomate offers for adding subtitles to videos.
It all starts with a template, which serves as the design for your videos and subtitles. You have the option to choose from ready-made templates, or you can design your own using the online editor. With numerous editing options available, you can customize the animations and style precisely to your liking. The platform supports virtually any subtitle style, including the most popular ones seen on social media:
You can then use this design to automatically transcribe videos and add subtitles to them. By setting up a Zap with the apps you already use, you can build your own video creation workflow.
And last but not least, you can easily share these subtitled videos, such as the one below, on your social media channels. Explore our tutorials for posting videos on Instagram, TikTok, YouTube , or Facebook.
You can find the complete process of automatically adding subtitles to videos in our step-by-step tutorial, complete with detailed instructions:
You might also like these tutorials


Start automating today
Start with a full-featured trial with 50 credits, no credit card required.
Get started for free →