How to Automatically Trim Videos using Zapier

Learn how to set up an automated no-code workflow using Zapier and Creatomate to cut off the end of videos and leave the first 10 seconds.
Webinars, Zoom recordings, YouTube videos, etc., are all great examples of video content you can repurpose for social media. Most platforms can't handle these videos because they're too long. So you have to trim these, cut the end off and leave only the beginning as a preview. Obviously you can do this manually every time, but video automation makes it much easier.
Creatomate is a video generation API to automate and scale your video production using code and no-code tools like Zapier, Make and Pabbly. In this tutorial, we'll set up an automated workflow in Zapier that takes a video from Google Drive, trims it to leave the first 10 seconds using Creatomate, and uploads it back to Google Drive. This is just a basic workflow that can be tailored to suit your needs. Other apps can be used to make it even more useful.
Using the template editor, you can trim your videos however you like. For instance, you can add an exit animation and a fade out to the audio, like in this example video:
Prerequisites
You'll need these tools to follow along:
- Google Drive: to store the input videos and the trimmed videos.
- Zapier: to set up the automated workflow.
- Creatomate: to automatically trim the videos. Create your free account here.
Tip: We'll use Google Drive for this tutorial. Please feel free to use other apps (like Airtable, Google Sheets, etc.) instead. With Zapier, you can also auto-post videos to Facebook, Twitter, and YouTube, as described in this tutorial.
How to trim videos with Zapier?
The first thing we need to do is set up Google Drive. We'll make one folder with two subfolders; one for the input videos and one for Zapier to send back the trimmed videos. If you already have Google Drive folders, you can use them instead.
Next, we'll create a template in Creatomate to trim the input videos. We'll use a responsive template that adapts to the input video's format. The template can be completely customized or you can create your own. Basically, we'll set the duration to 10 seconds, add an ending animation, and fade out the audio for the last 2 seconds. However, this is entirely up to you.
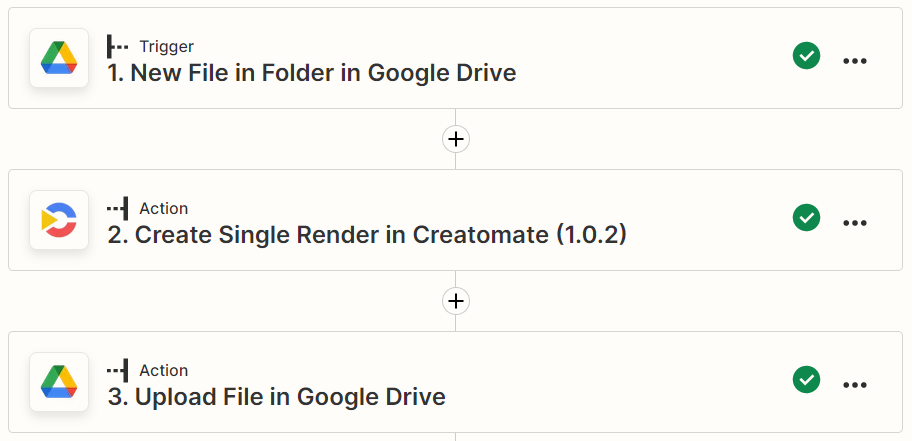
Lastly, we'll create a Zap that triggers whenever a new video is uploaded to our Input Videos folder. The video is then automatically trimmed by Creatomate using the template. Finally, the trimmed video gets uploaded back to our Trimmed Videos folder on Google Drive. Here's what our Zap will look like:
Let's get started!
1. Prepare Google Drive
Log in to your Google Drive account and click + New in the top left corner. Select New Folder, name it Trim Videos and click Create.
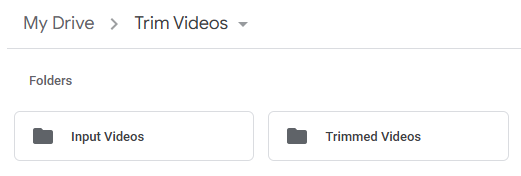
Double-click to enter the Trim Videos folder. Now, right-click and select New Folder to create two subfolders: Input Videos and Trimmed Videos:
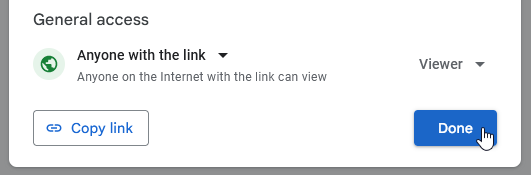
Now we have to make the Input Videos folder publicly accessible, so Creatomate is able to use the videos. So right-click this folder and select the Share option. Set the General access to Anyone with the link and click Done:
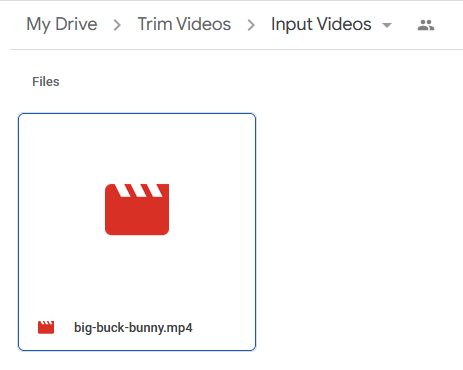
Let's upload an example video to our Input Videos folder. Double-click the folder to enter it, right-click to select File upload and select a video file from your computer. This video will be used as a test to set up our Zap. You can use one of your own videos or download one from Pexels. But make sure the video is longer than 10 seconds, otherwise you can't trim it.
Having prepared a Google Drive folder to upload videos, we'll create a video template next.
2. Create a template in Creatomate
Log in to your account, go to the Templates page and click + New. From the Fundamentals category, we'll pick the Trim a Video template. Select the Automatic size and click Create Template to open it in the editor:
Tip: The Automatic size template adjusts to the input videos format. It's useful if your input videos have different aspect ratios.
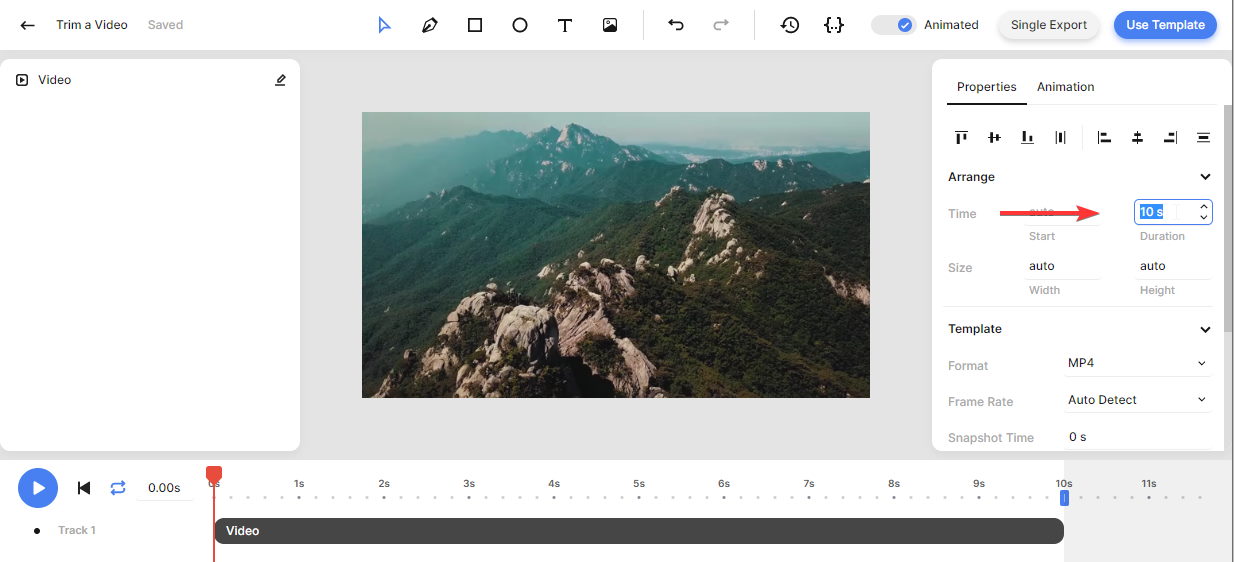
Now we can customize the template however we want. So, if we want to trim the input videos to 10 seconds, we have to set Arrangement -> Time -> Duration to 10 seconds, in the properties panel on the right.
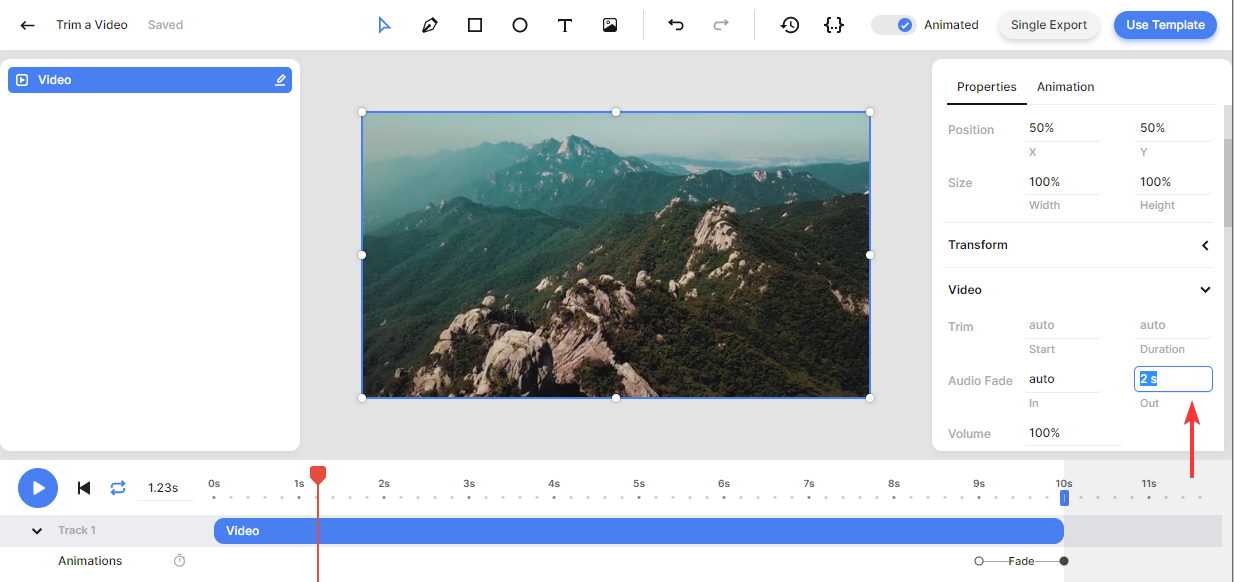
I don't like that our template ends so abruptly, which will happen with the trimmed videos too. So let's make the end smooth with an animation. Select the video element on the timeline, go to the Animations panel, select Exit, and pick an animation you like, such as Fade out:
Our input videos also have a sound, right? We can fade it out to prevent it from ending all at once. Select the video element on the timeline and set Video -> Audio Fade -> Out to 2 seconds, in the properties panel on the right:
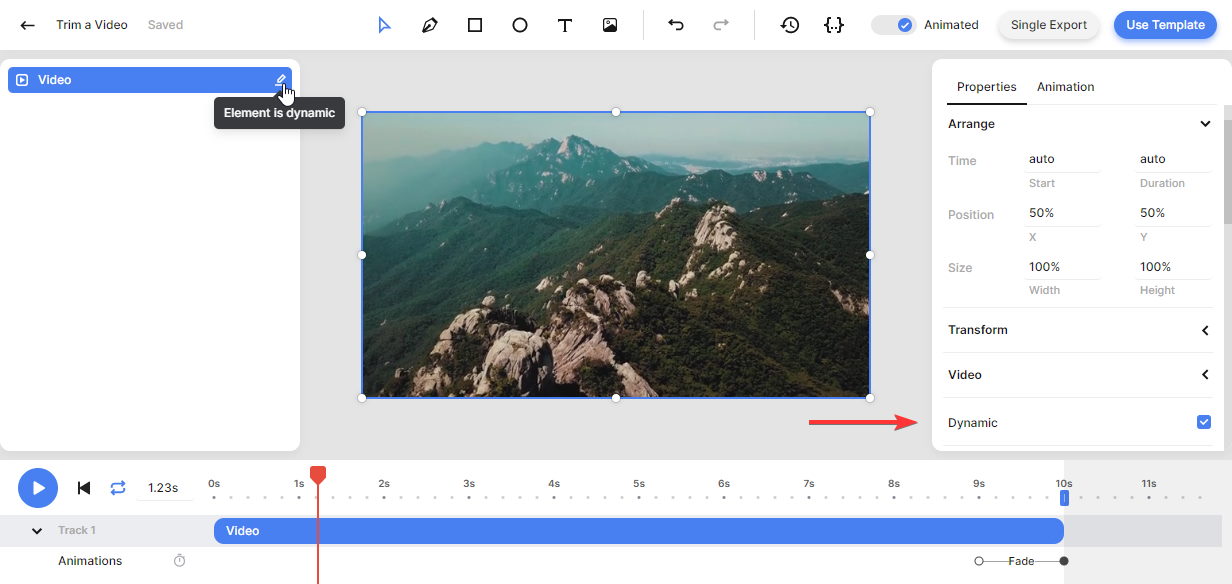
Last but not least, make sure the video element is dynamic. In this way, it can be replaced with our input videos, which will be trimmed based on the template. It's already dynamic by default, but if it's not, you can make it dynamic in the properties panel:
Feel free to make any other changes to the template you want. Once you're happy with your design, let's set up a Zap in the next step.
3. Add trigger: New File in Folder in Google Drive
Log in to your Zapier account and click + Create Zap. Choose the Google Drive app and select the New File in Folder event. Continue by selecting your account from the list or sign in to connect Google Drive first. Then, click Continue.
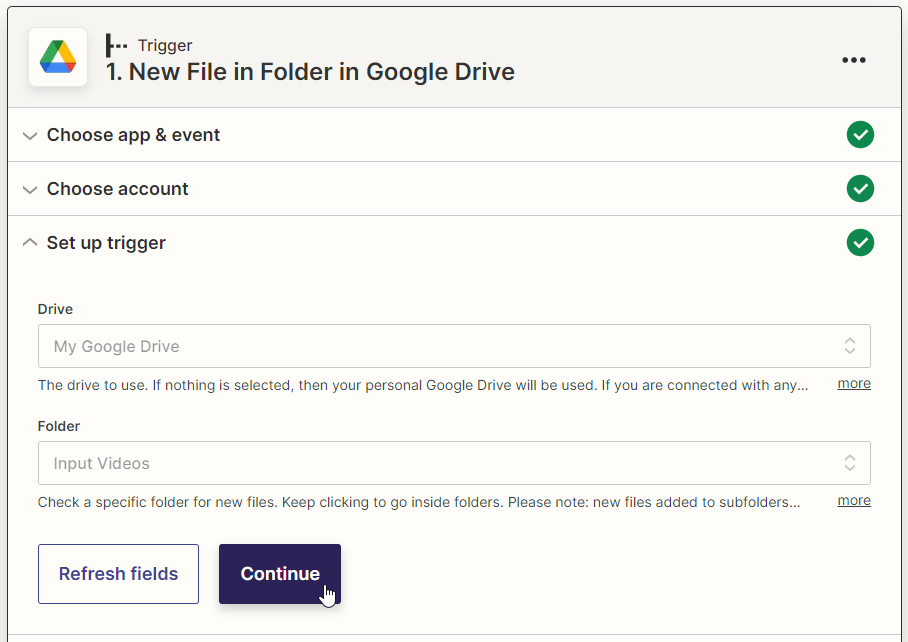
On the set up trigger screen, we'll specify that we want this Zap to trigger for newly uploaded videos in the folder we've created. So let's select your drive in the Drive field and select our Input Videos folder in the Folder field. You can find the Input Videos (sub)folder in the Trimmed Videos main folder. Then, click Continue:
Next, click Test Trigger to make sure Zapier can find the video file we've just uploaded. When the test was successful, click Continue.
4. Add action: Create Single Render in Creatomate
Choose the app Creatomate and select the Create Single Render event.
Continue by selecting your account from the list or signing in with your project's API key first. Then, click Continue.
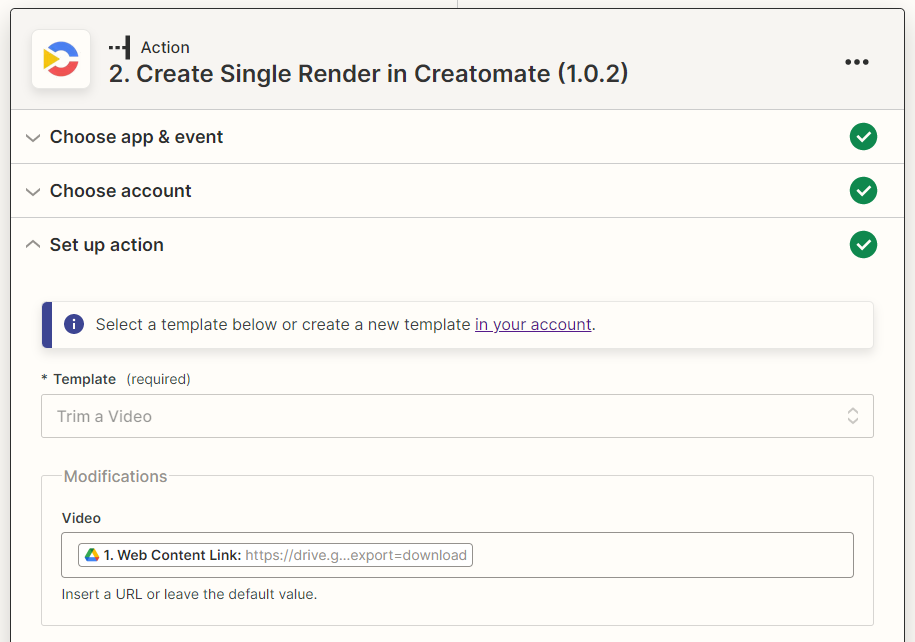
Now we'll set up the action that will automatically trim our input videos. First, select our Trim a Video template in the Template field. Then select the Google Drive -> Web Content Link in the Video Modification field. Click Continue:
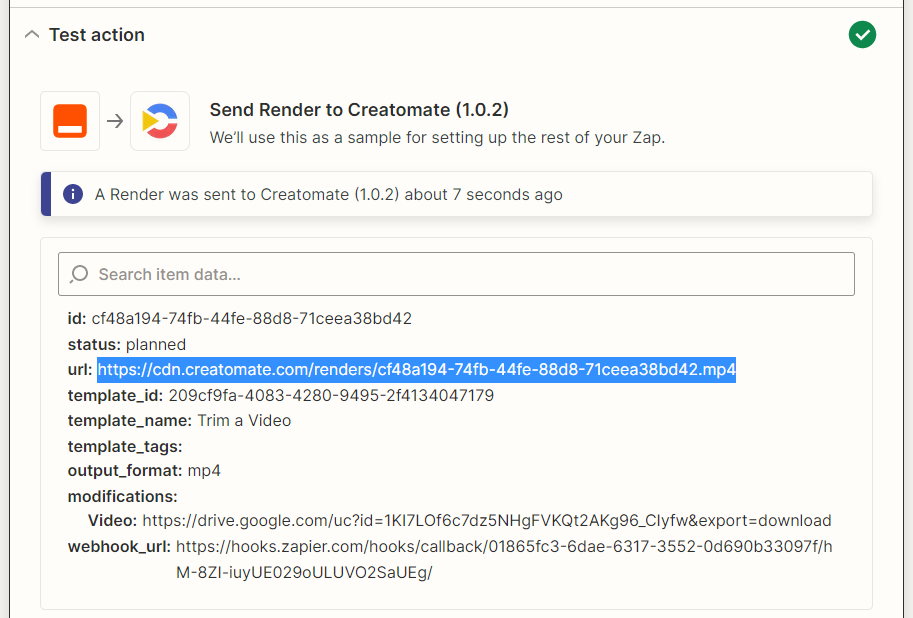
Click Test step on the last screen to make sure Creatomate can trim our input video. We can see what our trimmed video looks like by visiting the URL. It takes a moment to render the video, so if you get a Not Found message, refresh the page. This is only when setting up your Zap; once it's published, it will wait for the video to finish before moving on.
5. Add action: Upload File in Google Drive
Click +, choose the Google Drive app and select the Upload File event. Continue by selecting your account from the list, just like before.
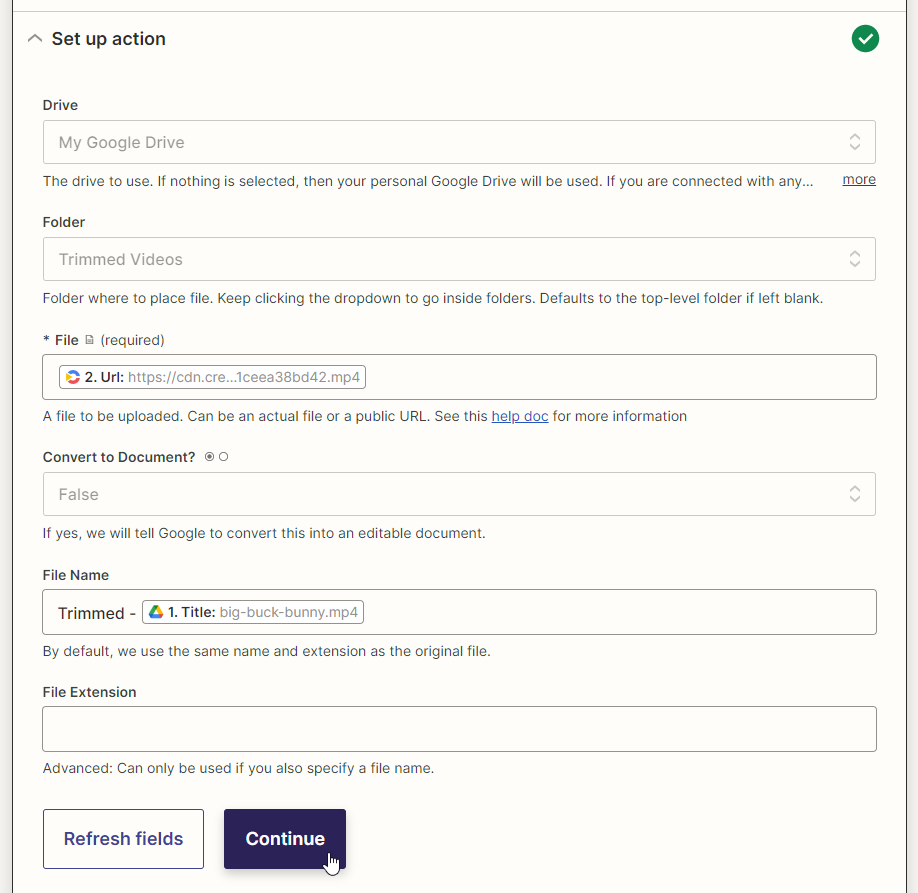
On the set up action page, let's tell Zapier how to upload the trimmed video to our special Google Drive folder:
- Set Drive to your Google Drive.
- Set Folder to Trimmed Videos. You can find it in the Trim Videos main folder.
- Set File to Creatomate -> Url
- Set Convert to Document to False
- Set File Name to Trimmed - Google Drive -> Title. You can name your files however you want.
When done, click Continue:
We'll finish up by clicking Test Trigger. In Google Drive, the trimmed video should be uploaded to our Trimmed Videos folder:
When the test was successful and you're happy with your workflow, click Publish Zap to activate it.
Wrapping up
We're done! This is how you can automatically trim videos with Zapier and Creatomate. Just use the apps that work for you and you'll never have to manually trim videos again.
You might also like these tutorials


Start automating today
Start with a full-featured trial with 50 credits, no credit card required.
Get started for free →