How to Tweet a Video for New WordPress Posts using Zapier

In this tutorial, you'll learn how to set up an automated workflow using Zapier and Creatomate that posts a new video on Twitter whenever a WordPress post is published.
Update: Zapier's Twitter integration stopped working due to changes in Twitter's API policy and pricing. As a result, you can no longer publish videos to Twitter. However, you can still post videos to Instagram, Facebook, TikTok, and YouTube Shorts.
Twitter is one of the best platforms to get your WordPress posts discovered by people. As one of the largest social media platforms, many of your readers (and potential readers) are already there. What's awesome about Twitter is that your content can be retweeted by others, effectively extending your reach beyond the confines of your own following. This not only helps you reach your current audience, it also makes your content easier to find for new people.
Yeah, I get it, you don't have time to manage another social media channel. Let alone make a video for every blog post in order to make it stand out. But did you know that this can be automated completely hands-free? And it's really easy to set up too. Let's find out how. By the end of this tutorial, we'll have a fully automated workflow that tweets a video whenever a post is published on your WordPress site, like so:
Prerequisites
Here's what we'll use:
- WordPress: where you publish your blog posts.
- Creatomate: to automatically create a video for every blog post.
- Zapier: to set up an automated workflow.
- Twitter: where the video is posted to promote your WordPress post.
Steps to follow
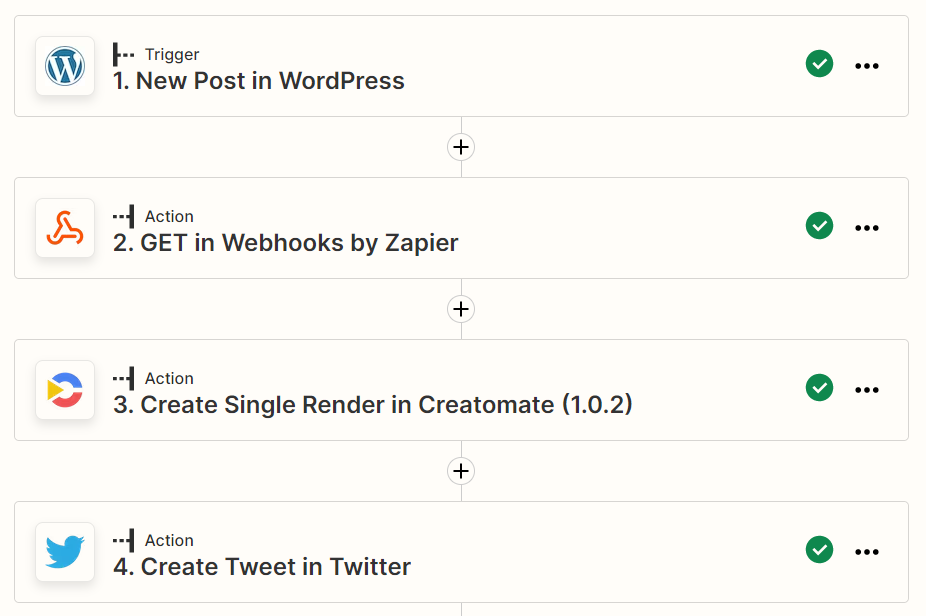
We'll start by setting up a video template in Creatomate. We then use Zapier to create an automated scenario that monitors your WordPress blog for new posts. As soon as a new post is found, we'll make sure that Zapier generates a video using Creatomate, which will then be shared via Twitter. This is what your Zap will look like afterwards:
1. Create a video template in Creatomate
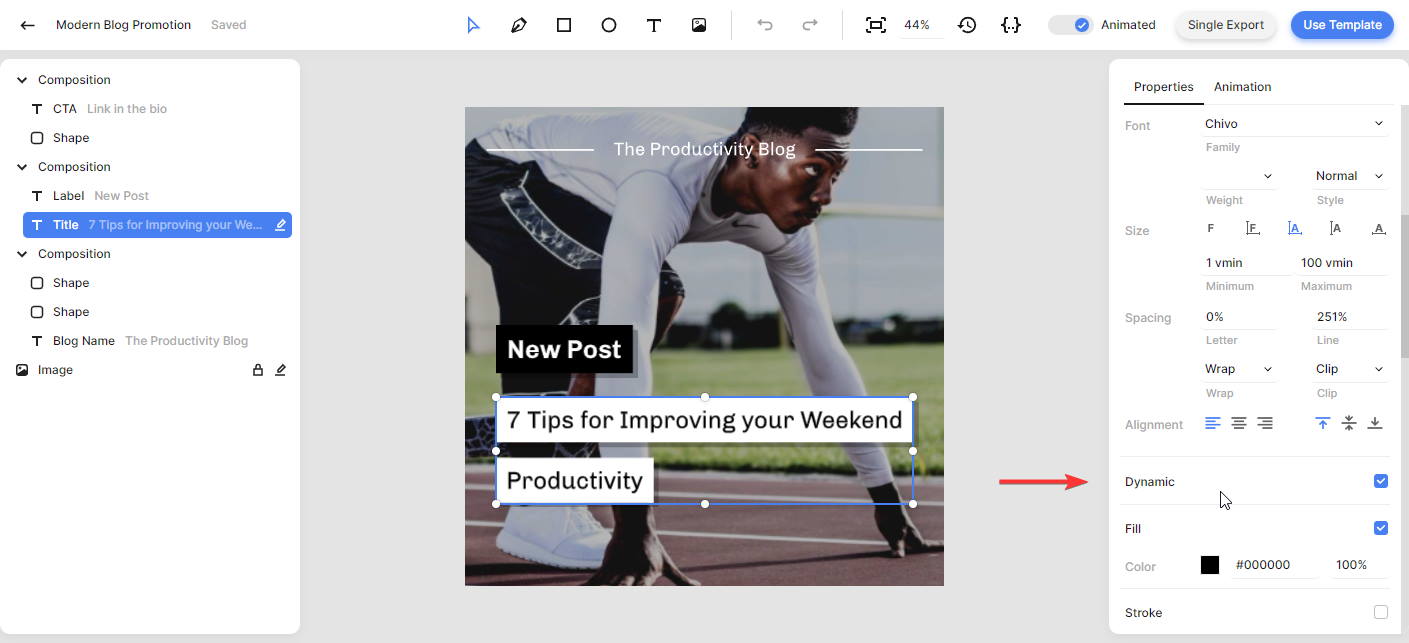
Get a free Creatomate account and go to the Templates page and click the + New button. Here we can pick a ready-made template, or we can make it from scratch to make it exactly the way we want. Let's go with the Modern Blog Promotion template that you can find under the Announcements category. Choose the 1:1 Square size and click Create Template.
One thing to keep in mind is that each element in your template can be marked as Dynamic, making it easy to replace it in Zapier later. As the image and text elements are already dynamic in this template, we don't need to change anything. However, if we were making a new template from scratch, we'd need to set the Dynamic property for each element we want to replace with Zapier. For the time being, I suggest keeping the template as-is. We can always customize it later.
2. Trigger for new WordPress posts
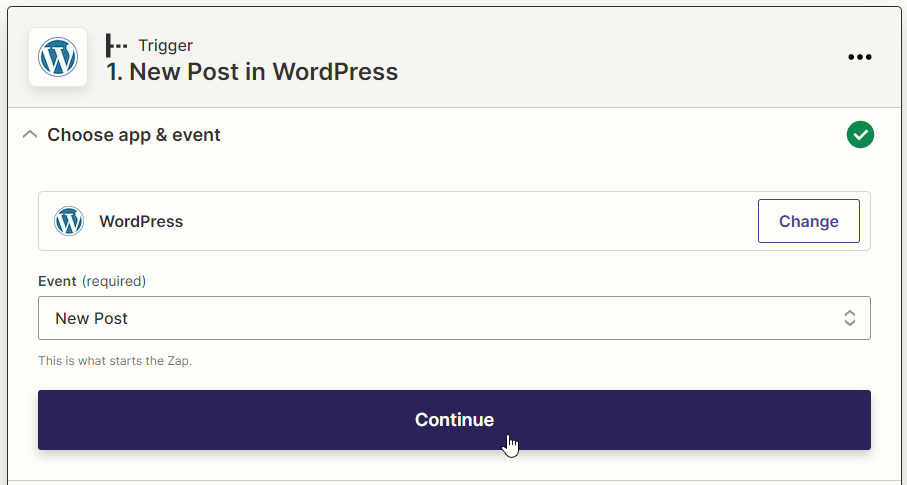
Let's create a new Zap in our Zapier dashboard. We want our Zap to run whenever a new WordPress post is published, so we'll select the WordPress app as the trigger of our Zap, then choose the New Post event. Click Continue.
Next, we need to connect Zapier to WordPress. Select your WordPress account from the list if you have previously used Zapier with WordPress. Otherwise, click Sign in to connect WordPress. This requires that you first install the Zapier for WordPress plugin on your WordPress website. Once that's done, return to Zapier and enter your base URL, username, and password. If you receive an authentication error, please see the most common problems page. We will be able to click Continue as soon as Zapier has connected to your WordPress account.

Continuing on to the next screen, we set the Post status to Published and the Post Type to Posts. Click Continue:
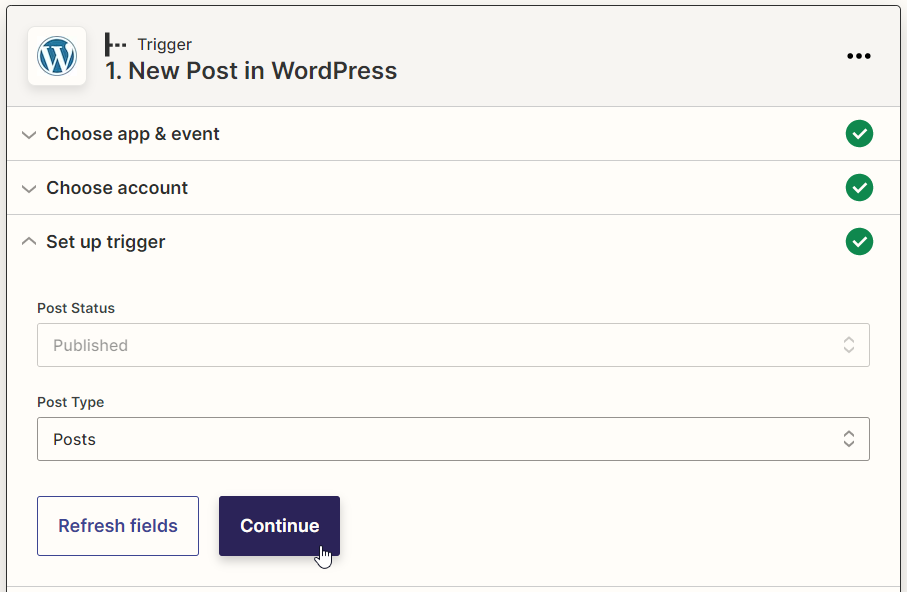
On the Test trigger screen, click the Test trigger button to verify that Zapier can find a post in your WordPress account. Then click Continue.
3. Retrieve the featured image (optional)
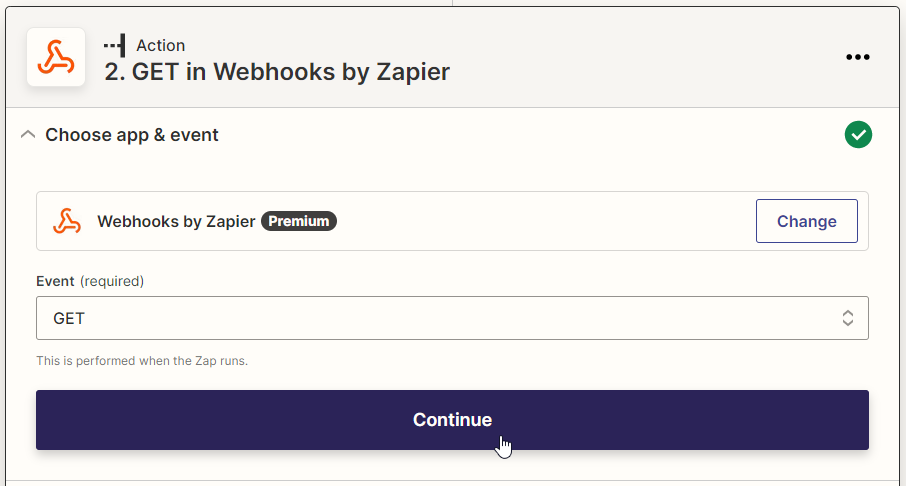
In order to use the featured image of our WordPress post, we must retrieve it from WordPress using a HTTP request. This step can be skipped if you don't want to use this image.
Choose the Webhooks by Zapier app and set Event to GET. Then click Continue.
Under Set up action, set the URL to Links Wp Featuredmedia Href. Set Send As JSON to Yes. Leave the rest as-is and click Continue:
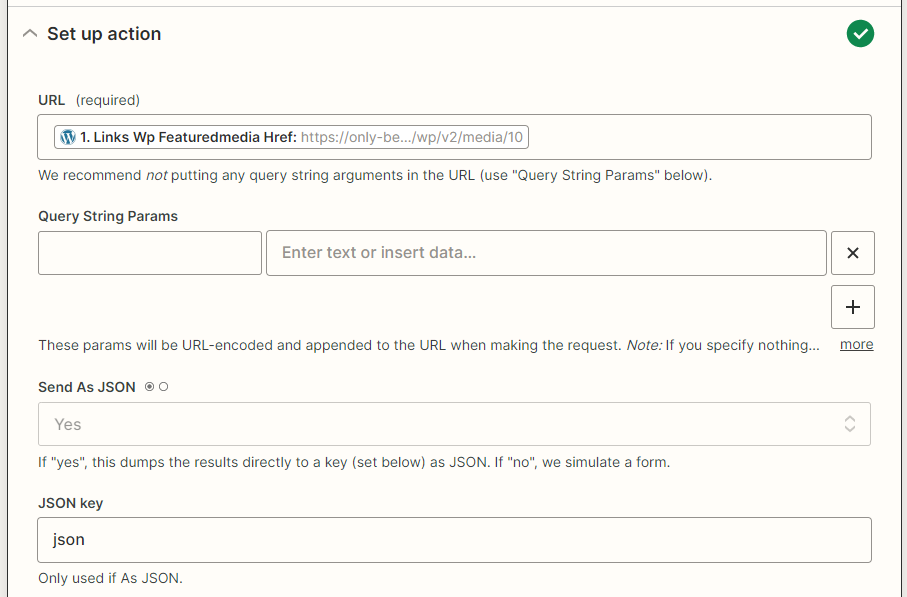
Test the action by clicking Test step.
4. Generate a video
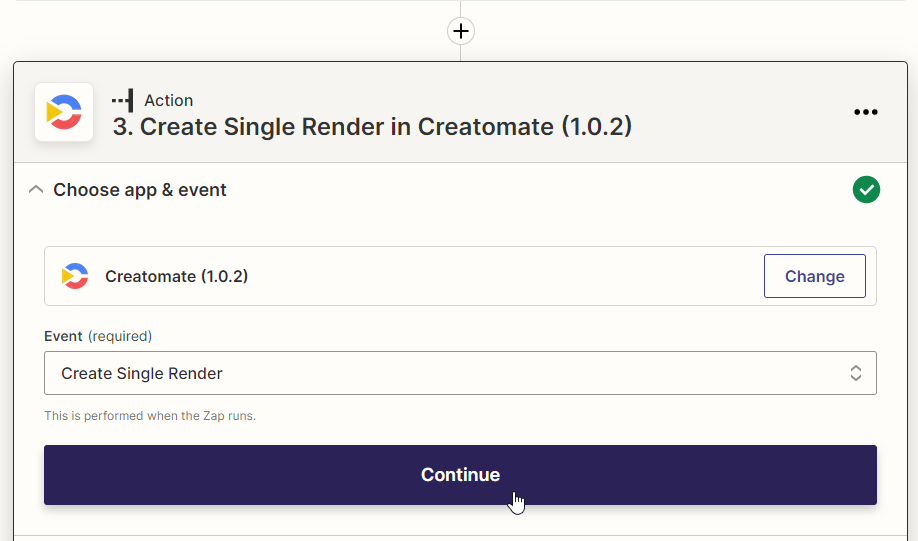
Add another action by clicking the + button at the bottom of the page, and then select Creatomate.
Choose the Create Single Render event, then click Continue.
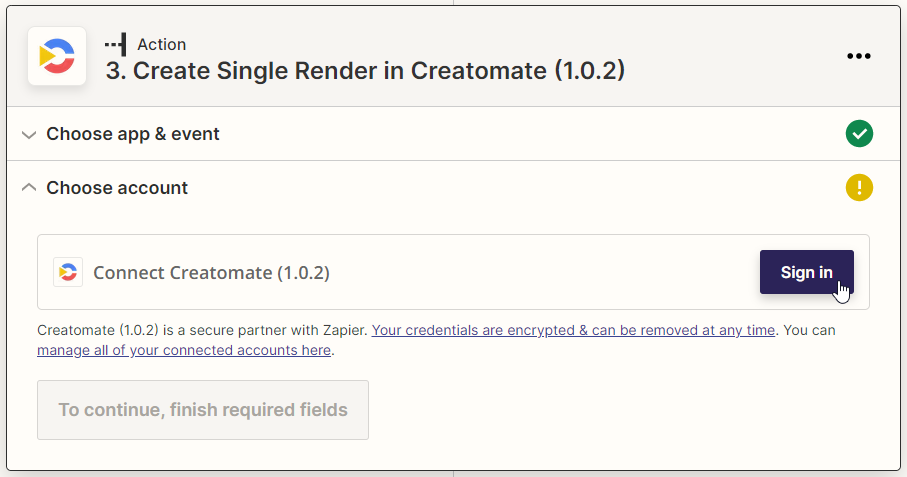
Connect your Creatomate account under Choose account. You will need to sign in if this is the first time you are connecting to Creatomate. You will be asked to enter your API key on the authentication screen. Then click Continue.
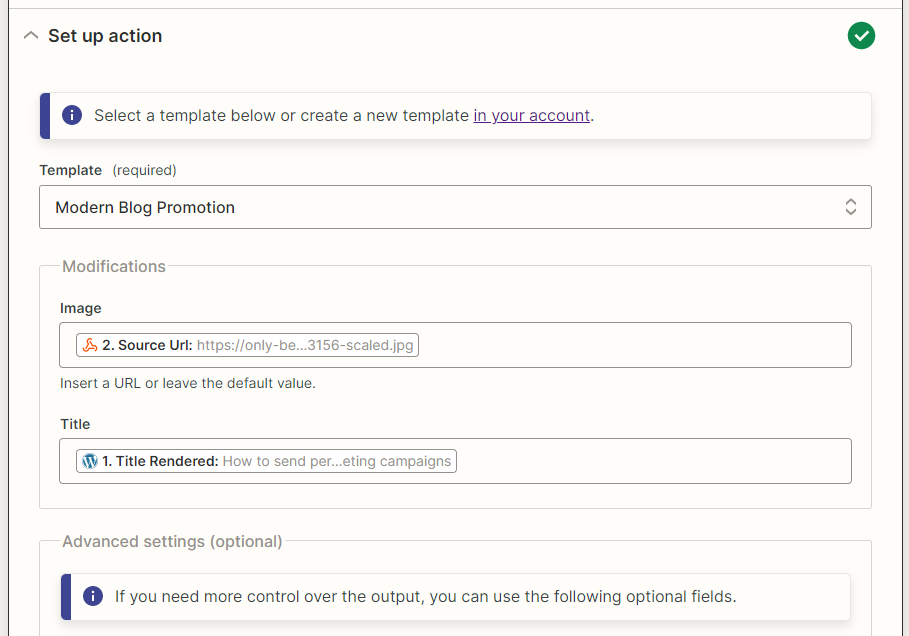
Under Set up action, choose the template we created in Creatomate. In case you're following along, this is the Modern Blog Promotion template. Next, we select which modifications should be applied to the template. These fields are based on the dynamic elements in your template. In this case, we have an Image and Title element. If your element isn't showing up, make sure it's marked Dynamic as described in step one.
- Set Image to GET in Webhooks by Zapier → Source Url.
- Set Title to New Post in WordPress → Title Rendered.
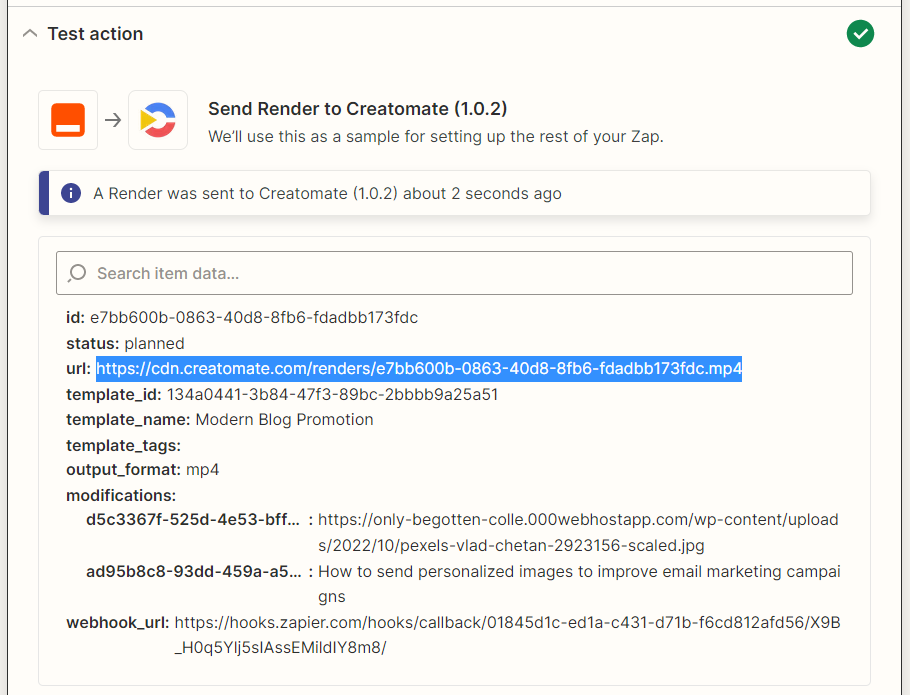
Click Continue, then click Test step. A video is now being created with Creatomate. You can see from the planned status that Creatomate accepted the render, but it hasn't finished yet. As long as rendering isn't complete, we'd get a Not Found page when visiting the URL to the video. If that's the case, wait a few seconds and try visiting the URL again. This only applies during testing, because once your Zap is published, Zapier will wait for the video to finish before moving on to the next step.
5. Publish on Twitter
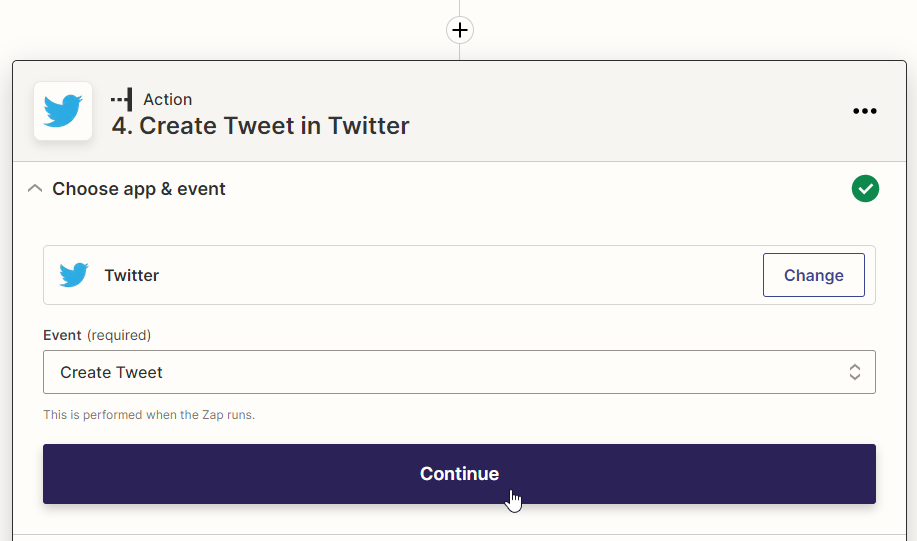
Last but not least, click on the + button once again to choose Twitter and the Create Tweet event. Click Continue.
Authorize Zapier to use your Twitter account by clicking Sign in. When done, click Continue.
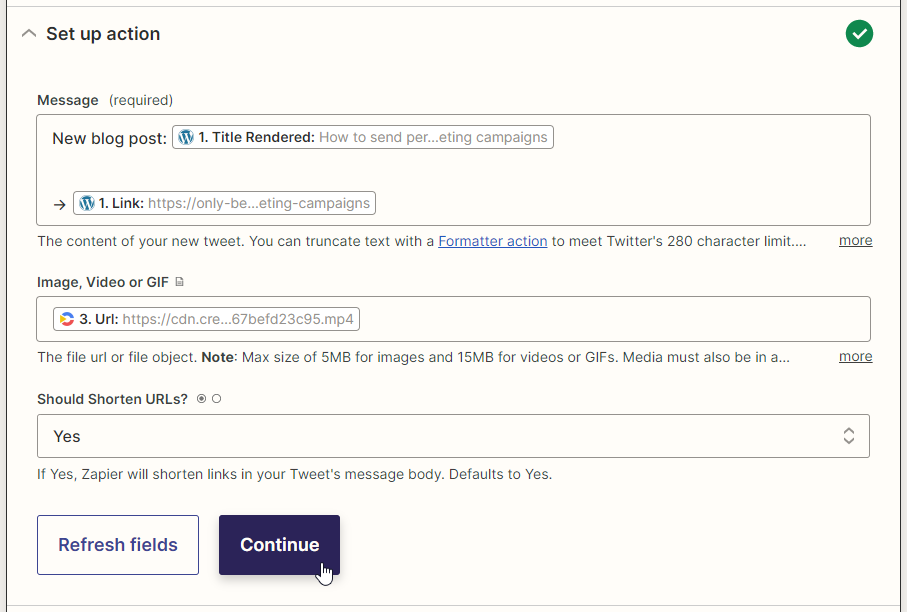
We can customize the tweet under Set up action. Enter the content of your tweet in Message. Make sure your tweet is unique so that Twitter won't reject it, for example by putting the title of your WordPress post in the message field.
In the Image, Video or GIF field, enter the URL of your render from Creatomate. Once you've finished setting up your tweet, click Continue.
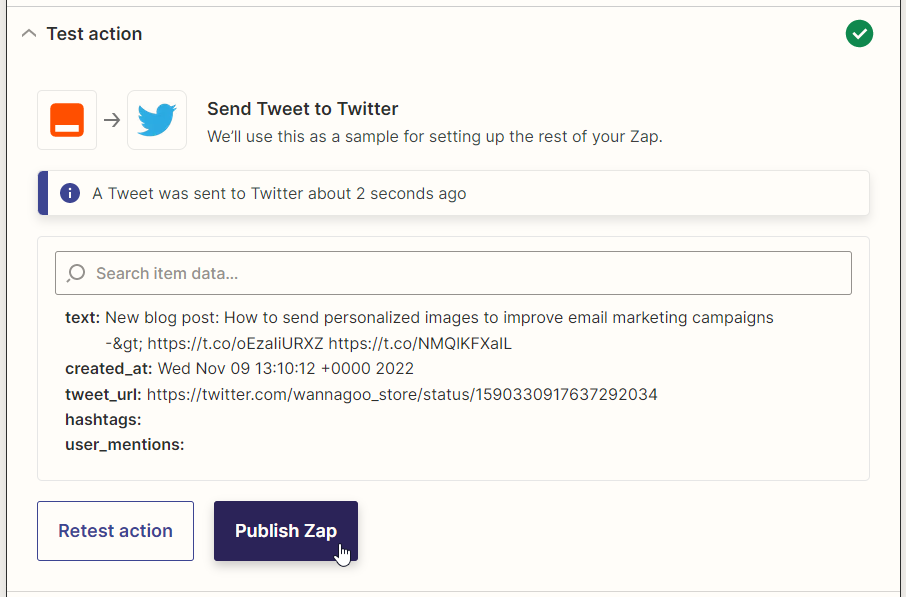
You can test this step by clicking Test step. Keep in mind that this will immediately post a tweet using your Twitter account, so you might want to remove it after testing. Click Publish Zap to activate the Zap.
Wrapping up
Awesome! You have now set up a fully automated workflow for announcing your newly published WordPress posts on Twitter. With this in place, why not automate your other social media channels as well? This can easily be accomplished by adding another Zap action that posts the video to Facebook too.
And before you leave, don't forget to check out our getting started articles for more marketing automation guides. Happy automating!
You might also like these tutorials


Start automating today
Start with a full-featured trial with 50 credits, no credit card required.
Get started for free →