How to Create YouTube Shorts in Bulk

In this video automation tutorial, you'll learn how to batch-generate YouTube Shorts using a simple spreadsheet or CSV file.
While short-form videos have great marketing potential, they can also be very labor-intensive and costly to produce. Fortunately, video automation has made it possible to make the most of YouTube marketing without taking up too much time.
In this tutorial, I'll show you how to batch-create YouTube Shorts using spreadsheet data. Instead of creating each video manually, this approach helps you create YouTube Shorts quickly and effectively. Perfect for producing a large number of YouTube videos all at once.
Though this tutorial focuses on creating YouTube Shorts in bulk, I'll also point you to follow-up tutorials that cover no-code automation using Zapier.com or Make.com. Whatever method you choose, all of them work with ChatGPT, should you want to integrate AI generation into your YouTube marketing strategy as well. Skip to the end for more details.
An example of a YouTube Short created using bulk generation is shown above. But you don't have to follow this template, because Creatomate's online video editor lets you create your own totally unique social media templates. Furthermore, this process works for YouTube Shorts as well as any other type of marketing videos. Let's dive right in!
How to create YouTube Shorts in bulk?
The first step in YouTube Short automation is to create a template video. This template will be applied to all generated Shorts. Next, you'll have the option of batch-editing all videos with a spreadsheet or no-code workflow. This is where you can upload a CSV file if you want to import data from Google Sheets, Airtable, or ChatGPT.
Once your spreadsheet has been set up correctly, all you have to do is hit a button to have the entire series of videos automatically produced. After that, you can download them to your device or further automate the process, such as scheduling them to be uploaded to YouTube automatically as well.
1. Create a video template
Let's start by creating a video template. Sign in to your Creatomate account or create a free account if you haven't already. Once in your Creatomate dashboard, go to Templates and click the + New button to create a new template.
Here, you can pick any of the ready-made templates for customization, or create a blank template from scratch. Click the Social Media category and click the Storytelling Video template. Then, choose the 9:16 Vertical format, and click Create Template:
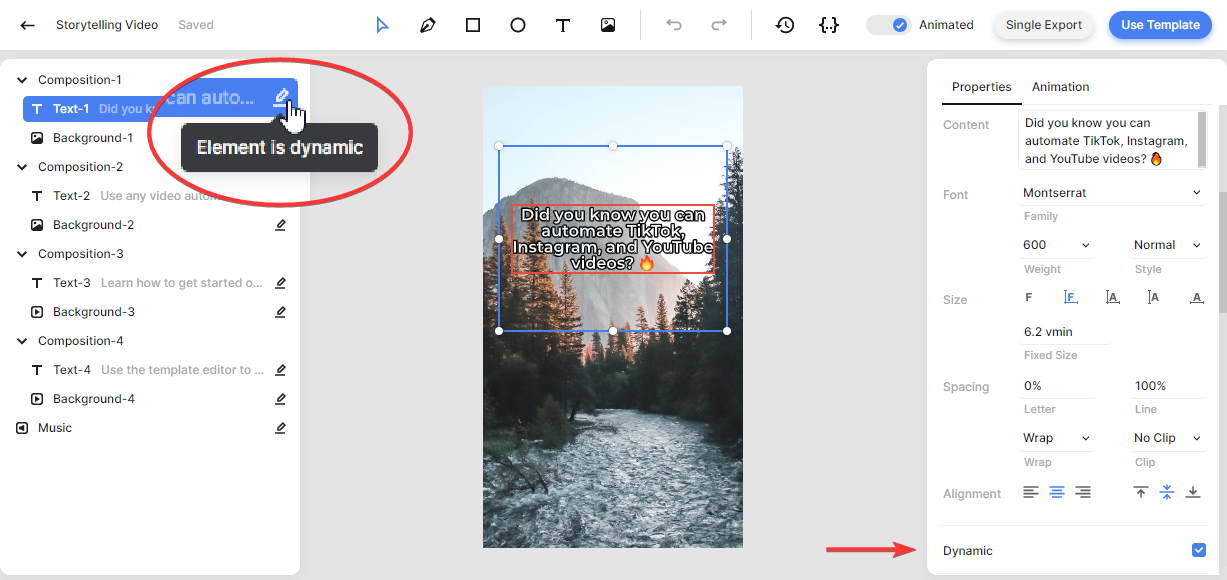
The template has now been saved in your account and is ready for customization. The left-hand panel shows the elements that make up the template. As you can see, the template is organized into 4 different compositions; Composition-1 to Composition-4. This tutorial does not go into details about creating your own templates, but if you are interested in learning more about the editor, check out this quick starting guide.
For now, all we need to know is that we can specify whether an element is a placeholder or not. This is crucial for the next step, as the spreadsheet will be structured based on the placeholders in the templates. To make an element a placeholder, select it in the editor and enable the Dynamic option in the right-hand panel:
This template already has placeholders set up, so you don't have to change anything.
2. Set up a spreadsheet
Now that we've got the template set up, we can create a new spreadsheet based on this template. To do that, click Use Template, the button located at the top right of the editor. From here, choose the Spreadsheet to Video option and select Create new feed. Then click Continue:
We're now on a new page with the spreadsheet on the left and a preview on the right. You can see that each column in the spreadsheet is generated based on the dynamic elements within the template; Music, Background-1, Text-1, etc.
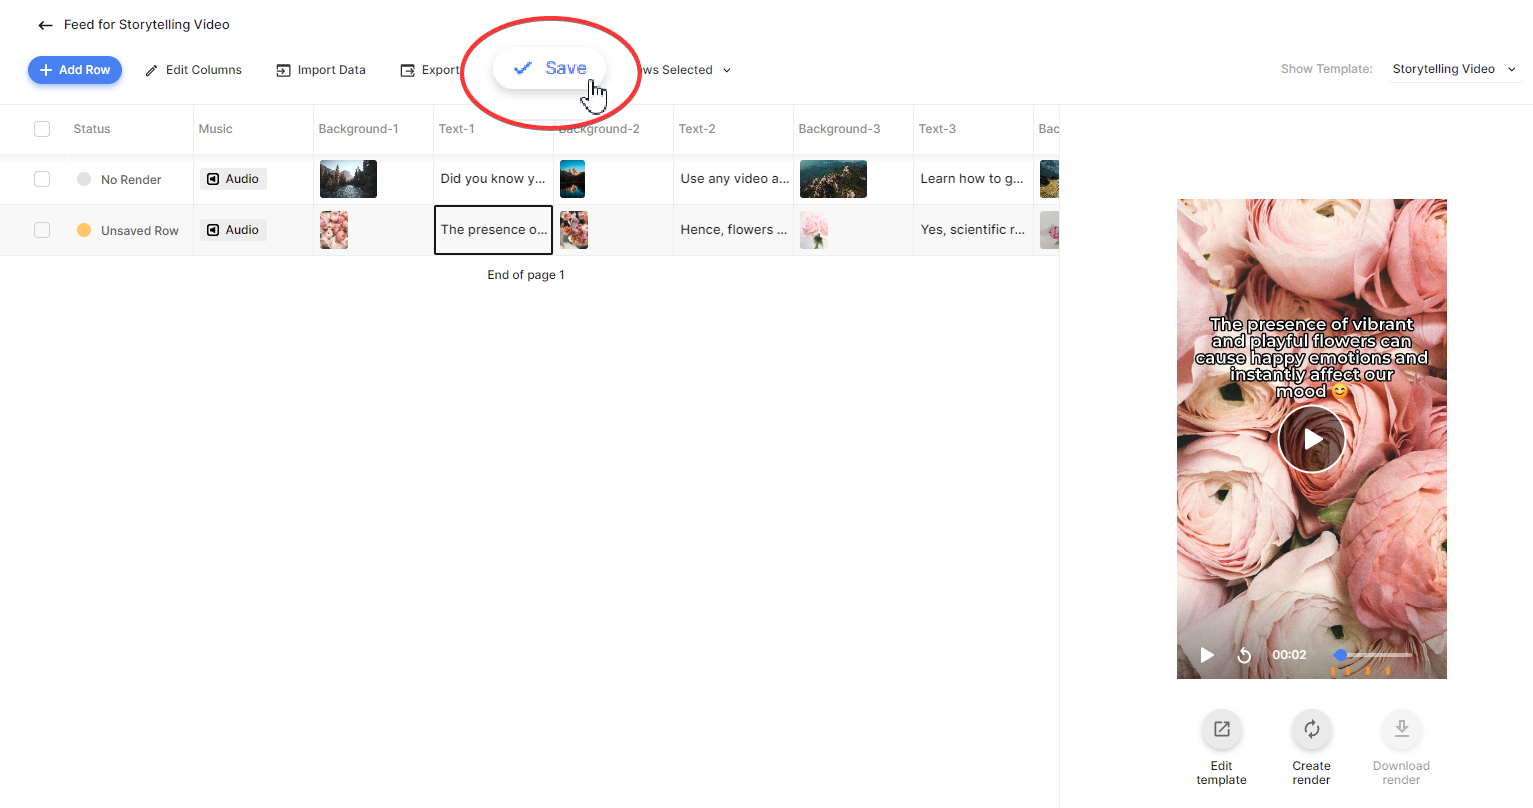
Each row of the spreadsheet will create a separate video. So in order to create a new video, simply click Add Row and start filling in the corresponding fields. Each cell accepts a text value, an uploaded file, or a URL to a file. For example, to replace the Text-1 value, double-click the corresponding data cell and type a different caption. On the right, you can view a preview of the video with the changes applied from the selected row.
Be sure to click Save after editing. You'll notice that the row's status has changed from "Unsaved Row" to "No Render". This indicates that the spreadsheet has been saved, but that the final video has not yet been generated:
You can also import a spreadsheet by uploading a CSV file using the Import Data button. This is useful if you want to import data into Creatomate from another tool, like Google Sheets, Airtable, or ChatGPT.
3. Generate the YouTube Shorts
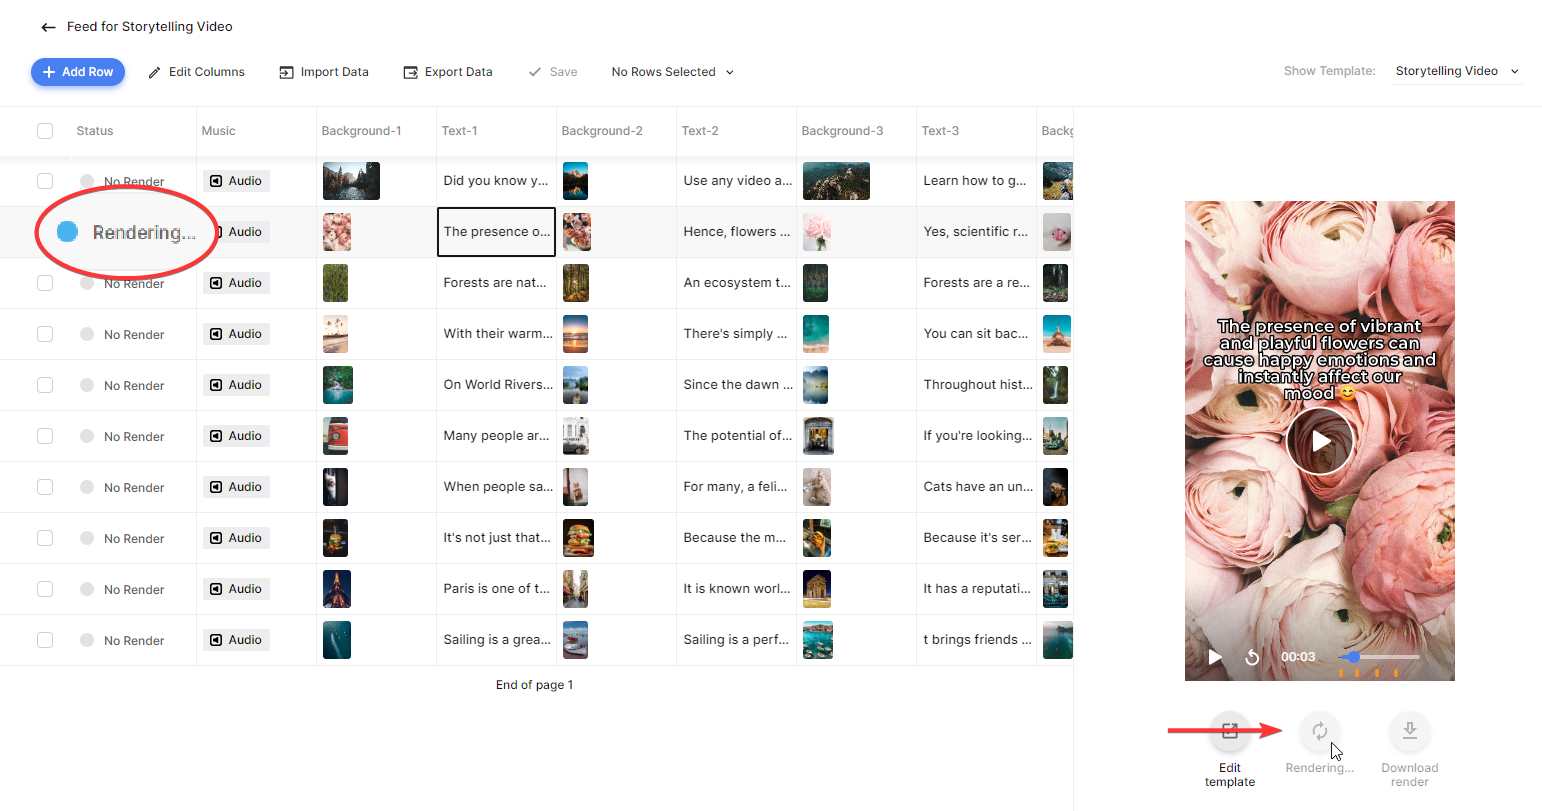
To produce the final video, click the Create render button below the video preview. The row now indicates that it's being rendered:
If you want to create multiple videos at once, you can do so by selecting several rows, then clicking × Rows Selected, and clicking Create Renders:
Once the videos have been rendered, you can download them to your device. After selecting the rows, click × Rows Selected, and then click Download Renders. Here, you can choose a file name. Then, click Download:
You can also export the spreadsheet with the generated videos as a CSV file. You can do this by clicking the Export Data button located at the top of the spreadsheet.
Next steps for YouTube Shorts automation
You have now learned how to generate YouTube Shorts with the help of a simple spreadsheet. Although this is already an effective method of bulk-generating videos, this is just the beginning in terms of video automation. For even greater automation, use a no-code platform like Zapier.com or Make.com to create hand-free workflows that integrate with other applications.
Here are a few suggestions for what you can do next:
👉 Schedule your YouTube Shorts
Buffer is a great social media management tool that allows you to schedule posts, including YouTube Shorts. When you've created videos for the entire month in advance, you can use Buffer to plan when they'll be posted automatically.
👉 Automatically generate and post YouTube Shorts
Alternatively, if you wish to completely automate the creation and posting of YouTube Shorts, you can set up an automated workflow in Zapier. Zapier is a no-code automation platform that supports over 5000 apps, including Creatomate and YouTube. Check out this tutorial to build a YouTube Shorts automation in just a few minutes.
👉 Use AI to generate content for your YouTube Shorts
You can also use AI technology, like ChatGPT or GPT-4, to generate facts, tips, quotes, and other content for your videos. Check out this spreadsheet tutorial or this Zapier tutorial for detailed instructions.
👉 Set up a spreadsheet trigger
You can use a webhook to automatically trigger another application to use the video once Creatomate has completed producing it, such as uploading it to Google Drive or sending it by email. We'll cover webhooks in this Zapier tutorial and in this Make tutorial.
👉 Add subtitles to your YouTube Shorts
If you want to create YouTube Shorts with spoken content, you can use Creatomate's auto-transcription feature to transcribe your videos and add animated word-by-word captions. Check out this tutorial for instructions.
You might also like these tutorials


Start automating today
Start with a full-featured trial with 50 credits, no credit card required.
Get started for free →