How to Automatically Add Subtitles to Videos using an API

Learn how to auto-transcribe video and audio files to create animated, word-by-word captions for social media using Creatomate's video generation API.
If you've ever had to create captions by hand, you know how slow and tedious the process can be. Fortunately, modern speech-to-text AI has become so accurate at identifying the correct words that we can now fully automate transcription without needing to review or edit the results.
In this tutorial, I'll show you how to use Creatomate to automatically transcribe any video or audio file and generate animated captions in your preferred style. Creatomate's REST API is designed for dynamic, data-driven video generation and has auto-transcription built in. That means you won't need extra transcription tools or API integrations to add subtitles to your videos.
Video courtesy of Ryan Holiday of The Daily Stoic podcast.
Social media captions come in countless creative styles – from bouncing words and highlighted phrases to karaoke effects and animated text. Creatomate supports virtually all of these and gives you complete control over animations, fonts, colors, and layouts, so you can create captions that perfectly match your brand and content style.
💡 AI Tip: In this tutorial, we'll add subtitles to an existing video. But if you'd like, you can also generate your own audio with AI voiceovers. Check out this tutorial to learn how to create voiceovers with ElevenLabs and combine them with animated captions in a video.
Prerequisites
Before getting started, make sure you have a Creatomate account. If you don't have one yet, you can sign up for free in just a minute.
You'll also need a way to send requests to the API. Because Creatomate provides a simple REST interface, you can use any API client you prefer, such as cURL, Postman, or Insomnia.
How to generate subtitles with the API
We'll start by creating a video template in Creatomate. This template is the foundation of your video, where you define the format and customize how the subtitles will look and animate.
Once the template is ready, the next step is to prepare an API request. Creatomate makes this easy by providing ready-to-use code snippets in several programming languages, all tailored to your template.
Then, specify the video or audio you want to subtitle. When you send the API request, Creatomate automatically transcribes that file and generates captions styled to your template. It then renders the final video and returns a URL for you to download it.
Tip: In this guide, we'll use cURL to demonstrate API requests. However, you can use any programming language or no-code automation platform you prefer. The following tutorials will help you get started in your preferred environment:
👉 How to Automatically Add Subtitles to Videos with Python
👉 How to Automatically Add Subtitles to Videos with Node.js
👉 How to Automatically Add Subtitles to Videos with n8n
👉 How to Automatically Add Subtitles to Videos with Make.com
👉 How to Automatically Add Subtitles to Videos with Zapier
1. Create a transcription template in Creatomate
Log in to your Creatomate account (or sign up for free if you don't have one yet).
Go to the Templates page and click New to open the template gallery. For this tutorial, choose the Highlighted Subtitles template from the Auto-Subtitles category. Then, pick a video size, such as 9:16 Vertical, and click Create Template to open it in the editor:
This template is pre-configured to automatically generate captions from an input file, so it's ready to use immediately. You don't need to make any changes, but here's a quick overview of how it works.
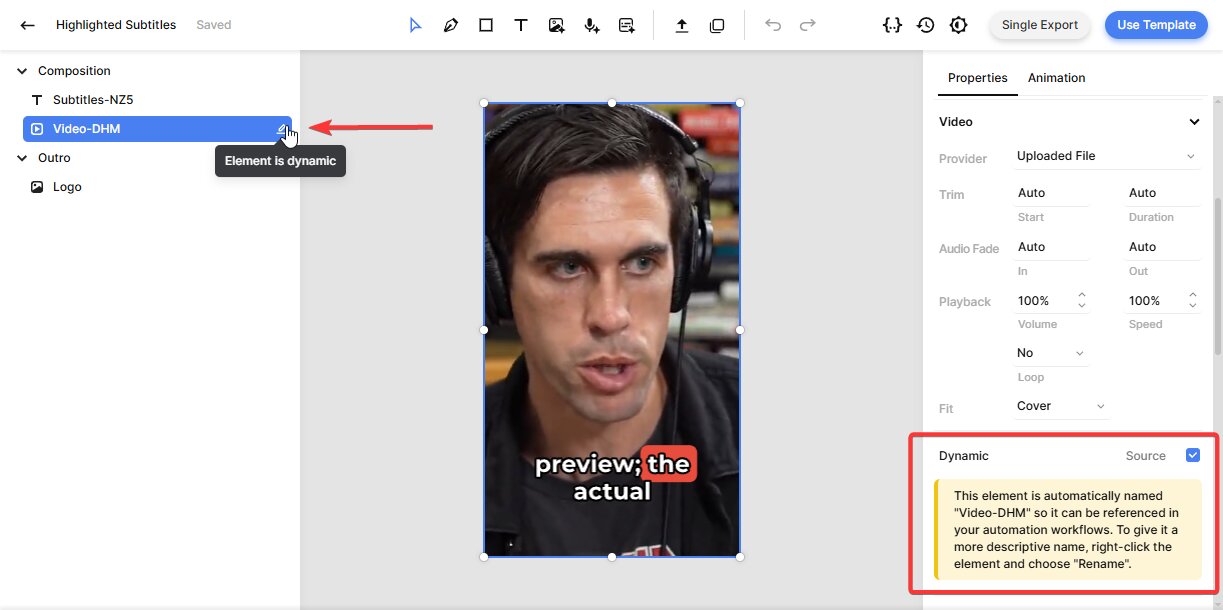
In the left-hand panel, you'll see the elements that make up our video design. The template is organized as a composition, including subtitles, a video element, and an outro that features a logo.
One key detail: the video element is marked as dynamic, which means you can easily swap it out for a different input file each time you make an API request:
If you explore the template in the editor, you'll notice that the subtitles are just placeholders. That's because the actual captions will be generated when we add a video (or audio) file using our script.
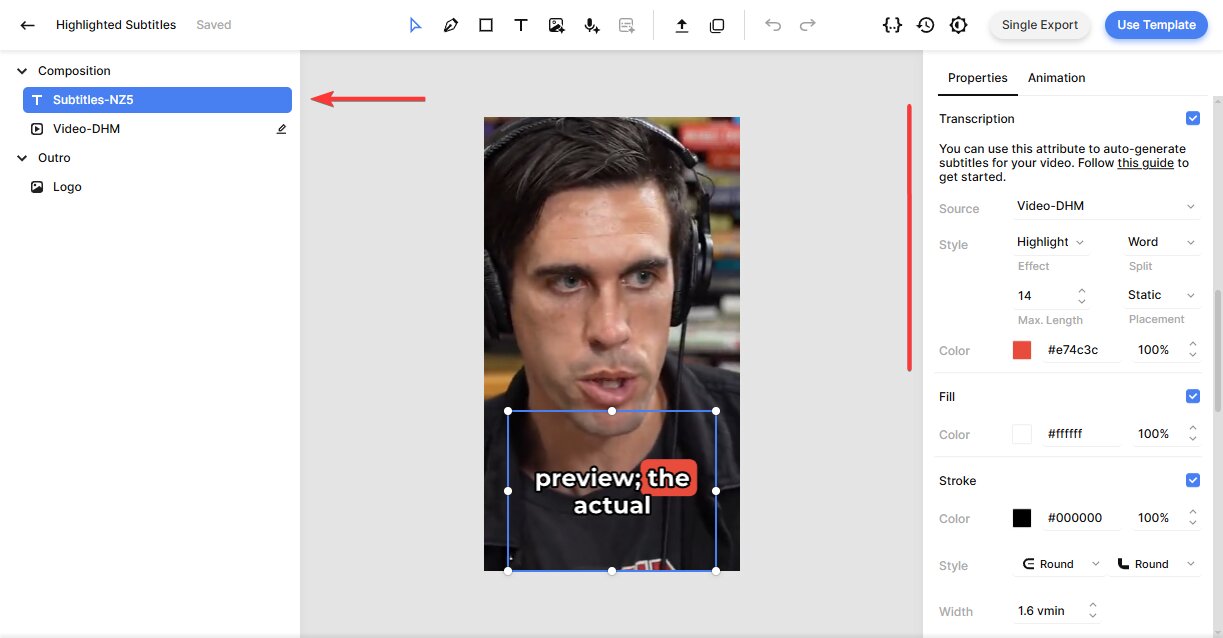
You can also customize the look and feel of the subtitles. To do this, select the Subtitles element and find the Transcription property on the right-hand panel. You'll see that the Source is set to the video element, which tells Creatomate to transcribe that file and generate subtitles automatically.
From here, you can adjust the style, color, fill, and stroke attributes to customize the subtitles however you like. For example, to display one word at a time, a style commonly used on YouTube, TikTok, and Instagram, set Max. Length to 1:
The template is fully customizable. For example, you can replace the logo with your own. In order to keep this tutorial focused on the automation process, we'll use the template as-is. If you'd like to explore the editor in more detail, check out the documentation.
With the template ready, let's move on to making the API call.
2. Set up the API call
We can now turn our template into an API request. Because Creatomate uses a REST API, you don't need any special software - just send a request over HTTP. Creatomate provides code snippets in several programming languages, which you can use right away.
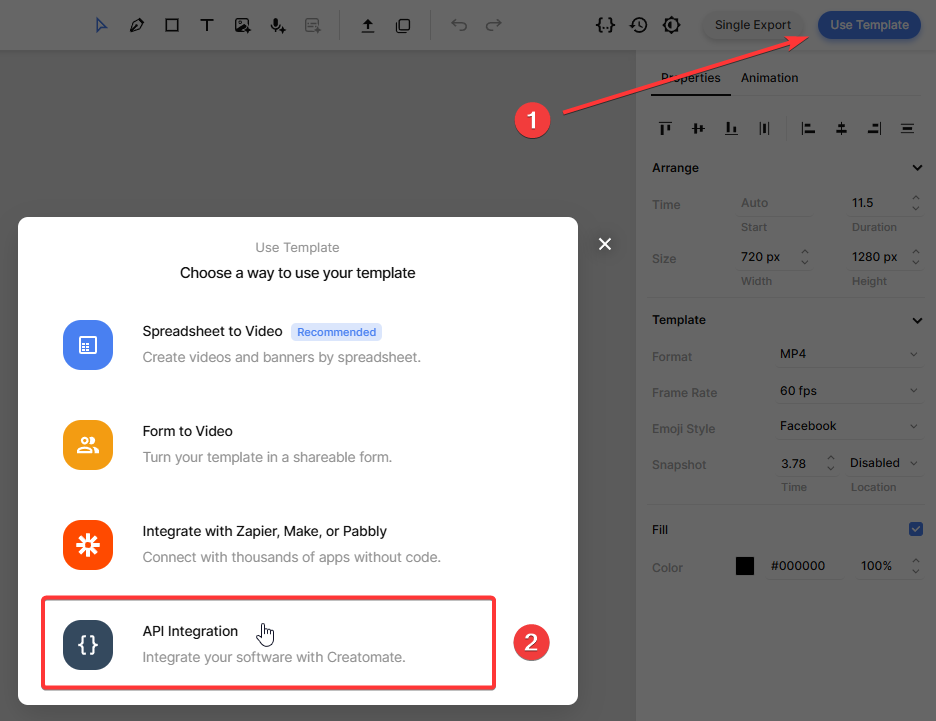
In the template editor, click the Use Template button in the top-right corner, then select API Integration:
Copy the cURL code snippet:

Paste it into your preferred API tool, such as Postman, Insomnia, or a terminal using cURL.
In the next step, we'll look at how to insert dynamic data.
3. Insert a video or audio file
The “modifications” parameter lets you replace the input video or audio file for each final video. Typically, this file might come from another API, a database, or user input. In this tutorial, we'll keep it simple and use an existing video file.
Here's an example you can use in your code:
{

  "template_id": "your_template_id",

  "modifications": {

    "Video-DHM.source": "https://cdn.creatomate.com/demo/the-daily-stoic-podcast.mp4"

  }

}
Make sure to replace "your_template_id" with the actual ID of your template. This tells the API which template to use when generating the video. You can find your template ID on the API Integration page from the previous step.
4. Render the video
With everything set up, it's time to make your first API request. In this example, we'll use cURL, but you can also use any API client, write a script in your preferred programming language, or use a no-code automation platform.
When you call the API endpoint, Creatomate will respond with a JSON object confirming that your video render has been queued. The response will look similar to this:
1
2  {
3    "id": "f5a7214c-9ca5-4e32-8848-3443c1b70be8",
4    "status": "planned",
5    "url": "https://f002.backblazeb2.com/file/creatomate-c8xg3hsxdu/f5a7214c-9ca5-4e32-8848-3443c1b70be8.mp4",
6    "snapshot_url": "https://f002.backblazeb2.com/file/creatomate-c8xg3hsxdu/f5a7214c-9ca5-4e32-8848-3443c1b70be8-snapshot.jpg",
7    ...
8  }
9
You'll see that the status is set to “planned”, which means Creatomate has accepted your request and will start processing it shortly.
Next, it will transcribe the input video and generate animated captions based on the style defined in your template. The processing time depends on the length of your video. In the following step, we'll cover how to wait for this process to complete.
5. Retrieve the subtitled video
The video is ready when the status changes to "succeeded".
You can check this by making a GET request to the API to see if the status has been updated. A more efficient approach is to use a webhook, which lets Creatomate automatically notify your application as soon as the video is ready.
For simplicity, you can also just wait about a minute and then open the URL provided in the API response. If you see a “Not Found” message, the video isn't ready yet – wait a little longer and try again.
Once processing is complete, the URL will display your finished video with the generated subtitles:
And that's it! Your video is now ready to use however you like.
Tip: You can monitor all your API activity in the API Log section of your Creatomate dashboard. If a render fails, the log provides detailed error messages and suggests fixes, making troubleshooting quick and easy.
What's next for video generation using an API
You now have the basics of adding subtitles to videos with the Creatomate API. From here, you can tailor it to match your own projects and workflows.
In this tutorial, we worked with an existing video file, but you can also create AI-generated voiceovers using a text-to-speech API like ElevenLabs. Once you have the audio, Creatomate can automatically generate matching animated subtitles.
To explore this workflow in more detail, check out this step-by-step tutorial:
You might also like these tutorials


Start automating today
Start with a full-featured trial with 50 credits, no credit card required.
Get started for free →