How to Automatically Add Subtitles to Videos with n8n

In this tutorial, you'll learn how to auto-transcribe video and audio files to add animated word-by-word captions to social media videos using n8n and Creatomate.
If you've ever had to transcribe a video or audio file, you know how tedious and time-consuming it can be. Fortunately, speech-to-text AI is here to help. It has become so accurate at transcribing that we can even use it in our automated workflows – without needing to review or edit the captions.
In this tutorial, I'll show you how to set up a workflow in n8n to automatically add subtitles to your videos. We'll use Creatomate's auto-transcription feature to transcribe video or audio files, create animated subtitles, and produce ready-to-use social media videos.
Video courtesy of Ryan Holiday of The Daily Stoic podcast.
When we look at captions on social media, we see a variety of styles. That's why we use Creatomate – it supports nearly all of them and even lets you customize animations and styling, helping you create the perfect subtitles for your videos.
💡 AI tip: In this tutorial, we'll use an existing video clip to generate subtitles. If you'd prefer, you can also use AI-generated voiceovers. Check out this tutorial to learn how to create voiceovers with ElevenLabs and turn them into a video with animated captions.
Prerequisites
We'll use the following tools:
- Creatomate: to automatically transcribe input files, generate captions, and compile everything into a video with animated subtitles.
- n8n: to set up the automated workflow.
- YouTube (optional): to share the generated videos on social media.
- Gmail (optional): to send a notification if something goes wrong.
Note: As an example, I'll show you how to post the videos as YouTube Shorts and send an email notification if something goes wrong. This is just to demonstrate how it works. n8n supports thousands of apps, allowing you to build custom workflows. Once you understand the process, you can integrate any tools that suit your needs.
How to generate subtitles using n8n?
We'll start by creating a video template in Creatomate, which will serve as the foundation for all our videos. In this step, we'll choose the video format and customize the subtitles.
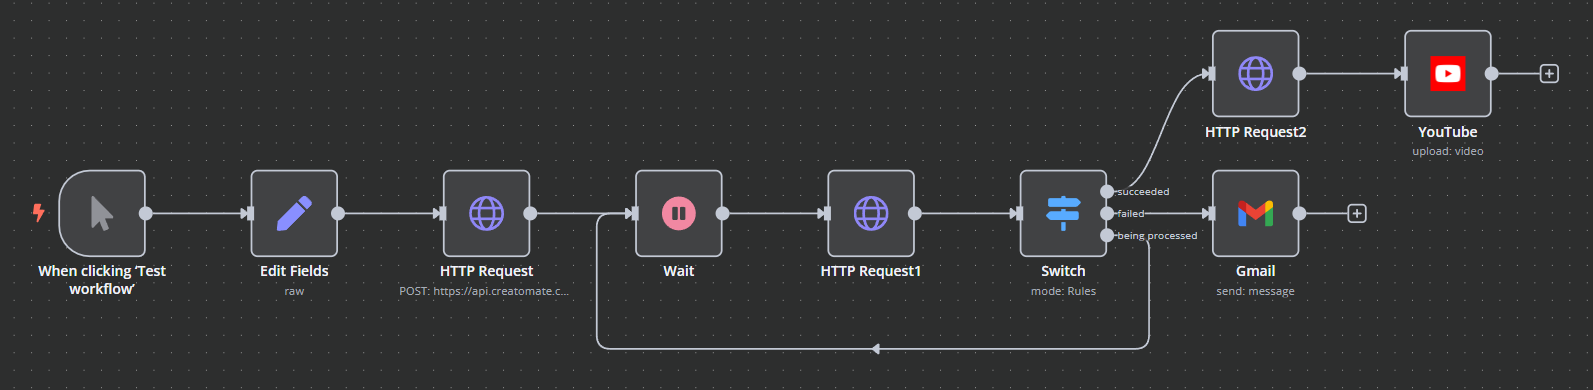
Next, I'll guide you through setting up a simple video automation workflow in n8n. Using a manual trigger and an Edit Fields node, we'll specify the video clip for which we want to generate subtitles. We'll also add a title and description that can be used when posting the video to social media. In real-world scenarios, you would replace this step with a more dynamic method for providing content for each video, such as using Google Sheets or even an AI tool like ChatGPT.
After that, we'll set up an API request for Creatomate, mapping the input video to the template. This allows Creatomate to transcribe the video file and generate subtitles. Since this process may take some time, we'll wait a moment before checking the video's status. If it's not ready yet, the workflow will keep checking until it is. Once the video is ready, we'll download it and upload it as a YouTube Short. In case something goes wrong during the video creation process, we'll set up an email notification to alert us so we can address the issue. Of course, feel free to customize this with different nodes based on your specific needs.
Let's get started!
1. Create a transcription template in Creatomate
Log in to your Creatomate account or sign up for free if you haven't already.
Navigate to the Templates page and click New to open the template gallery. For this tutorial, we'll use the Highlighted Subtitles template from the Auto-Subtitles category. Next, select a video size, such as 9:16 Vertical, and click Create Template to open it in the editor:
This template is already configured to automatically generate captions from an input file, so it's ready to use right away. You don't have to make any changes, but let me explain how it works.
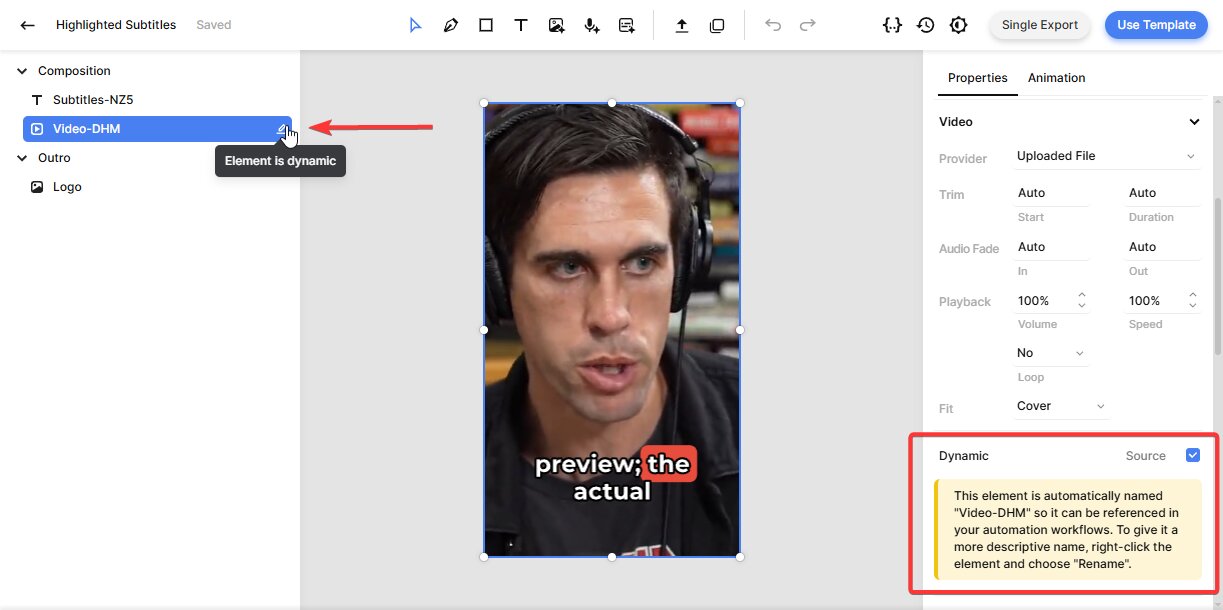
In the left side panel, you'll find the elements that make up our video design. It's organized as a composition with subtitles and video elements, along with an outro that includes a logo. One important thing to note is that the video element is marked as dynamic, which allows us to replace it with a different input file each time:
If you play with the template in the editor, you'll notice that the subtitles are just placeholders. This is because the actual captions will be generated once we insert a video file using the n8n workflow. If you'd like, you can customize the styling and animations of the subtitles.
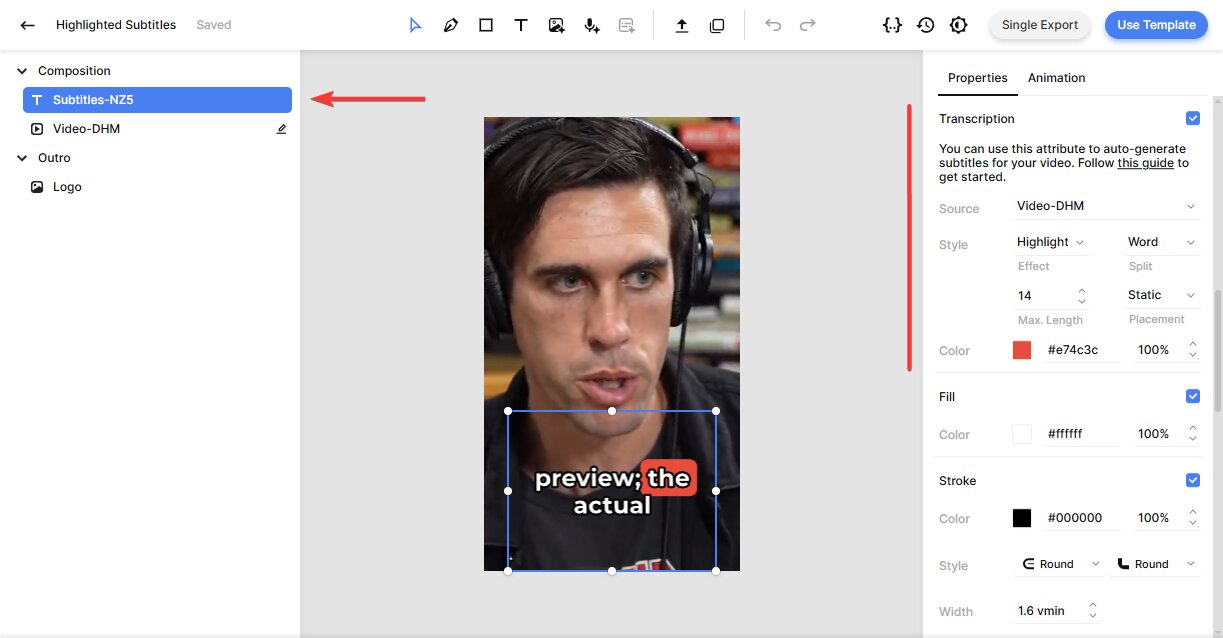
To do this, select the Subtitles element and find the Transcription property on the right. You'll notice the Source is set to the video element, which tells Creatomate to transcribe that file and generate subtitles for it. You can adjust the style, color, fill, and stroke attributes to customize the subtitles however you like. For example, to display one word at a time, (a style commonly used on YouTube, TikTok, and Instagram), set "Max. Length" to 1:
The template is fully customizable to fit your needs. For example, you can replace the logo with your own. However, to keep this tutorial focused on the automation process, we'll use the template as it is. If you'd like to learn more about the editor, check out this quick guide.
With our template in place, let's move on to n8n.
2. Add video/audio clip to your n8n workflow
The goal of this step is to provide the workflow with a video or audio file for transcription, along with a title and description for posting (optional). In this tutorial, we'll use static test data to generate a subtitled video. However, in a real-world scenario, you would typically use dynamic data and a more efficient method instead of the manual trigger and Edit Fields node.
In your n8n dashboard, click Create Workflow.
Once you're in the canvas, click + to add the first step. Choose Trigger manually, and you'll see that the When clicking ‘Test workflow' trigger has been added:
Next, click + and search for the Edit Fields (Set) node.
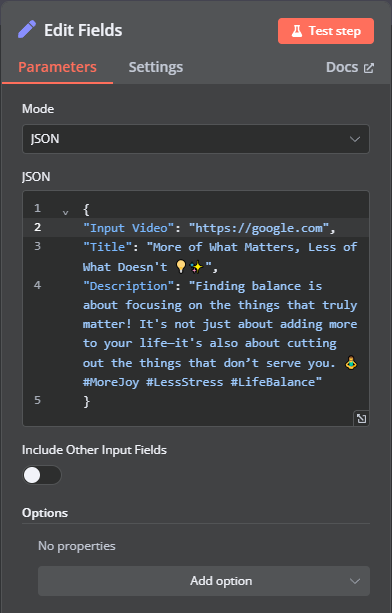
To add the sample content, set Mode to JSON and paste the following into the JSON field:
{
"Input Video": "https://cdn.creatomate.com/demo/the-daily-stoic-podcast.mp4",
"Title": "More of What Matters, Less of What Doesn't 💡✨",
"Description": "Finding balance is about focusing on the things that truly matter! It's not just about adding more to your life—it's also about cutting out the things that don't serve you. 🧘♀️ #MoreJoy #LessStress #LifeBalance"
}
Then, click Test step to confirm it was added correctly:

Let's generate the video in the next step.
3. Generate the auto-transcribed video
In this step, we'll send an API request to Creatomate to generate the video.
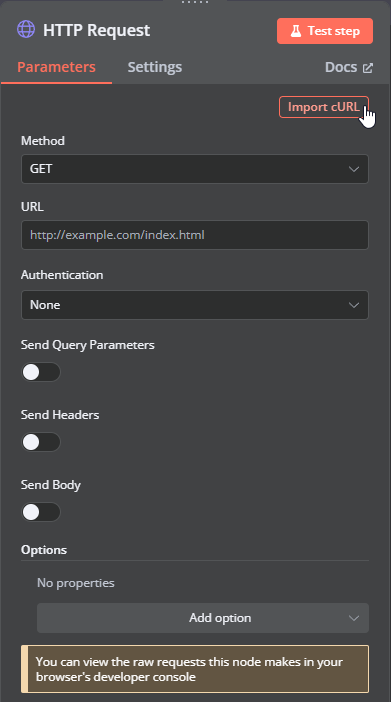
Add an HTTP Request node. For easy setup, click Import cURL:
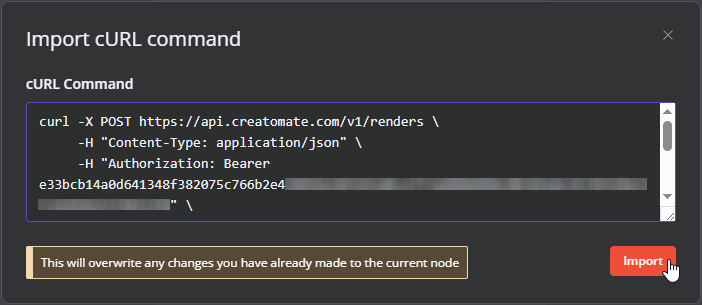
Go back to the template editor in Creatomate. In the top-right corner, click the Use Template button. Then, go to API Integration and copy the cURL command:
Paste it into n8n and click Import:
The node is almost fully configured – only one step remains: mapping the input file to the video template. Scroll down to the JSON script, switch to expression mode, and open it in full screen. Then, replace the video source with Edit Fields (Set) → Input Video:
Finally, click Test step to send the request to Creatomate.
In the output, you should see that the status is “planned”. This means Creatomate has accepted the request and will begin processing it.
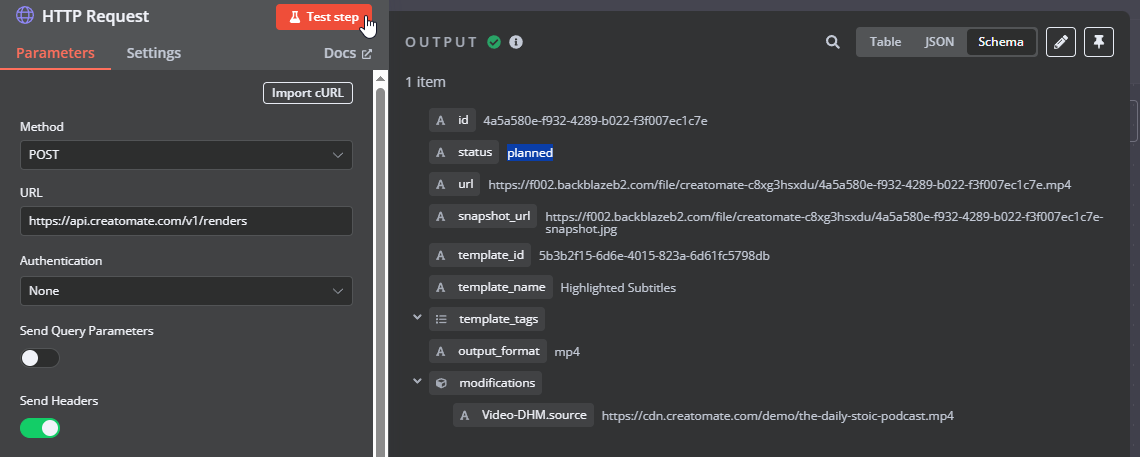
You'll also find a URL in the output. This is the link where you can access the video once it's ready. If you try to open it in your browser now, you'll likely see a ‘Not Found' message. This means the video generation process is still going on.
The time it takes to generate a video depends on factors such as video length, template complexity, resolution, and third-party integrations (like ElevenLabs or DALL·E).
In the next step, we'll monitor its progress.
4. Wait for the video to complete
If a subsequent node tries to use the URL before the video is ready, it may fail. To prevent this, we'll add a wait node to pause the workflow for a short period. After that, we'll check the video's status. Since there are several possible statuses, we'll handle each one appropriately to make sure the workflow runs smoothly and without errors.
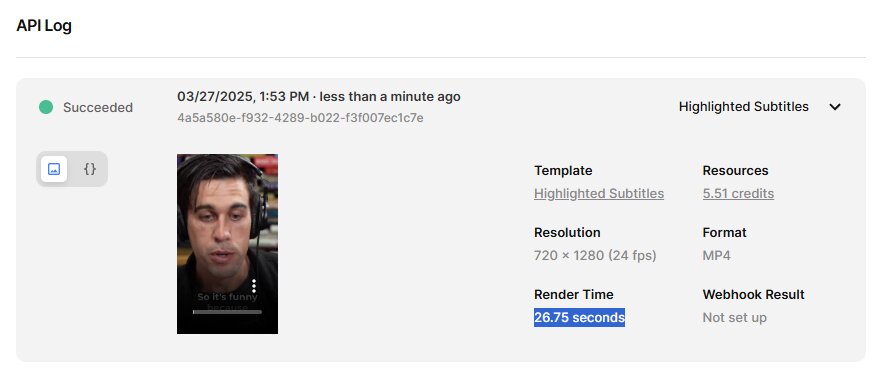
In your Creatomate dashboard, go to the API Log page. If everything worked well, you should see that the video was successfully generated. The Render Time shows how long it took to generate the video, for example, 26.75 seconds:
Next, add a Wait node to your n8n workflow and set it to 50 seconds (roughly double the render time):
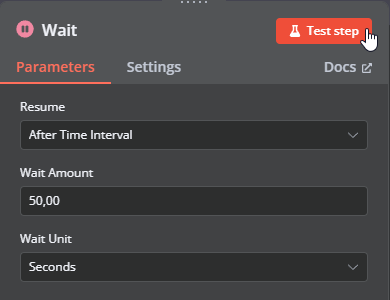
Click Test step and wait for it to finish.
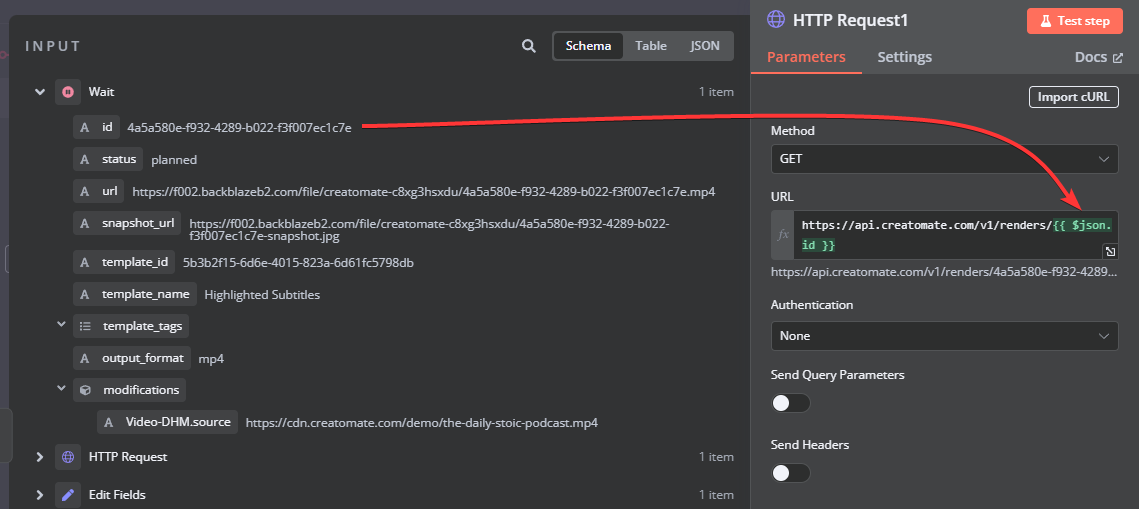
Then, add another HTTP Request node.
To set it up, select GET as the Method, and enter the following URL: https://api.creatomate.com/v1/renders/[ID]. Be sure to replace the [ID] placeholder with the 'id' value from the wait node, and make sure there are no spaces:
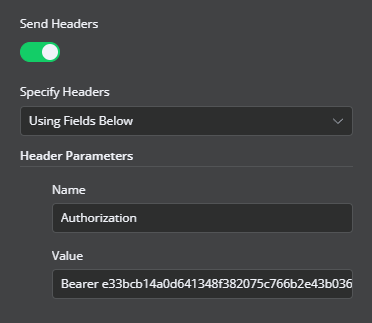
Next, toggle the switch to Send Headers. Name the header Authorization and paste your API key. You can find your API key on the API Integration page in Creatomate, where we previously copied the cURL command:
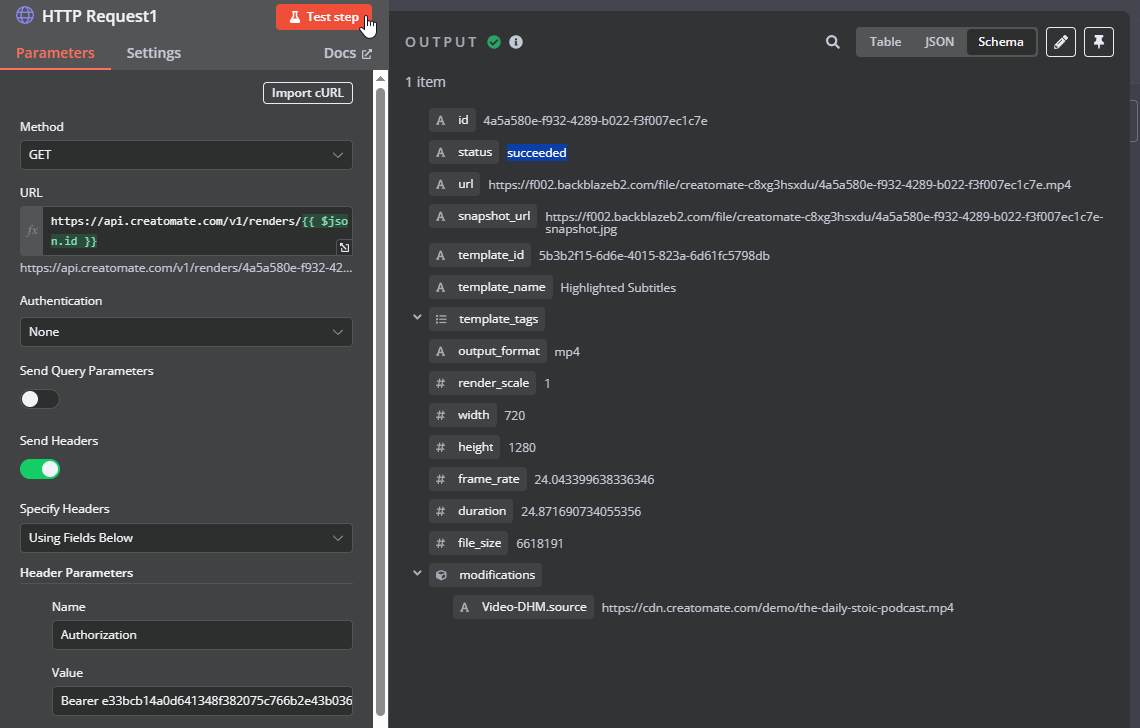
When you click Test step, you'll see that the status is now "succeeded", indicating that the video is ready to use:
While this is the desired outcome, sometimes a video may take more time to render, or an error could occur. We need to handle each video's status correctly – whether it has succeeded, is still processing, or has failed.
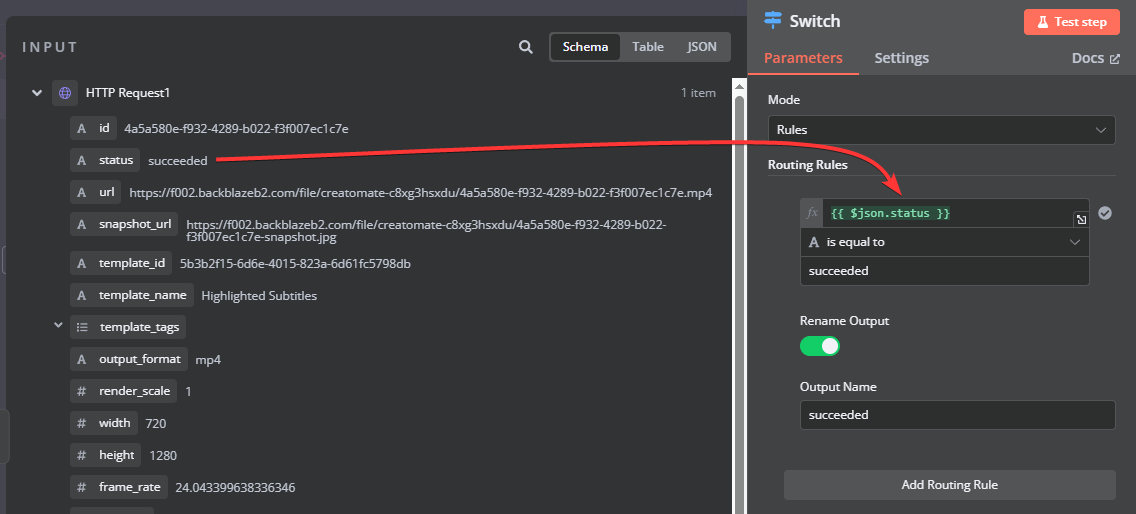
Next, add a Switch node.
Let's start with successful renders. Create a routing rule where ‘status' is equal to ‘succeeded' and rename the output to succeeded:
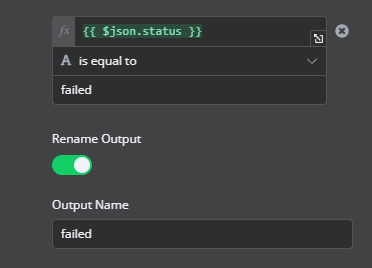
For failed renders, add a routing rule where ‘status' is equal to ‘failed' and rename the output to failed:
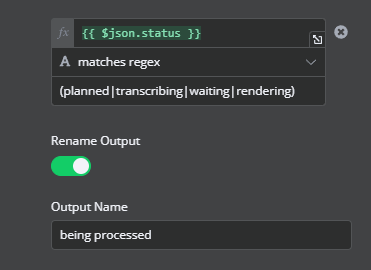
Lastly, there are several statuses that indicate a video is still being processed. Since we want to handle these renders the same way, we can group them into a single route. Add another routing rule, select the ‘status', and set it to matches regex with the following values: (planned|transcribing|waiting|rendering). Then, rename the output to being processed:
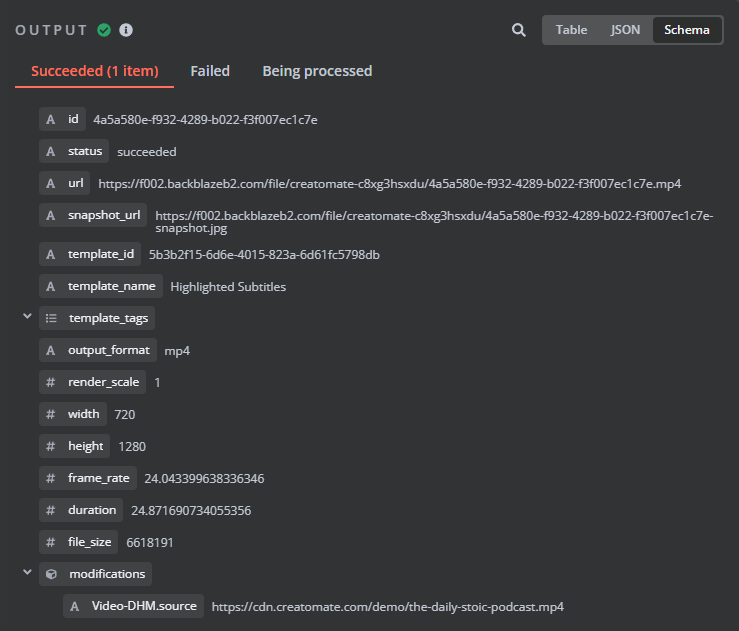
Next, click Test step, and you'll see that our video moves to the "succeeded" branch:
In the next step, I'll show you how to use the generated video and explain how to handle "failed" and "being processed" renders.
5. Use the subtitled video
Now that we have a video with animated subtitles, we can use it in various ways. As an example, I'll show you how to upload it as a YouTube Short.
The YouTube node requires the actual video file, not just the URL. So, we'll need to download the MP4 file first.
Note: If you want to use a node that requires the URL instead of the downloaded file, you can skip the download step and use the video URL directly.
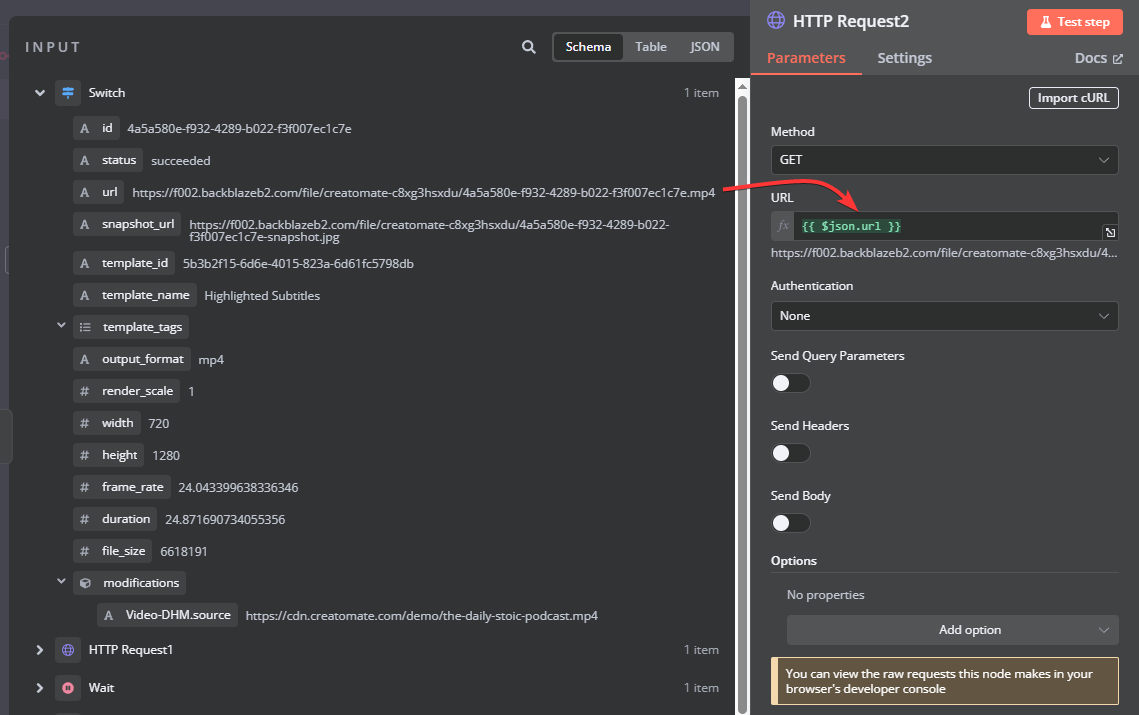
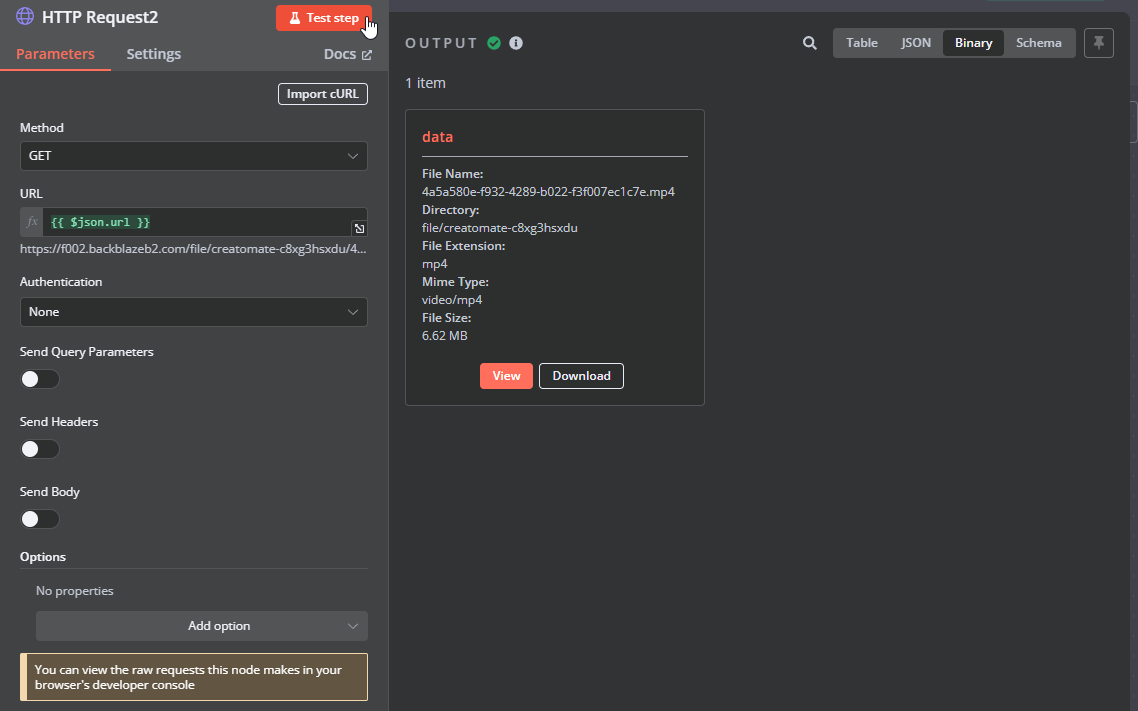
Following the “succeeded” branch, add another HTTP Request node. Set the Method to GET and, for the URL, select the video link:
Click Test step to make sure the MP4 can be downloaded. You should see a data bundle as output:
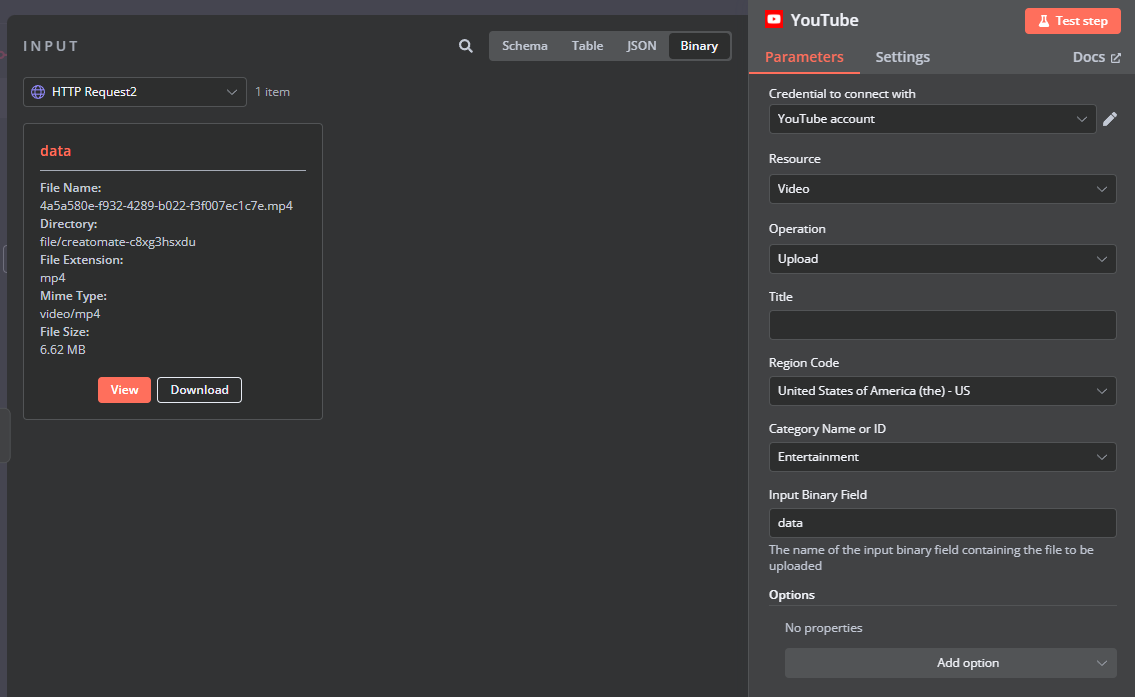
Next, add the YouTube node with the Upload a video action.
Select your account. If this is your first time using the YouTube app in n8n, you'll need to create a connection first. I found this documentation page helpful. Additionally, make sure to add yourself as a test user if you don't want to publish the app right away.
Then, set up the node as follows:
- Resource -> Video
- Operation -> Upload
- Region Code -> Choose a country or region where your audience is based or where you want the video to be categorized (e.g., US).
- Category Name or ID -> Select a category that best fits your video's content (e.g., Entertainment).
- Input Binary Field -> data (this refers to the subtitled video we just downloaded)
To add a Title, switch the input data to Schema and select Edit Fields -> Title.
If you also want to add a description, click Add option, choose Description, and map
Edit Fields -> Description:
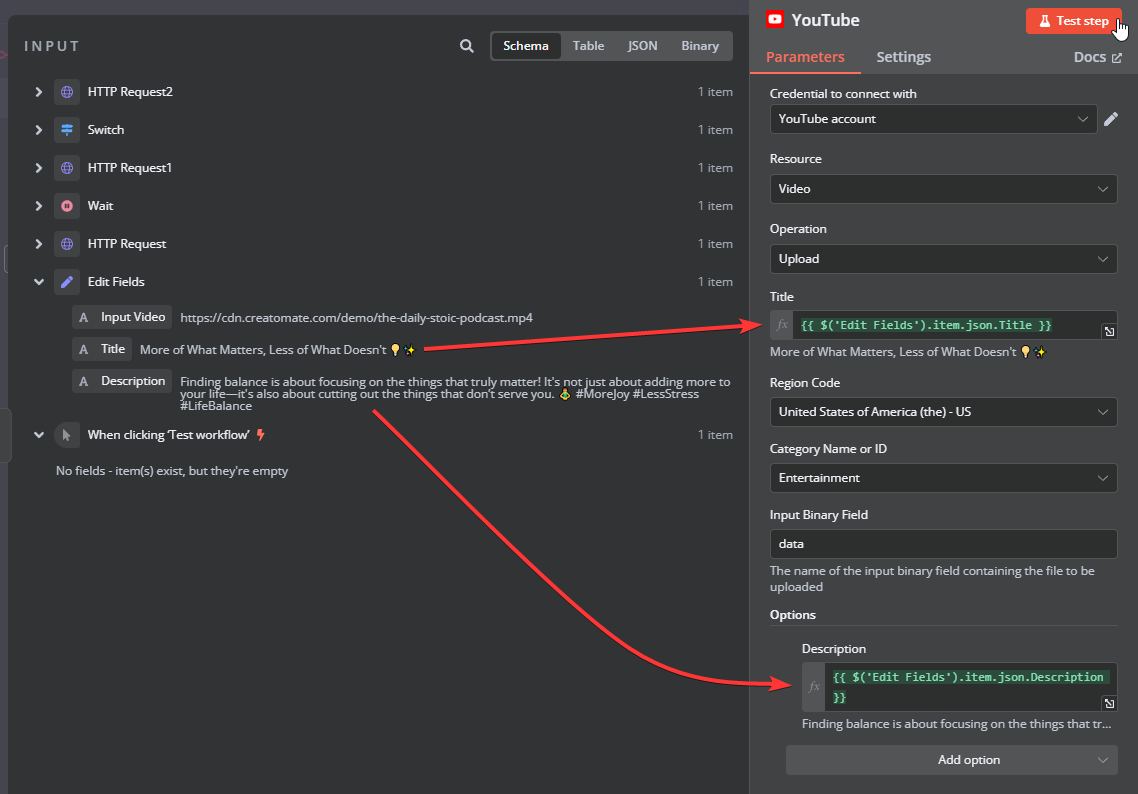
Once set up, click Test step to make sure it works.
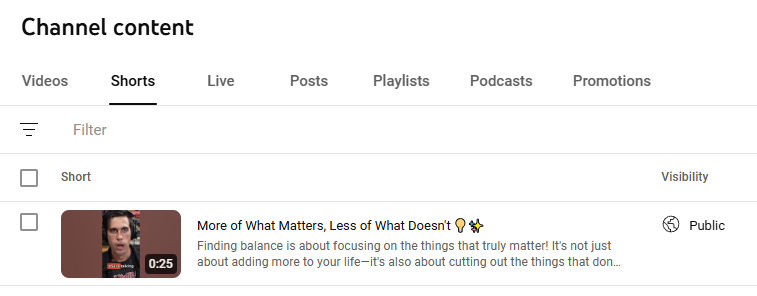
When I check my YouTube channel's content page, I see that a Short has been published:
The final piece of the puzzle is handling the other two routes.
For videos that haven't completed after the first check, we'll connect the "being processed" branch to the wait node and continue checking the status until it either succeeds or fails.
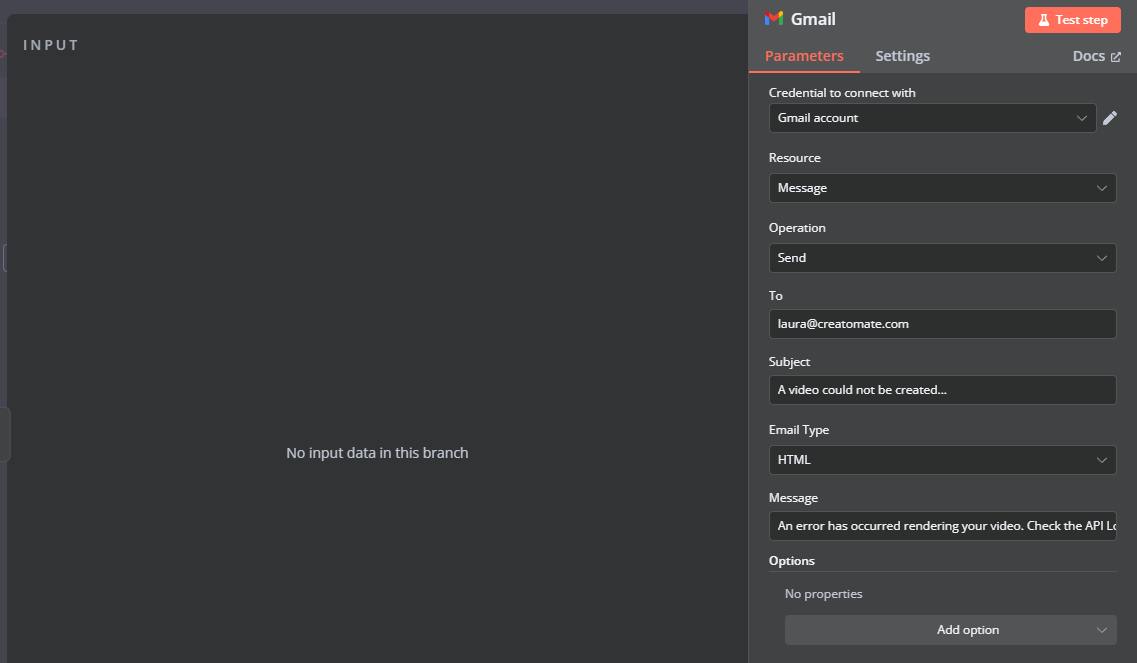
Last but not least, we'll handle failed renders. Sometimes a video fails to render, and when that happens, we want to be notified. I'm using Gmail to send a message, but you can replace it with any other app of your choice.
Let's set up a notification like this:
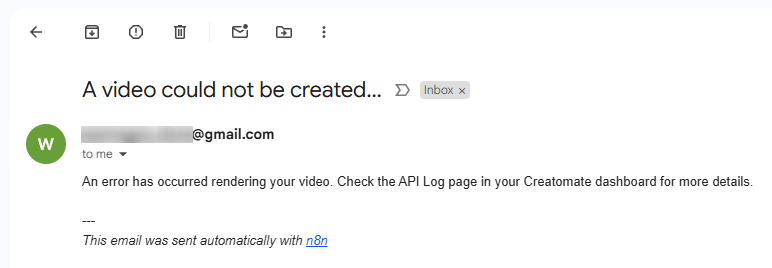
An error has occurred rendering your video. Check the API Log page in your Creatomate dashboard for more details.
Since the video we created earlier went through the "succeeded" branch, there won't be any input data here. Therefore, when we test this step, no email will be sent.
To verify that the notification step is set up correctly, we can intentionally create a failed render.
In the Edit Field node, replace the actual input video with a webpage URL, such as https://google.com:
Now, click the Test workflow button at the bottom of the canvas.
Since a webpage can't be transcribed, this render should follow the "failed" route. If everything is set up correctly, you should receive an email with the notification we just created:
On the API Log page, you'll find the error message:
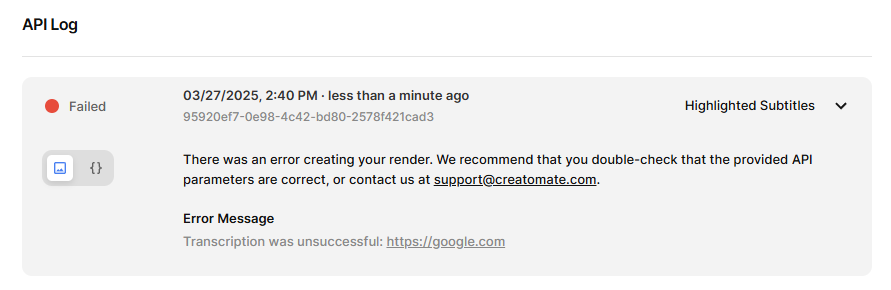
And that's it!
What's next for video creation with n8n
Congratulations! You've learned how to automatically add subtitles to videos using Creatomate's auto-transcription feature. It's a straightforward process, and the great thing is, it's highly flexible. You can easily adapt it to fit your own workflows, making it work best for you.
In this tutorial, we used a short video clip as input. But you're not limited to that – you can also use voiceovers. For example, you can have a text-to-speech tool like ElevenLabs generate AI voiceovers for your videos, and then use Creatomate to add animated subtitles. This can all be configured directly in the template, and in this tutorial, I'll show you how to set it up.
You might also like these tutorials


Start automating today
Start with a full-featured trial with 50 credits, no credit card required.
Get started for free →