How to Auto-Generate Faceless Shorts with ChatGPT and n8n

Learn how to build an n8n workflow that turns a topic into an AI-generated Short with a ChatGPT-written script, voiceover, and animated subtitles.
Faceless channels run on volume: short, narrated videos that don't need a camera, a studio, or even your own voice. The bottleneck is producing them consistently. In this step-by-step guide, we'll automate that process with n8n. You provide a topic – ChatGPT writes the script, ElevenLabs turns it into a voiceover, and Creatomate assembles the final Short with animated subtitles, ready to publish on YouTube.
By the end of this tutorial, you'll have generated a Short just like the one above – written, voiced, subtitled, and uploaded without any manual video editing.
Want a different look? Creatomate's online template editor lets you fully customize the design, from the subtitle style to the voice that reads your script.
Prerequisites
These are the tools we'll use:
- Creatomate: to customize a template and render the videos.
- OpenAI: to let ChatGPT write the video script.
- ElevenLabs: to produce the AI voiceover. Its free plan includes API access, so you can test this workflow without a paid subscription.
- n8n: to set up the automated workflow.
- YouTube (optional): to publish the generated Shorts.
Note: YouTube is just one example destination. You could also save each finished video to Google Drive so you can review it before publishing, or adapt the workflow to post it as an Instagram Reel or TikTok video.
How to create AI-generated Shorts with ChatGPT and n8n
We'll start in Creatomate by connecting ElevenLabs, a popular text-to-speech platform for creating natural-sounding AI voices, and setting up a video template. The template defines what every Short looks like: six image slots, each shown for an equal portion of the video, an AI voiceover that determines its length, and animated subtitles transcribed from the narration.
Then we'll build the workflow in n8n. As a demo, we'll use a manual trigger and an Edit Fields node to provide a topic and six ready-made background images. For this tutorial, we'll use the provided sample images, but you can replace them with your own or extend the workflow with an AI image generator. ChatGPT uses the topic to write everything else: the entire narration, plus a title and description for YouTube.
Next, we'll send an API request to Creatomate to generate the video. Creatomate first uses ElevenLabs to produce the voiceover, transcribes it into subtitles, and renders the template into a final video. Since rendering takes a moment, we'll have the workflow wait, check the video's status, and handle each outcome: succeeded, still processing, or failed. Once the video is ready, we'll download it and upload it to YouTube as a Short. If the render fails, the workflow sends an email notification so it never goes unnoticed.

Let's get started!
1. Set up your video template
Log in to your Creatomate account or sign up for free if you don't have one yet.
Before we create the design, let's connect ElevenLabs, which will generate the voiceovers. If you don't have an ElevenLabs API key yet, sign in to ElevenLabs and create one from your Developers settings.
Note: If you're new to ElevenLabs or want to learn how to choose a voice and customize its settings, check out our guide on how to create videos with AI voiceovers using n8n.
In Creatomate, click your project in the top left, then choose Project Settings. Open the Integration tab, switch ElevenLabs on, paste your API key, and click Confirm:
Creatomate can now use your ElevenLabs account to generate the voiceover automatically whenever the template is rendered.
Next, let's import the video template. For this tutorial, we'll use the Faceless Short template. Click the banner below to add it directly to your project:
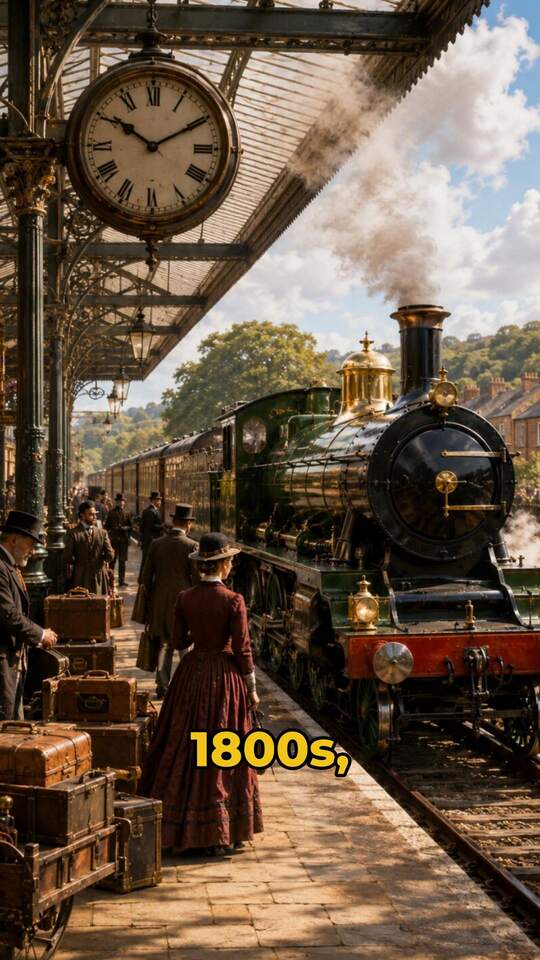
Let me quickly explain how the template works. On the left side of the editor, you'll find all the elements that make up the video design. Don't worry if the canvas looks mostly empty – that's expected. The template defines the design and automation settings, while the n8n workflow fills the elements marked as dynamic with the variable content for each video. Any design changes you make in the editor will be reflected in future videos generated with this template.
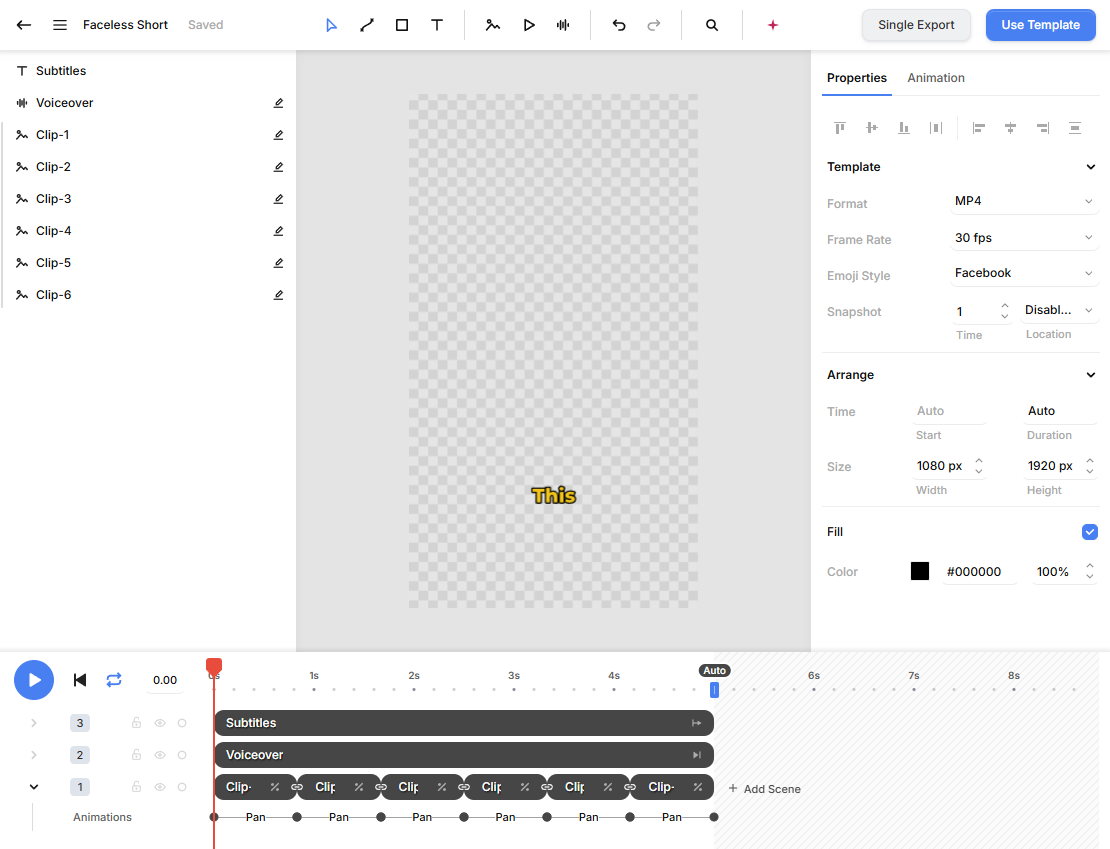
Here's what each element does:
- Clip-1 to Clip-6: six dynamic visual slots. Our workflow fills each one with an image URL, and every clip is shown for an equal portion of the video. You can also supply video URLs if you prefer.
- Voiceover: the narration. Its Audio property is preset to ElevenLabs, using the Multilingual v2 model and the Matilda voice. Any text supplied by the workflow is converted into speech during rendering, and the voiceover automatically determines the video's duration.
- Subtitles: Creatomate transcribes the voiceover during rendering and displays the subtitles word by word – the caption style popular on YouTube, TikTok, and Instagram. You can customize it using the Caption filter under the Animation tab.
That's everything you need to know about the template. If you'd like to explore the editor further, check out this quick guide.
Now, let's move on to n8n.
2. Start your n8n workflow
The goal of this step is to provide a topic for the video and six background images for its clip slots. To keep things simple, we'll use a manual trigger and an Edit Fields (Set) node. This setup is just for demonstration purposes. Once you understand the concept, you can replace it with any trigger and data source that fits your workflow.
In your n8n dashboard, click Create workflow.
Once you're on the canvas, click Add first step… and choose Trigger manually. The trigger appears on the canvas, named When clicking 'Execute workflow':
Next, click the + on the right of that node and search for and select Edit Fields (Set).
To add the sample content, set Mode to JSON. The field initially contains a small example (my_field_1 and my_field_2). Select all of it and replace it with the following JSON:
{

  "Topic": "why time zones were invented for railways",

  "Clip-1": "https://cdn.creatomate.com/demo/victorian-station.jpg",

  "Clip-2": "https://cdn.creatomate.com/demo/victorian-market-square.jpg",

  "Clip-3": "https://cdn.creatomate.com/demo/victorian-study.jpg",

  "Clip-4": "https://cdn.creatomate.com/demo/victorian-quay.jpg",

  "Clip-5": "https://cdn.creatomate.com/demo/victorian-bookshop.jpg",

  "Clip-6": "https://cdn.creatomate.com/demo/victorian-countryside.jpg"

}
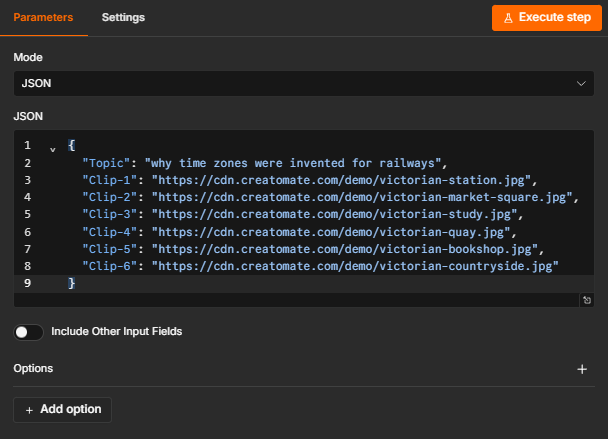
Feel free to replace the topic and sample images with your own. Make sure each image is available at a publicly accessible URL and visually matches the topic. Keep the field names Topic and Clip-1 through Clip-6 unchanged for now, as we'll refer to them in later steps.
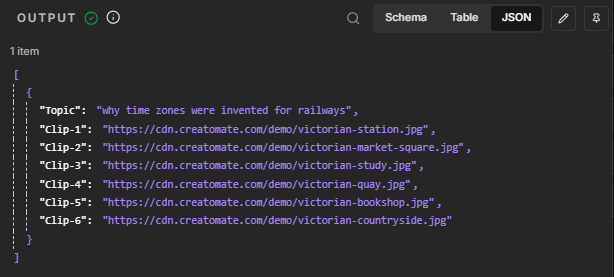
Then, click Execute step to confirm the fields were added correctly. The output panel should now list the topic and the six image URLs:
3. Write the script with ChatGPT
In this step, ChatGPT turns the topic into the video's narration, along with a title and description for YouTube.
Click the + after the Edit Fields node and add the OpenAI node with the Message a Model action. If you've connected OpenAI to n8n before, select your existing credential. Otherwise, choose Create new credential and enter your OpenAI API key – you can create one in your OpenAI dashboard.
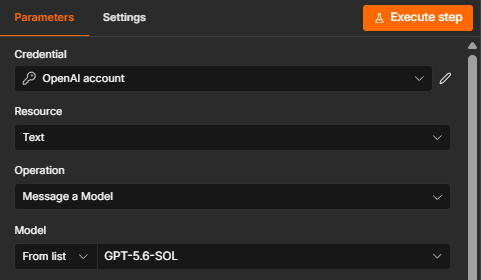
Confirm that Resource is set to Text and Operation to Message a Model. For Model, choose GPT-5.6-SOL. The GPT-5.6 family has three tiers: Sol prioritizes quality, Terra balances quality against cost, and Luna is designed for efficient, high-volume workloads. We'll use Sol because it writes the best narration, but if you plan to generate videos at scale, consider testing Terra to see whether it offers the right quality-cost trade-off for your content.
Now, let's write the prompt. It's important to give ChatGPT clear instructions on what to generate. Under Messages, paste the following into the Prompt field:
Write the voiceover script for a short faceless social media video about {{ $json.Topic }}.


"Voiceover" is one continuous narration of 90 to 120 words, designed to last approximately 45 to 55 seconds when read at a natural speaking pace. Tell it as a story: open with a surprising claim that makes the viewer want to know more, explain how things used to be and what changed, and end on a line that lands the payoff. Use plain language and short sentences, and stick to facts you are confident are accurate. Do not use emojis, hashtags, or any formatting – this text will be read aloud by a voice generator.


Also write a "Title" (a catchy YouTube title, emojis allowed) and a "Description" (1 to 3 sentences with a few fitting hashtags).


Return only valid JSON on a single line, exactly in this structure: {"Voiceover":"","Title":"","Description":""}
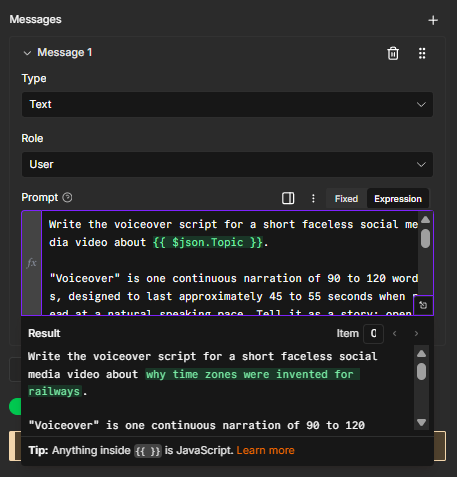
The {{ $json.Topic }} part pulls the topic directly from the previous step. When you paste the prompt, n8n should switch the field from Fixed to Expression, and the Result preview underneath should show your topic filled in. If the field remains set to Fixed, switch it to Expression manually.
Now click Execute step. The OpenAI node should return the JSON we requested as a text string nested inside the response. You can find it under output → content → text:
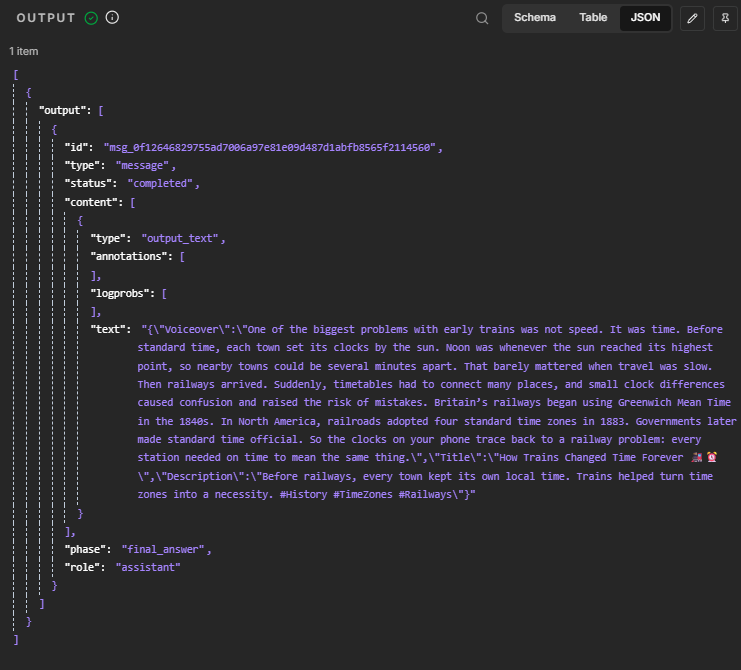
Before we can use these values in the rest of the workflow, we need to parse that text into separate fields.
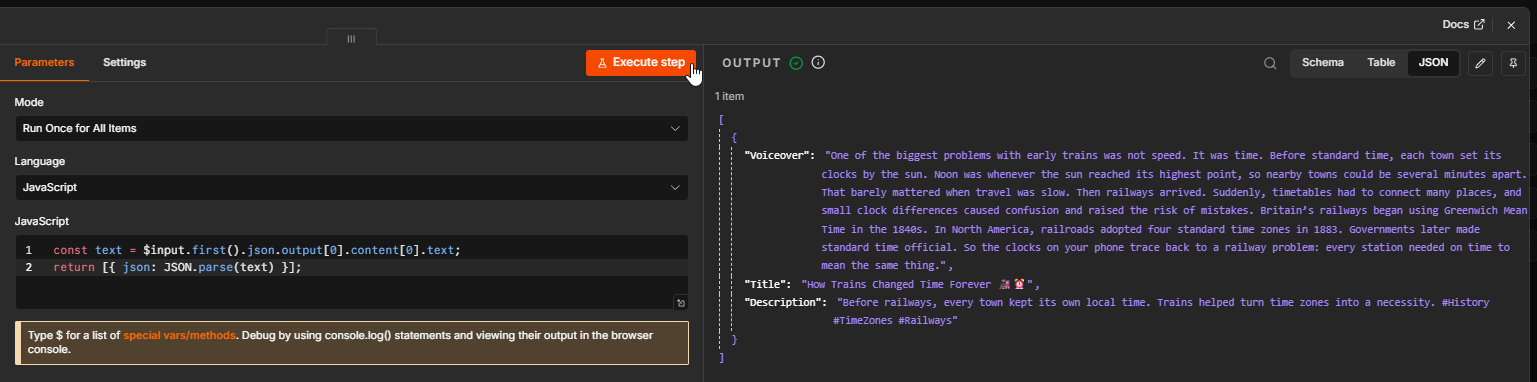
Click the +, add a Code node, and choose the Code in JavaScript action. Replace the sample code with these two lines:
1const text = $input.first().json.output[0].content[0].text;
2return [{ json: JSON.parse(text) }];
The first line extracts ChatGPT's reply from the response, and the second parses the JSON and returns its contents as individual fields.
Click Execute step. The output should now contain three fields: Voiceover, Title, and Description. We'll use the voiceover for the video template and the title and description when uploading the finished Short to YouTube:
That's all the written content for our Short, generated in seconds.
Now let's turn it into a video.
4. Render the video
In this step, we'll send an API request to Creatomate to render the video.
Add an HTTP Request node. For easy setup, click Import cURL.
Go back to the template editor in Creatomate and click Use Template in the top-right corner. Choose Developer API rather than Zapier, Make & n8n, which opens the platform guides. The cURL tab contains a ready-made request for this exact template. Copy the command:
Paste the command into n8n and click Import:
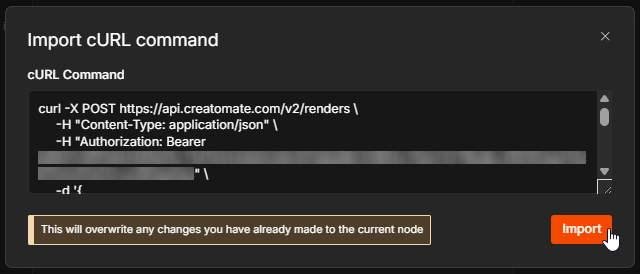
n8n configures the entire node for you: the POST method, the API endpoint, an Authorization header containing your API key, and a JSON body with the template's seven dynamic fields.
Note: Importing the cURL command places your API key directly in the node configuration. Don't share or export the workflow while the key is embedded. For a safer and reusable setup, store the Authorization header in an n8n Header Auth credential.
Before changing the JSON body, copy its template_id. This identifies the copy of the template in your own Creatomate project, and we'll need it in a moment.
Next, connect the content from the previous steps to the template. Clear the JSON body completely, then paste the following:
1{
2  "template_id": "PASTE_YOUR_TEMPLATE_ID_HERE",
3  "modifications": {
4    "Clip-1.source": "{{ $('Edit Fields').item.json['Clip-1'] }}",
5    "Clip-2.source": "{{ $('Edit Fields').item.json['Clip-2'] }}",
6    "Clip-3.source": "{{ $('Edit Fields').item.json['Clip-3'] }}",
7    "Clip-4.source": "{{ $('Edit Fields').item.json['Clip-4'] }}",
8    "Clip-5.source": "{{ $('Edit Fields').item.json['Clip-5'] }}",
9    "Clip-6.source": "{{ $('Edit Fields').item.json['Clip-6'] }}",
10    "Voiceover.source": "{{ $json.Voiceover }}"
11  }
12}
When you paste the new body into an empty field, n8n should recognize the {{ ... }} expressions and switch the field from Fixed to Expression. If it still shows Fixed, switch it manually. Leaving the field in Fixed mode would send the expressions as plain text and cause the render to fail.
Replace PASTE_YOUR_TEMPLATE_ID_HERE with the ID you just copied.
The six Clip expressions pull the image URLs from the Edit Fields node, while Voiceover.source uses the voiceover text from the Code node. The Result preview underneath shows the request as it will be sent. Open the field in full screen using the expand icon and verify that the template ID, image URLs, and voiceover are filled in correctly:
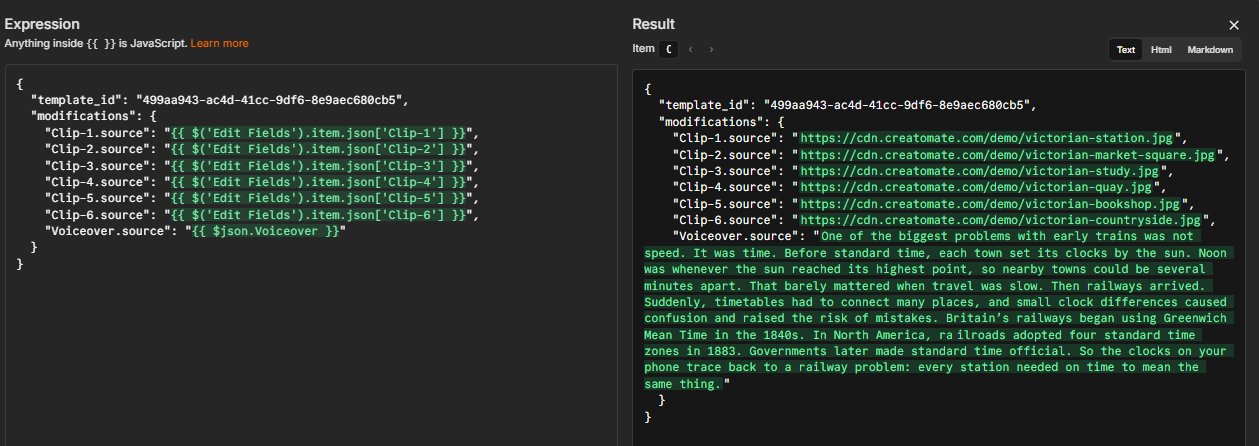
Finally, click Execute step to send the request to Creatomate.
In the output, you should see that the status is planned. This means Creatomate has accepted the request and will start processing it:
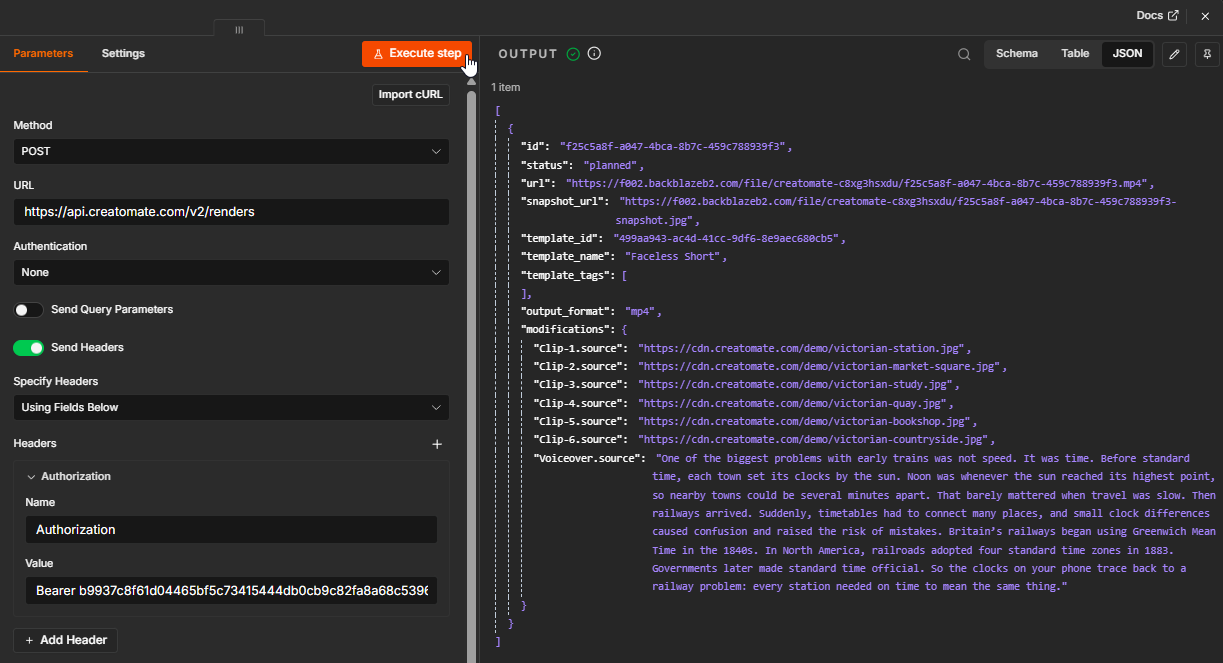
The response also includes a url for the finished video. Creatomate reserves this URL immediately, but the file won't be available until the render has succeeded. If you open it now, you may see a 'Not Found' message – this simply means the video is still being processed.
Render time depends on factors such as the video's duration and resolution, the complexity of the template, and third-party services such as ElevenLabs.
In the next step, we'll wait for the render to finish and monitor its status.
5. Wait for the video to complete
Because the video file behind the reserved URL may still be processing, we'll pause the workflow, check the render's status, and handle each possible outcome.
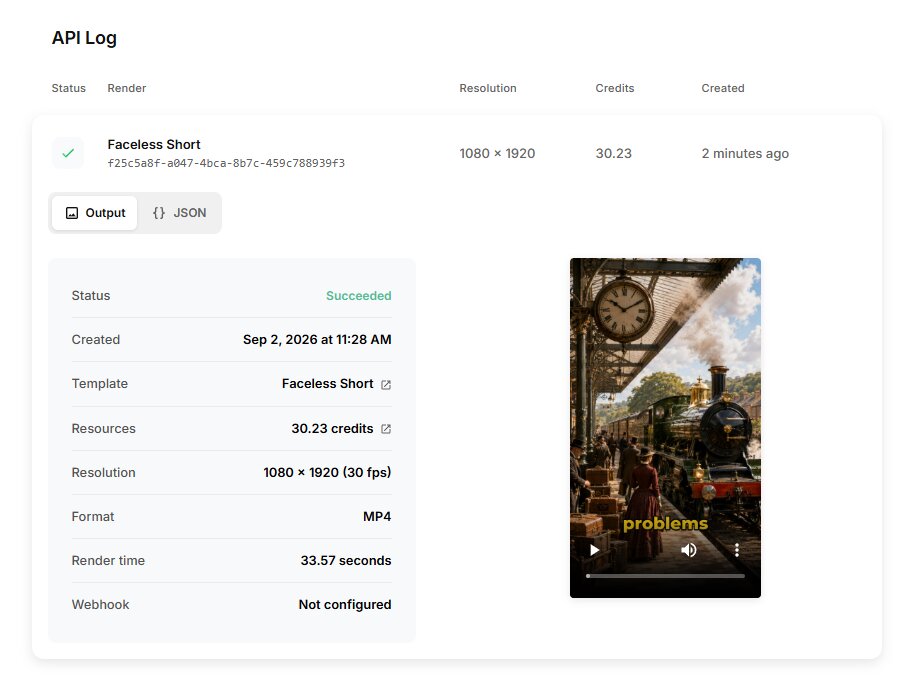
Review the render in the API Log
First, open the API Log page in your Creatomate dashboard. If the test render from the previous step has finished, its status should be succeeded. If it is still processing, wait a moment and refresh the page. The log also shows how long the render took and how many credits it used. In this example, a video of just under a minute took 34 seconds and used 31 credits, although your results may vary:
Pause the workflow
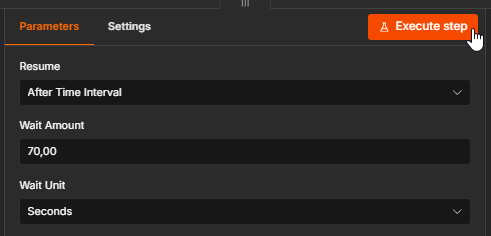
Back in n8n, add a Wait node and set it to 70 seconds – roughly twice the render time in this example. This delay prevents the workflow from checking the status unnecessarily often. If the video still isn't ready afterwards, we'll send the workflow back to this node and try again.
Click Execute step and wait for it to complete:
Check the render status
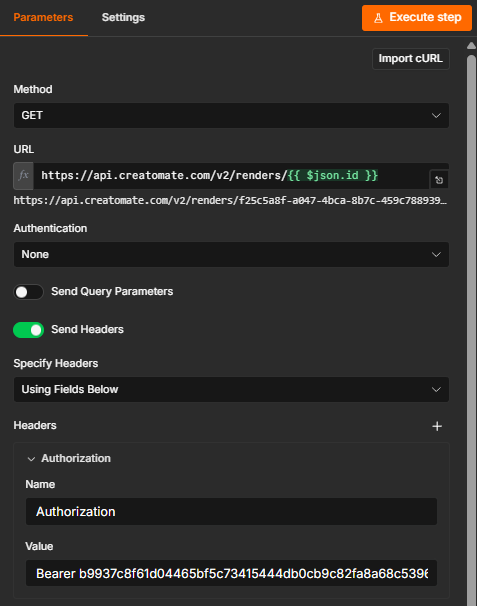
Next, add another HTTP Request node and configure it as follows:
- Method -> GET
- URL -> https://api.creatomate.com/v2/renders/{{ $json.id }}
The Wait node passes the render data through unchanged, so {{ $json.id }} still refers to the render ID returned by the first HTTP Request node. If you paste the URL into an empty field, n8n may switch to Expression automatically. Otherwise, switch it manually.
For authentication, use the same method as in the first HTTP Request node. If you stored the header in a Header Auth credential, reuse that credential. Otherwise, enable Send Headers and copy the same Authorization header and Bearer value.
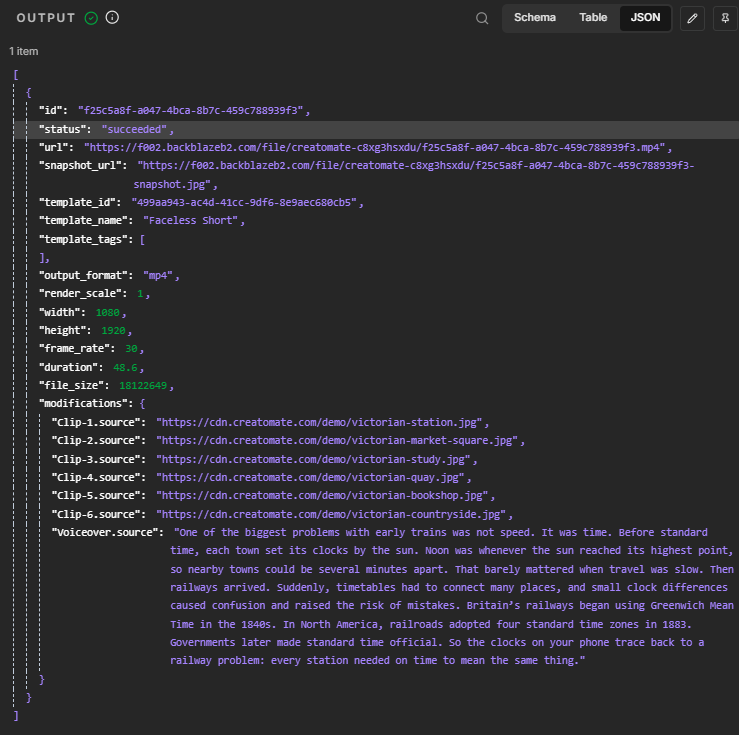
Click Execute step. In this example, the returned status is succeeded, which means the video is ready to use. If yours shows planned, waiting, transcribing, or rendering, the video is still being processed. A failed status means that an error occurred. We'll now add a node to separate these outcomes into three routes.
Route each possible outcome
To do this, add a Switch node.
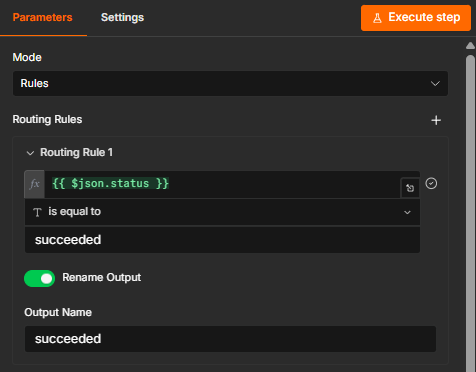
Let's start with successful renders. Create a routing rule where {{ $json.status }} is equal to succeeded, and rename the output to succeeded:
Next, add a routing rule where {{ $json.status }} is equal to failed, and rename the output to failed.
Finally, there are several statuses that indicate a video is still being processed. Because we want to handle all of them in the same way, we can group them into a single route. Add another routing rule for {{ $json.status }}, select matches regex, and enter (planned|transcribing|waiting|rendering) Then, rename the output to being processed:
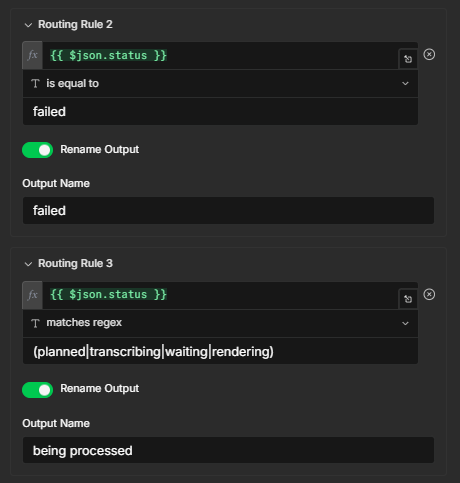
Once done, click Execute step. Because our test video has finished rendering, it should move through the succeeded output:
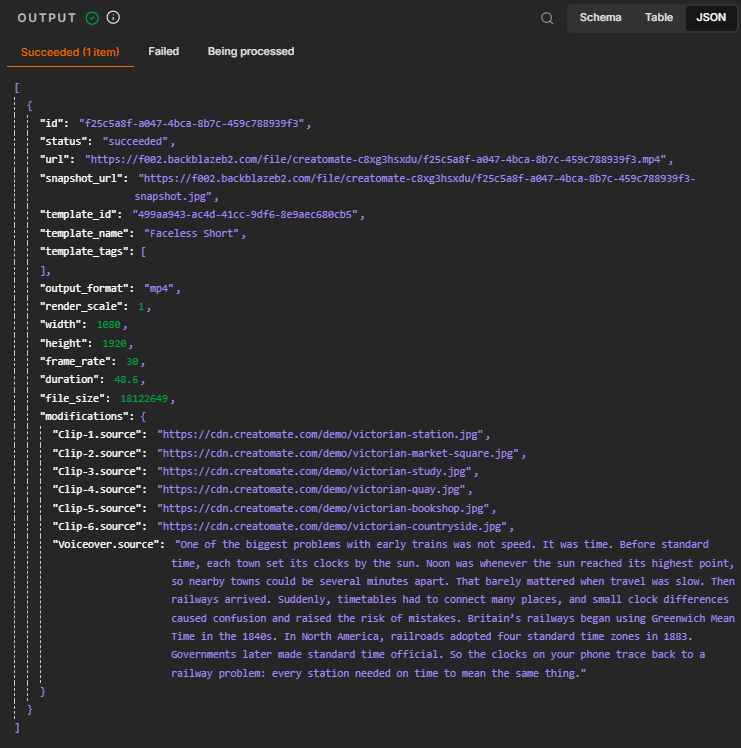
In the next steps, we'll connect the appropriate nodes to each output: successful videos will continue to YouTube, videos that are still processing will wait before being checked again, and failed renders will trigger an email notification.
6. Upload the Short to YouTube
Let's start with the successful renders and upload the finished videos to YouTube. While some apps can work directly with the video URL, the YouTube node requires the actual video file, so we need to download it first.
Note: If your destination accepts a video URL, you can skip this download and use
{{ $json.url }} directly.
Following the succeeded route, add another HTTP Request node and configure it as follows:
- Method -> GET
- URL -> {{ $json.url }}
Under Options, add Response, set Response Format to File, and leave Put Output in Field set to data
No Authorization header is needed because the finished video is served from public storage.
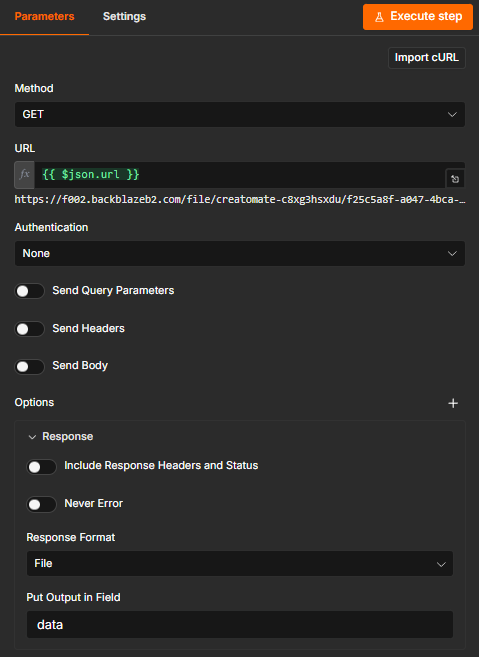
Click Execute step. The output should now contain a binary file named data, ready to be passed to the YouTube node:
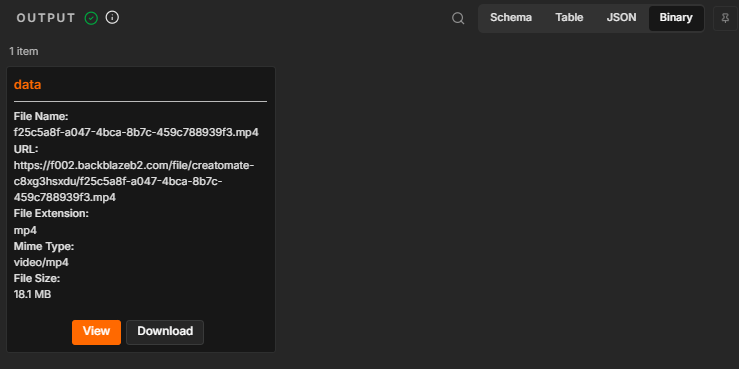
Next, add the YouTube node with the Upload a video action.
If you've used the YouTube node before, select your existing account. Otherwise, create a new credential by following n8n's Google OAuth instructions. If you're using a custom Google OAuth app in Testing mode, make sure the Google account you're connecting has been added as a test user.
Configure the node as follows:
- Resource -> Video
- Operation -> Upload
- Region Code -> Select a country or region to load the available video categories, such as US.
- Category Name or ID -> Choose the category that best fits your video, such as Entertainment.
- Input Binary Field -> data (this refers to the video file we just downloaded)
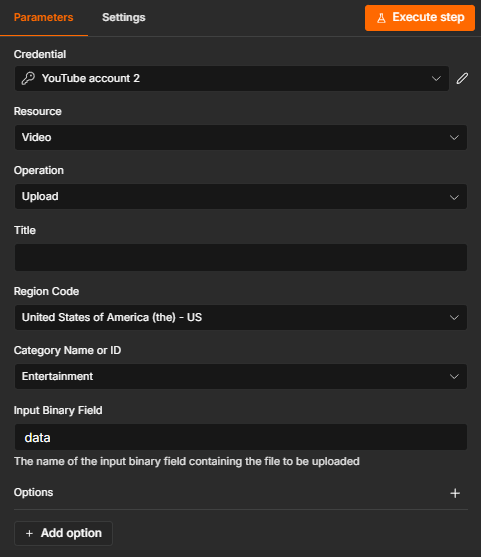
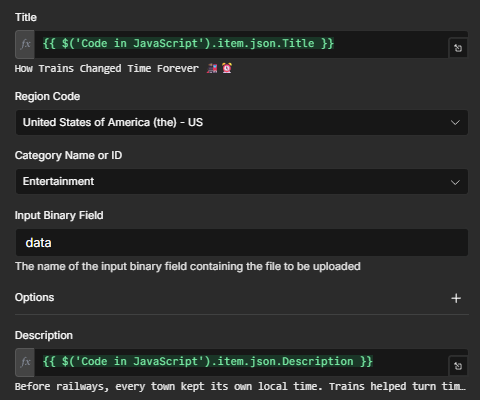
For the Title, enter: {{ $('Code in JavaScript').item.json.Title }}
Then click Add option, choose Description, and enter: {{ $('Code in JavaScript').item.json.Description }}
These expressions pull the title and description generated by ChatGPT from the Code node:
Tip: If you'd like to review the Short before it becomes publicly visible, add Privacy Status under Options and set it to Unlisted while testing. Once you're ready for future uploads to go live automatically, change it to Public.
Once everything is set up, click Execute step to test the upload.
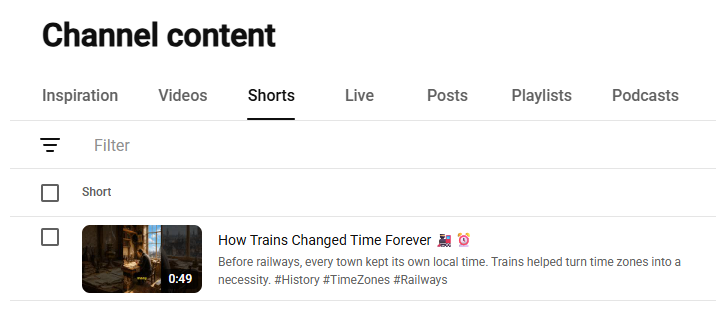
When you open the Content page in YouTube Studio, you should see the newly uploaded Short with the title and description written by ChatGPT:
The succeeded route is now ready.
7. Connect the remaining routes
In this final step, we'll send videos that are still being processed back for another status check, while failed renders will trigger an email notification.
Let's continue with videos that weren't ready during the first status check. Connect the being processed output of the Switch node back to the Wait node. This creates a loop: the workflow waits another 70 seconds, checks the video's status again, and sends it through the appropriate route. The loop stops as soon as the video either succeeds or fails:
Finally, let's handle videos that fail to render. This can happen for several reasons, such as an inaccessible image URL or a problem with a third-party integration. In such cases, it's important to be notified so you can resolve the issue.
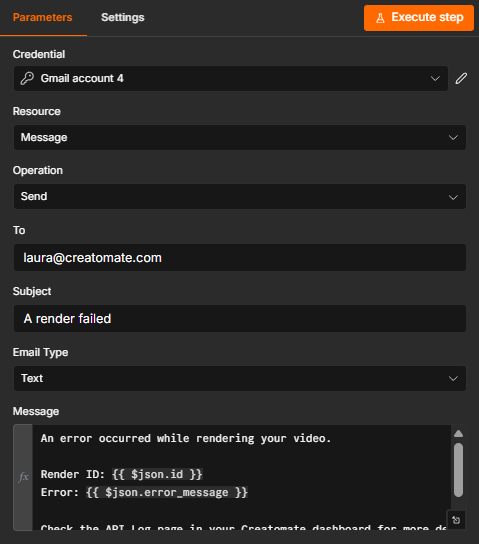
From the failed output of the Switch node, add a Gmail node with the Send a message action. You can use any other notification app you prefer.
Set the Subject to: A render failed
Set Email Type to Text so the notification keeps the line breaks shown below.
In the Message field, enter:
An error occurred while rendering your video.
Render ID: {{ $json.id }}
Error: {{ $json.error_message }}
Check the API Log page in your Creatomate dashboard for more details.
When a render follows the failed route, these expressions insert the render ID and error message returned by Creatomate.
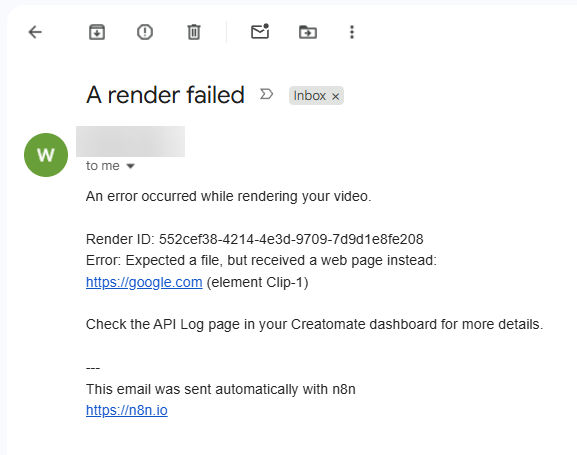
Because our current test video followed the succeeded route, the failed output has no data to pass to the Gmail node. To test the notification, we'll intentionally create a failed render.
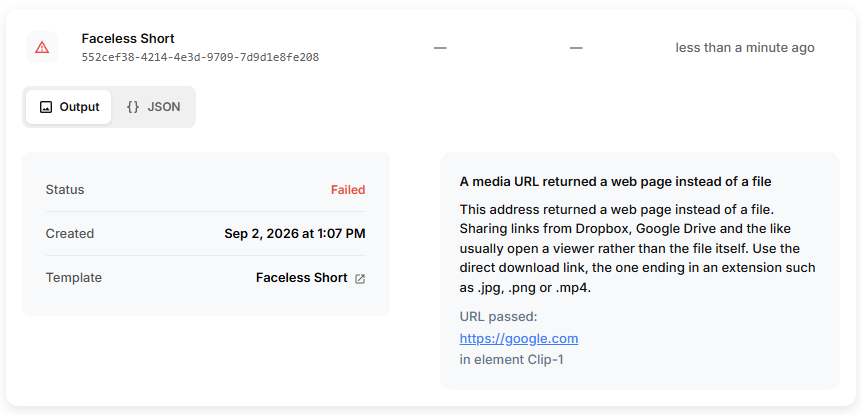
Return to the Edit Fields node and replace the Clip-1 URL with a webpage URL, such as https://google.com. Then click Execute workflow at the bottom of the canvas.
Because a webpage can't be used as an image, the render should follow the failed route. After the workflow checks its status, you should receive the notification email:
The API Log page will show the complete error message:
Once you've confirmed that the notification works, restore the original Clip-1 image URL.
That's it – your workflow can now turn a topic and a set of images into a complete faceless Short, monitor the render, and upload it to YouTube.
What's next for faceless Shorts with n8n
To run the workflow automatically, replace the manual trigger with a Schedule Trigger and choose how often you want it to run.
You'll also need a source that provides a new topic and new images for each video. For example, you could pull the next unused row from a spreadsheet, connect another content database, or add an AI image generator to create the visuals. Otherwise, the workflow will reuse the fixed topic and images from the Edit Fields node every time it runs.
Once you've tested the new setup, activate the workflow so the Schedule Trigger can run it automatically. Each time the workflow receives a new topic and set of images, ChatGPT writes the content, ElevenLabs creates the voiceover, Creatomate renders the video, and n8n sends it to your chosen destination.
If you'd prefer to review each video before it goes public, set the YouTube upload to Unlisted or save the finished file to Google Drive first.
Here are some tutorials to explore next:
- 🎙️ How to Create Videos with AI Voice Overs using n8n – pick a custom ElevenLabs voice and fine-tune the subtitle styling.
- 🎬 How to Automatically Create YouTube Shorts with n8n – the same pipeline, but using your own footage and voiceover files.
- ⚙️ How to Automate Video Creation with n8n – the fundamentals of Creatomate's n8n integration.
Related articles
Start automating today
Start with a full-featured trial with 50 credits, no credit card required.
Get started for free →