How to Create Videos with AI Voice Overs using n8n

Learn how to automatically generate AI voiceover videos with animated subtitles using ElevenLabs' text-to-speech API, n8n, and Creatomate.
In this step-by-step guide, I'll walk you through building an n8n workflow that automates the creation of videos with AI-generated voiceovers and animated subtitles. You'll learn how to connect ElevenLabs for voice generation with Creatomate for video production, and set up a simple system that automatically generates short-forms for social media.
By the end of this tutorial, you'll have created a short AI-voiced video – just like the example above – ready to upload to YouTube or use however you like.
Thinking of different types of video? No problem! Creatomate's online template editor lets you design videos tailored to your unique style, with fully customizable voices and animated subtitles.
Prerequisites
These are the tools we'll use:
- Creatomate: to create a template and generate videos.
- ElevenLabs: to choose an AI voice and produce the voiceovers.
- n8n: to set up the automated workflow.
- YouTube (optional): to share the generated videos on social media.
- Gmail (optional): to send a notification if something goes wrong.
Note: I'm just using YouTube and Gmail as an example. n8n supports thousands of apps, so feel free to use whatever works best for you.
How to auto-generate voiceover videos with n8n?
The first step is to create an ElevenLabs account, where you'll choose a voice for your voiceovers and generate an API key. After that, we'll connect ElevenLabs to Creatomate and set up a template that will serve as the foundation for all videos. In this template, we'll specify the voice we want to use and customize the styling and animations of the subtitles.
Once that's set up, we'll build a simple video automation workflow in n8n. As a demo, we'll use a manual trigger and an Edit Fields node to provide the content for the video. This includes the text for the voiceover, background images, and a title and description for posting. In real-world scenarios, you would use other apps to supply dynamic data for each video, such as Google Sheets or even AI tools like ChatGPT or DALL·E.
Next, we'll send an API request to Creatomate to generate the video. The voiceovers will be created first and inserted into the template. Creatomate's auto-transcription feature will then transcribe the voiceovers and generate subtitles. The images will also be added, and the template will be rendered into a final video.
The video creation process may take some time, so we'll have the workflow wait for a moment. After that, we'll check the video's status and handle it accordingly. Once the video is ready, I'll show you how to download the file and publish it as a YouTube Short. In case something goes wrong, I'll also show you how to send a notification via Gmail. Of course, you can replace these apps with the ones that work best for you.

Let's get started!
1. Set up ElevenLabs
In this step, we'll choose a voice for the voiceover and create an ElevenLabs API key, which we'll use to connect with Creatomate in the next step.
Go to ElevenLabs.io and sign up for a free account, or sign in if you already have one.
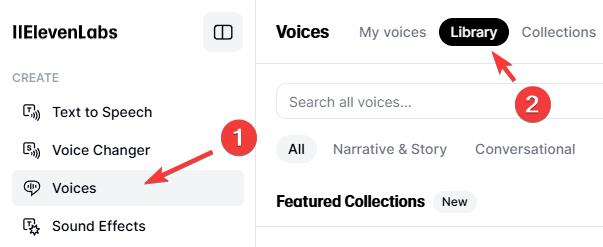
Once in the dashboard, click Voices, then go to Library:
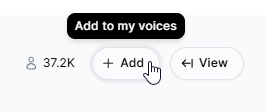
Here, you can choose any voice for your videos. Click Add to add one to your account:
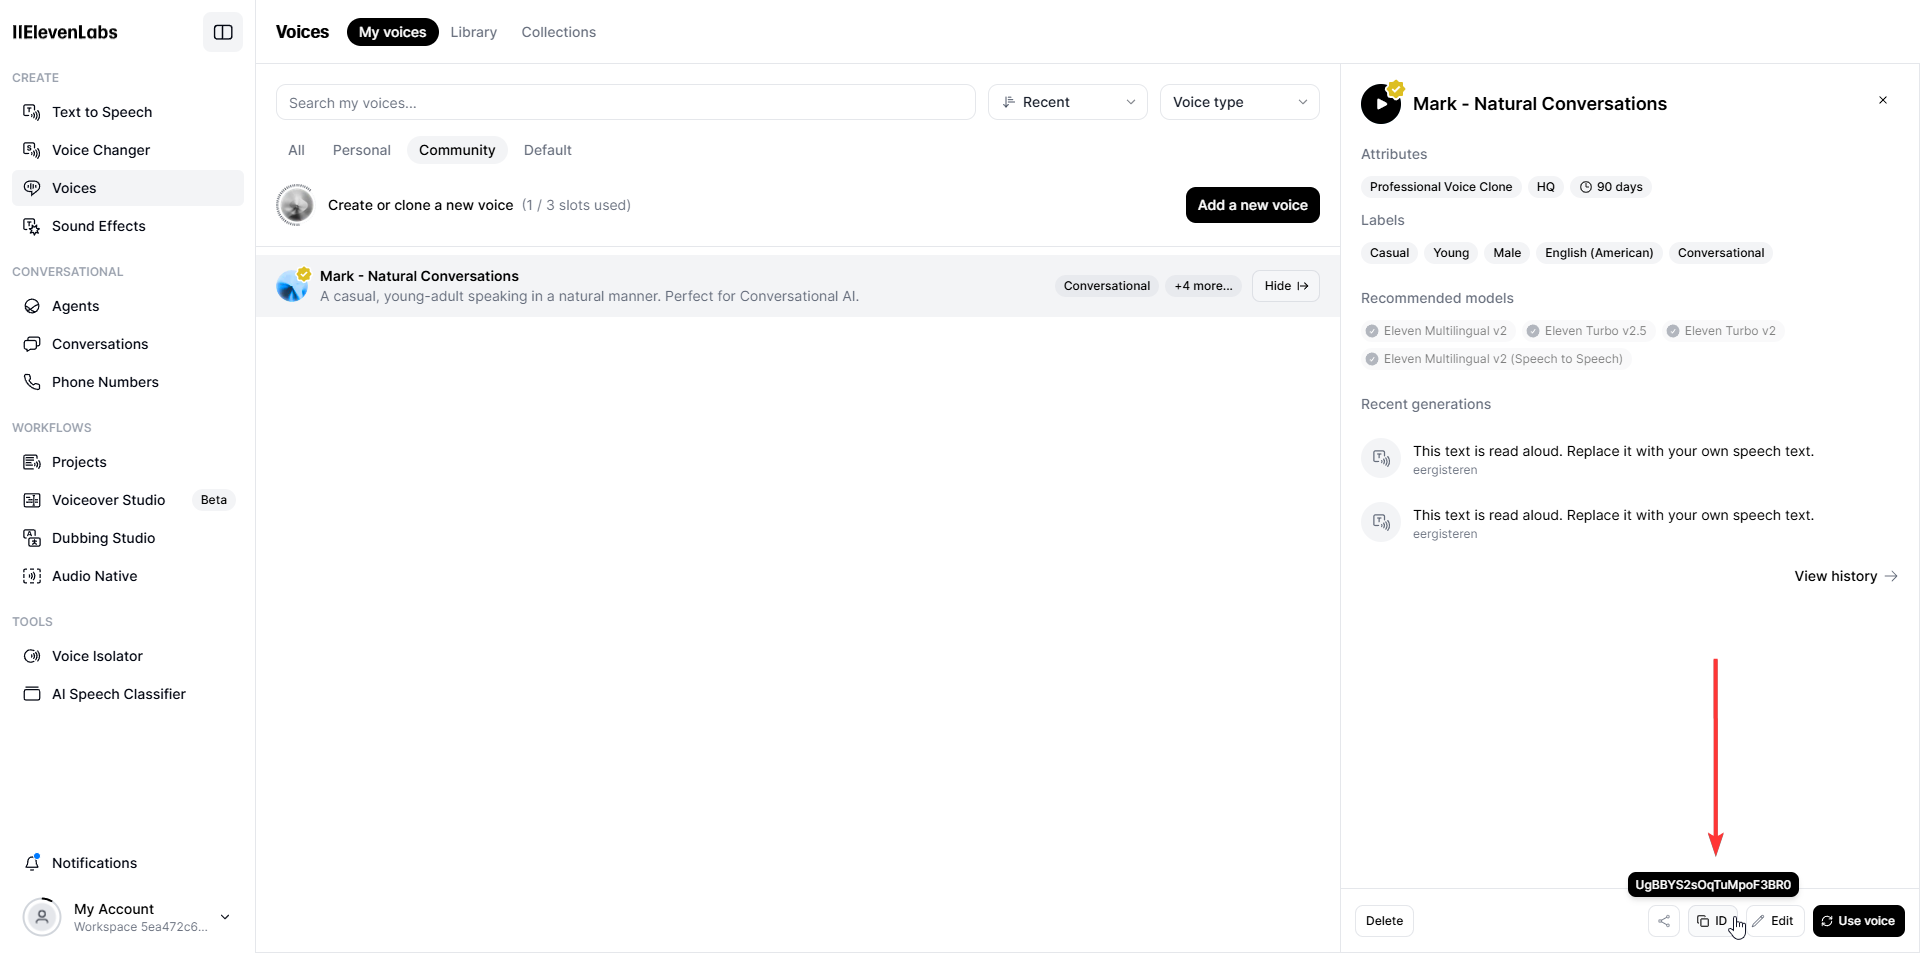
Switch back to My voices, and under the Community tab, you should see the voice you just added. To use this voice in your videos, you'll need its ID. To copy the voice ID, click View, then click the ID button at the bottom (click the screenshow below to open it in full screen):
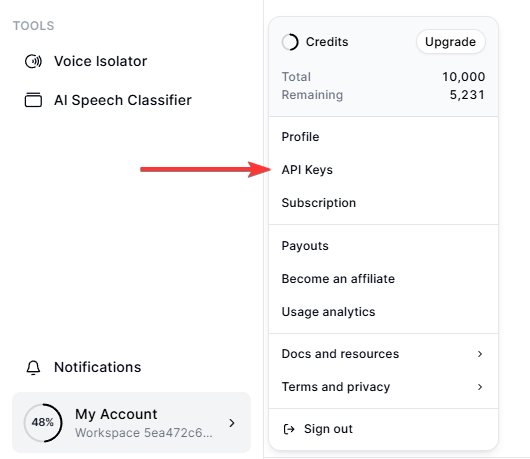
Next, click My Account in the bottom left corner and select API Keys. From there, you can create a new API key:
Now that you've chosen a voice and created an API key, it's time to move on to Creatomate.
2. Create a voiceover template in Creatomate
Log in to your Creatomate account or sign up for free if you don't have one yet.
Before we create a design for our videos, we need to connect to our ElevenLabs account. To do this, click ... in the top left, then choose Project Settings. Toggle the switch to enable the ElevenLabs integration, paste your API key, and click Confirm:
With this integration, Creatomate can send requests to your ElevenLabs account to generate voiceovers for your videos.
Next, let's create a template. Navigate to the Templates page and click New. For this tutorial, we'll use the Short-Form Voice Over template from the Voice Overs category. Choose a size for your videos, then click Create Template to open it in the editor:
Let me quickly explain how the template works and how we can use it in our automation process.
On the left side, you'll find all the elements that make up the video design. The template is divided into four scenes, each containing a voiceover, subtitle, and image element.
If you press the play button, you won't hear any voiceovers yet, and the subtitles will still be placeholders. That's because the AI-generated voiceovers will be created through the n8n workflow, and the subtitles will be generated afterwards.
Let's take a look at the voiceovers and subtitles using the first scene. The same concept applies to the 2nd, 3rd, and 4th scenes. So, if you make adjustments to the first composition, be sure to apply them to the other three compositions as well to keep the video consistent.
Select the Voiceover-1 element, then find the Audio property on the right. This is where you can customize the voiceover. The Provider is already set to ElevenLabs. For the Model, you can choose between four different text-to-speech models. In most cases, it's best to stick with Multilingual v2, as it offers excellent speech synthesis and supports many languages:
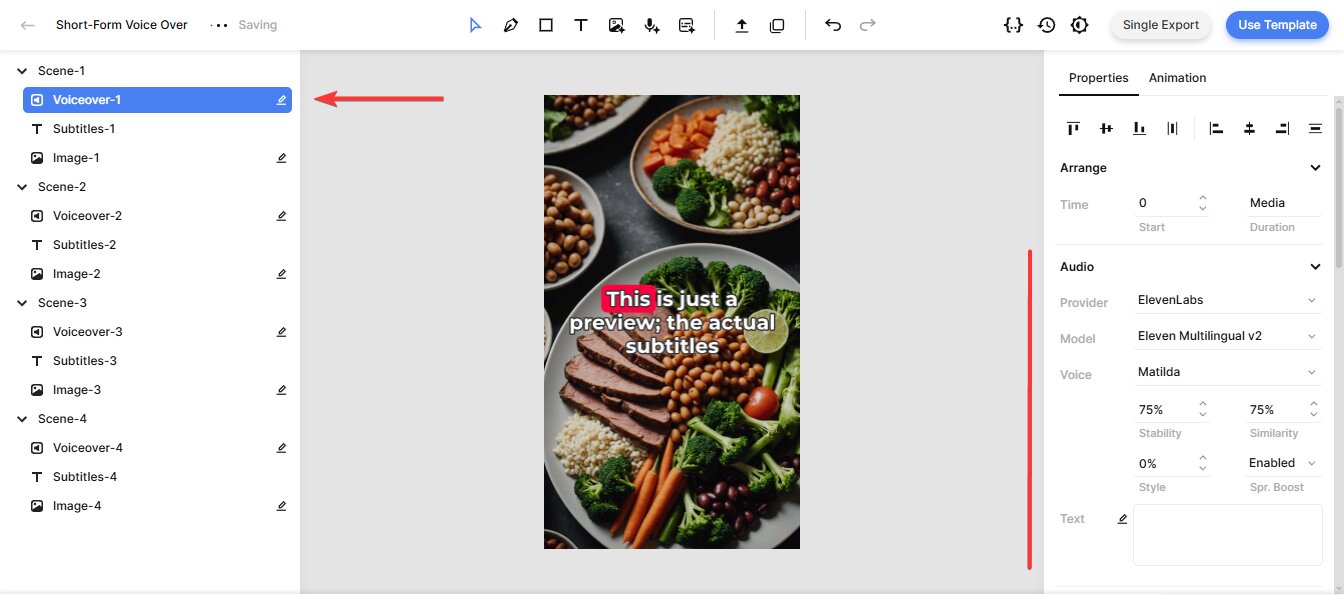
The Voice is set to Matilda by default, which is a premade voice from ElevenLabs. If you selected a different voice in the previous step, you can specify it here. To do this, click on Matilda, scroll up, click Custom Voice, replace the voice ID with the one from your chosen voice, and click OK:
You can also adjust parameters like Stability, Similarity, Style, and Speaker Boost. These settings allow you to fine-tune the voiceover generated by ElevenLabs. For example, the stability parameter controls the level of emotion and randomness in the voice. Unless you have a specific reason to change them, I recommend leaving these settings as they are, since the default values work well for most purposes. For more details on each setting, refer to ElevenLabs' Voice Settings documentation.
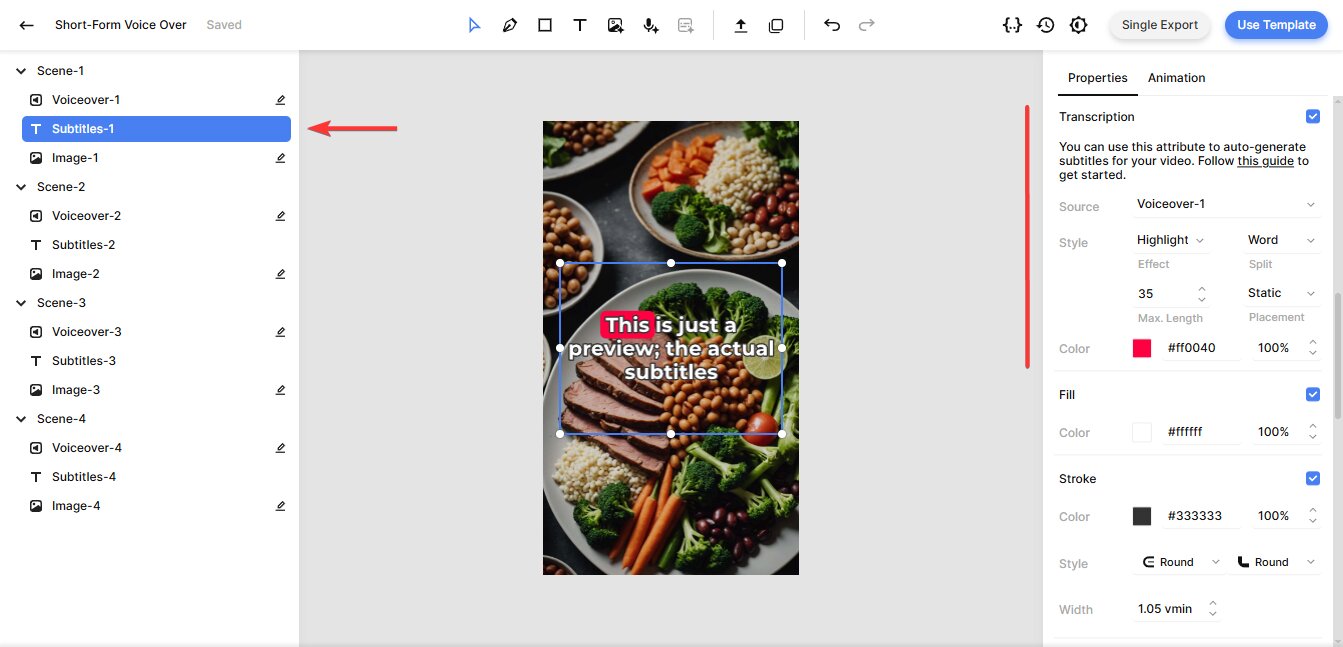
Next up, the subtitles. You don't need to make any changes here, but I want to explain how it works and where to find it if you'd like to adjust the subtitle style later.
Select the Subtitles-1 element and look for the Transcription property. The Source is set to Voiceover-1, which instructs Creatomate to transcribe that voiceover element and generate subtitles for it. The Style, Color, Fill, and Stroke properties let you further customize the look and feel of the subtitles. For example, if you want to display one word at a time – a style popular on YouTube, TikTok, and Instagram – set Max. Length to 1. The template shows a live preview, so feel free to experiment with these settings:
Lastly, for the image elements, all you need to know is that they are dynamic, meaning we can replace them with an image file provided through n8n:
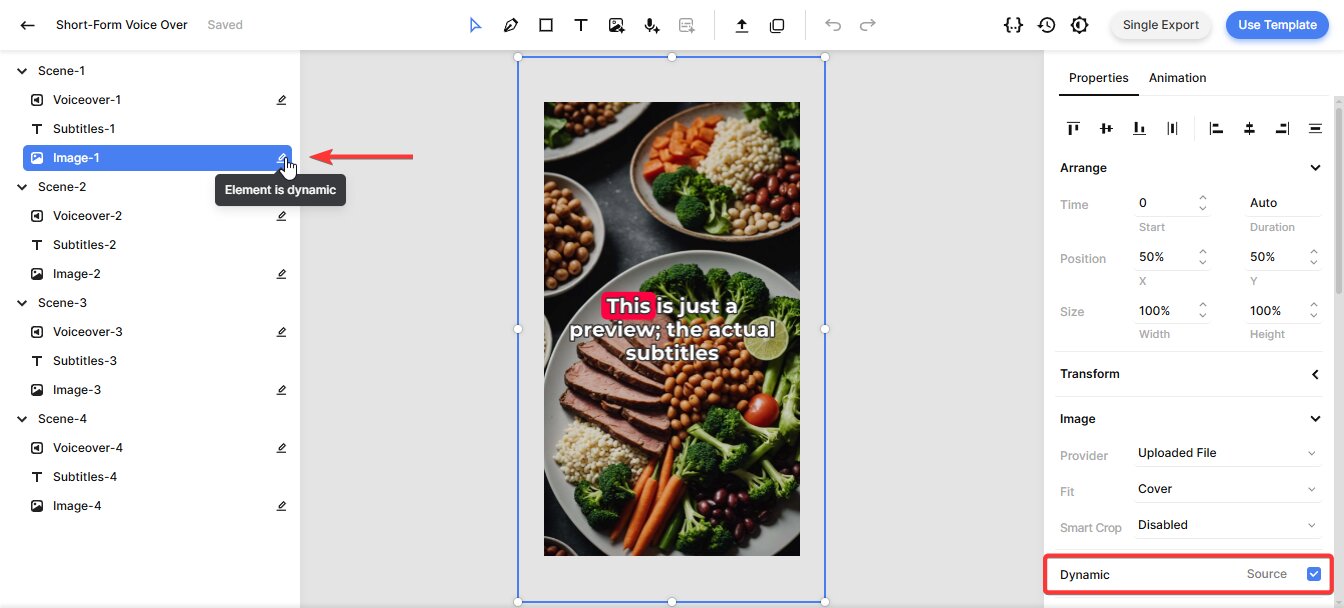
💡 AI tip: You can also use generative AI to create background visuals for your videos. Instead of providing an image file, just describe the visuals you want. Creatomate has native integration with DALL·E and Stable Diffusion, and you can set them up the same way we did with ElevenLabs.
That's everything you need to know about this template! We've covered the basics, but the editor offers many more customization options. If you want to explore further and fine-tune your video design, check out this quick guide.
Now that the template is set up, let's move on to n8n.
3. Add video content to your n8n workflow
The goal of this step is to provide text for the voiceovers along with images to use as video backgrounds. Since the video will be shared on social media, we'll also include a title and description.
To keep things simple, we'll use a manual trigger and an Edit Fields (Set) node. This is just for demonstration purposes. Once you understand the concept, you can replace them with any other app that fits your needs.
In your n8n dashboard, click Create Workflow.
Once you're in the canvas, click + to add the first step. Choose Trigger manually, and you'll see that the When clicking ‘Test workflow' trigger has been added:
Next, click + and search for the Edit Fields (Set) node.
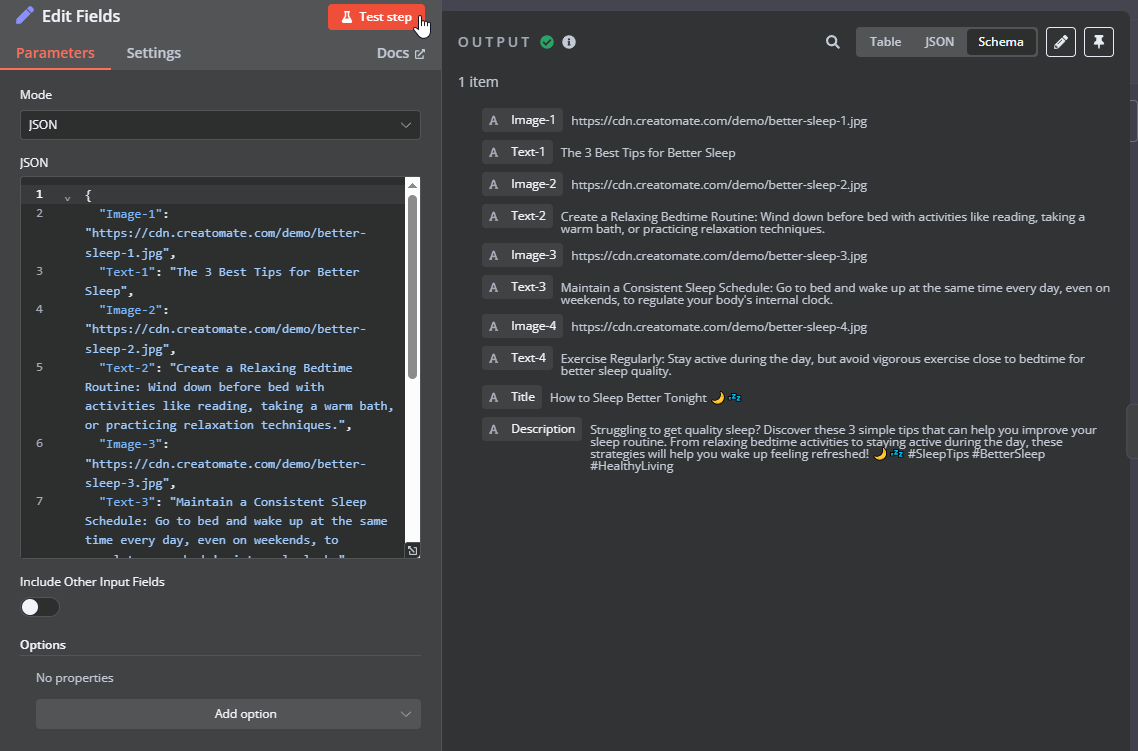
To add the sample content, set Mode to JSON and paste the following into the JSON field:
{

  "Image-1": "https://cdn.creatomate.com/demo/better-sleep-1.jpg",

  "Text-1": "The 3 Best Tips for Better Sleep",

  "Image-2": "https://cdn.creatomate.com/demo/better-sleep-2.jpg",

  "Text-2": "Create a Relaxing Bedtime Routine: Wind down before bed with activities like reading, taking a warm bath, or practicing relaxation techniques.",

  "Image-3": "https://cdn.creatomate.com/demo/better-sleep-3.jpg",

  "Text-3": "Maintain a Consistent Sleep Schedule: Go to bed and wake up at the same time every day, even on weekends, to regulate your body's internal clock.",

  "Image-4": "https://cdn.creatomate.com/demo/better-sleep-4.jpg",

  "Text-4": "Exercise Regularly: Stay active during the day, but avoid vigorous exercise close to bedtime for better sleep quality.",

  "Title": "How to Sleep Better Tonight 🌙💤",

  "Description": "Struggling to get quality sleep? Discover these 3 simple tips that can help you improve your sleep routine. From relaxing bedtime activities to staying active during the day, these strategies will help you wake up feeling refreshed! 🌙💤 #SleepTips #BetterSleep #HealthyLiving"

}
Then, click Test step to confirm it was added correctly:
4. Generate the video
In this step, we'll send an API request to Creatomate to generate a video.
Add an HTTP Request node. For easy setup, click Import cURL:
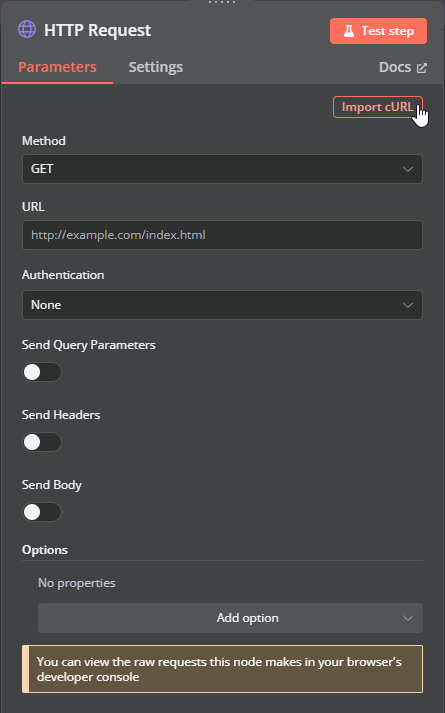
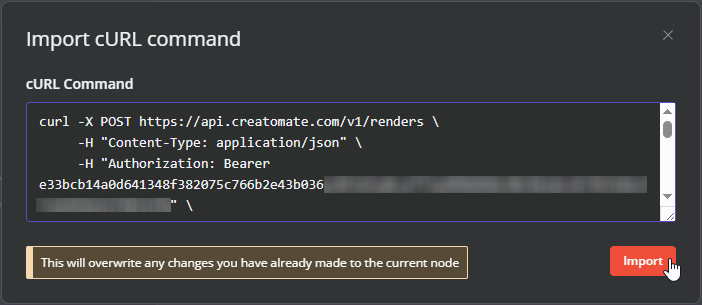
Go back to the template editor in Creatomate. In the top-right corner, click the Use Template button. Then, go to API Integration and copy the cURL command:
Paste it into n8n and click Import:
The node is almost set up – just one final step remains: mapping the test data to the video template. To do this, scroll down to the JSON script, switch to expression mode, and open it in full screen. Then, simply drag and drop the correct image and text items onto the corresponding elements:
Finally, click Test step to send the request to Creatomate.
In the output, you should see that the status is “planned”. This means Creatomate has accepted the request and will start processing it.
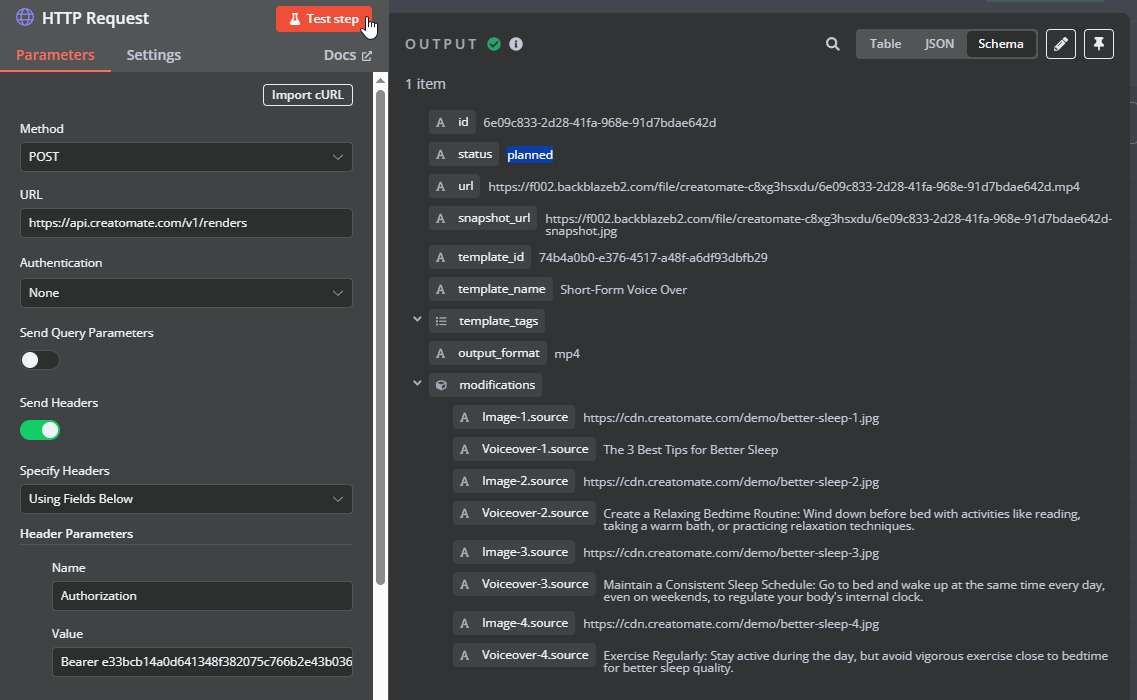
You'll also find a URL in the output. This is the link where you can access the video once it's ready. If you try to open it in your browser right now, you'll likely see a ‘Not Found' message. This means the video generation process is still ongoing.
The time it takes to generate a video depends on factors such as video length, template complexity, resolution, and third-party integrations (like ElevenLabs or DALL·E).
In the next step, we'll monitor its progress.
5. Wait for the video to complete
If the next node tries to use the URL before the video is ready, it may cause an error. To prevent this, we'll add a wait node to briefly pause the workflow. After that, we'll check the video's status and handle each possible outcome accordingly.
First, head over to the API Log page in your Creatomate dashboard. If everything worked well, you should see that the test video from the previous step has "succeeded". If not, just wait a moment. You can also see how long the video took to render. In my case, 38.36 seconds:
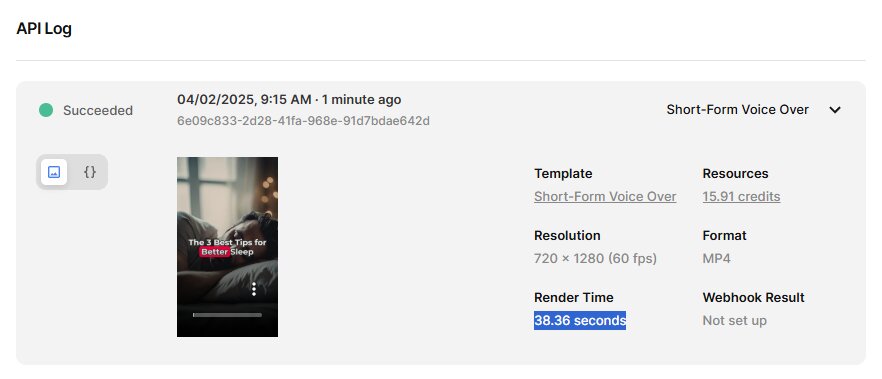
In n8n, add a Wait node and set it to 80 seconds (roughly double the render time):
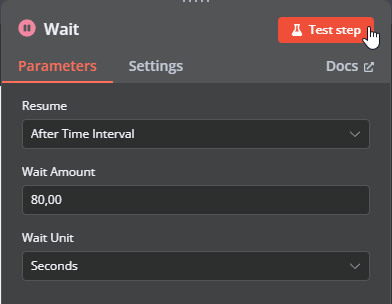
Click Test step and wait for it to complete.
Next, add another HTTP Request node.
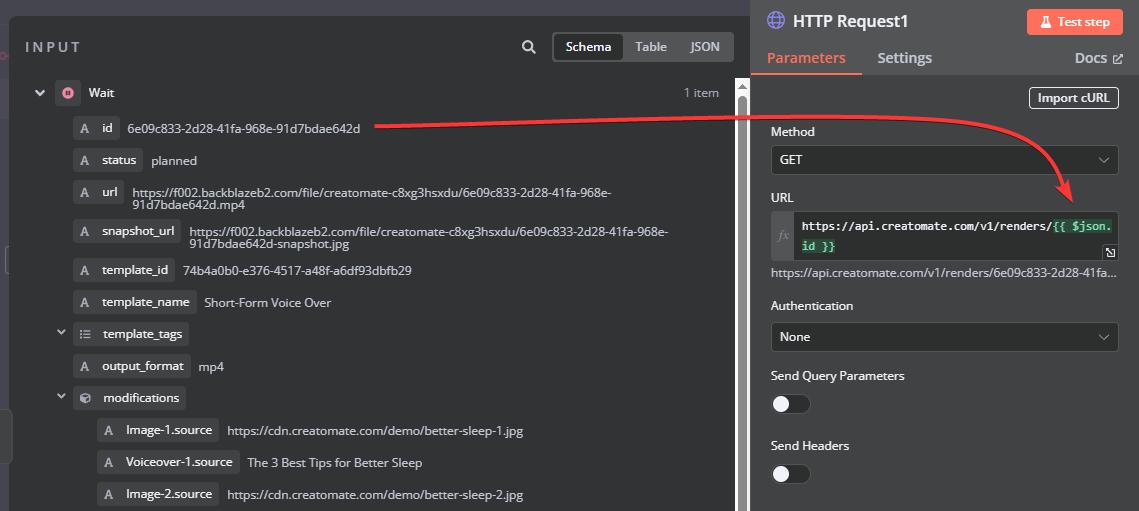
To set it up, select GET for the Method, and enter the following URL: https://api.creatomate.com/v1/renders/[ID]. Make sure to replace the [ID] placeholder with the 'id' value from the wait node, ensuring there are no spaces:
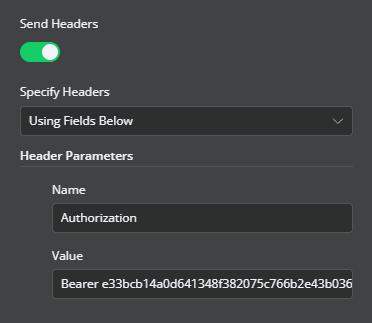
Also, toggle the switch to Send Headers. Name the header Authorization and paste your API key. You can find your API key on the API Integration page in Creatomate, where we previously copied the cURL command:
When you click Test step, the output should show that the video status is now "succeeded", meaning the video has fully rendered and is ready to use:
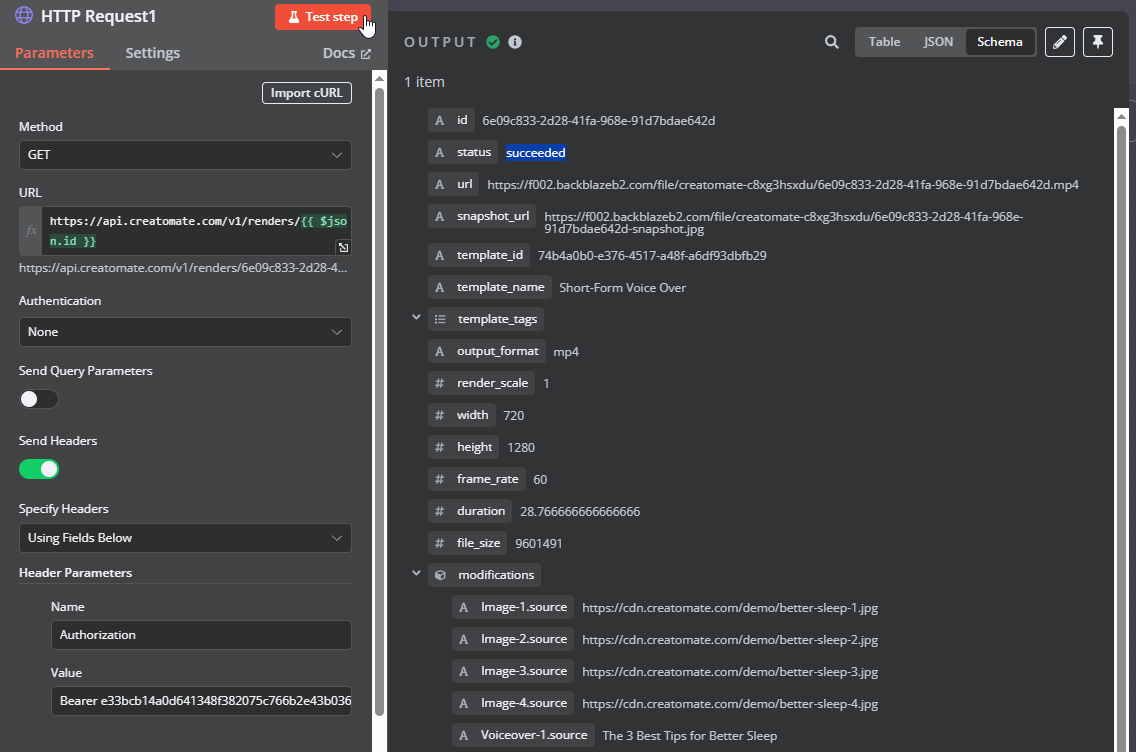
This is the desired outcome. However, sometimes a video takes longer to render, or an error occurs during the creation process. Therefore, we need a way to handle each video's status appropriately – whether it has succeeded, is still processing, or has failed.
To do this, add a Switch node.
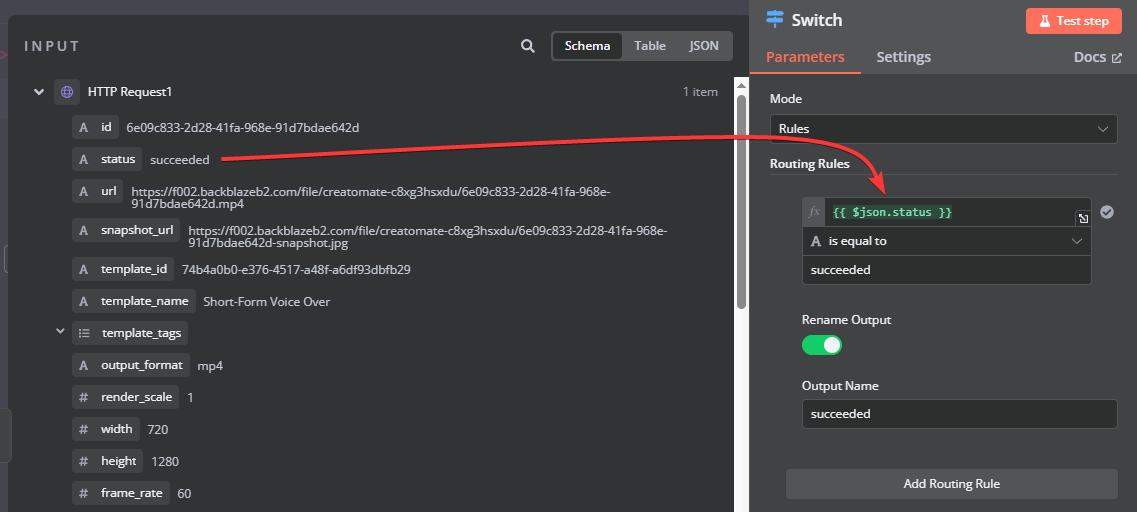
Let's start with successful renders. Create a routing rule where the ‘status' is equal to ‘succeeded', and rename the output to succeeded:
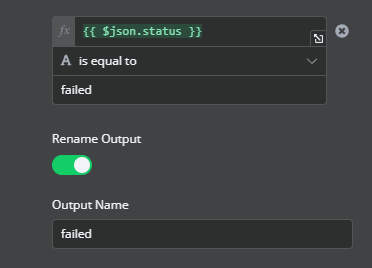
For failed renders, add a routing rule where ‘status' is equal to ‘failed' and rename the output to failed:
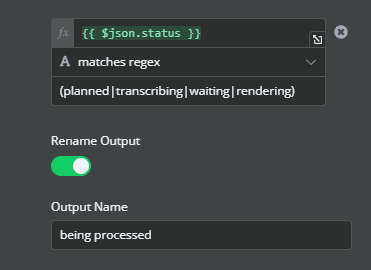
Finally, there are several statuses that indicate a video is still being processed. Since we want to handle these renders the same way, we can group them into a single route. Add another routing rule, select the ‘status', and set it to matches regex with the following values: (planned|transcribing|waiting|rendering). Then, rename the output to being processed:
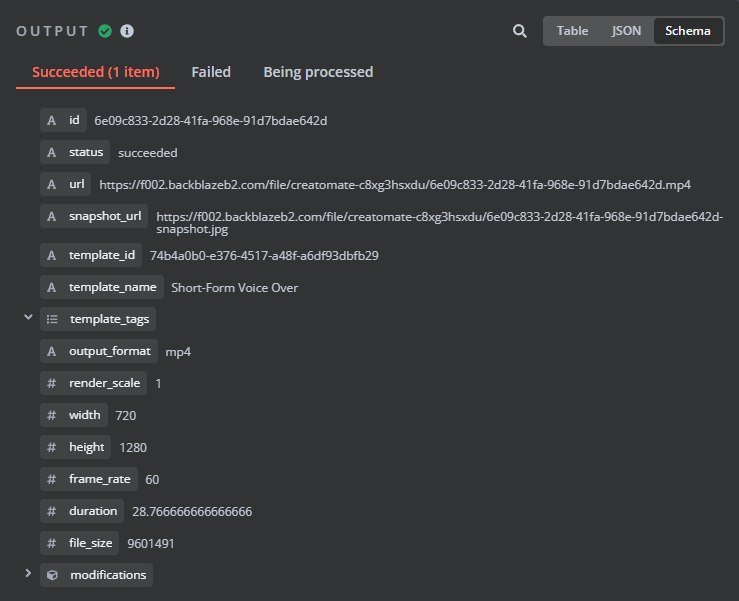
Once done, click Test step. You'll see that our test video moves to the “succeeded” branch:
In the next step, I'll show you how to use the generated video and explain how to handle both "failed" and "being processed" renders.
6. Use the voiceover video
Now that the video is ready, you can use it however you like. Feel free to use the app that works best for you. For this example, I'll show you how to upload it as a YouTube Short.
While some apps can work with the video URL, the YouTube node requires the actual video file, so we need to download the video first.
Note: If the node you want to use accepts the video link, you can skip this download step and use the URL directly.
Following the “succeeded” branch, add another HTTP Request node. Set the Method to GET and, for the URL, select the video link:
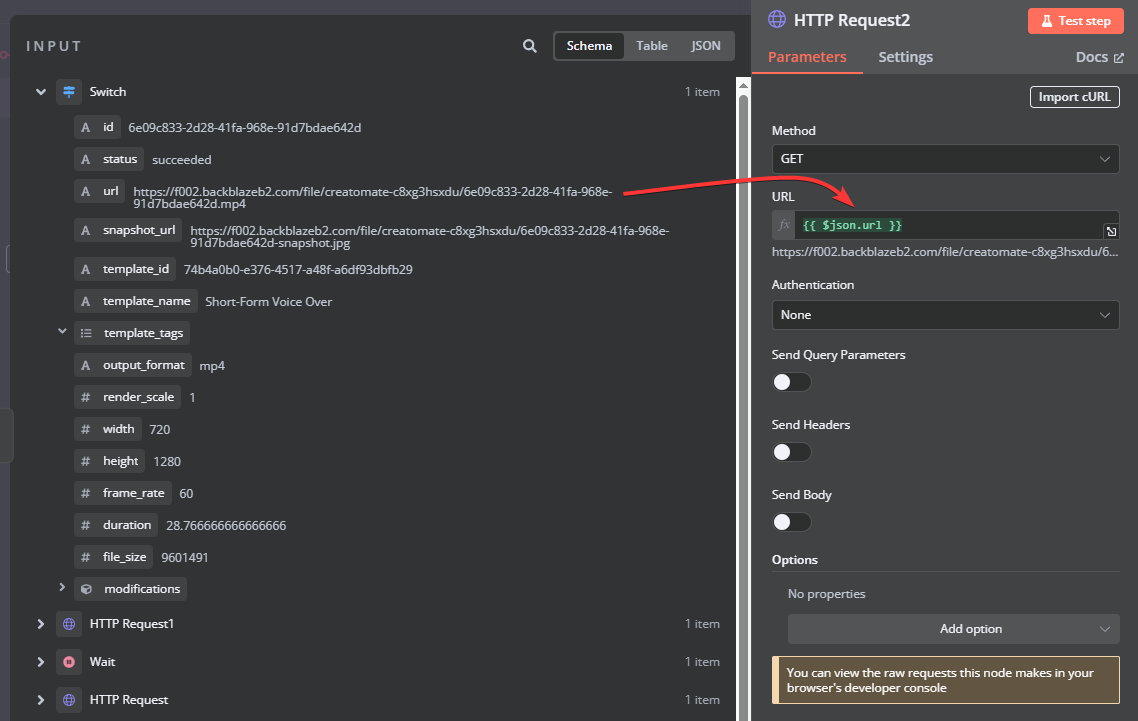
Click Test step to verify that the MP4 can be downloaded. You should see a data bundle in the output:
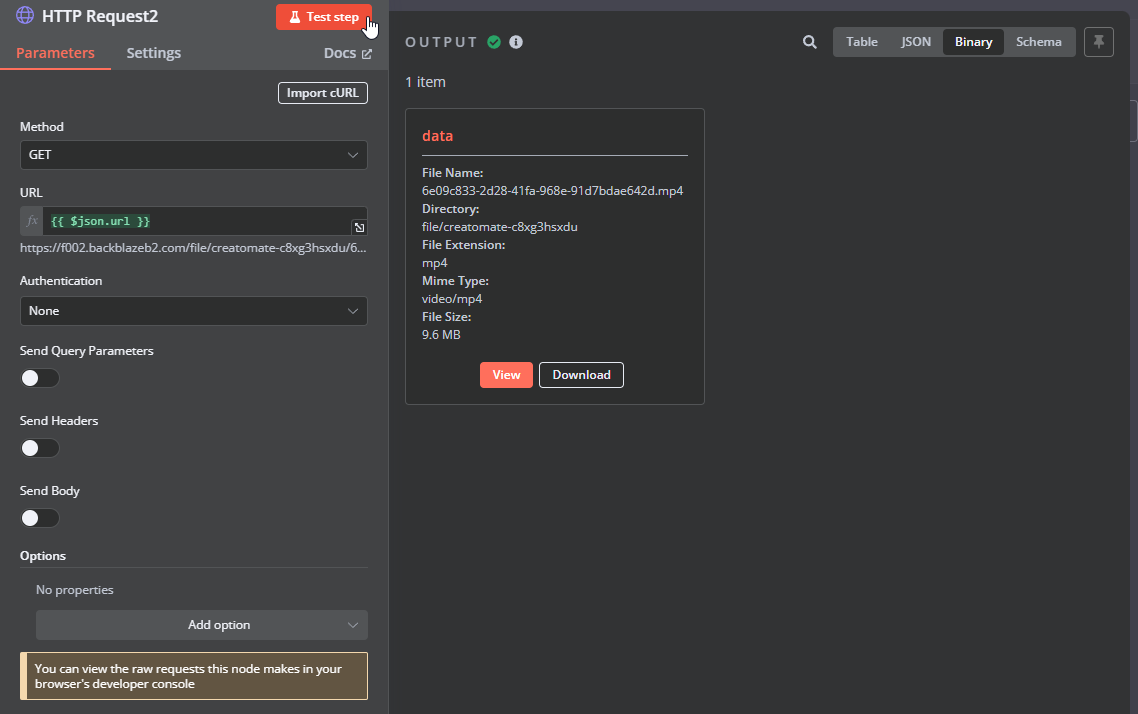
Next, add the YouTube node with the Upload a video action.
If you've used the YouTube node before, simply select your account. If this is the first time, you'll need to create a connection. Check out this n8n documentation page for instructions, and be sure to add yourself as a test user if you don't want to publish the app immediately.
Then, set up the node as follows:
- Resource -> Video
- Operation -> Upload
- Region Code -> Choose a country or region where your audience is based or where you want the video to be categorized (e.g., US).
- Category Name or ID -> Select a category that best fits your video's content (e.g., Entertainment).
- Input Binary Field -> data (this refers to the voiceover video we just downloaded)
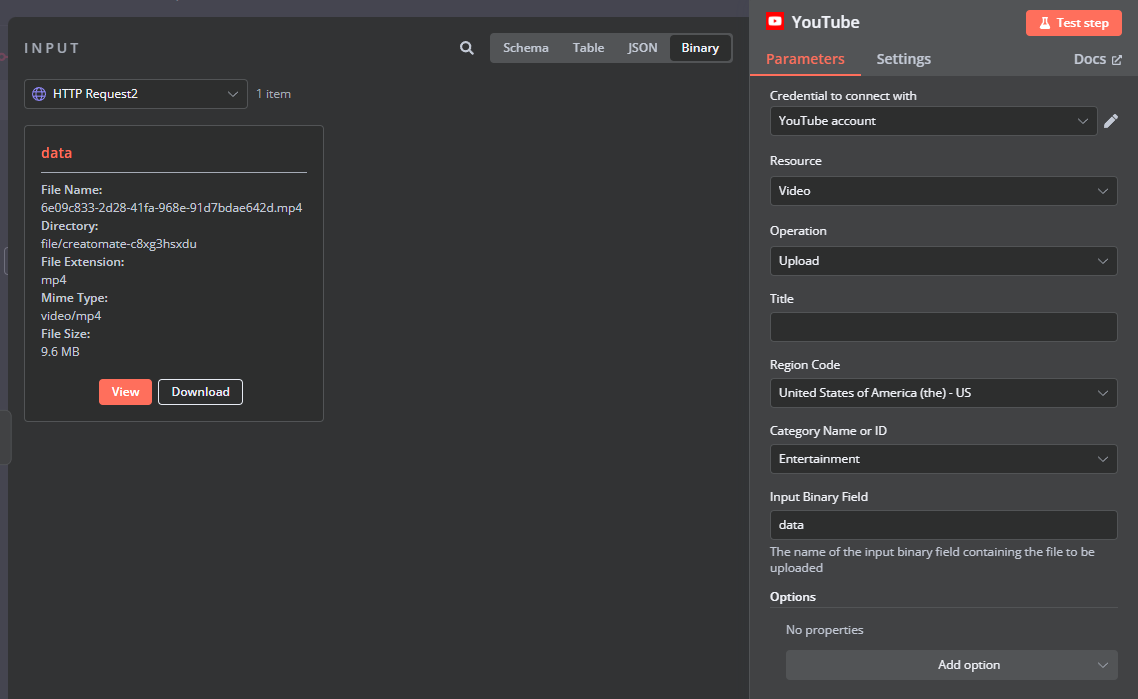
To add a Title, switch the input data to Schema and select Edit Fields -> Title.
If you'd like to add a description as well, click Add option, choose Description, and then map Edit Fields -> Description:
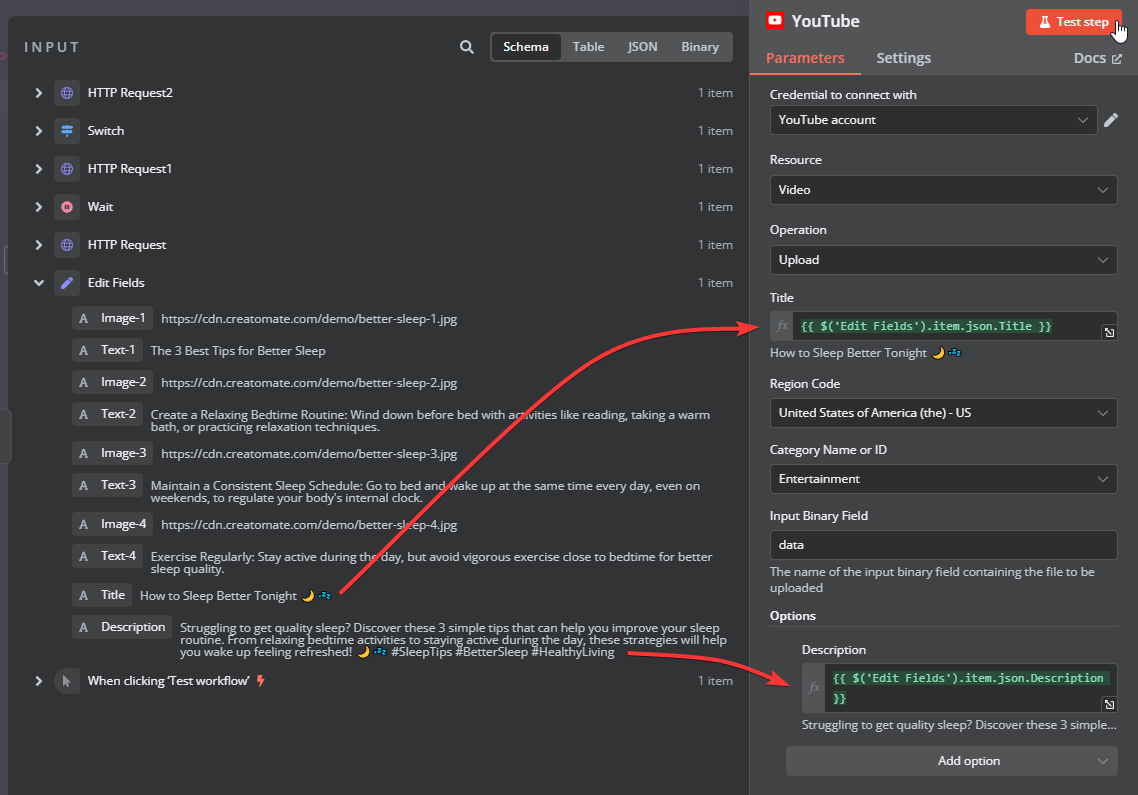
Once everything is set up, click Test step to see if it works.
When I check my YouTube channel's content page, I see that the Short has been successfully published:
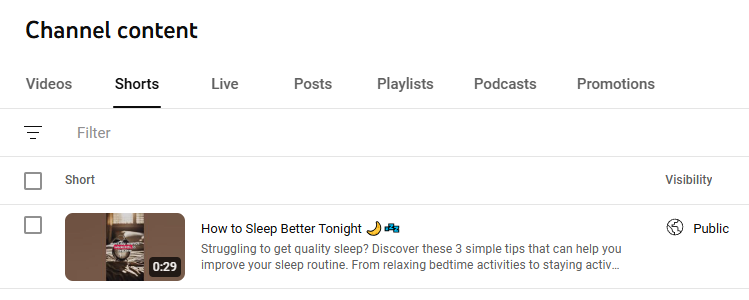
Did it work for you as well? Awesome!
Let's continue with the renders that weren't fully generated during the first check. By connecting the “being processed” branch to the wait node, the workflow will keep checking the video status until it either succeeds or fails:
Finally, let's discuss failed renders. A video may fail to render for several reasons. In such cases, it's important to be notified so you can resolve the issue. In this example, I'm using Gmail to send a message, but feel free to use any app that works best for you.
Let's set up a notification like this:
An error has occurred rendering your video. Check the API Log page in your Creatomate dashboard for more details.
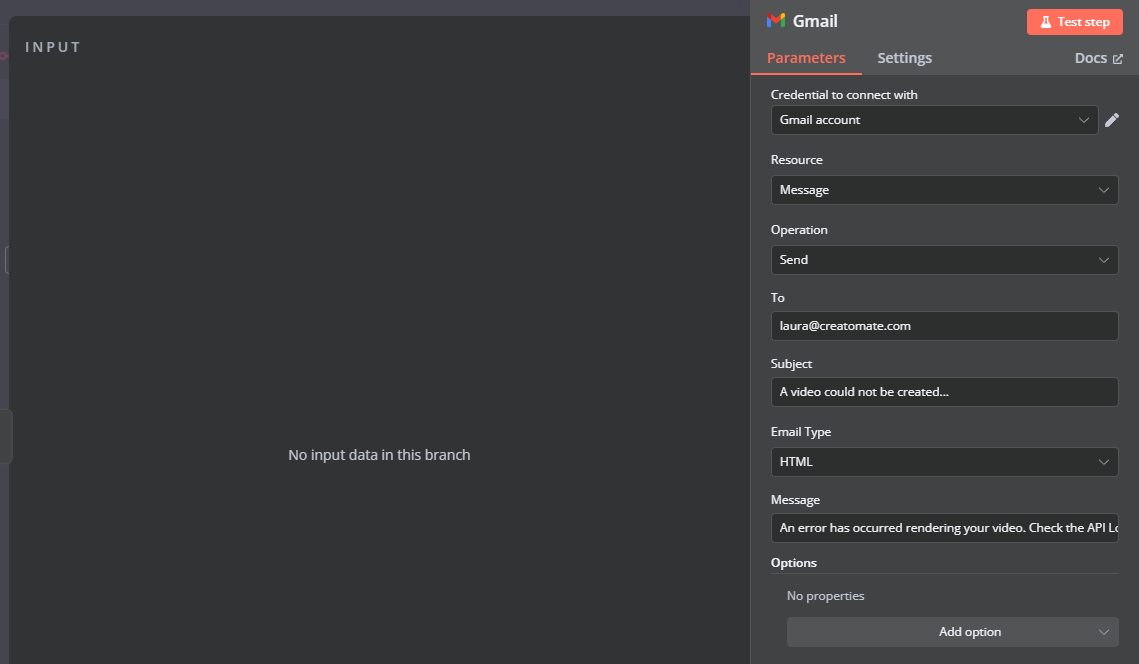
Since the video we created earlier went through the “succeeded” branch, there won't be any input data available. As a result, no email will be sent when we test this step.
To verify that the notification step is set up correctly, we can intentionally create a failed render.
In the Edit Fields node, replace the Image-1 value with a webpage URL, such as https://google.com:
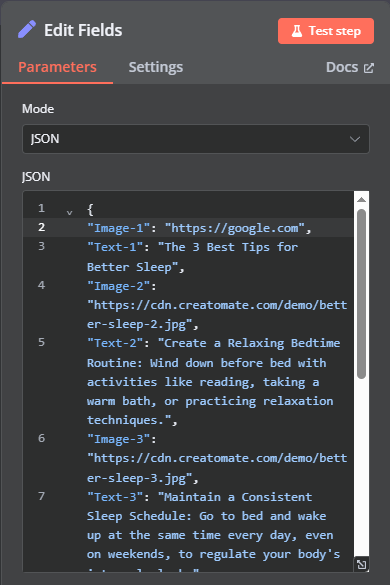
Now, click the Test workflow button at the bottom of the canvas.
Since a webpage can't be used for an image, this render will follow the “failed” route, and you should receive a notification email in your inbox:
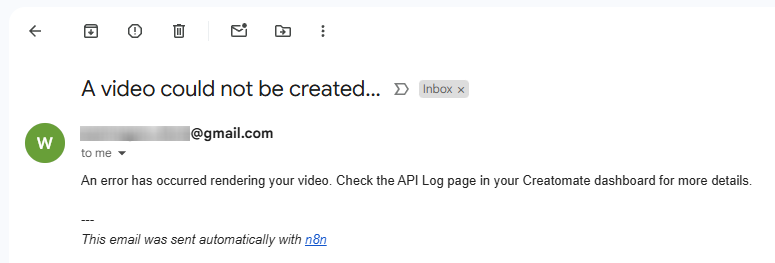
On the API Log page, you'll find the error message:

And that's it!
What's next for video creation with n8n
Now that you've learned how to use ElevenLabs to turn text into AI-generated voiceovers and create videos with animated subtitles using Creatomate, you're ready to take it further. To keep things simple, we used a manual method to provide video content, but now that you understand the process, you can integrate apps that best fit your needs.
The same goes for how you use the final video – besides sharing it on YouTube, you can also send it via email, upload it to cloud storage, or distribute it however you prefer.
If you're interested in generative AI, you can get even more creative by using ChatGPT to generate video scripts, including image prompts for tools like DALL·E. Just enter a topic, and within minutes, you'll have a short video with AI-generated voiceovers, visuals, and subtitles, ready to post on social media. This tutorial walks you through the process using Make.com, but the same steps apply to n8n workflows.