How To Auto-Create Real Estate Listing Videos Using Zapier

Learn how to automatically generate real estate videos from property listing data to share on social media using Zapier, Google Sheets, and Creatomate.
In the world of real estate, social media has become an increasingly important platform for attracting potential buyers. Short videos showcasing a property's images and features improve engagement and lead to more sales. However, creating and posting videos for each listing can be a time-consuming process for busy real estate agents. The good news is, automation is now available to streamline the process.
Creatomate, a video automation platform, allows real estate agents to automate and scale video production using both code and no-code tools. With reusable templates, unique social media videos can be automatically generated for every listing. In this tutorial, you'll learn how to set up an automated workflow in Zapier that takes property listing data from Google Sheets, generates a video using Creatomate, and posts it to Facebook Pages. Plus, with a gallery of ready-made templates and a video editor, you can create your own automated real estate templates.
Prerequisites
Here are the tools we'll use:
- Creatomate: to create a template and generate listing videos. Sign up for free.
- Zapier: to set up the automated workflow.
- Google Sheets: to store information about the property listings.
- Facebook Pages: to share the videos with your followers.
Note: In this tutorial, we'll be using Google Sheets to store property listing information. However, any application will work. Feel free to use a tool that works for you.
How to generate real estate listing videos with Zapier?
The first step is to create a video listing template in Creatomate. This design will serve as the foundation for our real estate videos. Next, we'll set up a Zapier workflow. It will trigger when new spreadsheet rows with property listing data are added to Google Sheets. Creatomate will then generate a video with this data. Once it's ready, the video will be posted on your Facebook Page. Here's what our Zap will look like:
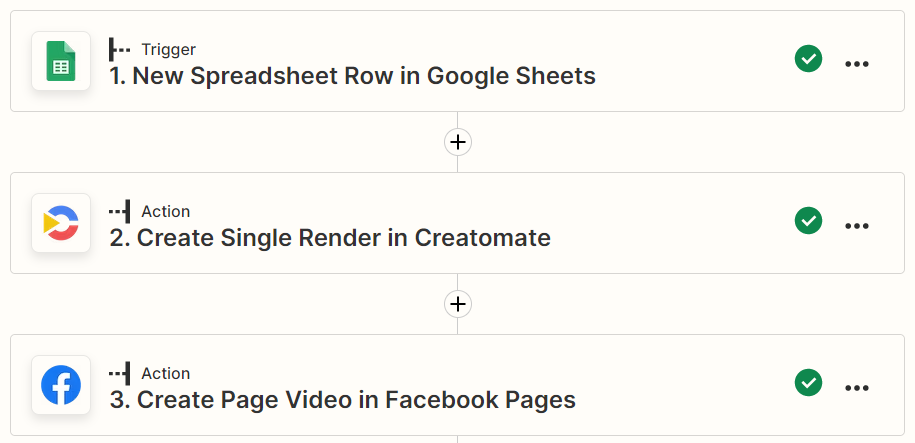
Tip: Through Zapier's no-code platform and integrations with thousands of apps, you can create a completely customized workflow that meets your needs. As an example, you could post videos automatically to Twitter and YouTube too, which can be done by adding the action Create Tweet in Twitter or Upload Video in YouTube. Check out this tutorial for step-by-step instructions.
Now let's get started!
1. Create a video listing template
Log in to your Creatomate account, navigate to the Templates page and click + New. From the template gallery, you can pick any template you like or design your own from scratch. But for this tutorial, let's use the Real Estate Detailed template from the Real Estate category. Let's go with 1:1 Square for now, but you can pick any size according to the videos you want to post. Click Create Template to open it in the editor:
Now let's take a look at the left side panel. Here we can find the elements that make up the template. It's important to know that elements can be marked as dynamic. In our template, the address, details, photos and realtor information are all dynamic. This allows us to dynamically replace its content through Zapier.
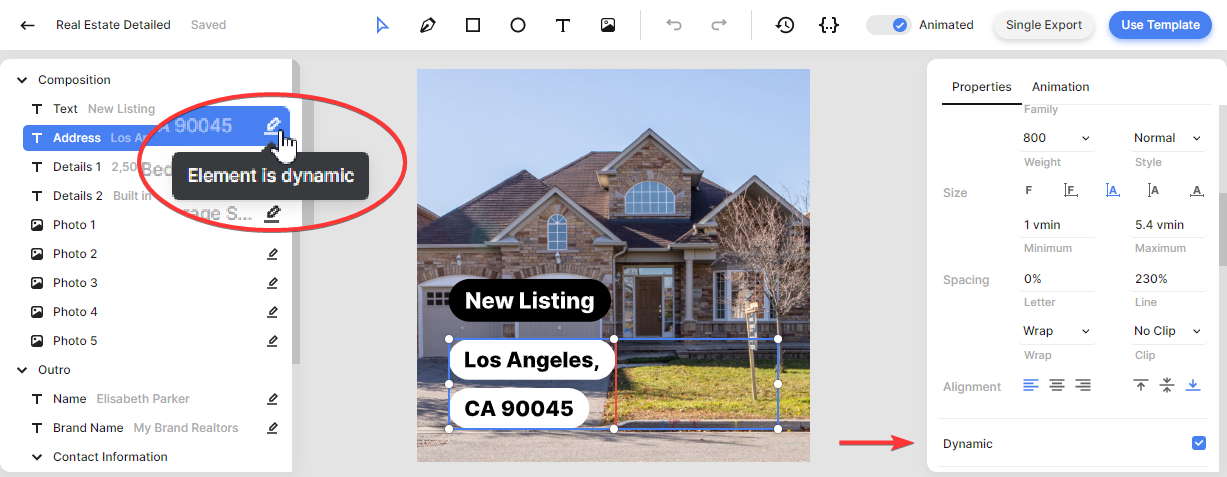
You can make an element dynamic by selecting it and checking the Dynamic property from the right side panel, as shown above.
To keep things simple, I'm using the template as is, but you can customize it however you want. Let's move on to the next step: setting up our Zap.
2. Add trigger: New Spreadsheet Row in Google Sheets
Below is the structure of the Google Sheets spreadsheet that we will be using. Each column is named after a dynamic element in the template. Additionally, I added a column in which we can write the social media post:

Tip: If you'd rather use Airtable, Google Forms, or any other app to provide the listing details, go for it!
Log in to your Zapier account and click + Create Zap. Search for the Google Sheets app and select the New Spreadsheet Row event. Continue by selecting your account or signing in first.
On the Trigger page, select your Spreadsheet and Worksheet. Then, click Continue:
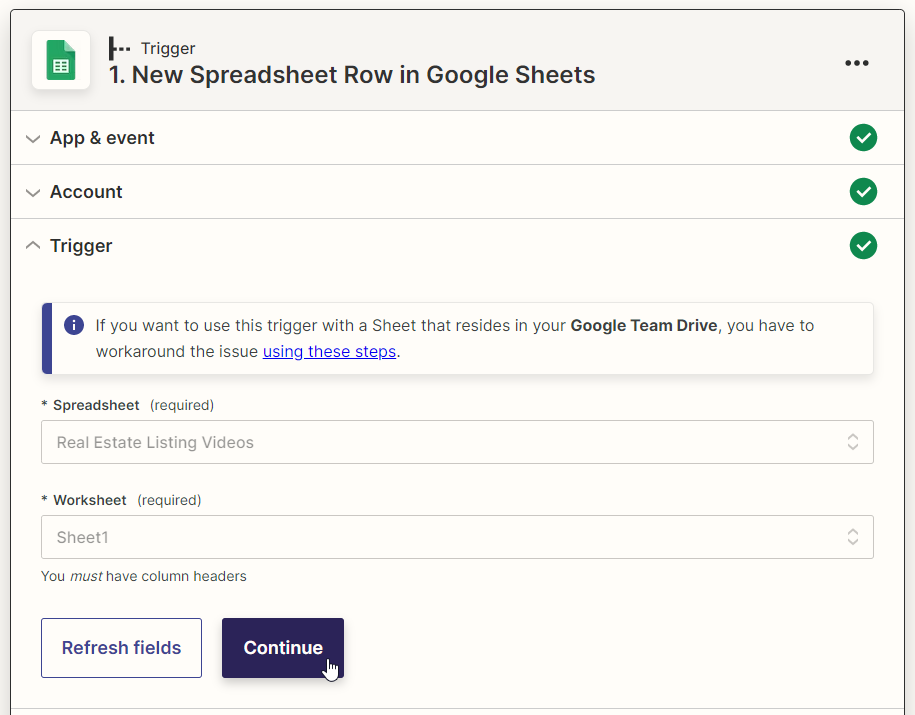
Click Test trigger on the Test page to make sure Zapier can find a row. When the test is successful, click Continue and move on to the next step.
3. Add action: Create Single Render in Creatomate
Search for the Creatomate app and select the Create Single Render event. Continue by selecting your account or signing in with your project's API key first. Then, click Continue.
On the Action page, select your Real Estate Detailed template in the Template field first:
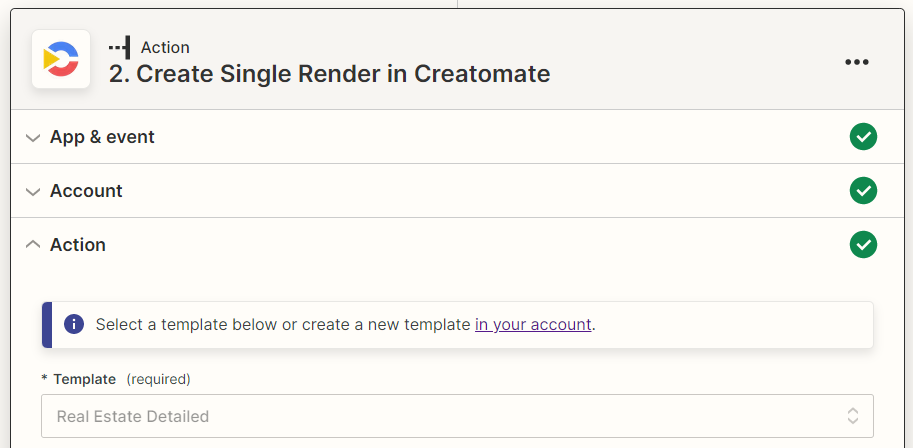
Once we select the template, Zapier will automatically detect the dynamic elements within that template and list them under Modifications. Data can now be mapped to these fields, enabling the video to be populated with data from any previous Zap steps. Here's an example:
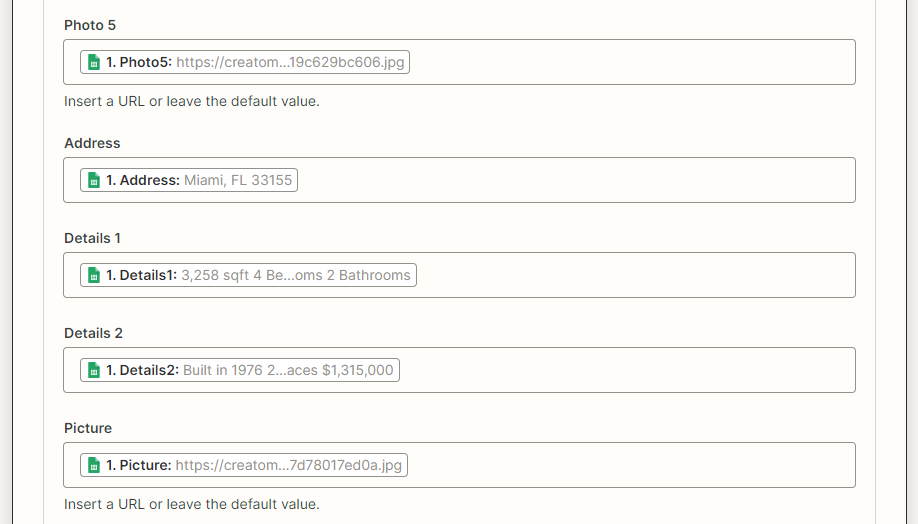
When done, click Continue.
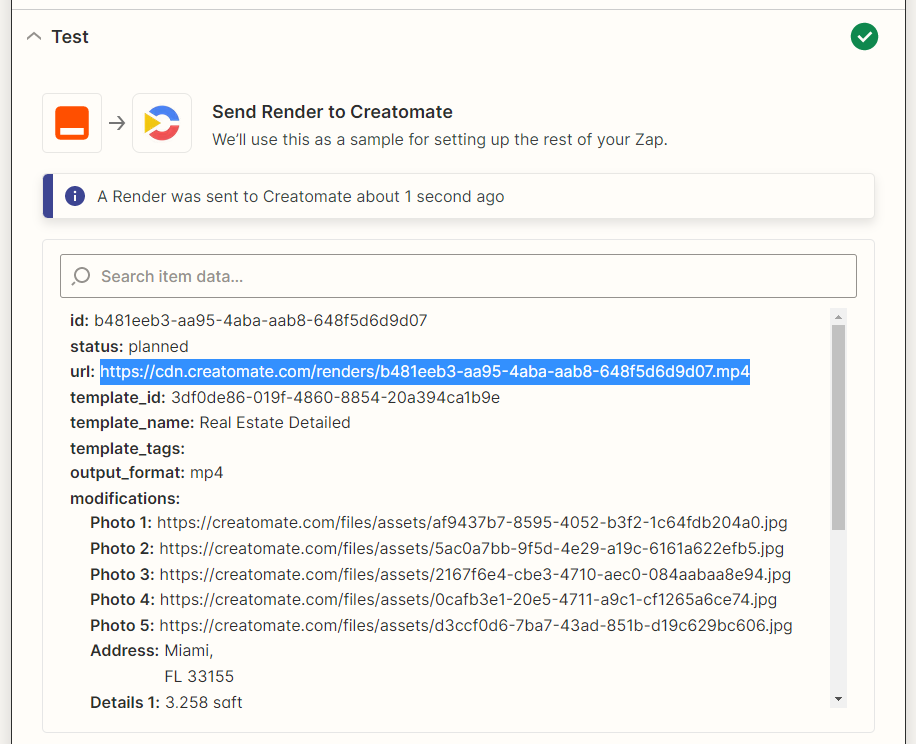
Click Test step on the Test page to verify that it is working. At this point, Creatomate is creating the video based on the template selected and the data provided. It may take some time for this process to complete, so please wait a minute before visiting the given URL. Simply reload the page if you get a Not Found message. This will only happen during testing, because once the Zap is live, the workflow will wait until the video finishes before moving onto the next step.
4. Add action: Create Page Video in Facebook Pages
Click +, search for the Facebook Pages app, and select the Create Page Video event. Continue by selecting your account or signing in first.
On the Action page, select your Page first. Then, add the video to your post by selecting Creatomate -> Url in the Video field. In the Description field, you can select Google Sheets -> Post to add your message. This is also where you can link to other data from previous Zap steps. When done, click Continue:
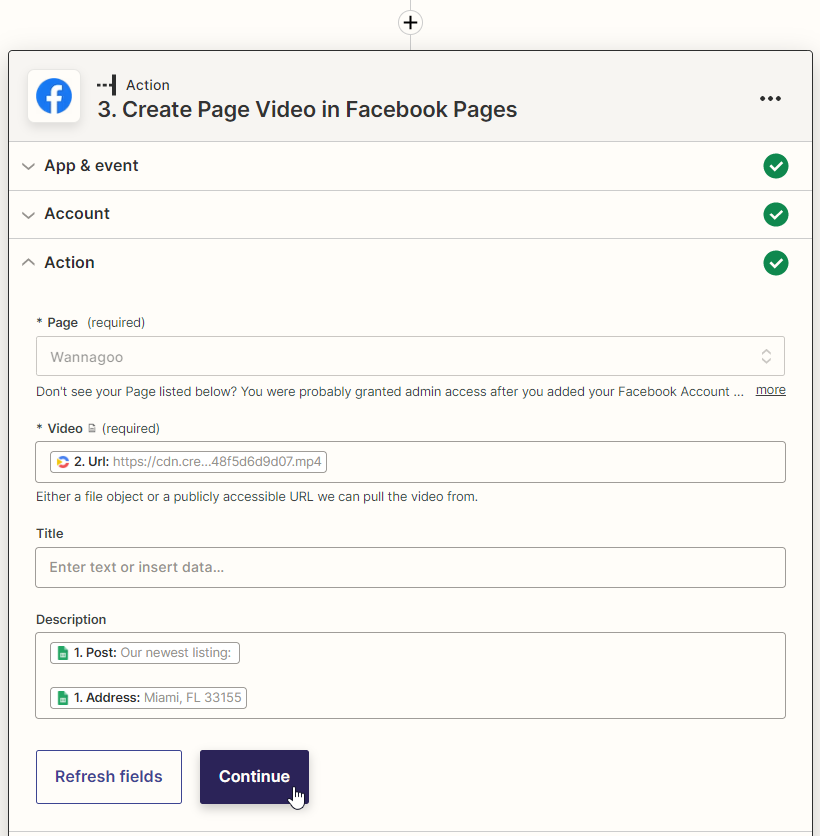
Click Test step on the Test page to post the video on your Facebook Page. The post will be published immediately, so if you've used some test data, you may want to delete it afterwards:
Last but not least, click Publish Zap to activate your workflow.
Wrapping up
In conclusion, automating your real estate video marketing workflow has never been easier thanks to video automation. With just four simple steps, you can create an efficient system for promoting your properties on social media.
Automating your social media marketing will allow you to continue to enjoy the benefits of social media marketing while focusing on other important aspects of your business.
Next, check out this guide where we explore an alternative method of scaling real estate videos without Zapier.