How to Automatically Create Animated GIFs using Zapier

This no-code tutorial shows how to automate GIF creation with Zapier and Creatomate to generate dynamic or personalized GIFs.
The GIF format is as old as the internet. They'll work on just about anything. Since most email clients do not support modern video formats - including Gmail - it is the only reliable method of embedding videos into emails (although technically, they are images).
While they are not used as frequently on the web anymore, GIFs remain extremely popular for email marketing due to their compatibility. An example of this is the use of personalized email marketing, in which a unique GIF is generated for each recipient.
The goal of this tutorial is to show you how to generate dynamic GIFs with a no-code tool like Zapier. But as Zapier supports thousands of apps, you can generate GIFs for whatever purpose you want. Just follow these steps and customize them to your needs.
The following is an example of the GIF we are going to create, but you should also check out the template editor to see how easy it is to create your own designs.
Don't use Zapier? Check out this Make tutorial or this tutorial to create videos and GIFs in bulk using a spreadsheet.
Prerequisites
These are the tools we'll use:
- Creatomate: to automatically generate the animated GIFs. Sign up for free.
- Zapier: to set up the automated workflow.
- A trigger app, like Airtable: to provide input images and text for the GIFs.
- An action app, like Email by Zapier: to use the GIFs in your marketing.
For the purpose of this tutorial, I'm going to set up a simple workflow with Airtable and Email by Zapier. Feel free to adapt it to your needs by setting up a workflow that works for you.
How to create GIFs with Zapier?
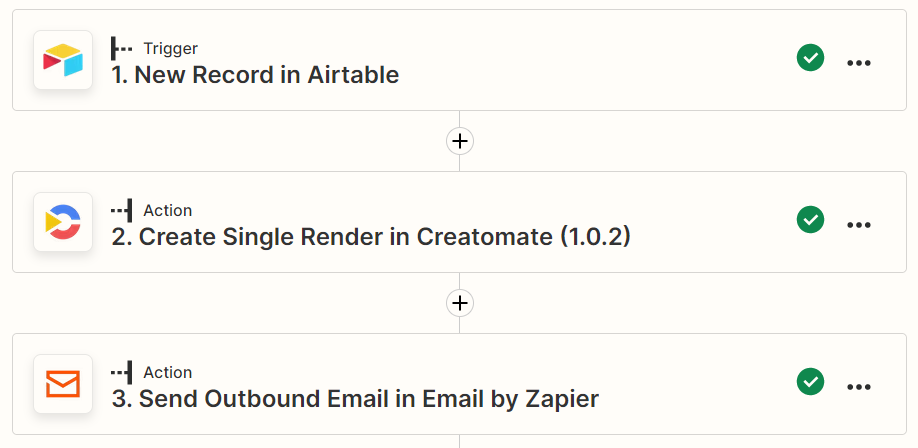
The first thing we'll do is make a GIF template in Creatomate. Next, we'll set up a Zap to automatically generate the GIFs and email them to someone's inbox. This is what it'll look like:
Now let's examine this workflow in more detail.
1. Create a template in Creatomate
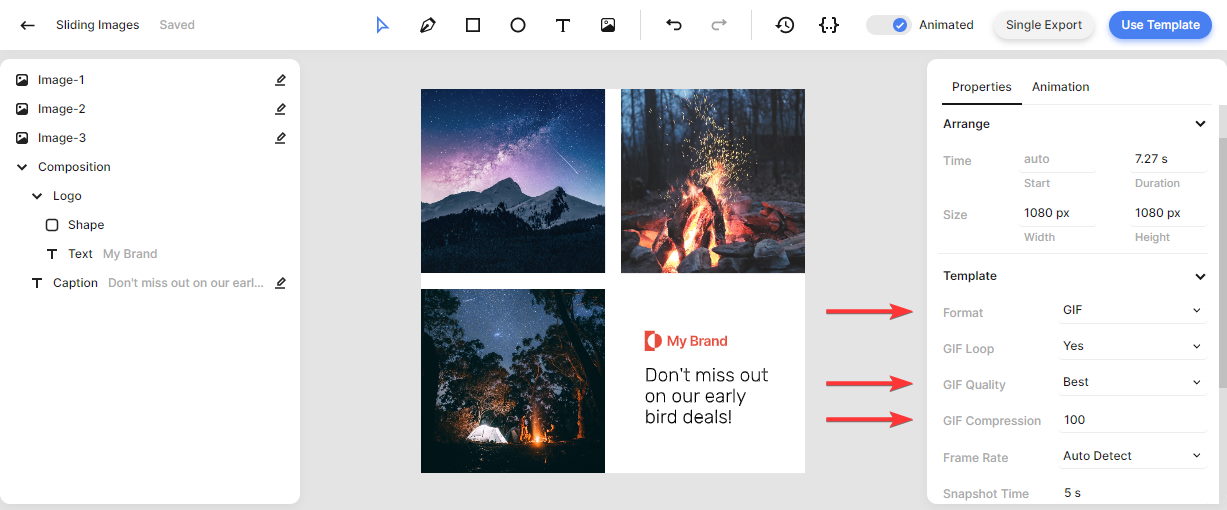
Log in to your account, go to the Templates page and click + New. The template gallery lets you pick from pre-designed templates or you can make your own. For this tutorial, let's go with the Sliding Images template from the Social Media category. We'll choose a size, like 1:1 Square, and click Create Template to open it in the editor:
As we intend to make a GIF, we must change a few settings in the template. First, select GIF as the output format. Next, set the GIF quality to Best and the GIF compression to 100. The compression refers to how much the GIF file size is reduced at the expense of output quality and ranges from 0 to 200. Setting it to 100 will result in both a high-quality and a reasonably sized GIF:
Let's take a look at the left-side panel. Here we can find the text, image, and video elements that make up the template. An important thing to know about a template is that an element can be marked as dynamic. This just means that it's a placeholder, that we'll later replace in our automated workflow. In this example, the Image-1, Image-2, Image-3, and Caption elements are all dynamic:
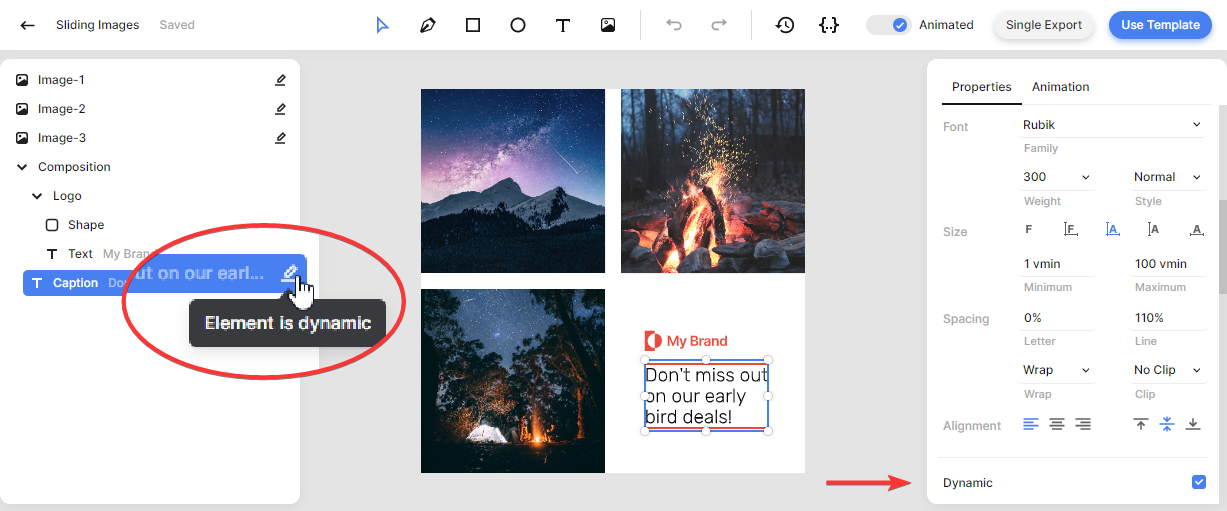
If you want to make an element dynamic, simply select it and check the Dynamic property from the right side panel, as shown above.
Now that we've got a template, let's create a Zap to automatically create GIFs based on this template.
2. Start your Zap with a trigger
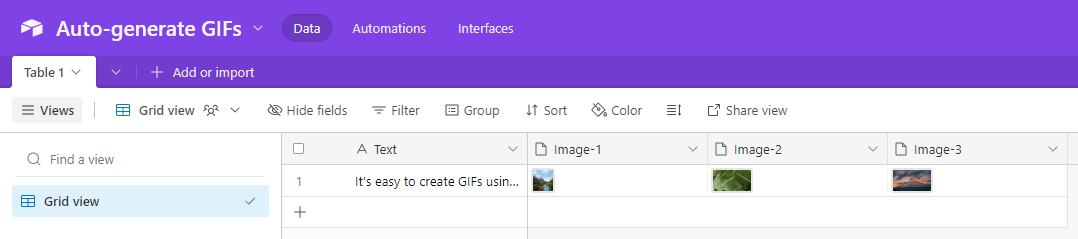
Every Zap starts with a trigger. As soon as a trigger is activated, the automated workflow will begin to execute. In this example, we want the Zap to run when a row is added to Airtable. The document I'm going to use is as follows:
Note: You can use whatever trigger app you like.
Log in to your Zapier account and click the + Create Zap button. Search for the Airtable app and select the New Record event. Continue by choosing your account or sign in to connect your account first. Then, click Continue.
To set up the trigger, select your Base and Table. Then, click Continue:
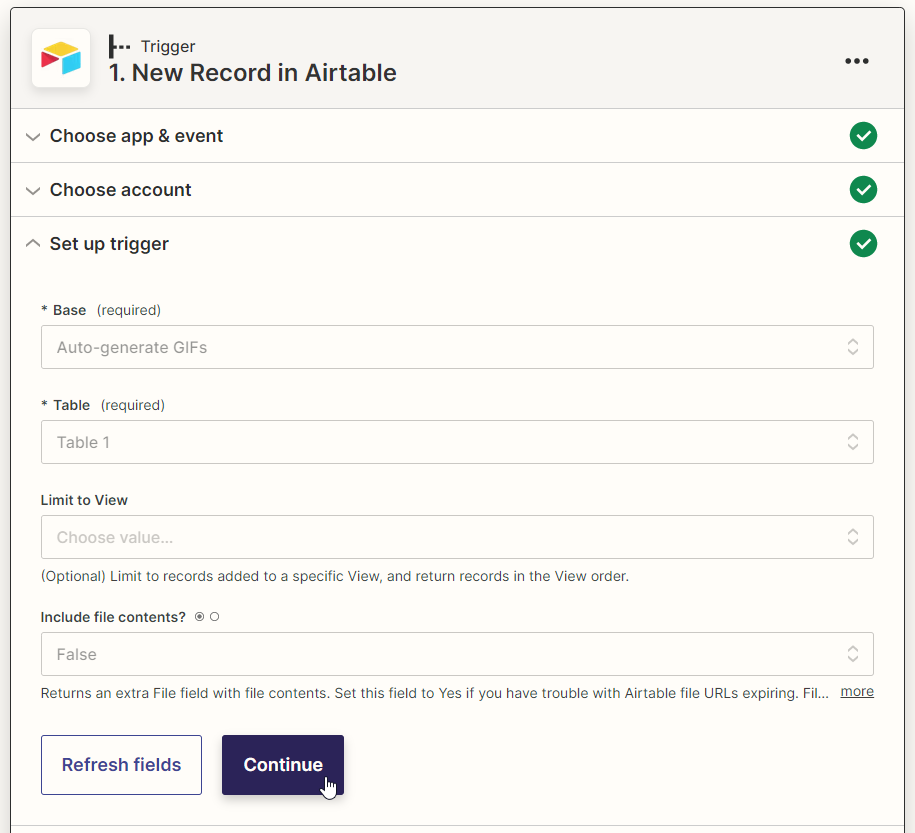
On the last screen, click Test trigger to make sure Zapier is able to find a record in Airtable. When the test was successful, click Continue.
3. Add action: Create Single Render in Creatomate
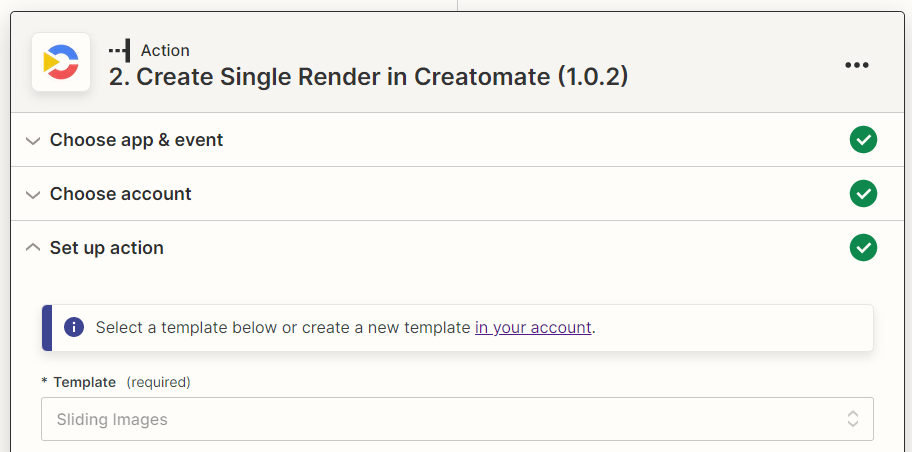
Search for the Creatomate app and select the Create Single Render event. Continue by choosing your account or sign in with your project's API key first. Then, click Continue.
On the set up action screen, we'll first select our Sliding Images template in the Template field:
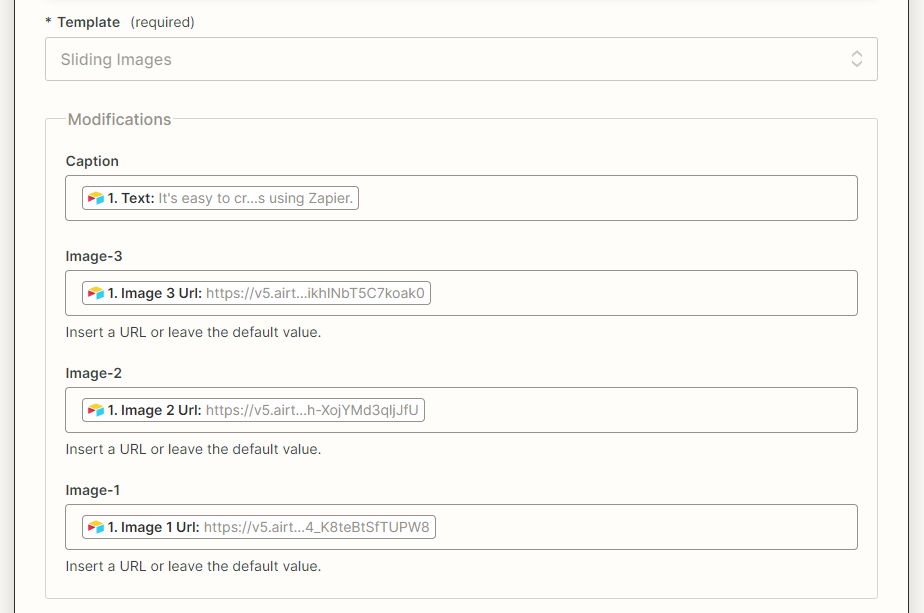
The dynamic elements in our templates appear under modifications. We can now map data from any previous step to our template so that each GIF will be unique:
- Set Caption to Airtable -> Text
- Set Image-3 to Airtable -> Image 3 Url
- Set Image-2 to Airtable -> Image 2 Url
- Set Image-1 to Airtable -> Image 1 Url
When done, click Continue:
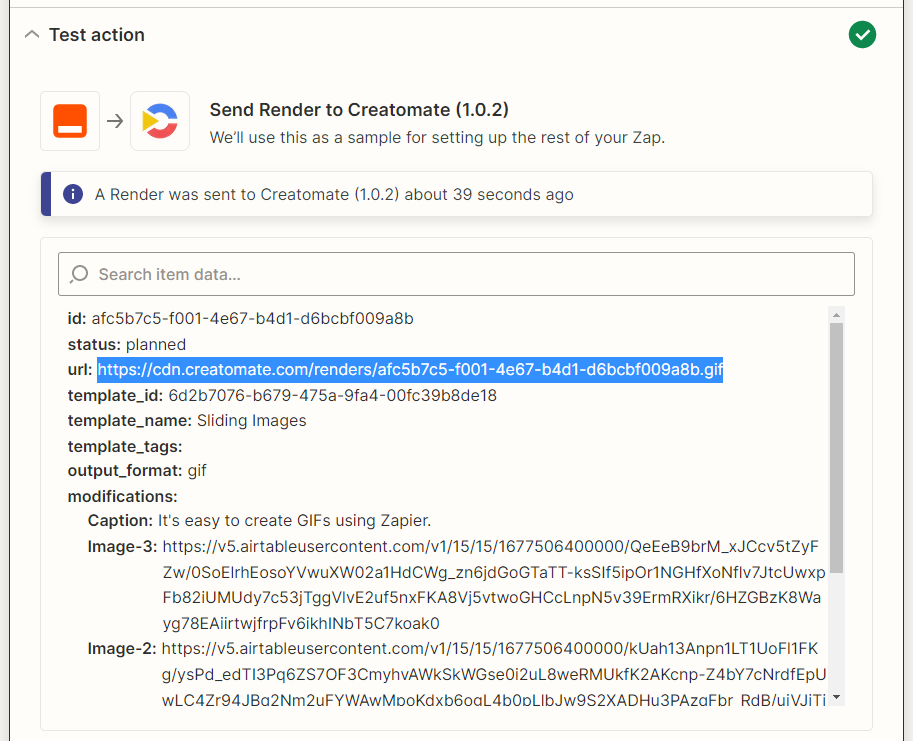
On the last screen, click Test step to manually trigger the workflow. Wait a moment before visiting the URL that is returned, as it may take a few seconds for the GIF to complete. Whenever the test succeeds, move on to the next step.
4. Add an action to further process the GIFs
Now that we have a GIF, we can use it with any of the thousands of apps Zapier supports. Here, I'm embedding the GIF in an email and sending it to my inbox. However, you can also map an email address to a row in an Airtable document, for example, to send personalized GIFs to any address.
Click + to add the Email by Zapier app and select the Send Outbound Email event.
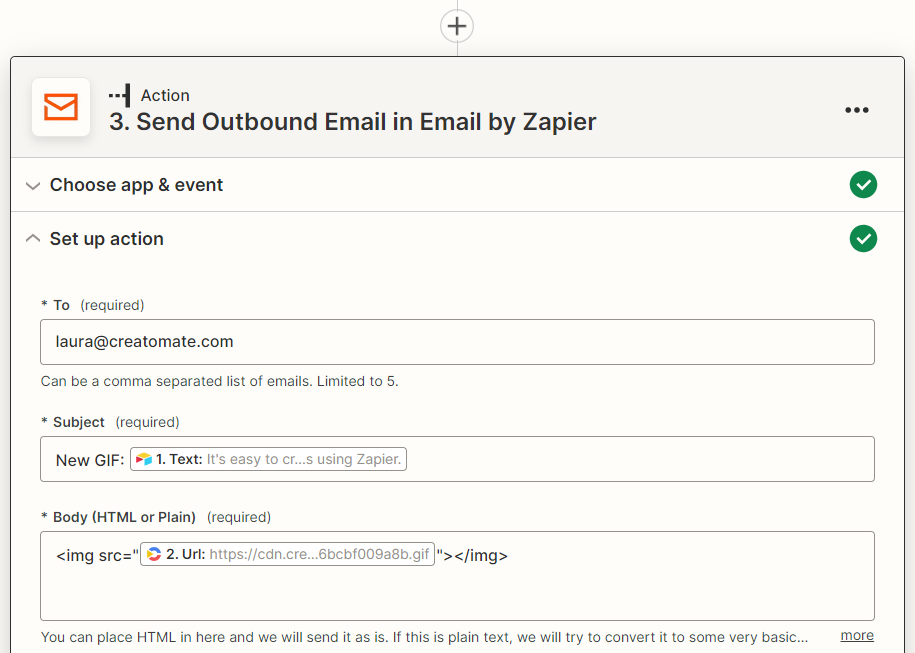
Fill in the required fields:
- To: Provide an email address.
- Subject: Enter the subject line of the email.
- Body: Enter HTML or plain text. I've used an IMG tag to display the GIF as image.
When done, click Continue:
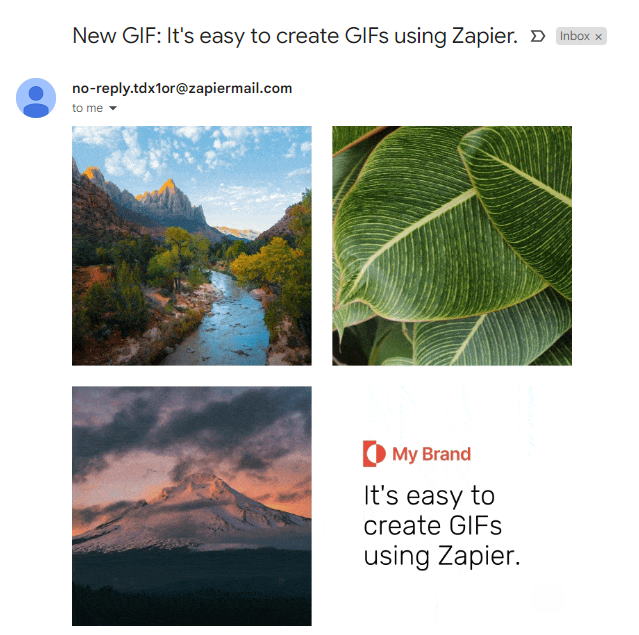
On the last screen, click Test step to send an email with the URL to the GIF to the provided email address. Here's what I found in my inbox:
After the test was successful, click Publish Zap to turn it on.
Wrapping up
This is all it takes to auto-generate animated GIFs using Zapier. Now that you have an understanding of the principles, simply tailor the workflow to your specific needs and you are ready to go!
You might also like these tutorials


Start automating today
Start with a full-featured trial with 50 credits, no credit card required.
Get started for free →