How to Automate Image Generation (No-Code Tutorial)

In this image automation tutorial, you'll learn how to automatically create any type of marketing image using Creatomate and Zapier.
Do you need to create a lot of images? Maybe hundreds or even thousands of visuals for social media, personalization, or other marketing campaigns? If so, you're probably looking for an efficient way to produce them all. Instead of making them by hand, let automation do the work for you.
As these images typically follow a similar design and only differ in content, they are perfect for automation. Creatomate is an image and video generation platform that helps you create visuals at scale. When used in combination with an automation platform, you can set up custom workflows that run specific tasks completely on autopilot. From creating the images to posting them on social media, emailing them, and much more.
Zapier and Make are great tools for this task. They are both no-code platforms, so you don't need any technical skills to use them. In this tutorial, I'll show you how to automatically generate images using Zapier. If you'd rather use Make.com, check out this tutorial instead.

To demonstrate how automated image generation works, we'll produce real estate banners similar to the one above. Of course, this is just an example—you can auto-generate images for any purpose. Creatomate comes with an online template editor that allows you to design images for virtually any use case.
Tip: Did you know you can easily automate video creation too? Just like how we create images in this tutorial, you can also generate YouTube Shorts, TikTok videos, Instagram Reels, videos with subtitles, voice-over videos, and even entirely AI-generated videos. Check out our blog page for step-by-step tutorials.
How to automate image creation?
The first step in automatically generating images is to create a template in Creatomate. Think of it as the basis for all the images. Within the template, you can define dynamic elements like text, images, colors, etc., that you want to differ for each generated image.
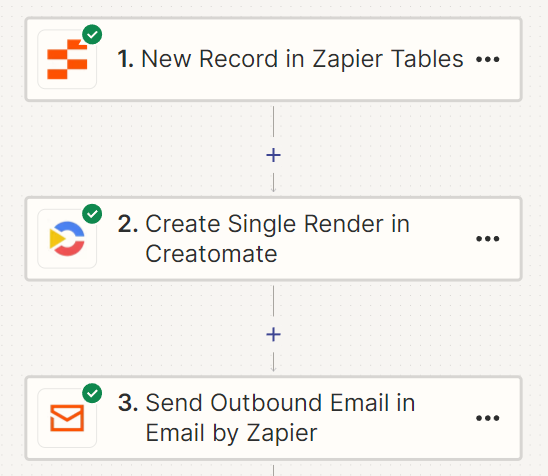
After that, we'll delve into Zapier and set up our automated workflow. To keep things simple in this tutorial, I'll show you how to build a very basic Zap using Zapier's table feature and email module:
In practice, you'll customize this Zap according to your specific needs by integrating the tools that work best for you. With support for over 6000 apps, you can use almost any marketing tool you can think of. For example, your Zap can trigger when new records are added to an Airtable base or Google Sheets document. And once Creatomate has generated the images, you can directly post them on your Facebook page or Instagram account.
If you're new to Zapier, it might seem complex at first, but it's actually quite straightforward. Don't worry if you don't understand everything yet; the workings of this automation will become clear in the next few steps.
Let's get started by creating an image template.
Tip: If you need to create a large batch of images all at once, you can do that too. Creatomate provides a spreadsheet feature designed specifically for this purpose. It allows you to generate many images in bulk. Here's a tutorial on how to do it.
1. Create an image template in Creatomate
Log in to your Creatomate account or sign up for free if you don't already have one.
Navigate to the Templates page and click the New button to open the template gallery. For the purpose of this tutorial, go to the Real Estate category, and pick the Real Estate Banner template. You can pick any size you want, then click Create Template to open it in the editor:
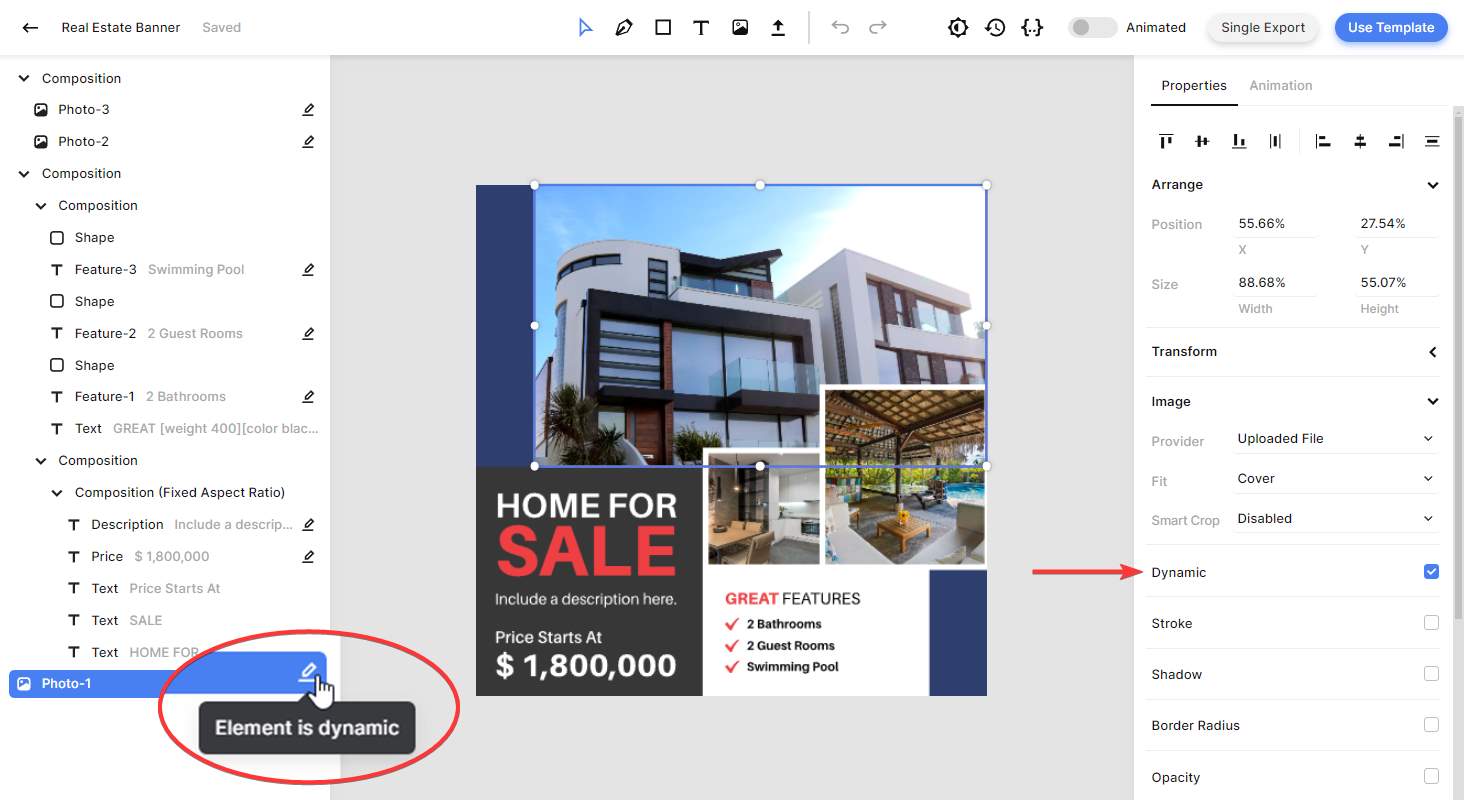
Let's take a look at the left side panel. Here, we can find the elements that make up our template. The most important thing you need to know is that elements can be marked as Dynamic. In our Real Estate Banner template, the Photo, Feature, Price, and Description elements are all dynamic. This means that we can replace their content with different text and pictures using our automated Zapier workflow.
Our template is already set up, so we don't have to change anything. But if you want to customize it, feel free to do so. You can refer to this quick guide to learn more about how the editor works.
Now that we have our template in place, let's set up the automated workflow next.
2. Trigger the automated workflow
Every Zapier workflow starts with a "trigger". A trigger is the event that kicks off the automation process. It could be something as simple as a specific time each day, a new row in Airtable or Google Sheets, a new product in Shopify, whatever works for you. The data received by this trigger can then be used to auto-generate the images.
In this step, we'll create a table and use it to provide content for our images. Once you understand the concept, feel free to use any other app that suits your needs.
Create a free Zapier account, or log in if you already have one.
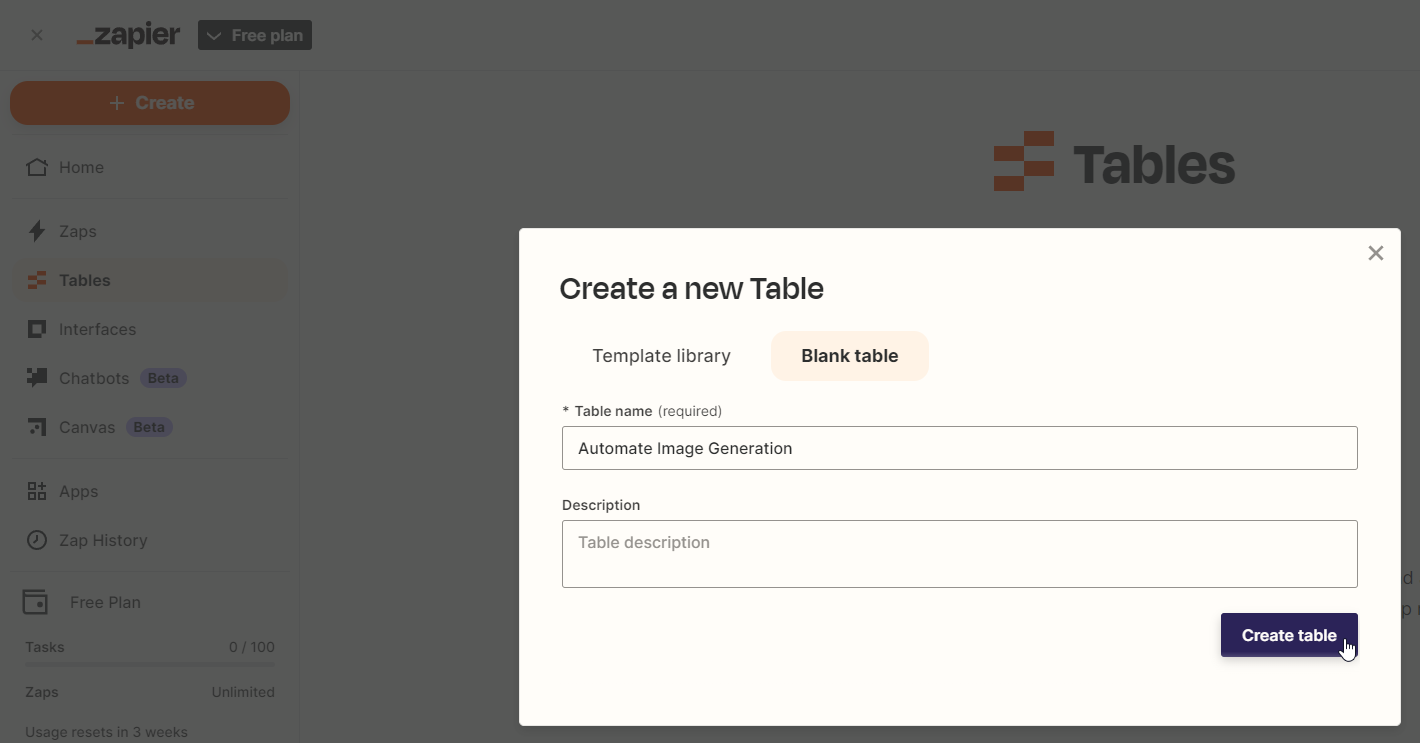
Once logged in, navigate to the Tables page. Click the Create blank table button, enter a name, and hit Create table:
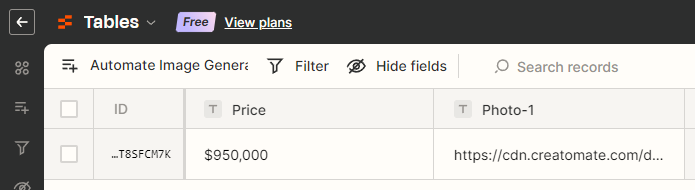
Let's set up a table with two text fields: Price and Photo-1. After that, we'll input the following data into the first record:
- Price -> $950,000
- Photo-1 -> https://cdn.creatomate.com/demo/house.jpg
Here's what your table should look like:
Note: Although our template has more dynamic elements than the two items we've just created in our table, these two examples will suffice to demonstrate how the process works.
Once your table is set up, go back to your Zapier dashboard. Then, click Create, and select Zaps:
Now, we're in the workflow editor, where we can build our Zap. First, let's click on the Trigger block. Search for and select Zapier Tables as the app, and choose New Record as the event. Then, click Continue.
On the Trigger page, select the table you just created:
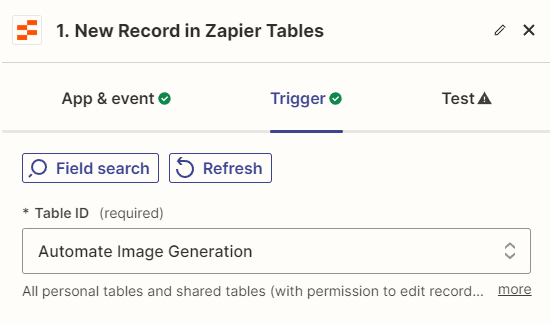
Then, click Continue.
Click Test trigger on the Test page to see if Zapier can find our sample record. Once the test is successful, click Continue with selected record:

Once your trigger has activated the Zap, it performs an action – creating an image in this case. We'll configure that action in the next step.
3. Auto-generate the images
In this step, we'll connect the dynamic data to the template to create each unique image.
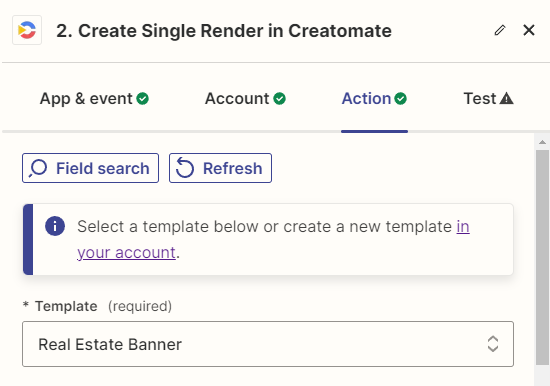
Add a new Zapier action, search for and select the Creatomate app with the Create Single Render event. Then, click Continue.
If you haven't already connected Creatomate with Zapier, sign in using your project's API key. You can find this key under Project Settings within your Creatomate dashboard.
On the Action page, select the Real Estate Banner template in the Template field first:
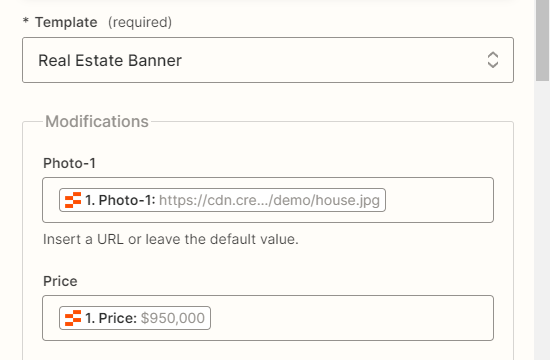
Zapier will now pull in the dynamic elements and list them under Modifications.
Here, we can connect the data we want to insert into our images:
- Set Photo-1 to Zapier Tables -> Photo-1
- Set Price to Zapier Tables -> Price
Then, click Continue.
Click Test step on the Test page to send a request to Creatomate. It will now take our image template, insert the price and photo, and generate a unique image. You can preview the image by visiting the URL provided in the test result:
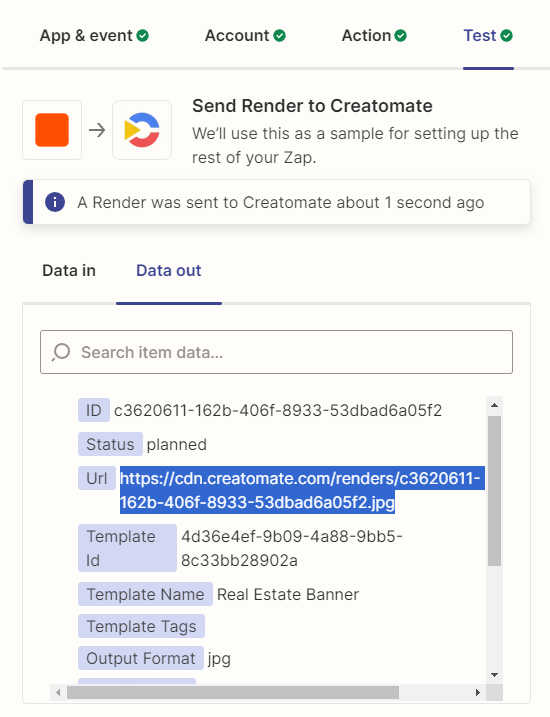
Here's how it should look:

Let's move on to the final step.
4. Further process the images
The image has been successfully generated, and you can use it however you like. For example, you can share it on Instagram or Facebook. To wrap up this tutorial, I'll show you how to send it via email.
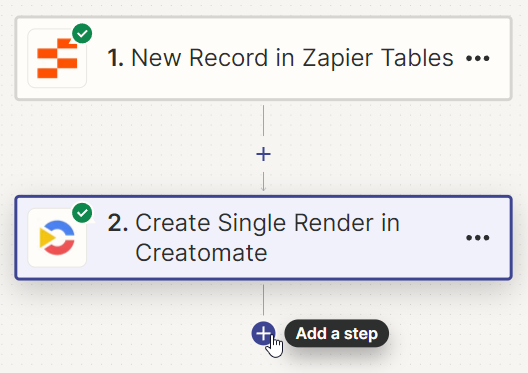
Click + to add a step to your Zap:
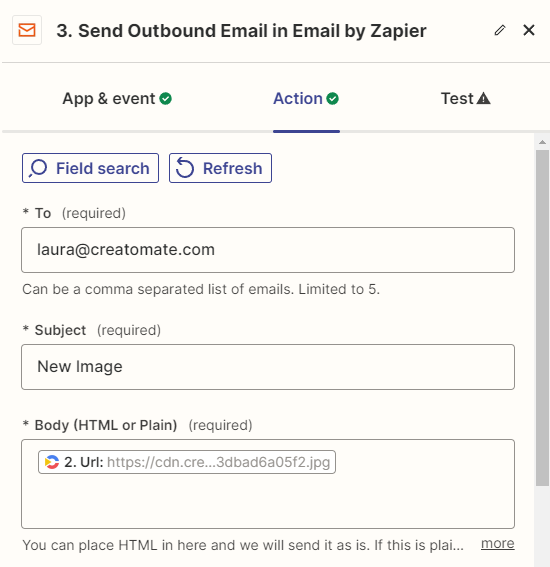
Search for and select the Email by Zapier app, and the Send Outbound Email event. Then, click Continue.
On the Action page, fill out at least the required fields. In the To field, enter your own email address to send the image to your inbox. Then, create a Subject line. You can also use data from your trigger for this. And to add the image link, select Creatomate -> Url in the Body field:
Then, click Continue.
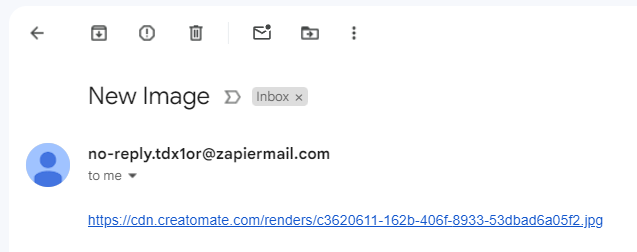
Click Test step on the Test page to make sure everything works as expected. Now, check your inbox. You should have received an email with the link to the image:
Once you're happy with your workflow, the only thing left to do is hit the Publish button to activate your Zap.
What's next for automated image generation?
And that's how to automate image generation using Zapier and Creatomate. It's pretty simple, isn't it? To demonstrate the basics, we've used a Zapier table and the email module. But in real-life applications, you'll likely use other apps such as Airtable, Google Sheets, Facebook, or Instagram—whatever works best for you.
If you're currently looking for an automated solution for image generation, your next step could be to extend that to videos. Don't worry; we've got you covered. Creatomate doesn't just automate images but also handles videos. Just as we demonstrated image creation in this tutorial, you can easily produce videos like YouTube Shorts, personalized ones, and even fully AI-generated stories complete with voiceovers and subtitles. To guide you through, we've written a series of step-by-step tutorials. Check them out on our blog page, or jump right into one of the most popular ones.
👉 How to use AI to Automate Videos for Shorts, Stories, and Reels
👉 How to Automatically Create and Post TikTok Videos using Zapier
👉 How to Automatically Create and Post YouTube Shorts using Zapier
👉 How to Auto-Create Personalized Videos using Zapier
You might also like these tutorials


Start automating today
Start with a full-featured trial with 50 credits, no credit card required.
Get started for free →