How to Automate Video Generation with C#

In this tutorial, you'll learn how to create videos programmatically using C# and Creatomate's video generation API.
If you've done video processing in C# before, you've probably used libraries like FFMpegCore or AForge.NET for basic editing, or MediaFoundation for more advanced tasks. These tools work well for common jobs like trimming, merging, or adding simple effects. But things get complicated quickly when you try to automate more advanced content – like personalized marketing videos, social media clips, or workflows that integrate with AI tools like ChatGPT, DALL·E, or ElevenLabs.
That's where Creatomate comes in: a powerful, cloud-based API built specifically for dynamic video generation. Whether you're building desktop apps with WPF, web APIs using ASP.NET Core, or console applications for batch processing, Creatomate integrates smoothly with your C# projects. It's particularly useful for enterprise developers looking to automate video production at scale or embed video workflows into existing .NET systems.
In this tutorial, I'll walk you through the fundamentals of using Creatomate with C#. By the end, you'll have a solid foundation for building your own automated video systems. I'll also point you to follow-up tutorials that dive deeper into advanced features – like AI voiceovers, animated subtitles, auto-generated visuals, and more.
The video we'll create here is just a starting point. From simple slideshows to highly dynamic, data-driven videos, Creatomate's online template editor and REST API give you full control to customize and automate video generation to meet your exact requirements.
Prerequisites
Before we begin, make sure you have the following:
- .NET SDK installed. If you haven't already, download it from the official .NET website. .NET 6.0 or higher is recommended.
- A Creatomate account. If you don't have one yet, you can sign up for free.
- Any code editor or IDE that supports C#. Visual Studio, VS Code, Rider – anything you're comfortable with.
- A terminal or command prompt. To run dotnet commands and test your app.
How to create videos using C#?
You can generate videos with C# and Creatomate in two ways.
The easiest and most recommended approach is to use a template. Start by designing a video layout in Creatomate – a reusable template with placeholders for text, images, audio files, or video clips. Then, from your C# application, send a request to the Creatomate API to fill in those placeholders with dynamic content. Each request produces a unique video based on the same layout. This method is perfect for automating large volumes of videos – and it's the one we'll focus on in this tutorial.
If you need full control over a videos' structure, you can skip the template and define everything directly in JSON. This method lets you build fully dynamic, data-driven videos from scratch – including layout, animations, transitions, and timing – all from within your C# code. While more powerful, it's also more complex and better suited to advanced use cases. If you're interested, take a look at the JSON to Video documentation.
Ready to get started? Let's dive in!
1. Set up your C# project
First, let's create a new directory for your project and initialize a C# console app.
Open your terminal or command prompt and run the following commands:
$ mkdir video_creation_project
$ cd video_creation_project
$ dotnet new console
This will generate a C# project with a Program.cs file, where you'll write your code.
Your C# project is now set up and ready to go. In the next step, we'll create a video template inside Creatomate that your script will use.
Note: This tutorial uses C#'s built-in HttpClient with JSON support to communicate with the Creatomate API. If you're using .NET 6 or later (recommended), everything you need is included by default. If you're using .NET 5 or earlier, you may need to run: dotnet add package System.Net.Http.Json or consider upgrading to a newer version of .NET.
2. Create a video template in Creatomate
Log in to your Creatomate account, or sign up for free if you don't have one yet.
Next, go to the Templates page and click New to open the template gallery. You can either start from scratch if you already have a design in mind, or choose a pre-made template for a faster setup.
To keep things simple for this tutorial, we'll use the Quick Promo template from the Featured category. Select the 9:16 Vertical size and click Create Template to open it in the editor:
Let's take a closer look at this video template and how it will be used in your C# script.
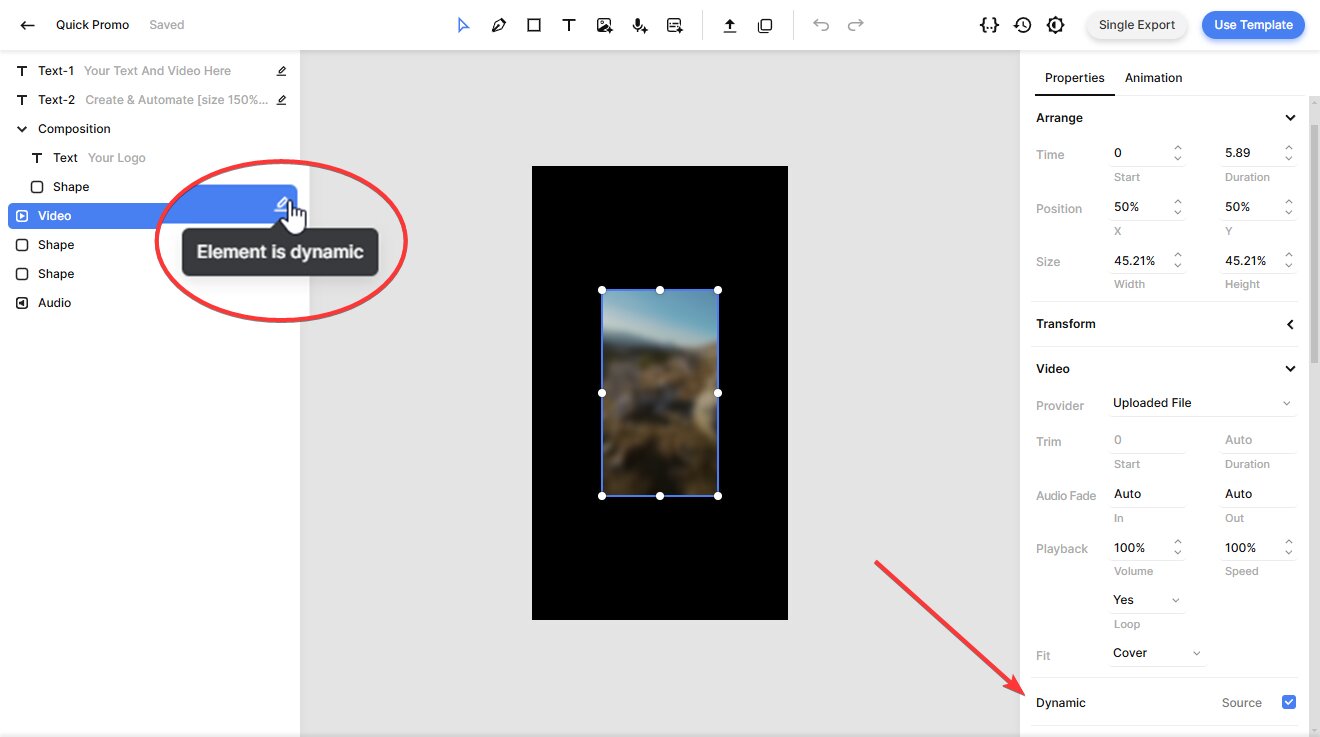
On the left side of the editor, you'll see a list of elements that make up the video. Some of them – like Video, Text-1, and Text-2 – are marked as dynamic. This means you can update them programmatically by sending different text or media using your C# script. This is exactly how we'll automate video generation later – by customizing these dynamic elements each time we send a request to the Creatomate API:
You can fully customize your template to fit your brand, message, or workflow. The editor is intuitive and flexible – perfect for both beginners and experienced video creators. If you'd like to explore more, check out the template editor guide.
Once you're happy with your template, you're ready to move on to the next step.
3. Generate the C# script
In this step, we'll turn our video template into an actual API request written in C#.
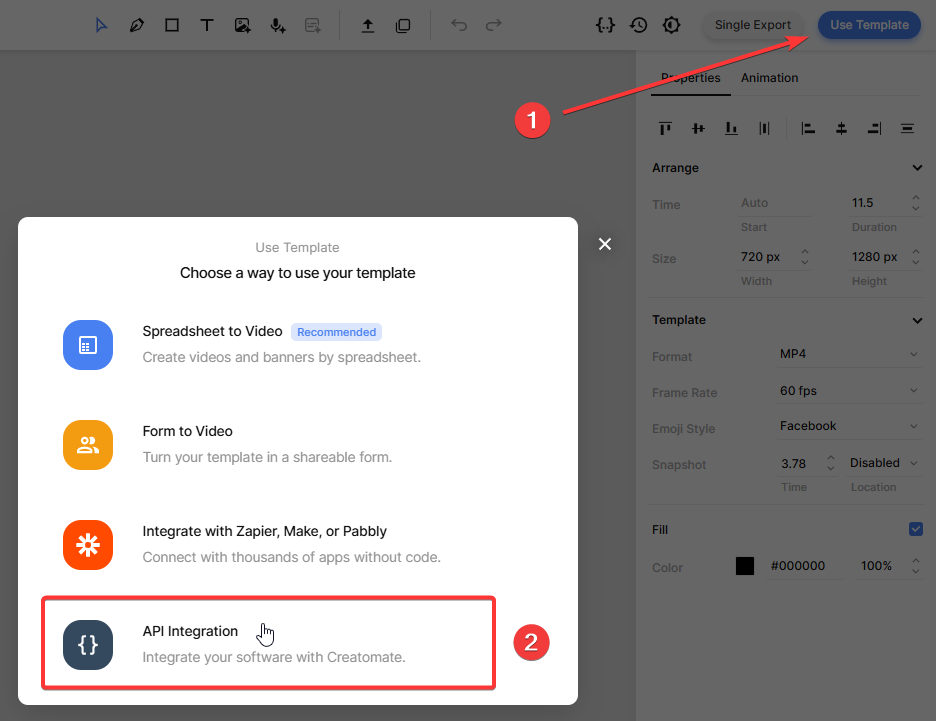
Inside the template editor, click on the Use Template button in the top-right corner. Then choose API Integration:
Creatomate provides ready-to-use code snippets in multiple programming languages. Select C# from the list, and copy the provided code:

Next, open the Program.cs file in your project and paste the copied code into it.
In the next step, you'll learn how to insert dynamic content into your script to modify each video.
4. Insert video content
Now it's time to customize your video by modifying its content – such as text, images, and videos – using the “modifications” parameter.
While this data can come from APIs, databases, or user input, we'll keep things simple for now with some predefined sample values.
Copy and paste the following into your C# script:
var data = new Dictionary<string, object> {

    ["template_id"] = "your_template_id",

    ["modifications"] = new Dictionary<string, object> {

        ["Video.source"] = "https://cdn.creatomate.com/demo/video5.mp4",

        ["Text-1.text"] = "Hello C# users 👋",

        ["Text-2.text"] = "It's easy to create videos from your own scripts!"

    }

};
Note: Make sure to replace "your_template_id" with the actual template ID from step 2. This tells Creatomate which template to use when generating your video.
5. Run the script to create a video
With your C# script ready, run it with the following command:
$ dotnet run
After the request is sent, Creatomate returns a JSON response confirming that your video render has been queued. The video will begin processing shortly.
The response will look something like this:
1{
2  "id": "2ac43304-6ba3-465d-9d5b-964f86f8caae",
3  "status": "planned",
4  "url": "https://f002.backblazeb2.com/file/creatomate-c8xg3hsxdu/2ac43304-6ba3-465d-9d5b-964f86f8caae.mp4",
5  "snapshot_url": "https://f002.backblazeb2.com/file/creatomate-c8xg3hsxdu/2ac43304-6ba3-465d-9d5b-964f86f8caae-snapshot.jpg",
6  ...
7}
There are two ways to check whether your video is ready:
1. Polling the status
You can write a small C# script that repeatedly sends GET requests to the Creatomate API to check if the "status" has changed to "succeeded".
2. Using a webhook (recommended)
A better approach is to set up a webhook. With webhooks, Creatomate will automatically send a notification to your application as soon as the video has finished rendering.
For now, after running your script, wait about a minute and visit the URL returned in the API response.
If you see a “Not Found” message, that means the video is still processing. Just give it a bit more time and refresh the page. Once it's ready, the URL will display your rendered video:
Now that you have the video link, you can download it or integrate it directly into your automation workflow – whatever suits your needs best.
Tip: You can monitor all your API activity in the API Log section of your Creatomate dashboard. If a video fails to render, the log will show detailed error messages along with suggested solutions to help you troubleshoot quickly.
What's next for video creation with C#
And that's how to create videos using C# and Creatomate. Now that you've got the fundamentals down, you can start tailoring this workflow to match your own applications and use cases.
As mentioned earlier, you can take things even further by integrating generative AI into your video production pipeline. Think about the faceless, short-form videos you often see on YouTube Shorts, TikTok, or Instagram Reels – these can be fully automated using AI.
You could begin by prompting ChatGPT to write a script based on a specific topic or keyword. Then, convert that script into an AI-generated voiceover using a text-to-speech service like ElevenLabs. With Creatomate's transcription features, you can automatically add styled, animated captions matching today's social media trends. For visuals, use tools like DALL·E or Stable Diffusion to generate background imagery. And to speed up publishing, you can even have ChatGPT create titles, descriptions, and hashtags for you.
If you're ready to explore more, check out the tutorials and examples below. While they may not be written in C#, the core ideas are easy to adapt to your C# projects.
👉 How to Create AI Voice Over Videos using an API
👉 Using ChatGPT's API to Auto-Create Social Media Videos by Code
👉 How to Automate AI-Generated Shorts, Stories, and Reels
You might also like these tutorials


Start automating today
Start with a full-featured trial with 50 credits, no credit card required.
Get started for free →