How to Create Videos with AI Voice Overs using Node.js

Learn how to automate videos with AI voiceovers, animated subtitles, and dynamic visuals using Node.js, ElevenLabs' text-to-speech API, and Creatomate.
Adding natural-sounding voiceovers to your videos is easier than ever. With AI-powered text-to-speech, you can generate narrations for your social media content, tutorials, product demos, and other marketing materials.
In this guide, you'll discover how to fully automate video production with Node.js. Your script provides both the text for voiceovers and the media (images or video clips) you want to include. We'll use ElevenLabs to generate lifelike voiceovers and Creatomate to compile everything into a polished video. Subtitles are added automatically, with animated captions synced to the audio:
Want a different look or feel? Creatomate's template editor lets you fully customize styles, layouts, and animations to match your brand or preferred format.
Prerequisites
These are the tools we'll use:
- Node.js version 18 or higher. If you haven't installed it yet, you can download it from the official Node.js website.
- ElevenLabs. For generating AI voiceovers.
- Creatomate. For creating a video design and generating the voiceover videos.
You'll also need a code editor or terminal capable of running Node.js scripts, such as VS Code, the built-in terminal on your OS, or any IDE you're comfortable with.
How to auto-generate voiceover videos with Node.js
We'll begin with ElevenLabs, where you'll pick a voice for the narration and generate an API key.
Next, we'll move over to Creatomate. We'll link our ElevenLabs account using the API key, then set up a video template. Think of the template as a blueprint for our voiceover videos – it defines the layout, styling, and subtitle settings, so every video we create follows a consistent design.
With that in place, we'll set up a Node.js project. Using our template, we'll write a script that automatically generates videos. We'll paste in the code, then add our own content: the narration text and the background visuals we want to include.
Once everything is ready, we'll run the script to render the video. It may take a little time to process, but when it's done, we'll receive a link to the finished video – complete with voiceovers, animated subtitles, and our chosen imagery.
Let's dive in.
1. Set up ElevenLabs for AI voiceovers
First, head over to ElevenLabs.io and sign up for a free account, or log in if you already have one.
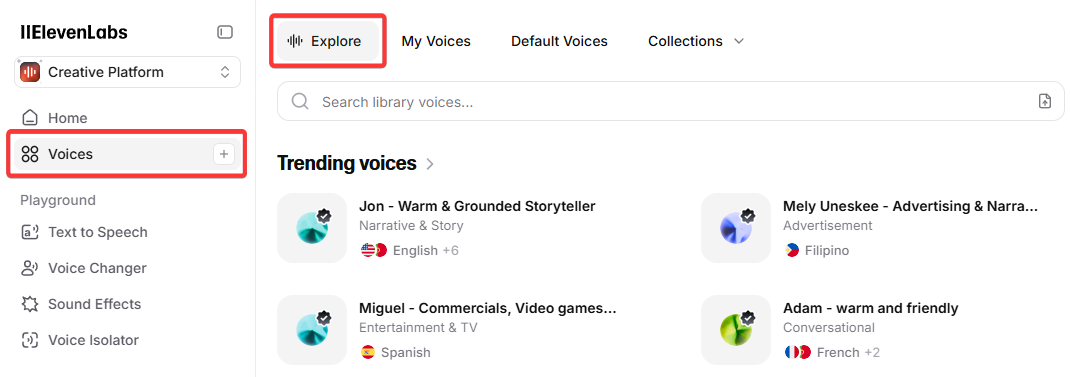
From the left-hand menu, click Voices. This will open the Explore tab, where you can browse a library of ready-made voices:
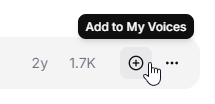
Choose a voice you like and click the + button to add it to your account:
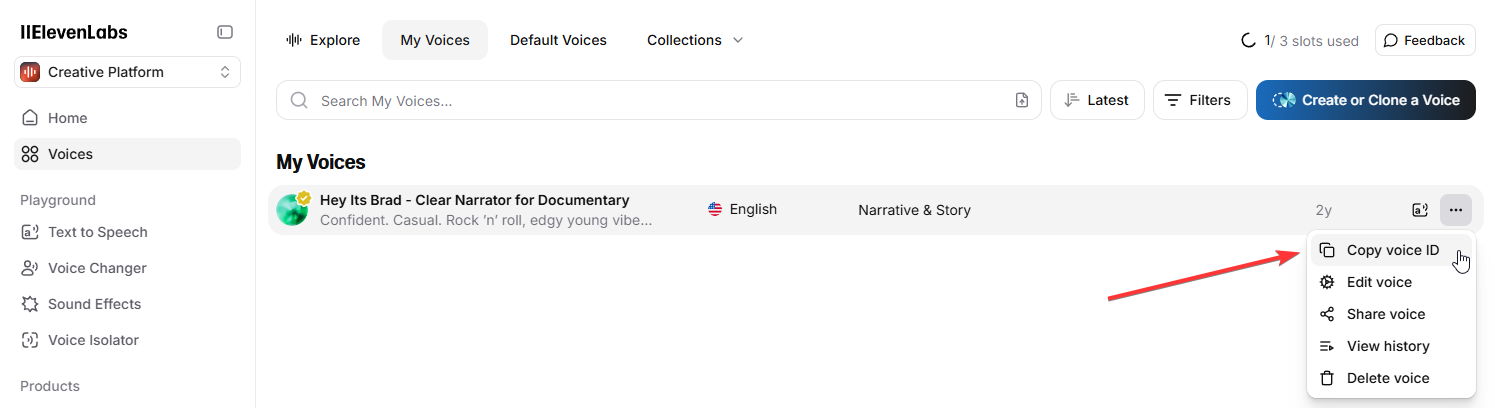
Confirm by clicking Add voice. The voice will now appear under “My Voices” (accessible from the top bar).
You'll need the voice ID in the next step. To find it, click the … menu next to your chosen voice and select Copy voice ID:
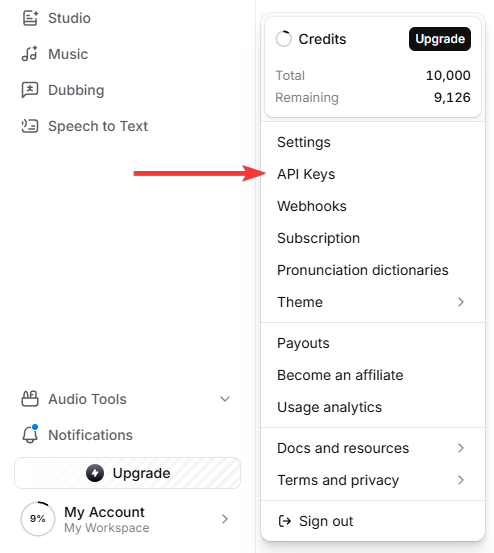
Now let's generate an API key. In the bottom-left corner, click My Account, then select API Keys:
Click Create API Key, give it a name (optional), and make sure Text to Speech is set to Has access. Finally, click Create:
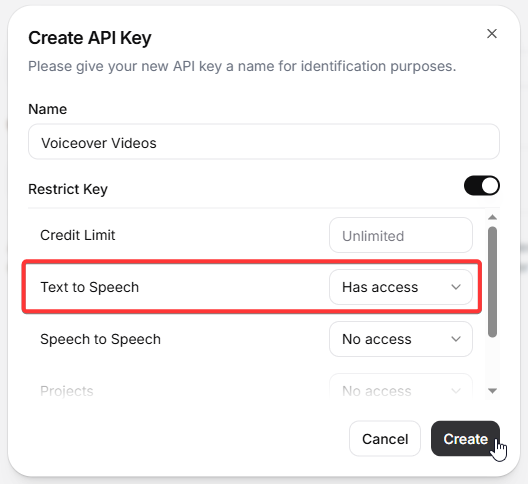
Copy the API key – you'll need it in the next step.
2. Create a video template in Creatomate
Log in to your Creatomate account, or sign up for free if you don't have one yet.
Before setting up your video template, we'll connect Creatomate with your ElevenLabs account. From the left-hand menu, click the … icon and select Project Settings. Under Integrations, switch on ElevenLabs, paste your API key, and click Confirm to save the connection:
Now it's time to design the layout for our voiceover videos. If you already have a style in mind, you can create a template from scratch. But for this tutorial, we'll keep it simple and use one of Creatomate's ready-made templates.
Go to the Templates page and click New. In the gallery, open the Voice Overs category and select Short-Form Voice Over. Then, choose the 9:16 Vertical format and click Create Template to open it in the editor:
Let's take a quick look at how this template is structured and how it fits into our Node.js script. On the left side of the editor, you'll see all the elements that make up the video. The template is divided into four scenes, each containing a voiceover, subtitle, and image placeholder.
If you press play now, you won't hear any narration, and the subtitles will still show placeholders. That's expected – the script will generate the voiceover later, and the subtitles will follow automatically.
For voiceovers and subtitles, we'll start with the first scene as an example. The same steps apply to the second, third, and fourth scenes, so be sure to repeat any changes in those as well to keep everything consistent.
Select the Voiceover-1 element, then look at the Audio settings in the right-hand panel. This is where you configure the narration. The Provider is already set to ElevenLabs. For the Model, you can choose from four text-to-speech options. In most cases, Multilingual v2 is the best choice – it produces high-quality speech and supports multiple languages.
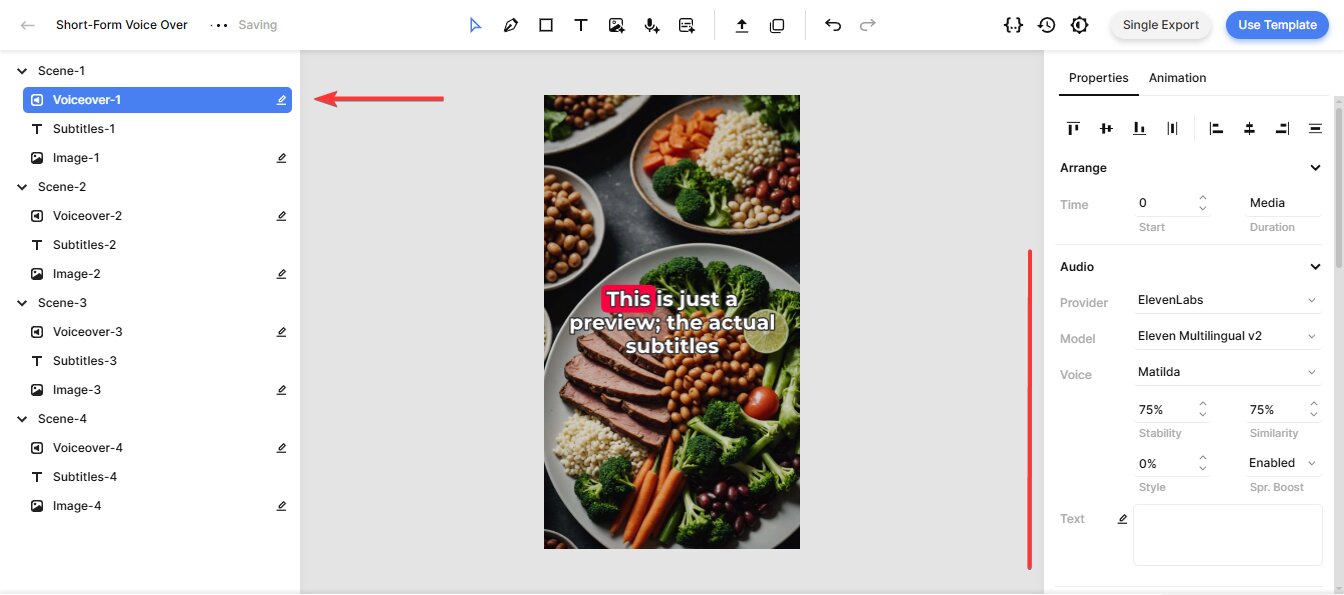
By default, the Voice is set to Matilda, a pre‑made voice from ElevenLabs. If you chose a different voice in the previous step, you can specify it here. Click Matilda, scroll up to Custom Voice, replace the voice ID with the one from your selected voice, and click OK:
You can also fine-tune the generated voiceover using parameters like Stability, Similarity, Style, and Speaker Boost. For example, Stability controls how much emotion or variation the voice has. In most cases, the default values give good results, but you can experiment if you want a specific tone. For more details, see the ElevenLabs Voice Settings documentation.
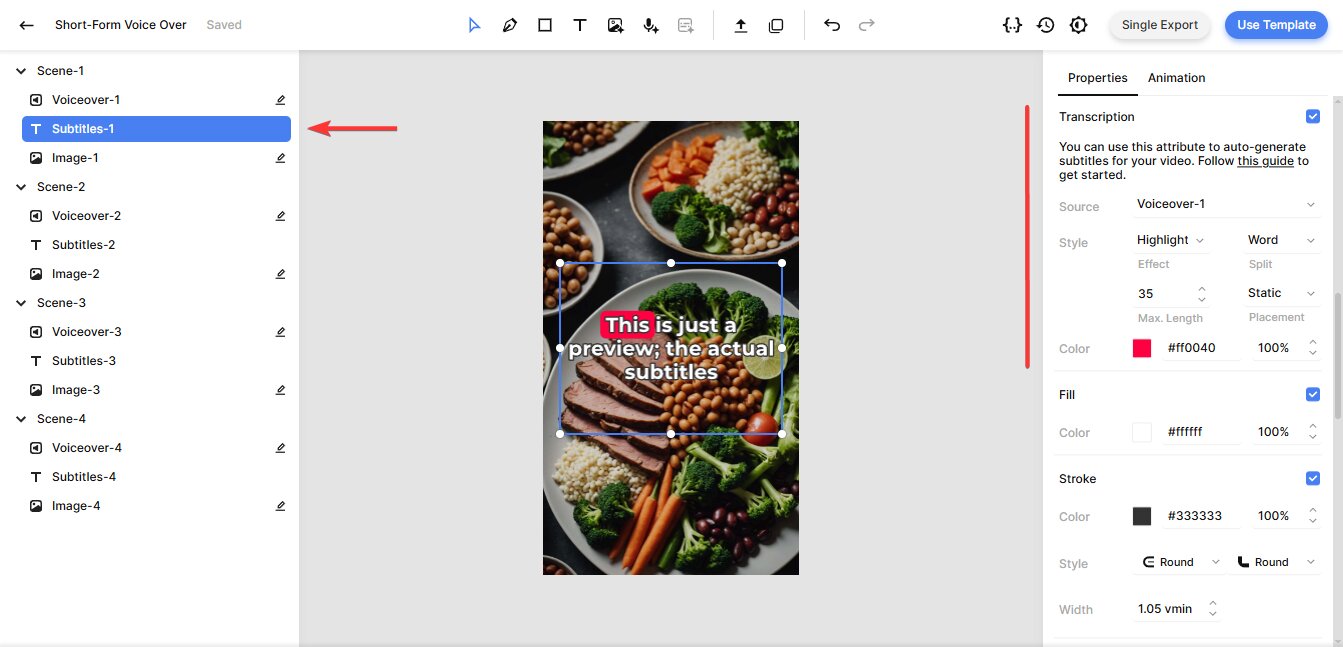
Next, let's take a look at the subtitles. You don't need to make any changes right now, but it's helpful to understand how they work in case you want to customize them later.
Select the Subtitles‑1 element and locate the Transcription property. Here, the Source is set to Voiceover‑1, which tells Creatomate to automatically transcribe that voiceover and generate subtitles.
You can also adjust the Style, Color, Fill, and Stroke settings to change the appearance of the subtitles. For example, to create the popular “one-word-at-a-time” effect often seen in YouTube Shorts, TikToks, and Instagram Reels, set Max. Length to 1. The template updates in real time, and you'll see your adjustments instantly.
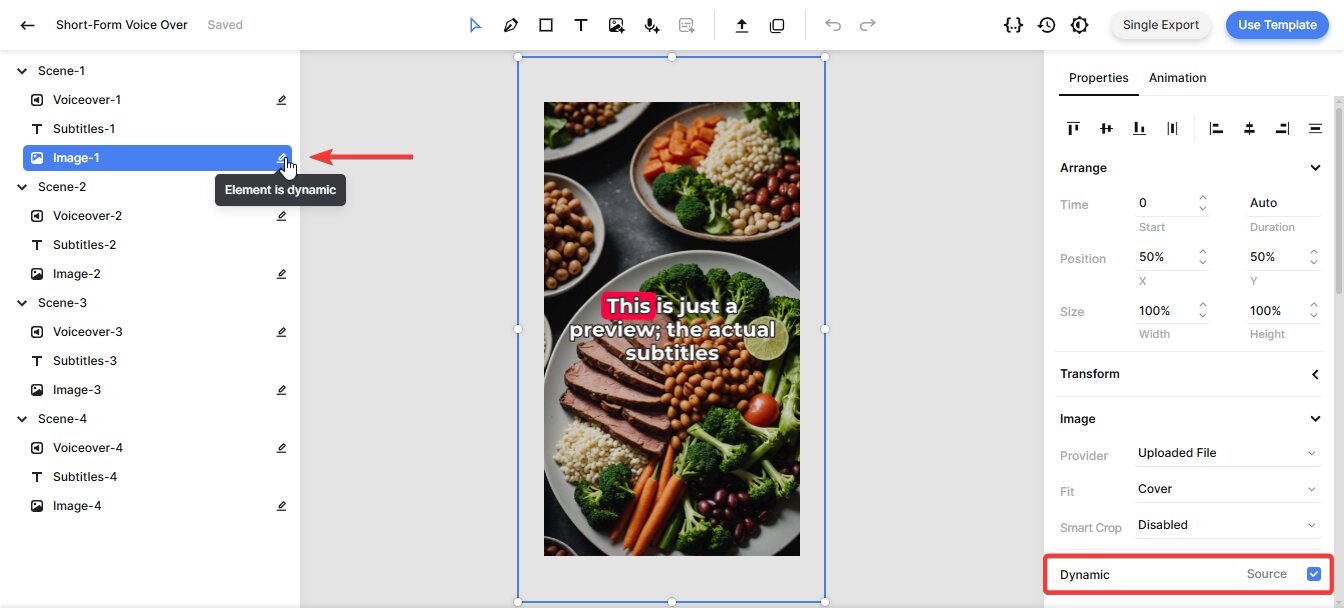
Finally, the image elements are marked as dynamic, which means we can programmatically replace them with any image files provided in our Node.js script.
That covers the essentials of this template. We've focused on the key elements here, but the editor also includes many more customization options if you'd like to refine your video further.
With the template ready, we're all set to move on to the Node.js part of the tutorial.
3. Set up a new Node.js project
Start by creating a new directory for this project. Open your terminal or command prompt and run:
$ mkdir voiceover_video_project
Then, navigate into it:
$ cd voiceover_video_project
Initialize a new Node.js project:
$ npm init -y
In this tutorial, we'll use the built-in Fetch API to communicate with Creatomate. It's available in Node.js 18 and later.
To check your current Node.js version, run:
$ node -v
If it's below 18, download and install the latest version from the Node.js website.
Now, create a JavaScript file where you'll write your code. You can name it anything, but for consistency, we'll use generate_voiceover_video.js:
Mac/Linux
$ touch generate_voiceover_video.js
Windows
$ echo. > generate_voiceover_video.js
With your Node.js project ready, the next step is to convert the template you just created into an API request.
4. Create your Node.js script
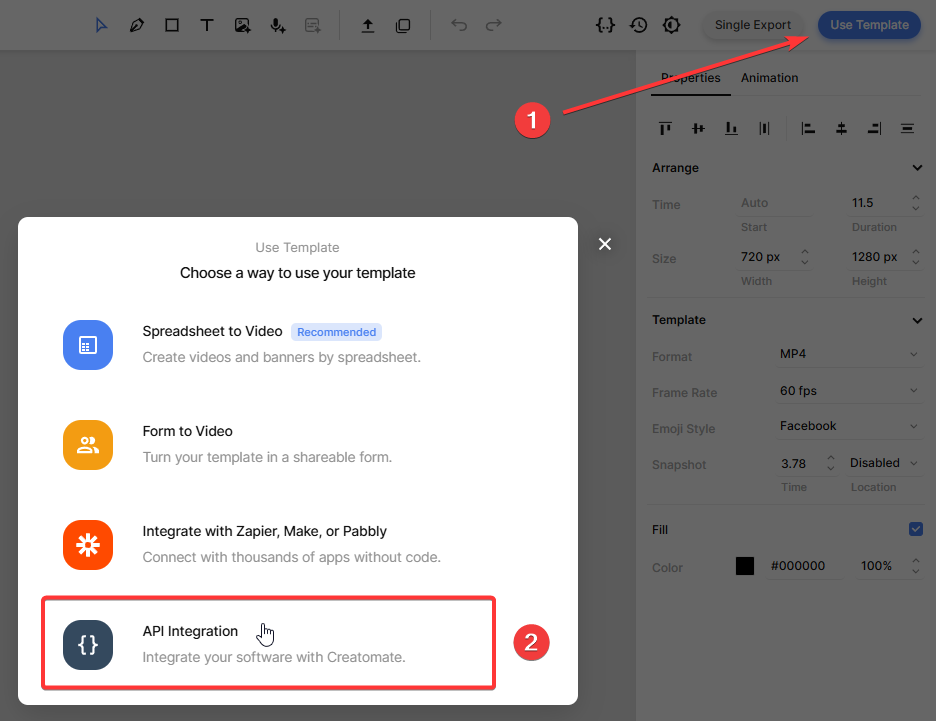
In the template editor, click Use Template in the top-right corner, then select API Integration:
Creatomate provides ready-made code snippets for several programming languages. We'll select Node.js and copy the snippet:
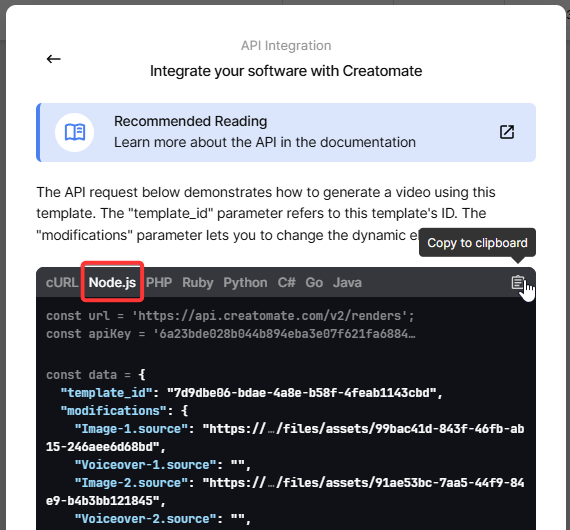
Paste it into the generate_voiceover_video.js file we set up earlier.
In the next step, we'll update the script to add dynamic content to our video.
5. Add text and image URLs
Next, we'll change the video content using the “modifications” parameter. This lets us customize almost anything in the template – text, images, colors, video clips, and more.
For this example, we'll focus on voiceovers and images. We'll provide the text to be spoken, along with publicly accessible URLs for the images you want to display. There's no need to worry about subtitles – Creatomate will generate them automatically from the voiceover audio.
For testing, we'll use sample data. In a real project, your content could come from APIs, databases, user input, or any other source that fits your workflow.
Paste the following code into your script:
const data = {

  "template_id": "your_template_id",

  "modifications": {

    "Image-1.source": "https://cdn.creatomate.com/demo/better-sleep-1.jpg",

    "Voiceover-1.source": "The 3 Best Tips for Better Sleep",

    "Image-2.source": "https://cdn.creatomate.com/demo/better-sleep-2.jpg",

    "Voiceover-2.source": "Create a Relaxing Bedtime Routine: Wind down before bed with activities like reading, taking a warm bath, or practicing relaxation techniques.",

    "Image-3.source": "https://cdn.creatomate.com/demo/better-sleep-3.jpg",

    "Voiceover-3.source": "Maintain a Consistent Sleep Schedule: Go to bed and wake up at the same time every day, even on weekends, to regulate your body's internal clock.",

    "Image-4.source": "https://cdn.creatomate.com/demo/better-sleep-4.jpg",

    "Voiceover-4.source": "Exercise Regularly: Stay active during the day, but avoid vigorous exercise close to bedtime for better sleep quality."

  }

};
Don't forget to replace the placeholder with your actual template ID. You can find it on the API Integration page from step 4.
6. Run the script to generate the video
With the script ready, we can now run it:
$ node generate_voiceover_video.js
After making the API request, you'll receive a JSON response confirming that Creatomate has accepted it. It looks something like this:
1
2  {
3    "id": "7a8b9c1d-2e3f-4567-8901-234567890abc",
4    "status": "planned",
5    "url": "https://f002.backblazeb2.com/file/creatomate-c8xg3hsxdu/7a8b9c1d-2e3f-4567-8901-234567890abc.mp4",
6    "snapshot_url": "https://f002.backblazeb2.com/file/creatomate-c8xg3hsxdu/7a8b9c1d-2e3f-4567-8901-234567890abc-snapshot.jpg",
7    ...
8  }
9
Notice that the status is set to “planned”. This means Creatomate has queued your request and will begin processing it soon. Here's what happens next:
- The text is sent to ElevenLabs to generate the voiceovers.
- Once the audio is ready, Creatomate automatically transcribes it and creates animated subtitles based on your template's style.
- Finally, the voiceovers, subtitles, and images are merged into a complete video.
Rendering can take some time, depending on the video's length and complexity of the template.
In the next step, we'll look at two ways to wait until your video has finished rendering.
7. Retrieve the voiceover video
Your video will be ready once the status changes to “succeeded”.
There are two ways to check this:
Polling
We can make a GET request to the API to check if the status has been updated.
Webhook (recommended)
We can configure a webhook so Creatomate automatically notifies our application when the video is finished.
For this example, we'll keep it simple. Wait about a minute, then open the URL from the API response. If you see a “Not Found” message, the video is still rendering. Wait a little longer and refresh the page.
Once the rendering is complete, the URL will load your finished video:
And that's it! Our voiceover video is now ready to use anywhere we need it.
Tip: You can keep track of all your API activity in the API Log section of your Creatomate dashboard. If a render fails, the log will show detailed error messages and suggest fixes to help you troubleshoot quickly.
What's next for video creation with Node.js
Now that you've successfully created videos with AI voiceovers using Node.js, you've laid the groundwork for much more sophisticated video automation.
In this tutorial, we added the voiceover text and images manually, but you don't have to stop there. By combining Node.js with generative AI, you could generate a full video script from a single topic, split it into individual scenes, and have each scene narrated automatically.
For visuals, AI tools like Flux, Runway, or Leonardo can create images or short clips that can be dynamically inserted into your videos. ChatGPT can also help craft prompts for these tools, making the creative process even smoother.
Even with just the basic voiceover and subtitle setup from this tutorial, you now have a strong foundation for building more advanced, fully automated, scalable video workflows.
Here are some resources that can spark new ideas. They aren't Node.js specific, but the techniques can be adapted to your scripts:
👉 Using ChatGPT's API to Auto-Create Social Media Videos by Code
👉 How to Automate AI-Generated Shorts, Stories, and Reels
You might also like these tutorials


Start automating today
Start with a full-featured trial with 50 credits, no credit card required.
Get started for free →