How To Auto-Create Ecommerce Product Videos Using Zapier

Learn how to automate e-commerce product videos and post them on social media using Zapier (Shopify, WooCommerce, and BigCommerce webshops).
If you're running an e-commerce company, you know that social media marketing is a must-have. It's not just important for keeping your existing customers engaged, but also for finding new ones. It's a great chance to show off your products to a big audience, whether they're new arrivals, discounted items, or best-sellers you want to showcase. The most effective way to do this is through videos. And the best part? You can now automatically create product videos and post them on social media using no-code tools.
This tutorial will guide you through the process of creating a Zapier workflow that turns e-commerce products into captivating social media videos that showcase images, features, and prices. Whatever platform you're using - Shopify, WooCommerce, BigCommerce, or any other - this tutorial is for everyone. We'll be using Creatomate, an API for video generation, to create these videos, which will be automatically posted on your Facebook Page.
We're going to automate videos like the one below. However, depending on your product information and needs, you can generate various types of e-commerce videos. So make sure to check out the gallery, which offers ready-made templates, and the editor if you wish to create your own video designs.
Prerequisites
Here are the tools we'll use:
- Creatomate: to create a template and generate videos. Sign up for free.
- Zapier: to set up the automated workflow.
- (Optional) Google Sheets: to provide product information.
- Facebook Pages: or any other social media platform to share the videos with your audience.
Since not everyone uses the same e-commerce platform, we will demonstrate the process using Google Sheets. However, you can use the Shopify, WooCommerce, or BigCommerce app to auto-generate a video when a new product is added to your store. So feel free to use the app that best suits your needs.
How to auto-generate social media videos for e-commerce products
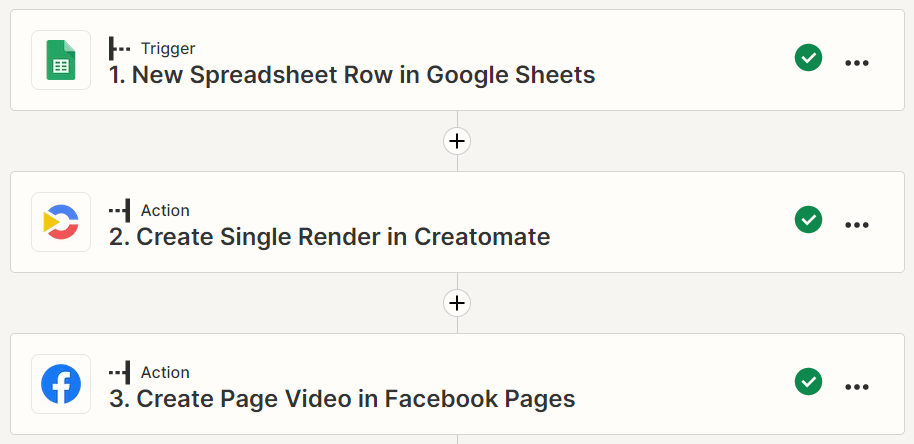
The first thing we'll do is create a product video template in Creatomate. This design will serve as the base for our e-commerce videos. Then, we'll set up an automated workflow in Zapier. The Zap will trigger when new rows with product information are added to Google Sheets. Creatomate then generates a video based on the template and the product data. Once it's ready, the video will be posted on your Facebook Page. Here's what our Zap will look like:
Let's get started by creating a template.
1. Create a product video template in Creatomate
Log in to your account and go to the Templates page. Click the + New button and browse the template gallery. Depending on what kind of e-commerce product videos you want to create, you can choose any template you like or design your own from scratch. But for this tutorial, let's use the Product Hero Discount template from the E-commerce category. Let's go with the 1:1 Square size for now and click Create Template to open it in the editor:
In the left side panel, we can find the elements that make up our template. An important thing to know is that elements can be marked as Dynamic. In our template, Discounted-Price, Normal-Price, Product-Description, Product-Name, and Product-Image are dynamic. This means we can replace its content with other text and images via Zapier, enabling us to automatically generate new and unique product videos:
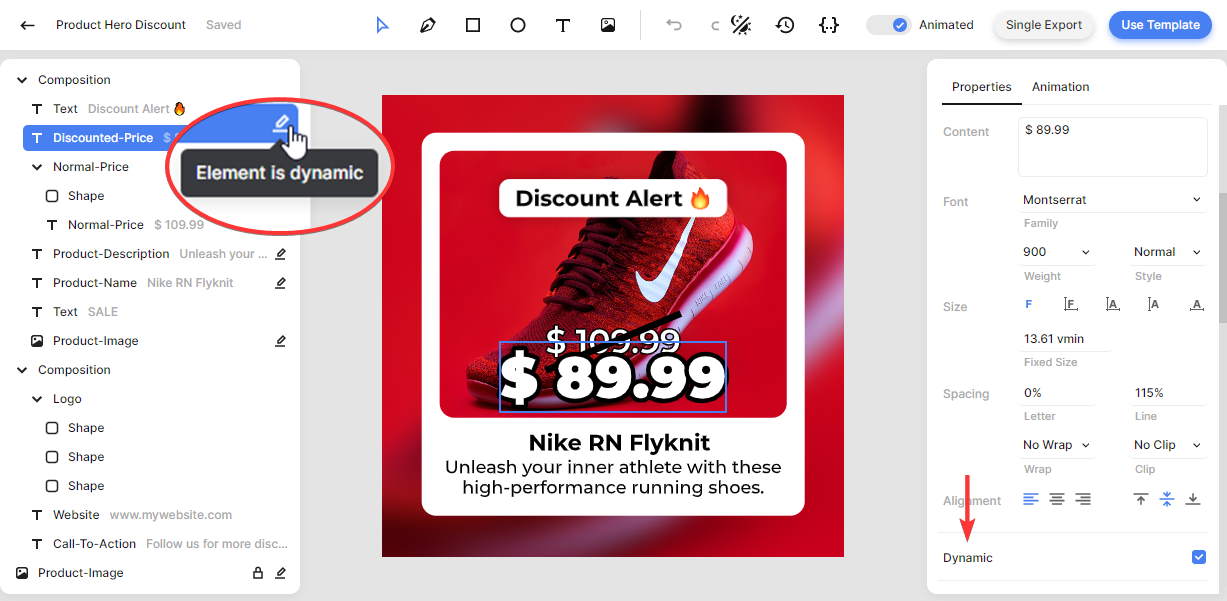
You can customize the template however you want. For example, you can replace the placeholder logo and website with your own. And if you want to make an element dynamic or non-dynamic, simply select it, and check the Dynamic property from the right side panel, as shown above.
To keep things simple, I'll use the template as it is. Next, let's set up our Zap.
2. Add trigger: New Spreadsheet Row in Google Sheets
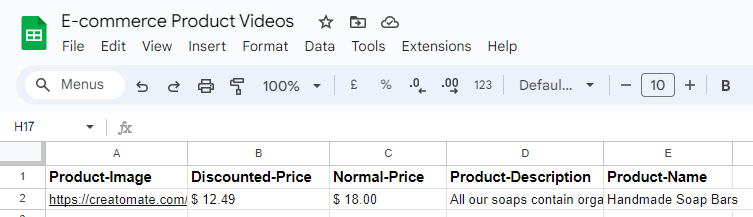
Below is the structure of the Google Sheets spreadsheet that I'll be using. Each column is named after a dynamic element in the template, so we can easily replace its content:
Tip: Rather than Google Sheets, you can use any other app to provide product information. For example, use the Shopify, WooCommerce, or BigCommerce app and select the new product event.
Log in to your Zapier account and click the + Create Zap button. Search for the Google Sheets app and select the New Spreadsheet Row event. Continue by selecting your account or signing in first.
Select your spreadsheet and worksheet on the Trigger page. Then, click Continue:
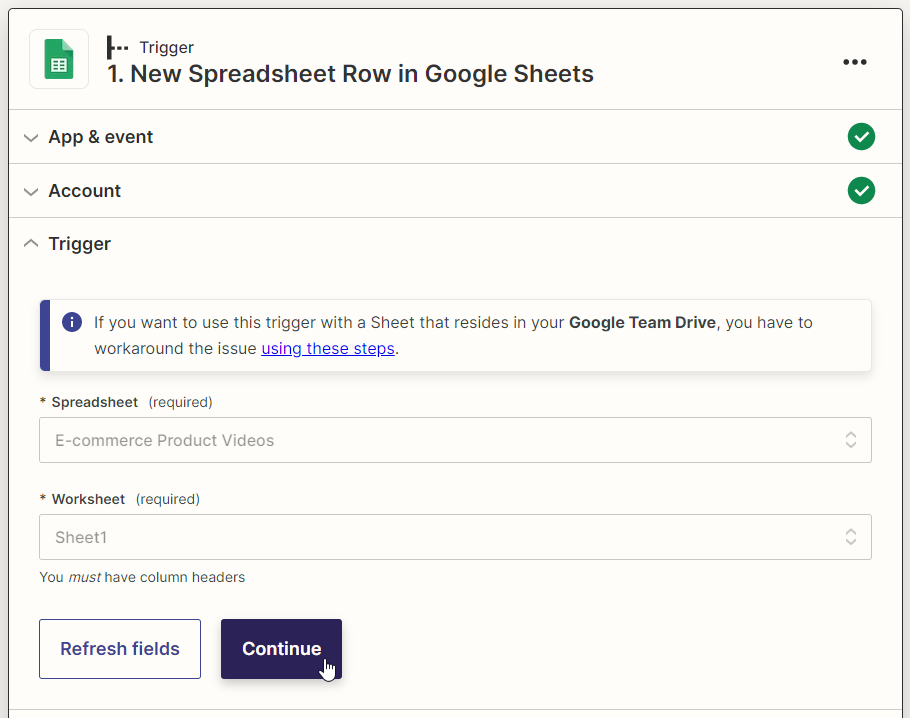
Click Test trigger on the Test page to make sure Zapier can find a row. When the test is successful, click Continue and move on to the next step.
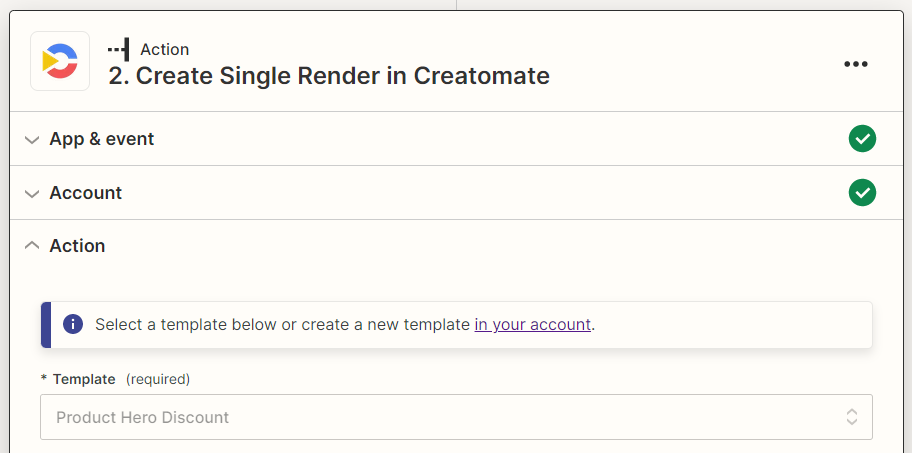
3. Add action: Create Single Render in Creatomate
Search for the Creatomate app and select the Create Single Render event. Continue by selecting your account or signing in with your project's API key first.
On the Action page, select your Product Hero Discount template in the Template field first:
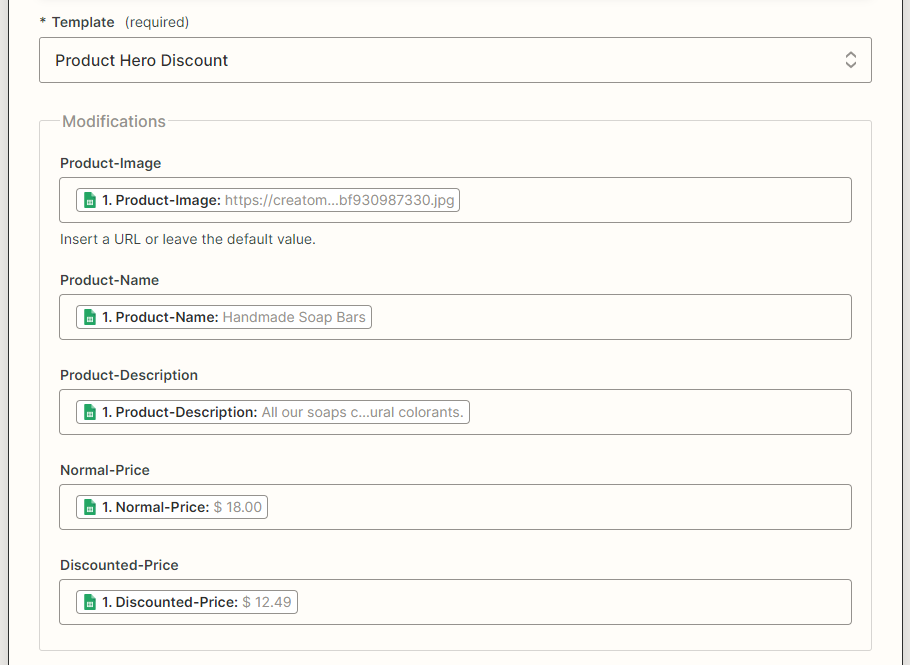
Once we select the template, Zapier will automatically detect its dynamic elements and list them under Modifications. We can now map the product information from our trigger app to the video template as follows:
- Set Product-Image to Google Sheets -> Product-Image
- Set Product-Name to Google Sheets -> Product-Name
- Set Product-Description to Google Sheets -> Product-Description
- Set Normal-Price to Google Sheets -> Normal-Price
- Set Discounted-Price to Google Sheets -> Discounted-Price
When done, click Continue:
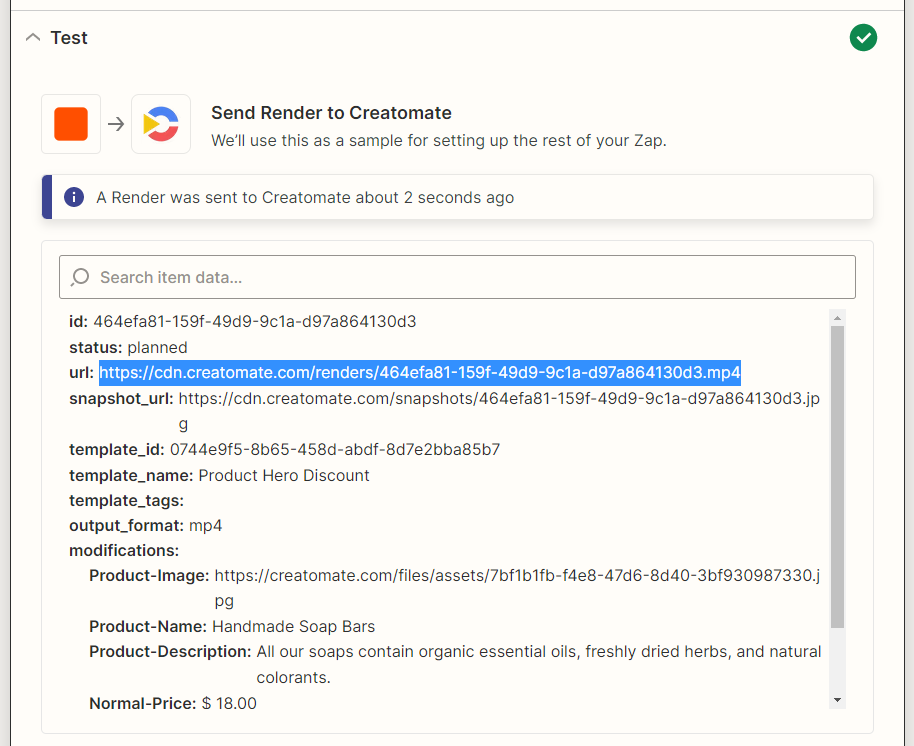
Click Test step on the Test page to make sure Creatomate can generate a video based on the template and the provided data. We can check the video by visiting the URL given in the test result. It may take some time to render, so if you encounter a Not Found message, refresh the page after waiting for a few seconds. This will only happen during testing, because once the Zap is live, the workflow will wait until the video finishes before moving onto the next step. If this test is successful, proceed to the next step:
4. Add action: Create Page Video in Facebook Pages
Click +, search for the Facebook Pages app, and select the Create Page Video event. Continue by selecting your account or signing in first.
On the Action page, select your page first. Then, select Creatomate -> Url in the Video field. Within the Description field, you can create your post by entering text and/or linking to any data from the previous steps. When done, click Continue:
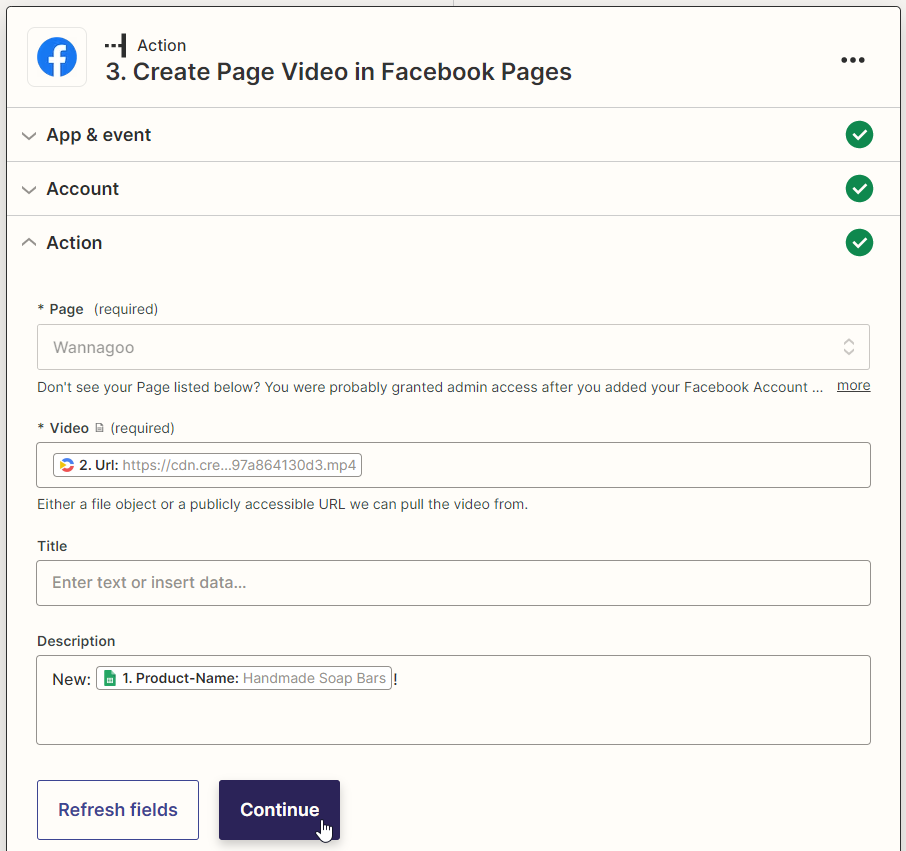
Click Test step on the Test page to make sure Facebook can post your video. Please note that it will be published immediately. If you have used test data, you may wish to delete it afterwards:
When the test is successful and you're happy with your workflow, click Publish Zap to activate it.
Wrapping up
With just four simple steps, you've created yourself an efficient system for promoting your products on social media. Thanks to Creatomate and Zapier, you can auto-generate any type of e-commerce video by using the apps and templates that best suit your needs.
Next, check out this tutorial where we explore an alternative method of automating product videos without Zapier.
You might also like these tutorials


Start automating today
Start with a full-featured trial with 50 credits, no credit card required.
Get started for free →