How to Automate Video Generation with Java

In this tutorial, you'll learn how to create videos programmatically using Java and Creatomate's video generation API.
If you've worked with video in Java before, you've probably come across tools like FFmpeg, either by running it through ProcessBuilder or using wrappers like Xuggler or JCodec. These libraries can do simple operations like turning a series of images into a video or adding text overlays, but they often fall short when it comes to automating more complex video workflows – such as generating social media content, personalized video messages, or integrating with AI tools like ChatGPT, ElevenLabs, or DALL·E.
That's where Creatomate comes in: a cloud-based video generation API made for dynamic video creation. Whether you're building backend services, Java-based web applications, or integrating video automation into enterprise systems, Creatomate offers a simple and scalable way to create video content directly from your Java code. It's especially useful for developers working with frameworks like Spring Boot or custom Java setups who need to generate high-quality videos on demand.
In this tutorial, you'll learn the fundamentals of video automation using Java and Creatomate – a solid foundation for building your own automated video workflows. By the end, I'll also point you to follow-up tutorials that explore more advanced features, such as adding AI-generated visuals, natural-sounding AI voiceovers, and animated subtitles.
The example video we'll create is just a starting point. From simple slideshows to complex, data-driven video content at scale, Creatomate gives you the flexibility to automate it all. Its online template editor and powerful REST API give you full creative control, making it easy to customize every detail directly from your Java code.
Prerequisites
Before you begin, make sure you have the following in place:
- Java Development Kit (JDK) installed. Java 11 or higher is recommended. You can download it from the official Oracle JDK website, or use a free, open-source alternative like Adoptium's Temurin builds, which also provides fully compatible JDK distributions.
- A Creatomate account. If you haven't signed up yet, you can create a free account here.
- A code editor or IDE that supports Java. Such as VS Code, IntelliJ IDEA, or Eclipse.
- A terminal or command prompt to compile and run your Java program. Make sure javac and java are available in your system's path. You can verify this by running java -version and javac -version.
How to create videos using Java?
There are two main ways to create videos with Java and Creatomate.
The simplest and most common approach is to use a video template. You design a layout once – including placeholders for text, images, videos, or audio – and then use Java to insert dynamic content. Each time your program runs, it sends different data to the API, generating a unique video based on the same template. This is the method we'll focus on in this tutorial.
Alternatively, if you need full flexibility, you can build videos entirely in code – without a predefined template. This gives you complete control over layout, timing, animations, and transitions by defining everything in JSON. It's a more advanced option, ideal for highly dynamic or data-driven content. If that sounds interesting, feel free to explore the JSON to Video documentation.
Let's start by setting up your Java project.
1. Set up your Java project
Start by creating a new folder for your project. In your terminal, run:
$ mkdir video_creation_project
Then navigate into the project directory:
$ cd video_creation_project
Next, create a Java file where you'll write your code. We'll call it ApiRequestExample.java
On macOS/Linux:
$ touch ApiRequestExample.java
On Windows:
$ echo. > ApiRequestExample.java
Java doesn't include built-in JSON support, so you'll need to add a library to handle JSON conversion. For this tutorial, we'll use Google Gson version 2.13.1.
Click the link below to download the Gson JAR file from Maven Central: https://repo1.maven.org/maven2/com/google/code/gson/gson/2.13.1/gson-2.13.1.jar
Once downloaded, place the JAR file inside the video_creation_project folder, alongside your ApiRequestExample.java file. This ensures the classpath setup works when compiling and running the program in step 5.
Note: If you prefer using a build tool like Maven or Gradle, you can include Gson as a dependency instead of downloading the JAR manually.
With your Java project now set up, we're ready to move on. In the next step, we'll design a template in Creatomate that your Java code will use to generate videos.
2. Create a video template in Creatomate
Log in to your Creatomate account, or sign up for free if you haven't already.
Head over to the Templates section and click New to browse the template gallery. You can either create a template from scratch or choose one of the ready-made options. For this tutorial, we'll keep it simple by selecting the Quick Promo template from the Featured category. Choose the 9:16 Vertical format, then click Create Template to open it in the editor:
Let's take a closer look at how this video template works and how you can use it in your Java program.
In the editor's left panel, you'll find a list of elements that make up the video. Some of these – such as Video, Text-1, and Text-2 – are marked as dynamic. These dynamic elements can be updated from your Java code by sending different text or media to the API:
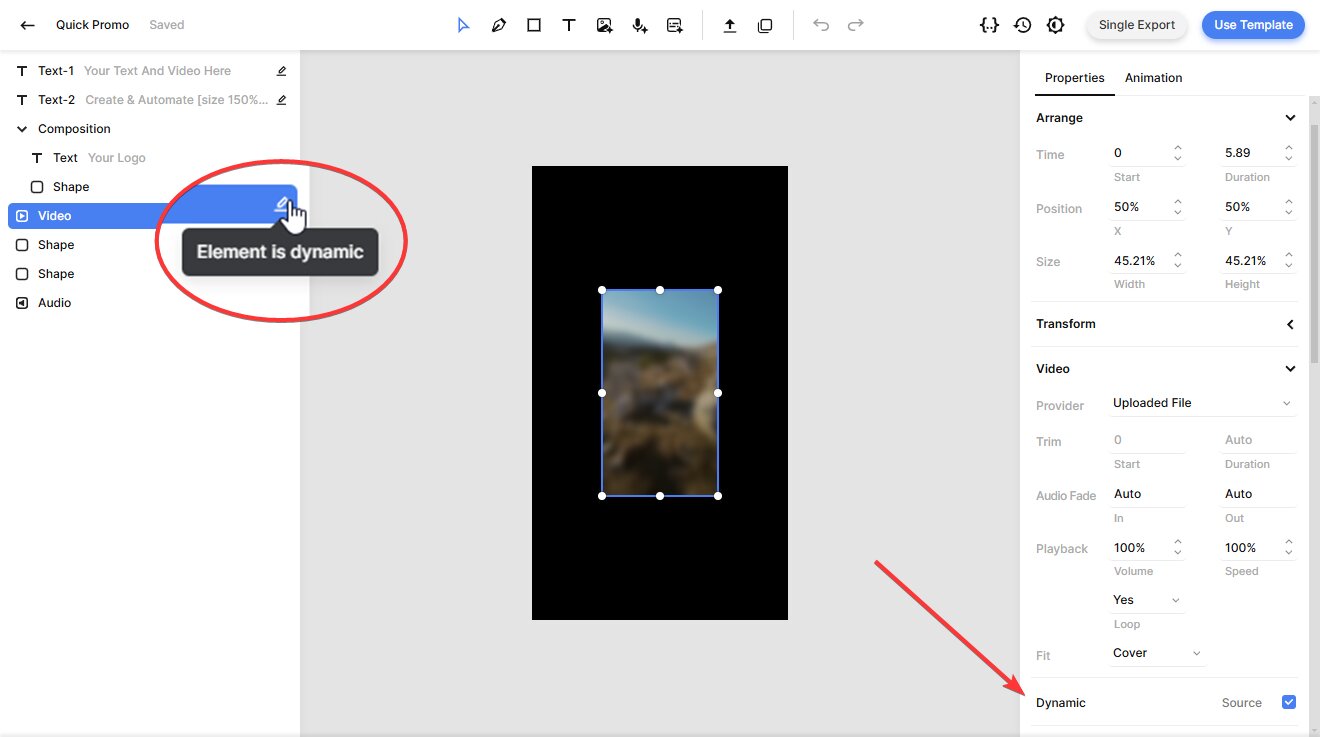
Feel free to customize your template to fit your brand, message, and workflow. The editor is intuitive and flexible, making it accessible whether you're new to video creation or have prior experience. For a deeper dive, you can explore the template editor guide.
Once you're happy with your video design, you're ready to move on to the next step.
3. Generate the Java code
Now, let's turn your video template into a working API request.
In the template editor, click the Use Template button in the top-right corner. Then select API Integration:

Creatomate offers ready-made code snippets in multiple programming languages. Choose Java from the list, then copy the generated code:
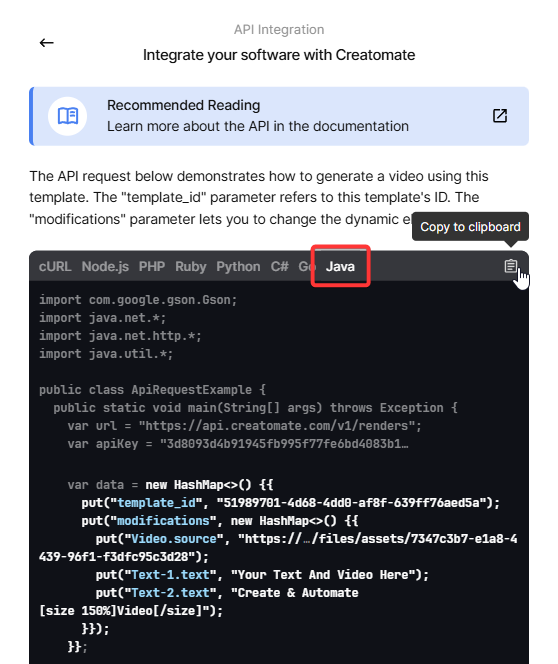
Next, open your ApiRequestExample.java file in your project and paste the copied code into it.
In the next step, you'll learn how to add dynamic content to customize each video.
4. Insert dynamic content
Now it's time to customize your video by updating its content – such as text, images, and videos – using the “modifications” parameter.
This data can come from APIs, databases, or user input, but for simplicity, we'll start with some predefined sample values.
Replace the data variable in your Java file with the following code:
  var data = new HashMap<>() {{

    put("template_id", "your_template_id");

    put("modifications", new HashMap<>() {{

      put("Video.source", "https://cdn.creatomate.com/demo/video5.mp4");

      put("Text-1.text", "Hello Java users 👋");

      put("Text-2.text", "It's easy to create videos from your own scripts!");

    }});

  }};
Note: Replace "your_template_id" with the actual ID of the template you created in step 2. This tells the API exactly which video design to use for rendering.
5. Run the program to create a video
Now that your code is ready, compile and run your program, making sure to include the Gson JAR in the classpath.
On macOS/Linux:
$ javac -cp gson-2.13.1.jar ApiRequestExample.java
$ java -cp ".:gson-2.13.1.jar" ApiRequestExample
On Windows:
$ javac -cp gson-2.13.1.jar ApiRequestExample.java
$ java -cp ".;gson-2.13.1.jar" ApiRequestExample
This will send the API request to Creatomate and print the JSON response in your terminal, confirming that the request was received. The response will look similar to this:
1{
2  "id": "75db0c95-3520-4c2e-a6a8-5484755ad8f5",
3  "status": "planned",
4  "url": "https://f002.backblazeb2.com/file/creatomate-c8xg3hsxdu/75db0c95-3520-4c2e-a6a8-5484755ad8f5.mp4",
5  "snapshot_url": "https://f002.backblazeb2.com/file/creatomate-c8xg3hsxdu/75db0c95-3520-4c2e-a6a8-5484755ad8f5-snapshot.jpg",
6  ...
7}
At this point, your video is being rendered in the background.
You have two options to check when your video is ready:
1. Polling
You can write a small Java program that periodically sends a GET request to the Creatomate API to check the video's status. The rendering is complete once the "status" changes to "succeeded".
2. Webhooks (Recommended)
A more efficient method is to use webhooks. Creatomate will notify your application automatically when the video is ready, so you don't need to keep polling the API.
For now, simply wait about a minute after running your program, then open the video URL from the API response. If you see a “Not Found” message, the video is still processing – wait a bit longer and refresh the page.
Once rendering is finished, the URL will show your completed video:
Now that you have the video URL, you can either download the video file or use it directly in your automation workflow – whichever best suits your use case.
Tip: You can monitor all your API activity in the API Log section of your Creatomate dashboard. If rendering fails, the log provides detailed error messages and suggested fixes to help you troubleshoot quickly.
What's next for video creation with Java
And that's how you can create videos using Java and Creatomate! Now that you've got the basics down, you can build on this foundation and customize it to fit your projects and workflows.
Interested in taking things further with AI-powered video creation? Those automated short videos you see all over YouTube, TikTok, and Instagram can be generated entirely with Java. Here's a typical workflow you might explore: use the ChatGPT API to generate video scripts on any topic, then convert those scripts into voice overs with a text-to-speech API like ElevenLabs. Creatomate can automatically add animated captions synced word-by-word, styled for trending social media formats. For background visuals, you can generate images with AI tools such as DALL·E or Stable Diffusion. And to complete the process, you can even generate video titles, descriptions, and hashtags with ChatGPT – ready to publish.
If you want to explore further, check out these tutorials and examples. While they're not Java-specific, the concepts translate easily and can help you expand your video creation capabilities in Java.
👉 How to Create AI Voice Over Videos using an API
👉 Using ChatGPT's API to Auto-Create Social Media Videos by Code
👉 How to Automate AI-Generated Shorts, Stories, and Reels
You might also like these tutorials


Start automating today
Start with a full-featured trial with 50 credits, no credit card required.
Get started for free →